flume的安装配置及使用
flume 作为 cloudera 开发的实时日志收集系统,受到了业界的认可与广泛应用。Flume 初始的发行版本目前被统称为 Flume OG(original generation),属于 cloudera。但随着 FLume 功能的扩展,Flume OG 代码工程臃肿、核心组件设计不合理、核心配置不标准等缺点暴露出来,尤其是在 Flume OG 的最后一个发行版本 0.94.0 中,日志传输不稳定的现象尤为严重,为了解决这些问题,2011 年 10 月 22 号,cloudera 完成了 Flume-728,对 Flume 进行了里程碑式的改动:重构核心组件、核心配置以及代码架构,重构后的版本统称为 Flume NG(next generation);改动的另一原因是将 Flume 纳入 apache 旗下,cloudera Flume 改名为 Apache Flume。
flume的特点:
flume是一个分布式、可靠、和高可用的海量日志采集、聚合和传输的系统。支持在日志系统中定制各类数据发送方,用于收集数据;同时,Flume提供对数据进行简单处理,并写到各种数据接受方(比如文本、HDFS、Hbase等)的能力 。
flume的数据流由事件(Event)贯穿始终。事件是Flume的基本数据单位,它携带日志数据(字节数组形式)并且携带有头信息,这些Event由Agent外部的Source生成,当Source捕获事件后会进行特定的格式化,然后Source会把事件推入(单个或多个)Channel中。你可以把Channel看作是一个缓冲区,它将保存事件直到Sink处理完该事件。Sink负责持久化日志或者把事件推向另一个Source。
flume的可靠性
当节点出现故障时,日志能够被传送到其他节点上而不会丢失。Flume提供了三种级别的可靠性保障,从强到弱依次分别为:end-to-end(收到数据agent首先将event写到磁盘上,当数据传送成功后,再删除;如果数据发送失败,可以重新发送。),Store on failure(这也是scribe采用的策略,当数据接收方crash时,将数据写到本地,待恢复后,继续发送),Besteffort(数据发送到接收方后,不会进行确认)。
flume的可恢复性:
还是靠Channel。推荐使用FileChannel,事件持久化在本地文件系统里(性能较差)。
flume的一些核心概念:
· Agent 使用JVM 运行Flume。每台机器运行一个agent,但是可以在一个agent中包含多个sources和sinks。
· Client 生产数据,运行在一个独立的线程。
· Source 从Client收集数据,传递给Channel。
· Sink 从Channel收集数据,运行在一个独立线程。
· Channel 连接 sources 和 sinks ,这个有点像一个队列。
· Events 可以是日志记录、 avro 对象等。
Flume以agent为最小的独立运行单位。一个agent就是一个JVM。单agent由Source、Sink和Channel三大组件构成,如下图:

值得注意的是,Flume提供了大量内置的Source、Channel和Sink类型。不同类型的Source,Channel和Sink可以自由组合。组合方式基于用户设置的配置文件,非常灵活。比如:Channel可以把事件暂存在内存里,也可以持久化到本地硬盘上。Sink可以把日志写入HDFS, HBase,甚至是另外一个Source等等。Flume支持用户建立多级流,也就是说,多个agent可以协同工作,并且支持Fan-in、Fan-out、Contextual Routing、Backup Routes,这也正是NB之处。如下图所示:

Flume的安装和部署
下载上传 cdh版本
1).解压
$ tar -zxf flume-ng-1.5.0-cdh5.3.6.tar.gz -C /opt/modules/cdh/
2).配置${FLUME_HOME}/conf/
$ cp flume-env.sh.template flume-env.sh
修改flume-env.sh
export JAVA_HOME=/opt/modules/jdk1.7.0_67
3).拷贝HDFS依赖及配置的jar包到${FLUME_HOME}/lib
${HADOOP_HOME}/
$ cp share/hadoop/common/hadoop-common-2.5.0-cdh5.3.6.jar share/hadoop/common/lib/commons-configuration-1.6.jar share/hadoop/common/lib/hadoop-auth-2.5.0-cdh5.3.6.jar share/hadoop/hdfs/hadoop-hdfs-2.5.0-cdh5.3.6.jar /opt/modules/cdh/flume-1.5.0-cdh5.3.6/lib/
4).拷贝HDFS相关的配置文件到flume的conf
${HADOOP_HOME}/etc/hadoop --> ${FLUME_HOME}/conf
$ cp etc/hadoop/core-site.xml etc/hadoop/hdfs-site.xml /opt/modules/cdh/flume-1.5.0-cdh5.3.6/conf/
[案例一: source:telnet sink:生成日志文件,直接打印到控制台]
1.生成agent模板
$ cp flume-conf.properties.template flume-conf.properties
$ cp flume-conf.properties a1.conf
2.编辑agent配置文件(source channel sink)
# Name the components on this agent
#a1指的是Agent的name,需要与启动agent的--name相对应
a1.sources = r1 #当前agent的sources名称
a1.sinks = k1 #当前agent的sinks名称
a1.channels = c1 #当前agent的channels名称
# Describe/configure the source
a1.sources.r1.type = netcat #sources的类型
a1.sources.r1.bind = bigdata.ibeifeng.com #绑定的主机
a1.sources.r1.port = 44444 #监听的端口
# Describe the sink
a1.sinks.k1.type = logger #输出到日志
# Use a channel which buffers events in memory
a1.channels.c1.type = memory #缓冲到内存中
a1.channels.c1.capacity = 1000 #存储到channels中的events的最大数据
a1.channels.c1.transactionCapacity = 100 数量##每次event在channel传输的最大的
# Bind the source and sink to the channel 将对应的source和sink绑定到channel
a1.sources.r1.channels = c1
a1.sinks.k1.channel = c1

3.yum 安装 telnet
# yum -y install telnet
4.启动agent ${FLUME_HOME}/
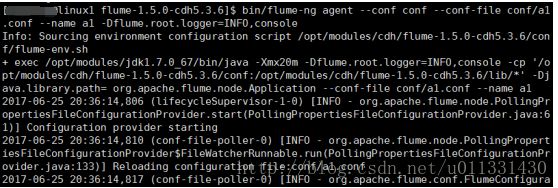
$ bin/flume-ng agent --conf conf --conf-file conf/a1.conf --name a1 -Dflume.root.logger=INFO,console
--conf 指定配置文件所在目录
--name 指定agent的名称,与a1.conf文件指定的一致
--conf-file 指定agent配置文件名称
-Dflume.root.logger=INFO,console 日志输出到console
Event: { headers:{} body: 48 65 6C 6C 6F 20 77 6F 72 6C 64 21 0D Hello world!. }
5.启动telnet
$ telnet linux1 44444
【退出telnet】
Ctrl+]
telnet>quit
Connection closed.


6.停止agent
${FLUME_HOME}
Ctrl+c 退出flume agent同时也就退出了telnet
[案例二:flume抽取日志文件]
source: 类型exec
tail -f
channel:memchannel
sink:HDFS
//使用agent a1 作为模板生成a2 agent 的配置文件
${FLUME_HOME}/conf
$ cp a1.conf a2.conf
1.配置a2.conf
=================修改a2.conf
#a2:agent name
a2.sources = r2
a2.channels = c2
a2.sinks = k2
# define sources
#主动获取日志
a2.sources.r2.type = exec
#获取日志的命令(注意要有权限)
a2.sources.r2.command = tail -F tail -F /opt/modules/cdh/hive-0.13.1-cdh5.3.6/logs/hive.log #上一行命令所运行的环境
a2.sources.r2.shell = /bin/bash -c
# define channels
a2.channels.c2.type = memory
a2.channels.c2.capacity = 1000
a2.channels.c2.transactionCapacity = 100
# define sinks
#目标上传到hdfs
a2.sinks.k2.type = hdfs
a2.sinks.k2.hdfs.path=hdfs:linux1:8020/flume/%Y%m%d/%H
a2.sinks.k2.hdfs.filePrefix = accesslog
#启用按时间生成文件夹
a2.sinks.k2.hdfs.round=true
#设置roundValue:1,round单位:小时
a2.sinks.k2.hdfs.roundValue=1
a2.sinks.k2.hdfs.roundUnit=hour
#使用本地时间戳(这个必须设置不然会报错)
a2.sinks.k2.hdfs.useLocalTimeStamp=true
#多少个events会flush to hdfs
a2.sinks.k2.hdfs.batchSize=1000
# File format: 默认是SequenceFile(key:value对),DataStream是无压缩的一般数据流
a2.sinks.k2.hdfs.fileType=DataStream
#序列化的格式Text
a2.sinks.k2.hdfs.writeFormat=Text
#设置解决文件过多、过小问题
#每60秒生成一个文件
a2.sinks.k2.hdfs.rollInterval=60
#当达到128000000bytes时,创建新文件 127*1024*1024(in bytes)
#实际环境中如果按照128M回滚文件,那么这里设置一般设置成127M
a2.sinks.k2.hdfs.rollSize=128000000
#设置文件的生成不和events数相关
a2.sinks.k2.hdfs.rollCount=0
#设置成1,否则当有副本复制时就重新生成文件,上面三条则没有效果
a2.sinks.k2.hdfs.minBlockReplicas=1
# bind the sources and sinks to the channels
a2.sources.r2.channels = c2
a2.sinks.k2.channel = c2

2.安装Apache HTTP服务器程序用于生成网站日志文件
2.1 安装Apache HTTP
# yum -y install httpd
2.2 启动httpd服务
# service httpd start

2.3 编辑一个静态的html的页面
# vi /var/www/html/index.html
this is a test html
2.4 浏览器输入主机名访问这个页面
Linux1

2.5 实时监控httpd日志
# chmod -R 777 /var/log/httpd
$ tail -f /var/log/httpd/access_log
3.启动hadoop
$ sbin/start-dfs.sh
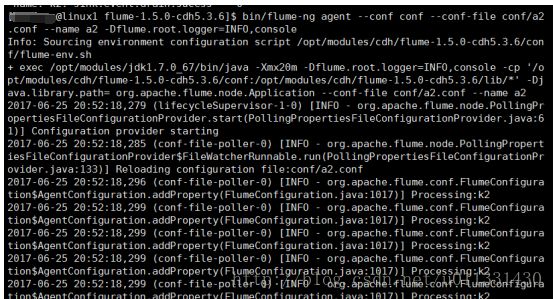
4.启动Flume-agent a2
$ bin/flume-ng agent --conf conf --conf-file conf/a2.conf --name a2 -Dflume.root.logger=INFO,console
5.刷新静态页面,观察HDFS是否生成指定的目录和文件


3.启动hadoop
$ sbin/start-dfs.sh
4.启动Flume-agent a2
$ bin/flume-ng agent --conf conf --conf-file conf/a2.conf --name a2 -Dflume.root.logger=INFO,console
5.刷新静态页面,观察HDFS是否生成指定的目录和文件
[案例三:flume抽取目录]
source: 类型spooldir
channel:memchannel
sink:HDFS
//使用agent a2 作为模板生成a3 agent 的配置文件
${FLUME_HOME}/conf
$ cp a2.conf a3.conf
1.配置a3.conf
=================修改a3.conf
a3.sources = r3
a3.sinks = k3
a3.channels = c3
# Describe/configure the source
# 源是某个目录使用spooldir
a3.sources.r3.type = spooldir
# 抽取的目录 $ cp -r ${HADOOP_HOME}/logs/* /home/user01/logs ->执行完之后,会在原文件后面自动加一个.COMPLETED,所以换个目录比较合适
a3.sources.r3.spoolDir = /home/beifeng/logs
# 抽取该目录下符合包含.log结尾的文件 第一个.匹配任意字符 *重复一次或多次 \转义 .log$ ->以.log结尾
a3.sources.r3.ignorePattern = ^.*out.*
# Use a channel which buffers events in file
# 设置channel类型是file
a3.channels.c3.type = file
# 设置检查点目录,记录已经获取哪些文件,一些元数据信息
a3.channels.c3.checkpointDir= = /opt/modules/cdh/flume-1.5.0-cdh5.3.6/checkpoint
#设置缓存的数据存储目录
a3.channels.c3.dataDirs = /opt/modules/cdh/flume-1.5.0-cdh5.3.6/bufferdata
# Describe the sink
a3.sinks.k3.type = hdfs
# 启用设置多级目录,这里按年/月/日/时 2级目录,每个小时生成一个文件夹
a3.sinks.k3.hdfs.path = hdfs://linux1:8020/flume2/%Y%m%d/%H
# 设置HDFS生成文件的的前缀
a3.sinks.k3.hdfs.filePrefix = accesslog
#启用按时间生成文件夹
a3.sinks.k3.hdfs.round = true
#设置round单位:小时
a3.sinks.k3.hdfs.roundValue = 1
a3.sinks.k3.hdfs.roundUnit = hour
#使用本地时间戳
a3.sinks.k3.hdfs.useLocalTimeStamp = true
# 设置每次写入的DFS的event的个数为100个
a3.sinks.k3.hdfs.batchSize = 100
# 写入HDFS的方式
a3.sinks.k3.hdfs.fileType = DataStream
# 写入HDFS的文件格式
a3.sinks.k3.hdfs.writeFormat = Text
#设置解决文件过多过小问题
#每60秒生成一个文件
a3.sinks.k3.hdfs.rollInterval = 60
#当达到128000000bytes时,创建新文件 127*1024*1024
#实际环境中如果按照128M回顾文件,那么这里设置一般设置成127M
a3.sinks.k3.hdfs.rollSize = 128000000
#设置文件的生成不和events数相关,与时间和大小相关
a3.sinks.k3.hdfs.rollCount = 0
#设置成1,否则当有副本复制时就重新生成文件,上面三条则没有效果
a3.sinks.k3.hdfs.minBlockReplicas =1
# Bind the source and sink to the channel
a3.sources.r3.channels = c3
a3.sinks.k3.channel = c3


===================================
【案例4:fan out】
# Name the components on this agent
a4.sources = r1
a4.sinks = k1 k2
a4.channels = c1 c2
# Describe/configure the source
a4.sources.r1.type = exec
a4.sources.r1.command = tail -f /var/log/httpd/access_log
a4.sources.r1.shell = /bin/bash -c
# Use a channel which buffers events in memory
a4.channels.c1.type = memory
a4.channels.c1.capacity = 1000
a4.channels.c1.transactionCapacity = 100
a4.channels.c2.type = file
a4.channels.c2.checkpointDir = /opt/modules/cdh/flume-1.5.0-cdh5.3.6/checkpoint
a4.channels.c2.dataDirs = /opt/modules/cdh/flume-1.5.0-cdh5.3.6/bufferdata
# Describe the sink
a4.sinks.k1.type = logger
a4.sinks.k2.type = hdfs
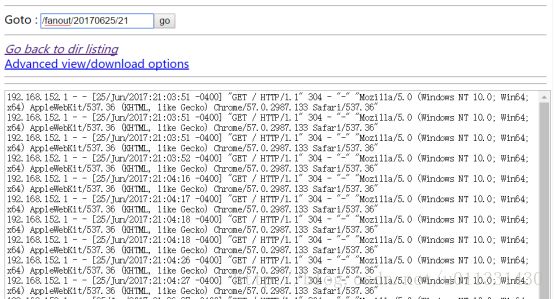
a4.sinks.k2.hdfs.path = hdfs://linux1:8020/fanout/%Y%m%d/%H
a4.sinks.k2.hdfs.filePrefix = accesslog
a4.sinks.k2.hdfs.round = true
a4.sinks.k2.hdfs.roundValue = 1
a4.sinks.k2.hdfs.roundUnit = hour
a4.sinks.k2.hdfs.useLocalTimeStamp = true
a4.sinks.k2.hdfs.batchSize = 100
a4.sinks.k2.hdfs.fileType = DataStream
a4.sinks.k2.hdfs.writeFormat = Text
a4.sinks.k2.hdfs.rollInterval = 60
a4.sinks.k2.hdfs.rollSize = 128000000
a4.sinks.k2.hdfs.rollCount = 0
a4.sinks.k2.hdfs.minBlockReplicas =1
# Bind the source and sink to the channel
a4.sources.r1.channels = c1 c2
a4.sinks.k1.channel = c1
a4.sinks.k2.channel = c2
a4.sources.r1.selector.type = replicating
刷新页面控制台打印日志


===============
【案例五、综合应用 两级架构】
$ vi flume1.conf
## name是agent1
agent1.sources = r1
agent1.channels = c1
agent1.sinks = k1
# define sources
agent1.sources.r1.type = exec
## 注意一定要执行flume命令的用户对该/var/log/httpd/access_log文件
## 具有可读的权限
agent1.sources.r1.command = tail -F /var/log/httpd/access_log
agent1.sources.r1.shell = /bin/bash -c
# define channels
agent1.channels.c1.type = memory
agent1.channels.c1.capacity = 1000
agent1.channels.c1.transactionCapacity = 100
# define sinks
#启用设置多级目录,这里按年/月/日/时 2级目录,每个小时生成一个文件夹
agent1.sinks.k1.type = avro
# agent3所在的IP
agent1.sinks.k1.hostname = 192.168.152.100
# agent3监听的端口
agent1.sinks.k1.port = 4545
# bind the sources and sinks to the channels
agent1.sources.r1.channels = c1
agent1.sinks.k1.channel = c1
$ vi flume2.conf
agent2.sources = r2
agent2.channels = c2
agent2.sinks = k2
# define sources
agent2.sources.r2.type = exec
## 注意一定要执行flume命令的用户对该/var/log/httpd/access_log文件
## 具有可读的权限
agent2.sources.r2.command = tail -F /opt/modules/cdh/hive-0.13.1-cdh5.3.6/logs/hive.log
agent2.sources.r2.shell = /bin/bash -c
# define channels
agent2.channels.c2.type = memory
agent2.channels.c2.capacity = 1000
agent2.channels.c2.transactionCapacity = 100
# define sinks
#启用设置多级目录,这里按年/月/日/时 2级目录,每个小时生成一个文件夹
agent2.sinks.k2.type = avro
agent2.sinks.k2.hostname = 192.168.152.100
agent2.sinks.k2.port = 4545
# bind the sources and sinks to the channels
agent2.sources.r2.channels = c2
agent2.sinks.k2.channel = c2
$ vi flume-collector.conf
# 配置agent3:
agent3.sources = r3
agent3.channels = c3
agent3.sinks = k3
# define sources
# source:avro 对应flume1和flume2的sink
agent3.sources.r3.type = avro
# agent3所在的IP
agent3.sources.r3.bind = 192.168.152.100
# agent3监听的端口
agent3.sources.r3.port = 4545
# define channels
agent3.channels.c3.type = memory
agent3.channels.c3.capacity = 1000
agent3.channels.c3.transactionCapacity = 100
# define sinks
#启用设置多级目录,这里按年/月/日/时 2级目录,每个小时生成一个文件夹
agent3.sinks.k3.type = hdfs
agent3.sinks.k3.hdfs.path=hdfs://192.168.152.100:8020/flume3/%Y%m%d/%H
agent3.sinks.k3.hdfs.filePrefix = accesslog
#启用按时间生成文件夹
agent3.sinks.k3.hdfs.round=true
#设置round单位:小时
agent3.sinks.k3.hdfs.roundValue=1
agent3.sinks.k3.hdfs.roundUnit=hour
#使用本地时间戳
agent3.sinks.k3.hdfs.useLocalTimeStamp=true
agent3.sinks.k3.hdfs.batchSize=1000
agent3.sinks.k3.hdfs.fileType=DataStream
agent3.sinks.k3.hdfs.writeFormat=Text
#设置解决文件过多过小问题
#每60秒生成一个文件
agent3.sinks.k3.hdfs.rollInterval=60
#当达到128000000bytes时,创建新文件 127*1024*1024
#实际环境中如果按照128M回滚文件,那么这里设置一般设置成127M
agent3.sinks.k3.hdfs.rollSize=128000
#设置文件的生成不和events数相关
agent3.sinks.k3.hdfs.rollCount=0
#设置成1,否则当有副本复制时就重新生成文件,上面三条则没有效果
agent3.sinks.k3.hdfs.minBlockReplicas=1
# bind the sources and sinks to the channels
agent3.sources.r3.channels = c3
agent3.sinks.k3.channel = c3
##启动agent1:
bin/flume-ng agent --conf conf/ --name agent1 --conf-file conf/flum1.conf
##启动agent2:
bin/flume-ng agent --conf conf/ --name agent2 --conf-file conf/flum2.conf
##启动agent3:
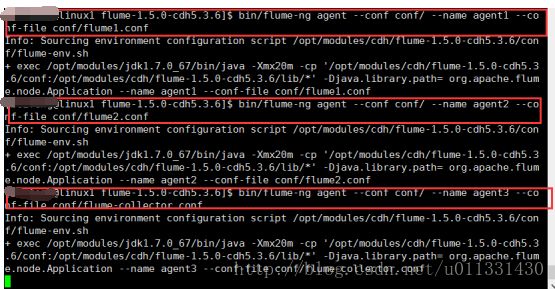

在hdfs上可以同时读到事件1和事件2的日志
