Easymall项目分布式拆分整合(四)
Easymall项目分布式拆分整合(四)
目录
Easymall项目分布式拆分整合(四)
一.前端系统的搭建开发
一.搭建
1.maven骨架webapp
2.pom文件修改
1.parent的继承
2.common的依赖(exclusions redis从common中传递过来)
3.处理jsp有效显示在springboot下的依赖支持
3.页面和静态文件的引入,删除index.jsp
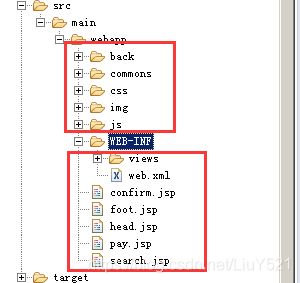
1.最终在前端系统中的页面相关内容如下
2.创建文件夹src/main/java(src/test/java一并出现)
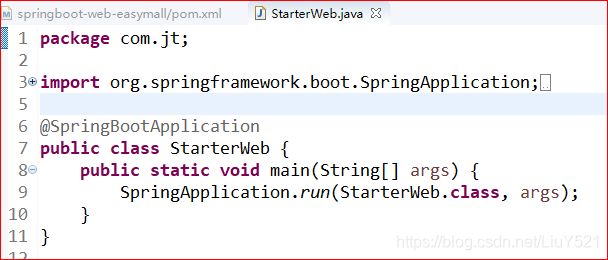
4.启动类(所有独立的系统中启动类扫描范围都是com.jt)
1.我这里依赖里面有个坑,浪费半个小时解决,
2.具体什么坑,留给有缘人.解决方案就不讲了,自行处理
3.坑,埋了之后运行,就不会报错了
5.编写application.properties配置文件
1.定义端口8091(8092 8093 8094 8095 8096 8097)
2.前端系统的页面跳转的前缀后缀
3.nginx高并发对前端集群的访问(nginx的根目录完成conf/nginx.conf编辑)
4.如下内容是在nginx.conf配置
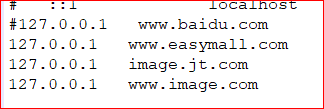
5.hosts文件域名easymall绑定127.0.0.1
二.开发前端系统具体功能
2.1实现easymall前端系统的所有页面跳转功能(不带数据)
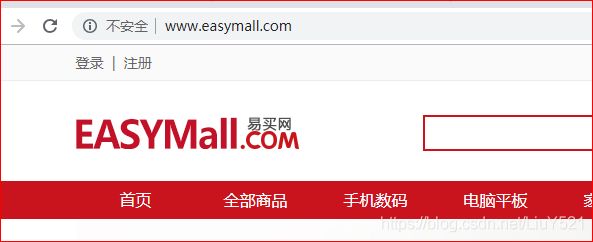
1.首页的访问
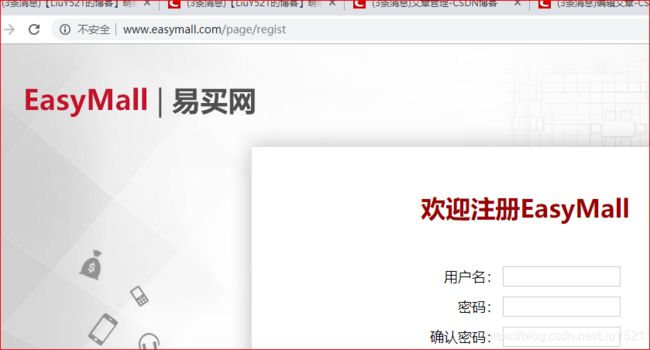
2.注册登录(page/login,page/regist)
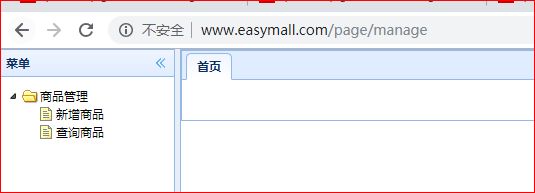
3.后台商品首页(page/manage,page/item-list,page/item-edit等)
4.导入IndexController类
2.2完成首页全部商品分页查询
1.导入相关代码,从之前SSM项目,或者SpringBoot中获取
三.httpclient发起代码内容部的http请求.
3.1httpclient代码api
1.映入httpclient依赖,SpringBoot支持版本4.5.3 版本号可写可不写
2.做个测试类
四.实现前端系统的访问后台商品系统的过程(productService)
1.接口文件
2.解析字符串,创建一个工具类
3.创建一个ProductService 类,去访问
4.ProductService中调用httpClient改版.
5.准备一个httpclient连接使用的配置属性properties中
6.将两个配置相关的class引入web工程
1.HttpClient(配置类,实现各种对象创建各种属性读取)
2.HttpClientService(二次封装了CloseableHttpClient底层api)
3.HttpResult添加到当前common工程中
五.总结
一.前端系统的搭建开发
一.搭建
1.maven骨架webapp
2.pom文件修改
1.parent的继承
cn.tedu

springboot-parent-easymall

0.0.1-SNAPSHOT
2.common的依赖(exclusions redis从common中传递过来)
cn.tedu

springboot-common-easymall

0.0.1-SNAPSHOT
3.处理jsp有效显示在springboot下的依赖支持
jstl,jasper(easymall工程提供)
javax.servlet

jstl


org.apache.tomcat.embed

tomcat-embed-jasper
3.页面和静态文件的引入,删除index.jsp
自动生成的index.jsp 存在的话,会默认读取
1.最终在前端系统中的页面相关内容如下
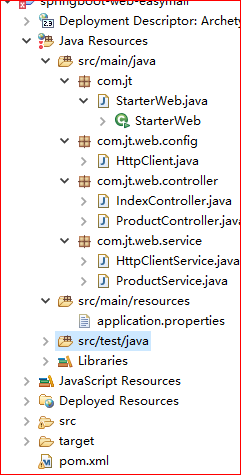
2.创建文件夹src/main/java(src/test/java一并出现)
4.启动类(所有独立的系统中启动类扫描范围都是com.jt)
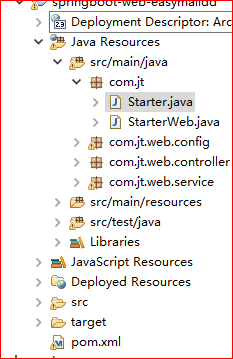
1.我这里依赖里面有个坑,浪费半个小时解决,
2.具体什么坑,留给有缘人.解决方案就不讲了,自行处理
3.坑,埋了之后运行,就不会报错了
5.编写application.properties配置文件
server.port=8091

spring.mvc.view.prefix=/WEB-INF/views/
spring.mvc.view.suffix=.jsp

http.maxTotal = 100
http.defaultMaxPerRoute = 20
http.connectTimeout=1000
http.connectionRequestTimeout=500
http.socketTimeout=10000
http.staleConnectionCheckEnabled=true1.定义端口8091(8092 8093 8094 8095 8096 8097)
- server.port=8091
2.前端系统的页面跳转的前缀后缀
- spring.mvc.view.prefix=/WEB-INF/views/
- spring.mvc.view.suffix=.jsp
3.nginx高并发对前端集群的访问(nginx的根目录完成conf/nginx.conf编辑)
前端是启动一个不同ip和端口的集群
nginx配置访问前端的域名(www.easymall.com)

server {

listen 80;    //端口

server_name www.easymall.com;   //在hosts文件做映射

location /{

高并发

proxy_pass http://easymall/     //虚拟域名

单节点转发

proxy_pass http://127.0.0.1:8093/
4.如下内容是在nginx.conf配置
#easymall的前端系统访问
		server {
			listen       80;
	        	server_name  www.easymall.com;
		    	location / {
		        proxy_pass http://127.0.0.1:8091;
                #proxy_pass http://jt_tomcats;
	            proxy_connect_timeout 600;
                proxy_read_timeout 600;}
               }
打开配置文件并修改
5.hosts文件域名easymall绑定127.0.0.1
1.C:\Windows\System32\drivers\etc 默认地址
2. 127.0.0.1 www.easymall.com
二.开发前端系统具体功能
2.1实现easymall前端系统的所有页面跳转功能(不带数据)
1.首页的访问
- RequestMapping("/")
- return "index" //前缀后缀拼接找到index.jsp
1.启动nginx,项目运行测试
2.直接输入域名,nginx进行转发
2.注册登录(page/login,page/regist)
3.后台商品首页(page/manage,page/item-list,page/item-edit等)
目前只能实现空数据,跳转
- RequestMapping("page/{pageName}")
- return pageName;
4.导入IndexController类
将easymall的springboot整合里的IndexController拷贝,修改成纵向拆分的包名结构com.jt.web.controller(com.jt.product.controller,com.jt.user.controller)
@Controller
public class IndexController {
	@RequestMapping(value="/",method=RequestMethod.GET)
	public String goIndex() {
		return "index";//视图解析器,前缀,后缀的拼接
		//最终页面响应的结果WEB-INF/views/index.jsp
	}
	//动态接收请求地址参数做页面跳转
	@RequestMapping(value="page/{pageName}",method=RequestMethod.GET)
	public String goPage(@PathVariable String pageName){

		return pageName;
	}
}
2.2完成首页全部商品分页查询
1.导入相关代码,从之前SSM项目,或者SpringBoot中获取
- 前端系统与前端页面之间的交互访问,已经在easymall实现了controller接收 从easymall中将ProductController粘贴到当前纵向拆分之后的web系统
- 之前easymall单体项目中的所有controller都早就定义好了和jsp页面和ajax调用的数据结构,所有controller无需修改方法
- 在web前端系统重新定义productServer,xxService们,在业务层中不能访问数据层,只能从后台各种服务系统中调用数据
- 修改ProductService中第一个方法,调用商品后台的返回数据
代码就不沾了,需要去之前项目拷贝,或者去下载我上传的项目
三.httpclient发起代码内容部的http请求.
http协议,不仅仅是浏览器可以支持(底层语言写),C,PHP,PYTHON,JAVA都支持各种各样封装了http协议的客户端代码,TransportClient就是底层封装了http协议的客户端,专门为es做的方法;
需要使用一种可以在java代码中发起http请求的客户端--httpClient
3.1httpclient代码api
1.映入httpclient依赖,SpringBoot支持版本4.5.3 版本号可写可不写
org.apache.httpcomponents

httpclient

4.3.5
2.做个测试类
从test测试代码中访问 https://blog.csdn.net/LiuY521/
代码
public class HttpTest {
	/*
	 * 通过httpclient直接访问京东首页
	 * 从代码中发起请求,request对象准备
	 * 发送调用,之后接收response返回响应内容,我们只关心响应体
	 * 京东首页返回的响应体
	 */
	@Test
	public void test01() throws Exception{
		//获取一个httpclient的实现类客户端CloseableHttpClient
		CloseableHttpClient client = HttpClients.createDefault();
		//相当于TransportClient意义一样的
		//构造一个请求对象Request,定义了不同的请求方式对应不同的请求对象
			HttpGet request=new HttpGet("https://blog.csdn.net/LiuY521/");
		//client调用对象request发起请求,获取返回结果response
		CloseableHttpResponse response = client.execute(request);
		response.getAllHeaders();
		response.getParams();
		//关系响应体
		HttpEntity entity = response.getEntity();//京东服务器返回的所有首页的响应体内容
		//将entity解析成string
		System.out.println(EntityUtils.toString(entity));
		//可以对其他系统返回的字符串数据解析使用
	}
}
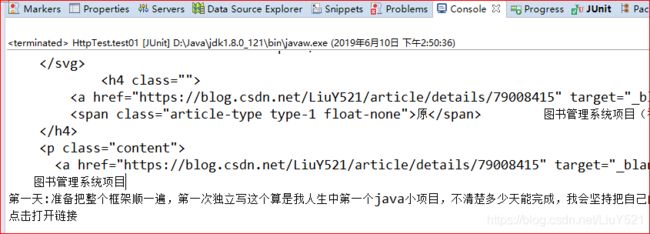
测试结果
ps:可以获取相应体返回的数据,如果返回的是字符串,可以解析使用
四.实现前端系统的访问后台商品系统的过程(productService)
1.接口文件
| 请求地址 |
http://product.jt.com/product/queryByPage?page=1&rows=5 |
| 请求参数 |
Integer page,Integer rows |
| 请求方式 |
get提交 |
| 相应数据 |
Page对象,totalPage总页数,currentPage当前页数,products分页查询结果; {"total":56,"currentPage":2;"products":[{},{},{},{},{}]} |
2.解析字符串,创建一个工具类
在common中添加MapperUtils,管理系统调用的所有mapper对象
/* ObjectMapper mapper = new ObjectMapper();
* 每次解析json 都需要创建一个新的对象,浪费内存,
* 可以做一个静态的常量
* 如果很多地方都在使用的话,可以定义一个静态类去封装
*/
3.创建一个ProductService 类,去访问
@Service
public class ProductService {
	public Page queryByPage(Integer currentPage, Integer rows) {
		//定义请求到后台的url地址,访问后台获取分页查询的各种数据返回
		String url="http://product.easymall."
				+ "com/product/queryByPage?page="
				+currentPage+"&rows="+rows;
		//获取一个httpclient的实现类客户端CloseableHttpClient
		CloseableHttpClient client = HttpClients.createDefault();
		//request对象 get请求
		HttpGet request=new HttpGet(url);
		try{
			//client调用对象request发起请求,获取返回结果response
			CloseableHttpResponse response = client.execute(request);
		//解析response,entity字符串
			String jsonData=EntityUtils.
					toString(response.getEntity());
		//jsonData={"total":56,"currentPage":2;"products":[{},{},{},{},{}]}
			Page page=MapperUtils.MP.readValue(jsonData, Page.class);
			return page;
		}catch(Exception e){
			e.printStackTrace();
			return null;
		}
	}
}
4.ProductService中调用httpClient改版.
为了解决httpclient对象在代码中频繁创建和销毁,需要引入框架解决,让httpclient某个对象注入到业务层代码调用,并且也可以对httpclient底层api做二次封装
5.准备一个httpclient连接使用的配置属性properties中
- http.maxTotal = 100
- http.defaultMaxPerRoute = 20
- http.connectTimeout=1000
- http.connectionRequestTimeout=500
- http.socketTimeout=10000
- http.staleConnectionCheckEnabled=true
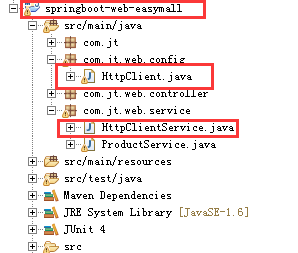
6.将两个配置相关的class引入web工程
1.HttpClient(配置类,实现各种对象创建各种属性读取)
2.HttpClientService(二次封装了CloseableHttpClient底层api)
- doGet(url)
- doGet(url,Map)
- doPost(url) 返回的是一个VO模版对象HttpResult
- doPost(url,Map)
- doPostJson(url,json)
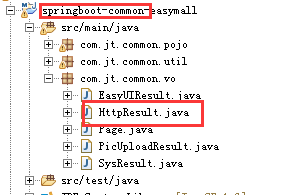
3.HttpResult添加到当前common工程中
优化之后的代码
@Service
public class ProductService {
	@Autowired
	private HttpClientService client;
	public Page queryByPage(Integer currentPage, Integer rows) {
		//定义请求到后台的url地址,访问后台获取分页查询的各种数据返回
		String url="http://product.easymall."
				+ "com/product/queryByPage?page="
				+currentPage+"&rows="+rows;

		try{
			String jsonData = client.doGet(url);
			Page page=MapperUtils.MP.readValue(jsonData, Page.class);
			return page;
		}catch(Exception e){
			e.printStackTrace();
			return null;
		}
	}

}
五.总结
目前Easymall分布式V1.0的三个模块已经配置好
- 1.Parent父工程主要是pom配置文件的,这里面的配置文件主要是所以模块都会使用到的依赖的封装,
- 2.common子工程主要是一些其他模块使用频繁的工具类,VO,pojo 封装,使用的时候依赖即可,无需重复创建
- 3.web子工程只要是负责前端系统的开发,纵向拆分,不需要访问数据库,无法去后台之间获取数据
上传Easymall分布式V1.0项目
c12089c92dec67d31478efbdb1e4a7c9 MD5加密了
密码 521125
