本文详细介绍在mac下配置flutter环境的每一个步骤,通过图文的方式使得读者快速理解和掌握flutter的环境搭建流程。
系统环境要求
macOS (64-bit)
硬盘空间: 700 MB (不包含android studio等编辑器工具).
命令行工具:bash, mkdir, rm, git, curl, unzip, which,brew需要保证上述命令在命令行下能使用,
如果没有安装brew,那么需要先安装:参考:https://segmentfault.com/a/11...
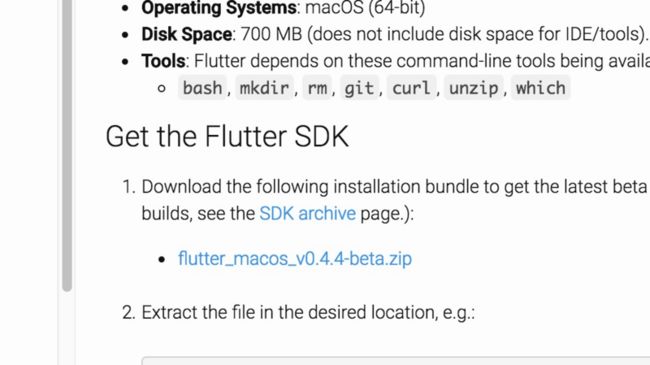
下载flutter
推荐去官网下载,速度并不慢,网址:
https://flutter.io/setup-macos/
点击链接:
更新后的链接地址:
https://storage.googleapis.co...
配置环境变量
先把刚才下载的flutter_macos_v0.3.2-beta.zip解压缩,笔者选择使用的目录是根目录下的app文件夹
配置环境变量,这里笔者使用命令行:
vim ~/.bash_profile增加一行:
export PATH=/app/flutter/bin:$PATH保存一下,注意如果这个文件不存在,那么就新建一个。保存完毕之后运行命令:
source ~/.bash_profile这个时候应该能运行flutter命令了,我们运行命令行:
flutter -h这个时候应该能展示flutter的命令帮助:
有些读者可能会使用iterm2并使用扩展包zsh,那么只需要将上述的环境变量的值直接写入到zsh的配置文件.zshrc中,下次启动zsh会自动加载这个环境变量。
检查环境
运行命令行:
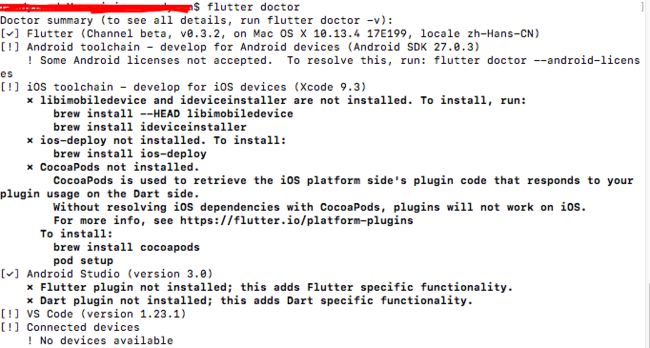
flutter doctor按照检测结果的说明,如果有[!] ✗ 标志,表示本行检测不通过,需要做一些设置或者安装一些软件。
如果android studio没有安装,那么可以先装下,并使用android studio下载最新的android sdk。android studio下载地址:http://www.android-studio.org/
如果有安装,那么很有可能看到:
[!] Android toolchain - develop for Android devices (Android SDK 27.0.3)
! Some Android licenses not accepted. To resolve this, run: flutter doctor --android-licens
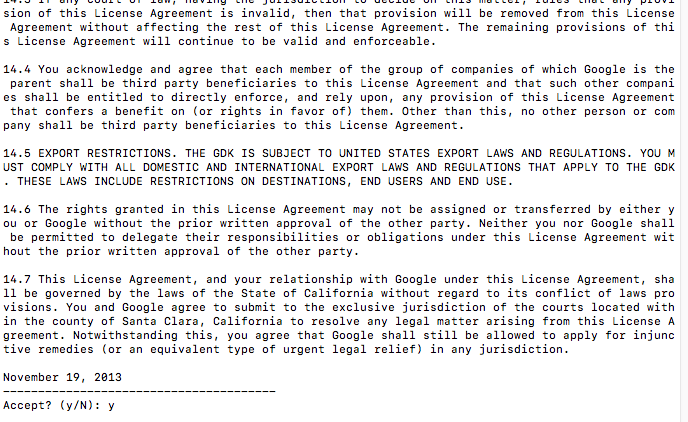
需要运行
flutter doctor --android-licenses这里界面会要求输入Y/N,一路输入Y就行了。
✗ ideviceinstaller is not installed; this is used to discover connected iOS devices.
  To install, run:
    brew install --HEAD libimobiledevice
    brew install ideviceinstaller
✗ ios-deploy not installed. To install:
    brew install ios-deploy
✗ CocoaPods not installed.
    CocoaPods is used to retrieve the iOS platform side's plugin code that responds to your plugin usage on the Dart side.
    Without resolving iOS dependencies with CocoaPods, plugins will not work on iOS.
    For more info, see https://flutter.io/platform-plugins
  To install:
    brew install cocoapods
    pod setup
运行命令:
brew install --HEAD libimobiledevice
brew install ideviceinstaller
brew install ios-deploy
brew install cocoapods
pod setup
这个步骤有点慢...
当然读者看到的也许和笔者不太一致,请酌情处理。
这里出现了个错误,按照说明,运行:
brew link --overwrite cocoapods然后继续运行:
pod setup如果直接运行这个命令,会相当慢,那么我们曲线解决:
cd ~/.cocoapods/repos
git clone https://github.com/CocoaPods/Specs.git
如果还是太慢,那么去
链接: https://pan.baidu.com/s/1mQ1V... 密码:lax1
下一份,解压缩到~/.cocoapods/repos/master目录
[✓] Android Studio (version 3.0)
✗ Flutter plugin not installed; this adds Flutter specific functionality.
✗ Dart plugin not installed; this adds Dart specific functionality.
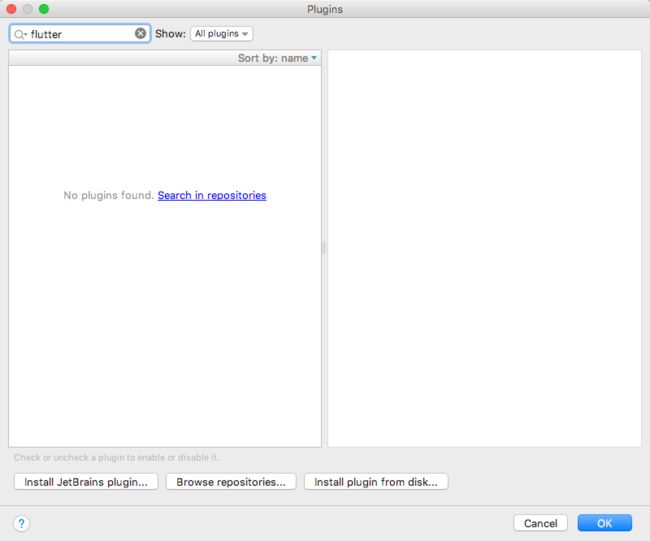
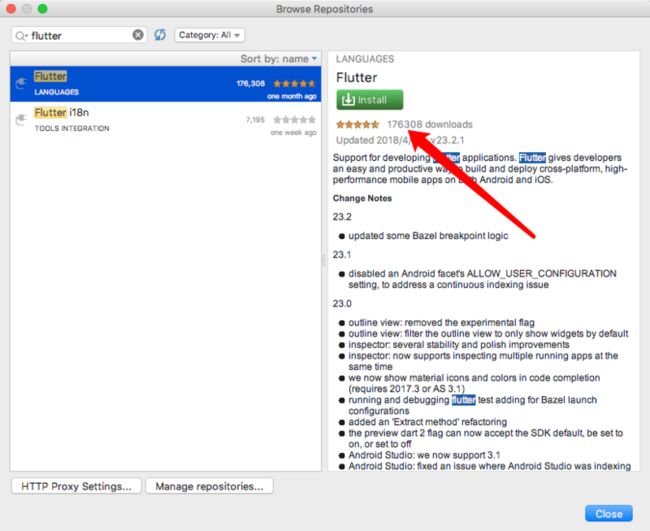
打开android studio, 打开plugin
输入flutter搜索,点击中间的 Search in repositories
点击install,顺利的话安装完毕之后重启android studio
再次运行
flutter doctor注意这里有个坑,如果按照指引来做,会一直卡在这里。这里要先重装一下python,运行下面的命令:
brew reinstall python@2
pip install six
再次运行
flutter doctor如果顺利,可以看到环境ok
配置环境变量
如果在国内,你懂的,还需要设置一下pub源,不然就不能愉快的使用别人写的库。
运行:
vim ~/.bash_profile增加
export PUB_HOSTED_URL=https://pub.flutter-io.cn
export FLUTTER_STORAGE_BASE_URL=https://storage.flutter-io.cn
然后运行
source ~/.bash_profile至此,我们的环境就搭建完毕了,可以愉快的开发了。
搭建环境常见问题整理:
最近有很多朋友咨询,大概的问题在这里整理下,以后陆续更新:
Q: 从github clone下来的版本,为什么执行flutter doctor的时候,等待时间很长?
A: 不建议使用github上面clone的flutter版本搭建环境,那样的话很有可能因为网络原因导致最终不成功,需要直接从官网下载安装包安装,上面有提到,很多人亲测下载速度很快,所以放心下。
Q: Android Studio上安装完flutter和dart插件后,重启AS,并没有看到菜单上有多“新建Flutter工程”的选项
A: 清空Android Studio配置文件,让Android Studio重新生成配置文件就行。
环境变量配置清单
export FLUTTER_ROOT=你的flutter安装目录
export PUB_HOSTED_URL=https://pub.flutter-io.cn
export FLUTTER_STORAGE_BASE_URL=https://storage.flutter-io.cn
export PATH=你的flutter安装目录/bin:$PATH
附件:
今天在重新安装flutter版本之后发现这个问题:
Unhandled exception:
Exception: ideviceinfo returned an error:

#0      IMobileDevice.getInfoForDevice (package:flutter_tools/src/ios/mac.dart:141:9)

#1      IOSDevice.getAttachedDevices (package:flutter_tools/src/ios/devices.dart:156:55)

#2      IOSDevices.pollingGetDevices (package:flutter_tools/src/ios/devices.dart:112:57)
#3      PollingDeviceDiscovery.devices (package:flutter_tools/src/device.dart:166:52)

#4      DeviceManager.getAllConnectedDevices (package:flutter_tools/src/device.dart:94:46)

#5      DeviceValidator.validate (package:flutter_tools/src/doctor.dart:687:54)

#6      Doctor.startValidatorTasks (package:flutter_tools/src/doctor.dart:111:52)
#7      Doctor.diagnose (package:flutter_tools/src/doctor.dart:184:41)
#8      _AsyncAwaitCompleter.start (dart:async/runtime/libasync_patch.dart:49:6)
#9      Doctor.diagnose (package:flutter_tools/src/doctor.dart:174:24)
#10     DoctorCommand.runCommand (package:flutter_tools/src/commands/doctor.dart:48:39)
#11     _AsyncAwaitCompleter.start (dart:async/runtime/libasync_patch.dart:49:6)
#12     DoctorCommand.runCommand (package:flutter_tools/src/commands/doctor.dart:34:42)
#13     FlutterCommand.verifyThenRunCommand (package:flutter_tools/src/runner/flutter_command.dart:401:18)
#14     _asyncThenWrapperHelper. (dart:async/runtime/libasync_patch.dart:77:64)
#15     _rootRunUnary (dart:async/zone.dart:1132:38)
#16     _CustomZone.runUnary (dart:async/zone.dart:1029:19)
#17     _FutureListener.handleValue (dart:async/future_impl.dart:129:18)
#18     Future._propagateToListeners.handleValueCallback (dart:async/future_impl.dart:642:45)
#19     Future._propagateToListeners (dart:async/future_impl.dart:671:32)
#20     Future._complete (dart:async/future_impl.dart:476:7)
#21     _SyncCompleter.complete (dart:async/future_impl.dart:51:12)
#22     _AsyncAwaitCompleter.complete. (dart:async/runtime/libasync_patch.dart:33:20)
#23     _rootRun (dart:async/zone.dart:1124:13)
#24     _CustomZone.run (dart:async/zone.dart:1021:19)
#25     _CustomZone.bindCallback. (dart:async/zone.dart:947:23)
#26     _microtaskLoop (dart:async/schedule_microtask.dart:41:21)
#27     _startMicrotaskLoop (dart:async/schedule_microtask.dart:50:5)
#28     _runPendingImmediateCallback (dart:isolate/runtime/libisolate_patch.dart:115:13)
#29     _RawReceivePortImpl._handleMessage (dart:isolate/runtime/libisolate_patch.dart:172:5)
根据这里:https://github.com/flutter/fl...
brew update
brew uninstall --ignore-dependencies libimobiledevice
brew uninstall --ignore-dependencies usbmuxd
brew install --HEAD usbmuxd
brew unlink usbmuxd
brew link usbmuxd
brew install --HEAD libimobiledevice
问题得以解决
如果还有疑问,加入qq群: 854192563,我们一起探讨。
