动态加载Lightmap
https://gitee.com/langresser_king/terrain_proj
本文主要是总结上文中代码中的关于光照贴图的代码和加载的方法。
首先是GameController类中的方法:
TerrainLoadMgr.sington.LoadLM
然后是:
public IEnumerator LoadLM(Action finish)
{

       string scene = SceneManager.GetActiveScene().name;
       string path = Path.Combine(Application.streamingAssetsPath, scene + "_lightmap.ab");
得到当前打开场景的名字:
D:/OGL/terrain_proj-master/terrain_proj-master/Assets/StreamingAssets\race_track_lake2_lightmap.ab
然后是www加载:
WWW www = new WWW(path);
yield return www;
 AssetBundle curBundleObj = www.assetBundle;
 TextAsset text = curBundleObj.LoadAsset<TextAsset>(scene);
 MemoryStream ms = new MemoryStream(text.bytes);
 ms.Position = 0;
 BinaryReader reader = new BinaryReader(ms);
 int cnt = reader.ReadInt32();
 string[] lmcolors = new string[cnt];
 string[] lmdirs = new string[cnt];
 LightmapData[] datas = new LightmapData[cnt];
加载完毕之后取得www中的包,然后获取其中的场景信息说明文件,读到内存流中去。
使用二进制进行读取。
读取一个int,得到数量。
然后是创建光照贴图的颜色数量、方向图数量、光照贴图数据数组。
for (int i = 0; i < cnt; i++)
{

    lmcolors[i] = reader.ReadString();
    lmdirs[i] = reader.ReadString();
    LightmapData data = new LightmapData();
    if (!string.IsNullOrEmpty(lmcolors[i]))
    {

        data.lightmapColor = curBundleObj.LoadAsset<Texture2D>(lmcolors[i]);
    }
    if (!string.IsNullOrEmpty(lmdirs[i]))
    {

        data.lightmapDir = curBundleObj.LoadAsset<Texture2D>(lmdirs[i]);
    }
    datas[i] = data;
}
对光照贴图数据进行初始化。
lightmap_data.SetUp();
它是个属性,如下:
    XLightmapData lightmap_data
    {

        get
        {

            if (_lightmap_data == null)
            {

                _lightmap_data = GameObject.FindObjectOfType<XLightmapData>();
            }
            return _lightmap_data;
        }
    }
这个类中有一个方法SetUp,是对光照贴图的属性进行设置。
public void SetUp()
{

	LoadLightmap();
private void LoadLightmap()
{

     for (int i = 0; i < terrainsRendererInfo.Length; i++)
     {

         if (terrains[i] != null)
         {

             terrains[i].lightmapScaleOffset = terrainsRendererInfo[i].lightmapOffsetScale;
             terrains[i].lightmapIndex = terrainsRendererInfo[i].lightmapIndex;
             Debug.Log("lightmap scale: " + terrainsRendererInfo[i].lightmapOffsetScale+" index: " + terrainsRendererInfo[i].lightmapIndex);
         }
     }
遍历数组terrainsRendererInfo
对地形的terrains[i]进行光照贴图的索引和采样位置进行设置。
lightmapIndex标记的是使用第几个光照贴图;lightmapScaleOffset从这个光照贴图的何处采样。
if (m_RendererInfo.Count > 0)
{

     foreach (var item in m_RendererInfo)
     {

         item.renderer.lightmapIndex = item.lightmapIndex;
         item.renderer.lightmapScaleOffset = item.lightmapOffsetScale;
     }
 }
对凡是有Render组件的物体设置其光照贴图设置。
ok,我们回忆下刚才做的事情分为两个步骤。
第一是从包里读取贴图数据;第二步是根据之前物体使用的光照设置进行光照采样的设置。
再用通俗的话来说,就是加入物体A在烘焙之前,使用的是第1个光照贴图jpg1,也就是lightmapIndex = 1,采样的位置是(0,0,20,20),也就是lightmapScaleOffset=(0,0,20,20)。
那么从包里读取贴图数据则是得到jpg1。
有了数据之后,还需要对物体的光照信息设置包括lightmapIndex和lightmapScaleOffset,这些信息是保存的在序列化资源上的。
一切就绪之后,最后一步则是使用:
LightmapSettings.lightmaps = datas;
使其光照贴图生效。
LoadLightmapOffsetInfo(reader);
这个就是读取每个物体使用的光照贴图的信息。
总结这个函数的目的是,对动态物体、地形的光照信息进行读取。
reader.Close();
ms.Close();
www.Dispose();
if (finish != null) finish();
读取完毕之后,就进行回调。
下面是举例说明,光照贴图的打包与加载。
项目在:https://gitee.com/yichichunshui/Lightingmap.git
准备场景:
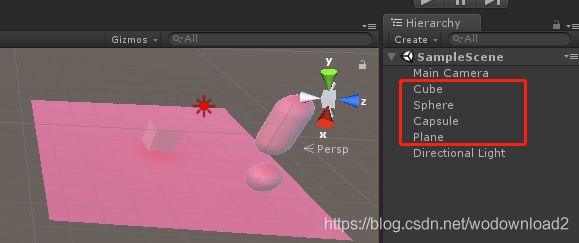
场景中的Cube、Sphere、Capsule、Plane都为静态物体。
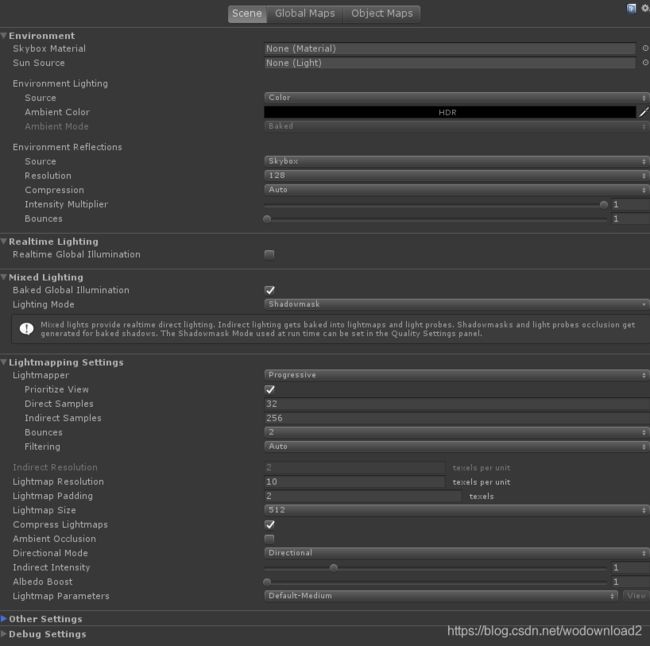
Directional Light为唯一一盏灯,其模式为:

由于选择了Directional Mode 为Directionnal,所以有一个方向贴图。
如果场景中的物件比较多,那么颜色贴图可能会大于一个。
观察一个烘焙之后的物体的光照属性:
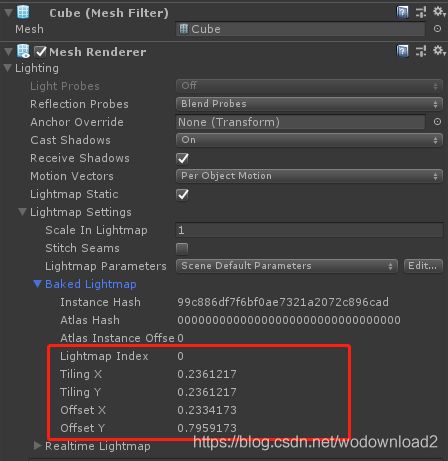
如cube,它的烘焙贴图的索引为0,另外还有平铺以及缩放参数,这些都是要记录好的。否则不知道从哪个光照贴图,哪个位置采样。
接下来就是打包处理。
using System.Collections;
using System.Collections.Generic;
using System.IO;
using UnityEditor;
using UnityEngine;

public class BuildBundle : EditorWindow
{

    [MenuItem("Tools/BuildLightmap")]
    public static void BuildLightmap()
    {

        string inDir = Application.dataPath + "/Scenes/SampleScene";
        string outDir = Application.dataPath + "/StreamingAssets/Scenes/SampleScene";

        if (!Directory.Exists(inDir))
        {

            return;
        }

        if (!Directory.Exists(outDir))
        {

            Directory.CreateDirectory(outDir);
        }

        DirectoryInfo dirInfo = new DirectoryInfo(inDir);
        FileInfo[] files = dirInfo.GetFiles();

        AssetBundleBuild[] ab = new AssetBundleBuild[1];
        ab[0].assetBundleName = "smaplescene";
        List<string> assetNames = new List<string>();
        for (int i = 0; i < files.Length; ++i)
        {

            if (files[i].FullName.EndsWith(".meta")) continue;
            string assetName = files[i].FullName.Substring(files[i].FullName.IndexOf("Assets"));
            assetNames.Add(assetName);
        }
        ab[0].assetNames = assetNames.ToArray();
        BuildPipeline.BuildAssetBundles(outDir, ab, BuildAssetBundleOptions.None, EditorUserBuildSettings.activeBuildTarget);
    }
}
下面就是使用这个光照贴图了:
 private void OnClickLoad()
    {


        Init();
        AssetBundle ab = AssetBundle.LoadFromFile(bundleRootPath + "smaplescene");
        if (ab != null)
        {

            LightmapData[] data = new LightmapData[1];
            data[0] = new LightmapData();
            Object[] objs = ab.LoadAllAssets();
            for (int i = 0; i < objs.Length; ++i)
            {

                if (objs[i].name.Contains("dir"))
                {

                    data[0].lightmapDir = (Texture2D)objs[i];
                }
                else
                {

                    data[0].lightmapColor = (Texture2D)objs[i];
                }
            }

            SetLightmapInfo();
            LightmapSettings.lightmaps = data;
        }
        else
        {

            Debug.LogError("ab is null " + bundleRootPath + "samplescene");
        }
    }
这里写的不太灵活,但是大体是那么个意思。
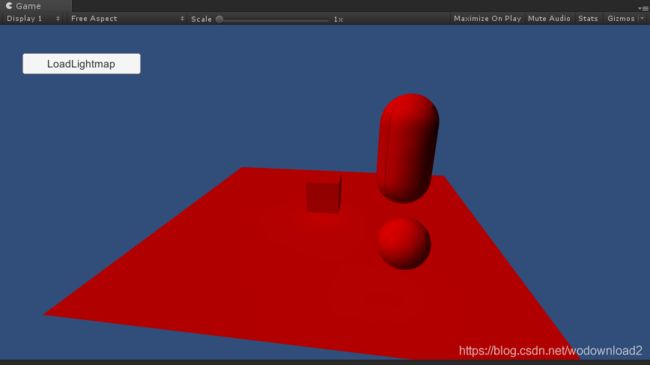
经过这个之后,我们发,物体并没有亮起来,原因是:

这个在删除光照贴图数据之后,光照信息就丢失了,所以我们还要能够把光照信息序列化起来。
[Serializable]
public class LightmapInfo
{

    public int lightmapIndex;
    public Vector4 lightmapOffset;
}


public class LightmapInfoScript : MonoBehaviour
{

    public LightmapInfo info;
}
   [MenuItem("Tools/SaveLightmapInfo")]
    public static void SaveLightmapInfo()
    {

        GameObject[] gos = FindObjectsOfType(typeof(GameObject)) as GameObject[];
        for (int i = 0; i < gos.Length; ++i)
        {

            Renderer render = gos[i].GetComponent<Renderer>();
            if (render != null && gos[i].isStatic)
            {

                LightmapInfoScript comp = gos[i].GetComponent<LightmapInfoScript>();
                if(comp == null)
                {

                    comp = gos[i].AddComponent<LightmapInfoScript>();
                }
                comp.info = new LightmapInfo();
                comp.info.lightmapIndex = render.lightmapIndex;
                comp.info.lightmapOffset = render.lightmapScaleOffset;
            }
        }
    }
这样我们在烘焙之后,保存光照信息、打包光照数据之后,才能删除光照数据,物体记录数据之后:

在加载完光照贴图之后,还需要重新设置每个物体的光照信息:
    public void SetLightmapInfo()
    {

        GameObject[] gos = FindObjectsOfType(typeof(GameObject)) as GameObject[];
        for (int i = 0; i < gos.Length; ++i)
        {

            Renderer render = gos[i].GetComponent<Renderer>();
            //Debug.LogError("ab is  render = " + render + "   isStatic=" + gos[i].isStatic);
            if (render != null /*&& gos[i].isStatic*/) //这个注释掉因为在android手机上被标记为static竟然为false,不可思议
            {

                LightmapInfoScript comp = gos[i].GetComponent<LightmapInfoScript>();
                if(comp != null)
                {

                    render.lightmapIndex = comp.info.lightmapIndex;
                    render.lightmapScaleOffset = comp.info.lightmapOffset;
                }
            }
        }
    }
不晓得问题出现在哪里,可能还有很多的小细节没有注意到,后面再补充。
总体来说,光照信息的序列化、打包、加载、应用基本过程已经讲解完毕。
补记:
1、当发布到android手机上的时候,发现被标记为static的物体,其输出结果依然为false,所以像代码中一样,去除static属性判断。
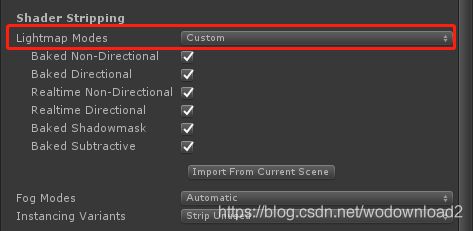
2、当发布到手机上的时候,发现加载光照贴图正常,设置索引正常,但是依然是黑色的,百度之后,发现Edit=>Project Settings=>Graphics关于Lightmap Modes改为Custom才可以正常发布。
参考:https://www.cnblogs.com/verlout/p/5734390.html
以上是关于打包和加载一个光照贴图的方法。
下面我们做个实验:
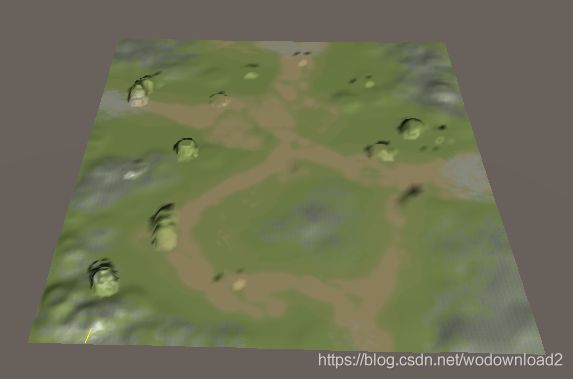
1、准备一个大地形500x500的地形,然后将其分割为5x5的小地形
2、分割后对地形进行烘焙,也就是说现在对分割后的5x5的小地形单独烘焙,观察其烘焙贴图结果
3、使用9宫格加载周围的地形,并且加载其烘焙贴图
4、尝试使用寻路到隔壁的地形
然后,设置烘焙参数,进行烘焙。
然后序列号每个小地形上的光照贴图索引和偏移。
打包这些烘焙的贴图。
