angularjs2 简单使用起始篇(一)
angularjs2 简单使用起始篇—基于一个小例子(一)
本篇文章基于angularjs 2.3.0
angularjs2 是不同于anjularjs ,前者是基于组件的,而后者着是基于demo的。angularjs2 比较像RN。组件化是前端的一个趋势,这种方式类似于android的bar,listview等组件,可以直接调用显示,开发者写好组件后,只要关心数据,样式,其他会有组件自动填充完成。因为内容比较多,会分成3篇文章来写。

一、环境
1.需要安装node,具体怎么安装去百度,谷歌。
2.编辑器 建议使用atom。需要安装两个插件

3.设备,我是用的mac,也可以用pc
二、开始
1.利用《快速起步》种子
    git clone https://github.com/angular/quickstart.git  quickstart
    cd quickstart
    npm install
    npm start
npm install 是安装依赖
npm start 运行项目
2.直接下载简单的项目文件,没有其他任何前端工程化的文件,就是简单的编程文件,不过需要安装http-server
建议第一种方式,本篇文章也是按照第一种方式讲解
三、分析
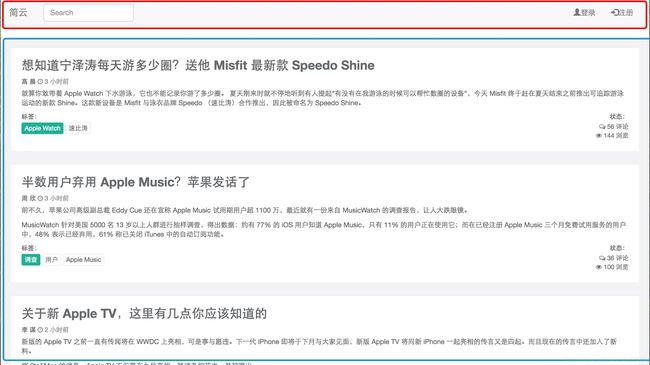
我们将按照这两部分来分成两个组件header和listview
四、项目结构

1.index.html 项目的起始页,我们放入一些bootstrap的样式文件
  <link rel="stylesheet" href="http://cdn.static.runoob.com/libs/bootstrap/3.3.7/css/bootstrap.min.css">
    <script src="http://cdn.static.runoob.com/libs/jquery/2.1.1/jquery.min.js">script>
    <script src="http://cdn.static.runoob.com/libs/bootstrap/3.3.7/js/bootstrap.min.js">script>
    <link href="http://cdn.bootcss.com/font-awesome/4.6.3/css/font-awesome.min.css" rel="stylesheet">
   <link href="http://cdn.bootcss.com/animate.css/3.5.2/animate.min.css" rel="stylesheet">
2.app文件夹中 是最主要的
header的代码:
1.先写模板就是头部的html代码,类似于android的xml,就是一些简单的html代码,基于bootstrap来写的,样式并不是我们这篇文章考虑的重点
header.html
<div class="top">
<nav class="navbar navbar-default" role="navigation" >
    <div class="container-fluid">
    <div class="navbar-header">
        <button type="button" class="navbar-toggle" data-toggle="collapse"
                data-target="#example-navbar-collapse">
            <span class="sr-only">切换导航span>
            <span class="icon-bar">span>
            <span class="icon-bar">span>
            <span class="icon-bar">span>
        button>
        <a class="navbar-brand" href="#">简云a>
    div>

    <div class="collapse navbar-collapse" id="example-navbar-collapse">
    <div>
        <form class="navbar-form navbar-left" role="search" action="http://www.">
            <div class="form-group">
                <input type="text" class="form-control" placeholder="Search">
            div>

        form>
    div>
    <ul class="nav navbar-nav navbar-right">
        <li><a href="#"><span class="glyphicon glyphicon-user">span>登录a>li>
        <li><a href="#"><span class="glyphicon glyphicon-log-in">span>注册a>li>
    ul>
    div>
    div>
nav>
2.现在来写组件代码,组件主要就是来和html定义的模板进行交互的,这样我们以后只要和组件进行交互,就行了,不在考虑模板,模板定义好之后可以高度复用。
header.component.ts
import { Component, Input } from '@angular/core';
@Component({
  moduleId: module.id,
  selector: 'mangues-header',
  templateUrl: './header.html'
})
export class HeaderComponent {

}
templateUrl:对应的参数就是这个组件绑定 header.html 模板,类似于android的自定义控件绑定xml,这里使用url应用的文件(我们模板文件写在单独文件中的,这里也可以直接用template参数对应模板文件字符串)
selector:对应的参数就是 对外调用的标签,外部引用可以通过这个标签来调用,类似于android xml里面调用自定义控件
moduleId:固定写法,为了templateUrl 能用相对地址,不然引用header.html就需要从app文件夹开始
3.组件需要使用,首先需要注册进系统里,不然无法调用。
import { NgModule }      from '@angular/core';
import { BrowserModule } from '@angular/platform-browser';
import { FormsModule }   from '@angular/forms';

import { AppComponent }  from './app.component';
import { HeaderComponent } from './component/header/header.component';
import { ListViewComponent } from './component/listview/listview.component';

@NgModule({
  imports: [
    BrowserModule,
    FormsModule
  ],
  declarations: [
    AppComponent,
    HeaderComponent,
    ListViewComponent,
  ],
  bootstrap: [ AppComponent ]
})
export class AppModule { }
先引入header.component.ts 中的HeaderComponent类
import { HeaderComponent } from ‘./component/header/header.component’;
然后注册declarations中就可以使用了
4.使用自定义的组件
看 app.component.ts组件
import { Component } from '@angular/core';
@Component({
selector: 'my-app',
template: `mangues-header>
<mangues-listview>mangues-listview> `,
})
export class AppComponent {
}为什么可以显示呢,上面说过selector对应的参数是为了外部标签调用,我们在index.html中定义了一个标签,所以项目index.html 开启的时候会因为my-app标签引用app.component.ts组件,因为上面已经在header.component.ts组件中定义了mangues-header,所以这里的template 对应的模板标签就会直接调用header.component.ts组件 也就调用了header.html 模板。
Loading AppComponent content here ... listview 这边的显示和header一样 就不重复写了,可以直接看代码。
五、项目运行
如果在开始阶段 下载运行了快速起步,就可以直接改代码,浏览器中会自动改变
如果没有,或者已经关闭终端,可以npm start重新运行
npm start下一篇文章:anjularjs2 header的数据绑定,模板当然是样式自定义,数据外部传入了,不然不如直接写html操作DOM呢。从外部改变title和登录 注册的url。
github下载下载的demo直接到根目录执行
npm install
npm start