(八)坦克大战--(6)自动炮台
1,前言
制作自动炮台
其实就是一个自动旋转但是不会移动的敌人
2,步骤
2.1,下载模型
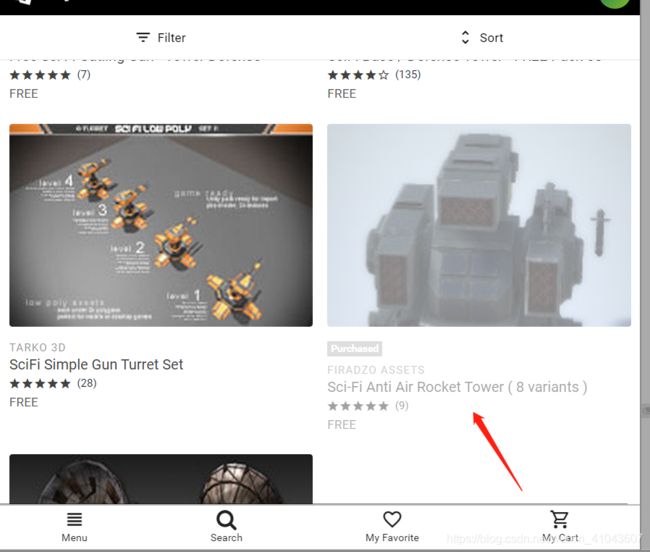
炮台的模型可以从AssetStore进行下载导入
下图是我所下载的炮台模型

2.2,新建Cube
接下来新建一个Cube,并命名为GunTurrent-Green(因为这里使用的是绿色的炮台)
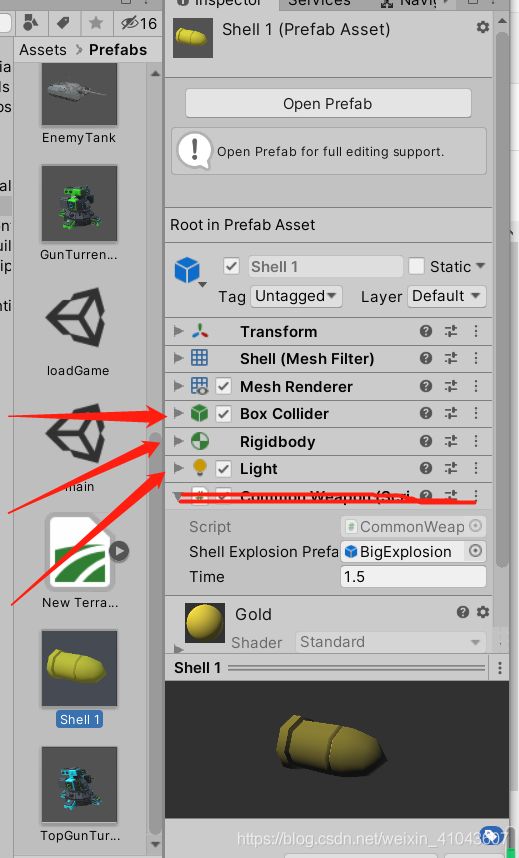
添加相应的组件
Rigibody和Box Collider

2.3,挂载模型
然后就是调整一下GunTurrent-Green和模型的位置
调整过程参照之前的即可
2.4,创建ShootPoint
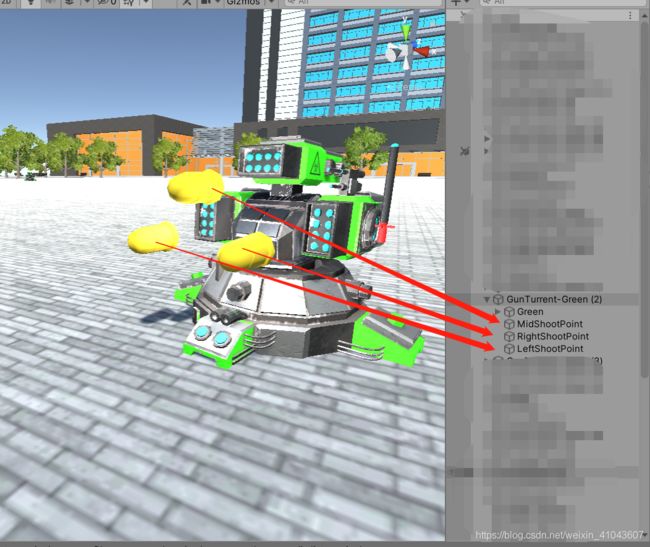
我这里设定一个炮台一次可以发射三颗炮弹,对应模型的三个炮弹发射口
也就是说一次发射操作,需要实例化三颗炮弹,所以需要创建三个ShootPoint。
按照位置分别命名为:MidShootPoint,RightShootPoint,LeftShootPoint
 细节调整不多赘述了,就跟坦克发射炮弹一样的操作,只不过数量由一个变为三个就是了。
2.5,脚本编写
2.5.1,炮台转向
炮台自动转向的脚本其实就是将敌人自动追踪的脚本改写下即可
新建一个脚本并命名为GunTowerController
改写:将控制坦克移动的代码删除即可
using System.Collections;
using System.Collections.Generic;
using UnityEngine;

public class GunTowerController : MonoBehaviour
{

    /**
      * Debug.DrawLine:在场景视图中绘制一条线段,从字面上理解这个应该是只有调试环境的时候才会生效,真正游戏里边是看不到的。
      * GameObject.FindGameObjectWithTag:获取带有指定标记的游戏对象。
      * Quaternion.LookRotation:求两点间旋转的四元数。
      * Quaternion.Slerp:在两个旋转四元数中做差值,用来做旋转的过渡效果。
      * Time.deltaTime:获取上一帧到当前所经过的时间,单位毫秒
      */


    ///
    /// 旋转速度
    ///
    public float RotateSpeed = 3;
    //玩家控制的坦克
    private Transform m_TargetTransform;
    //敌人坦克
    private Transform m_SelfTransform;

    void Awake()
    {

        var player = GameObject.FindGameObjectWithTag("Player");
        m_TargetTransform = player.transform;
        //这里的transform是坦克的初始的位置
        m_SelfTransform = transform;
        // print("transform is : "+transform);
    }

    void Update()
    {

        //调试场景中画一条线,从敌人坦克开始,到玩家坦克技术,红色
        Debug.DrawLine(m_SelfTransform.position, m_TargetTransform.position, Color.red);
        //求得两物体之间旋转的角度  两点间旋转的四元数
        var lookRotation = Quaternion.LookRotation(m_TargetTransform.position - m_SelfTransform.position);
        //地方坦克旋转的角度
        m_SelfTransform.rotation = Quaternion.Slerp(m_SelfTransform.rotation, lookRotation, RotateSpeed * Time.deltaTime);

    }
}
2.5.2,炮台攻击
接下来是进行炮台发射炮弹的脚本编写
其实就是将敌方坦克自动发射炮弹的脚本加以改造
新建脚本,命名为GunTowerWeapon
using System.Collections;
using System.Collections.Generic;
using UnityEngine;

public class GunTowerWeapon : MonoBehaviour
{

    /**
     * 这是控制敌方炮塔发射炮弹的脚本
     */

    //炮弹的外壳
    public GameObject shell;
    //炮弹发射时施加的力
    public float shootPower;
    //炮弹发射的位置
    public Transform midShootPoint;
    public Transform leftShootPoint;
    public Transform rightShootPoint;

    private int fireTime = 0;


    //玩家控制的坦克
    private Transform m_TargetTransform;

    void Awake()
    {

        var player = GameObject.FindGameObjectWithTag("Player");
        m_TargetTransform = player.transform;
    }

    // Update is called once per frame
    void Update()
    {

        if (Vector3.Distance(transform.position,m_TargetTransform.position)<80f)
        {

            fireTime++;
            if (fireTime == 150)
            {

                Shoot();
                fireTime = 0;
            }
        }
    }

    void Shoot()
    {

        //这是实例化出来的炮弹
        //中间的发射口
        GameObject newShell1=Instantiate(shell, midShootPoint.position, midShootPoint.rotation) as GameObject;
        //左边的发射口
        GameObject newShell2=Instantiate(shell, leftShootPoint.position, leftShootPoint.rotation) as GameObject;
        //右边的发射口
        GameObject newShell3=Instantiate(shell, rightShootPoint.position, rightShootPoint.rotation) as GameObject;

        //获得实例化对象的刚体属性
        Rigidbody r1 =newShell1.GetComponent<Rigidbody>();
        Rigidbody r2=newShell2.GetComponent<Rigidbody>();
        Rigidbody r3 =newShell3.GetComponent<Rigidbody>();

        r1.velocity = midShootPoint.forward * shootPower;
        r2.velocity = leftShootPoint.forward * shootPower;
        r3.velocity = rightShootPoint.forward * shootPower;


    }
}
2.5.3,炮台生命值
接下来就是编写炮台生命值的脚本,与敌方坦克的生命值脚本大致相同
首先将GunTurrent-Green的标签设置为Enemy,方便炮弹命中炮台时,能够通过标签进行对象的判断
新建脚本,命名为GunTowerHealth
using System.Collections;
using System.Collections.Generic;
using UnityEngine;

public class GunTowerHealth : MonoBehaviour
{

    /**
     * 这个类是敌方炮塔的生命值
     */
    public int hp = 100;

    //这个是炮塔血量为0,爆炸的效果
    public GameObject tankExplosion;

    // Start is called before the first frame update
    void Start()
    {


    }

    // Update is called once per frame
    void Update()
    {


    }


    void TakeEnemyDamage()
    {

        //如果在受到这颗炸弹的伤害之前,hp就已经小于0了。那就不会继续受到伤害了
        if (hp<=0)
        {

            return;
        }
        hp -= Random.Range(30, 40);
        //受到伤害之后血量为0,就应该控制死亡效果
        if (hp<=0)
        {

            SendMessage("EnemyHadBeenDestroy");
            GameObject.Instantiate(tankExplosion, transform.position + Vector3.up, transform.rotation);
            GameObject.Destroy(this.gameObject);

        }

    }
}
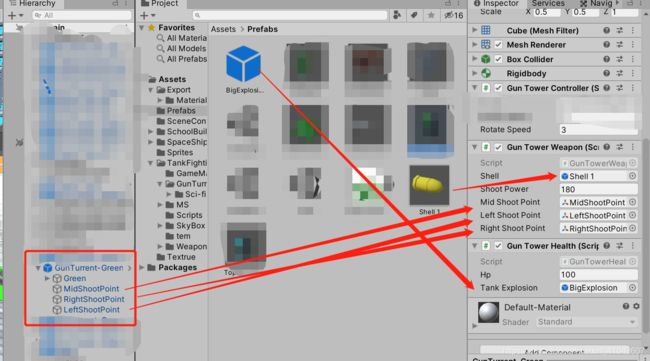
2.6,挂载脚本
2.7,导成Prefab
然后就是将制作好的GunTurrent-Green拖到Prefabs目录下,变成Prefab
方便后续的使用
未完待续…
