1、所需环境
Linux:这里使用CentOS 7.5
MySQL:5.5及以上
PHP:5.2及以上
Apache:也可使用nginx
Git
2、安装环境
2.1、 脚本安装
2.1.1、脚本 install_rhel-derivs.sh
https://secure.phabricator.com/source/phabricator/browse/master/scripts/install/install_rhel-derivs.sh
注:可修改执行脚本。比如修改相关软件版本
2.1.2、脚本安装内容
Apache 2.2、MySQL 5.3、PHP 5.3、Git 1.7 并用git下载phabricator, arcanist, libphutil
2.1.3、脚本下载执行
cd /opt
# 下载脚本
wget  https://secure.phabricator.com/source/phabricator/browse/master/scripts/install/install_rhel-derivs.sh
# 给执行权限
chmod 755 ./install_rhel-derivs.sh
# 执行
./install_rhel-derivs.sh
# 移动phabricator相关文件到apache的发布目录下
mkdir -p /var/www/html/pha/
mv /opt/arcanist /var/www/html/pha/
mv /opt/libphutil /var/www/html/pha/
mv /opt/phabricator /var/www/html/pha/
2.2、自行安装(这里使用此方式)
推荐这种安装
注意版本问题
2.2.1、Apache 安装
# Apache 2.4.6
yum install httpd

# 开放端口
firewall-cmd --zone=public --add-port=80/tcp --permanent
# 重启防火墙
firewall-cmd --reload

# 启动
systemctl start httpd

# 查看
httpd -v
2.2.2、MySQL安装
# 安装
yum install mysql-server
# 安装不了,进行如下操作
wget http://repo.mysql.com/mysql-community-release-el7-5.noarch.rpm
rpm -ivh mysql-community-release-el7-5.noarch.rpm
yum install mysql-server

# 启动
systemctl start mysqld

# 查看
mysql -V

# 登录
mysql -u root -p
# 修改root登录密码
set password for root@localhost = password('******');
# 设置远程访问
grant all privileges on *.* to 'root'@'%' identified by '******' with grant option;
# 刷新退出
flush privileges;
quit

# 开放端口
firewall-cmd --zone=public --add-port=3306/tcp --permanent
# 重启防火墙
firewall-cmd --reload

# 修改数据库默认编码
# 进入mysql配置文件
vi /etc/my.cnf
# 在下面两项中添加:
[client]
default_character_set=utf8
[mysqld]
collation_server = utf8_general_ci
character_set_server = utf8

# 重启
systemctl restart mysqld
2.2.3、PHP安装
# PHP 5.4
yum -y install php

# 查看
php -v

# php 组件
yum install php-pecl-zendopcache php-devel php-mbstring  php-mcrypt  php-pear php-common php-ldap php-cli pcre-devel  php-iconv php-curl php-pcntl php-gd  php-fpm  php-bcmatphp-odbc php-process php-snmp php-soap php-pecl-jsonphp-xml php-xmlrpc php-xhprof php-phpoffice-phpexcel  php-mhash

# 其他
yum curl curl-devel

# apc
yum install php-pecl-apc php-apc

# apc yum安装不行,可尝试如下安装
#   1)首先要安装apc的依赖包:
yum install httpd-devel pcre-devel gcc make
#   2)然后使用pecl安装apc:
pecl install apc
#   3)添加apc扩展到配置文件php.ini或apc.ini
vi /etc/php.ini
#   添加如下
[apc]
extension=apc.so
#
vi /etc/php.d/apc.int
#   添加如下
/extension=apc.so

-----------------------------------------------------------
# php 其他安装方式:
# php7.1
# https://blog.csdn.net/hu_zhe_kan/article/details/79368169
# 注意:Phabricator不支持PHP7.0版本
yum -y install php71w
# php 组件
yum -y install php71w-cli php71w-common php71w-devel php71w-embedded php71w-fpm php71w-gd php71w-mbstring php71w-mysqlnd php71w-opcache php71w-pdo php71w-xml php71w-ldap php71w-odbc php71w-pear php71w-xmlrpc php71w-snmp php71w-soap curl curl-devel php71w-bcmath
#
yum curl curl-devel
# apc
yum install php-pecl-apc
-------------------------------------------------------------
2.2.4、Git
# Git 2.16.5
# yum 默认为1.X
# 若yum安装2.X:https://blog.csdn.net/caimengyuan/article/details/80634752
yum install git

# 查看
git --version
2.2.5、语法高亮
# 语法高亮设置
yum install python-pygments
2.2.6、git克隆phabricator
# phabricator
mkdir -p /var/www/html/pha/
cd /var/www/html/pha
git clone https://github.com/phacility/libphutil.git
git clone https://github.com/phacility/arcanist.git
git clone https://github.com/phacility/phabricator.git
3、相关配置
3.1、Apache
# 1、进入配置文件
vi /etc/httpd/conf/httpd.conf
# 2、修改或添加如下配置
# DocumentRoot
DocumentRoot "/var/www/html/pha/phabricator/webroot"
# DirectoryIndex 添加index.php
# Apache 2.4 之前版本
DirectoryIndex index.php index.html index.html.var
# Apache 2.4 及其之后版本
DirectoryIndex index.php index.html
# VirtualHost
RewriteEngine on
RewriteRule ^/rsrc/(.) - [L,QSA]
RewriteRule ^/favicon.ico - [L,QSA]
RewriteRule ^(.*)$ /index.php?__path__=$1 [B,L,QSA]
# Directory 加入上述VirtualHost中
# Apache 2.4 之前版本
3.2、MySQL
# 进入phabricator目录
cd /var/www/html/pha/phabricator/

# 配置如下,也可在./conf/local/local.json中添加
./bin/config set mysql.host localhost
./bin/config set mysql.port 3306
./bin/config set mysql.user root
./bin/config set mysql.pass ******

# 为phabricator创建mysql相关数据表
./bin/storage upgrade --force
3.3、访问页面,进行有关配置
浏览器访问地址:IP访问即可
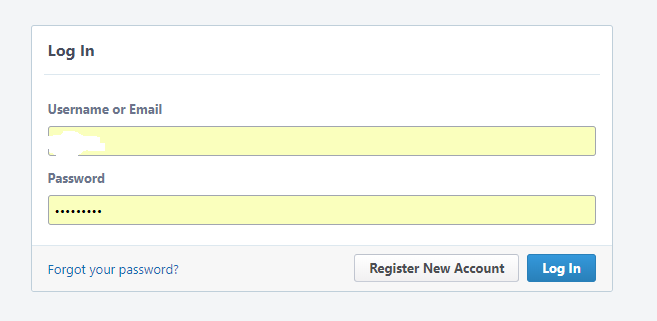
3.3.1、注册管理员
注册信息:用户名/密码/邮箱/
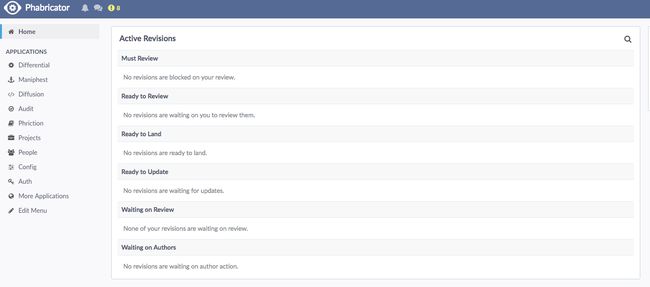
访问进入注册界面填入上述注册信息进行注册,然后进入主页面
注:也可用phabricator后台命令来注册管理员 ./bin/auth recover <管理员账号> ...
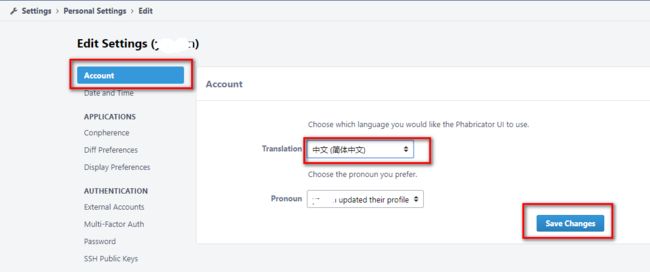
3.3.2、 添加中文支持
cd ./src/extensions
git clone https://github.com/wanthings/phabricator-zh_CN.git
进入页面进行配置
3.3.3、解决相关issue问题
注:点击进入issue问题, 会有相关解决方法的提示,一般根据提示进行相关配置即可解决
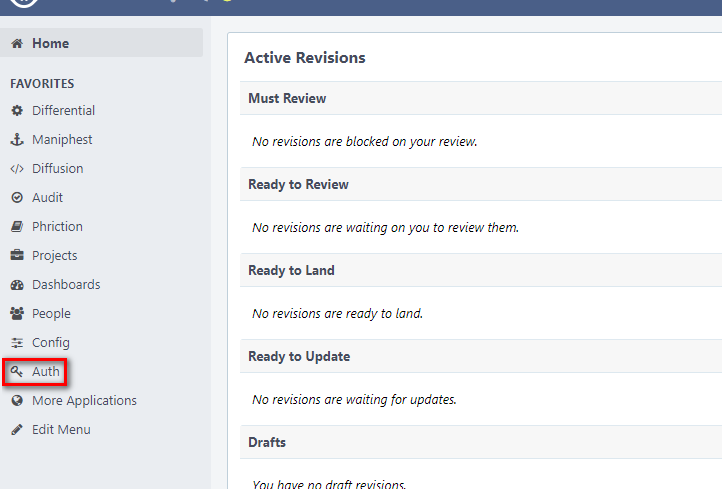
1) Authentication Providers Configured(登录认证)
该问题是用户登录配置,不解决的话无法正常登录phabricator,需要设置授权方式(认证信息),如下配置

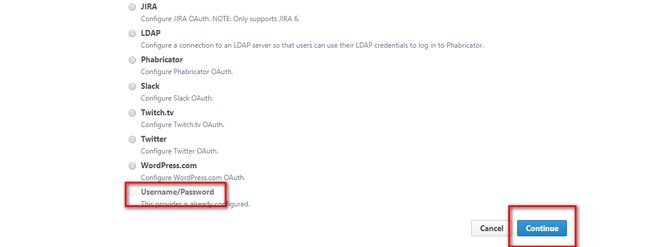
退出后可到登陆界面进行登录
2)Phabricator Daemons Are Not Running(开启守护线程)
后台守护进程将会执行系统跟踪、检测以及邮件收发等操作。所以该问题应该修复,后期如果出现了问题或者刷新的话,可以对它停止、调试、重启等操作。特别是在邮件收发服务失败时,应该多次重启这个守护进程。
# 启动守护进程即可
./bin/phd start
3)脚本安装环境时,会出现MySQL 5.3 版本过低,需进行升级
# 最好先进行备份,再升级
# 升级
more /etc/redhat-release
rpm -Uvh http://repo.mysql.com/mysql-community-release-el6-5.noarch.rpm
yum -y upgrade mysql
# 重启
systemctl restart mysqld
4)Missing Repository Local Path(配置本地库)
该操作执行本地代码库以及网络代码库本地保存路径。系统默认使用/var/repo,也可以其他的可用路径。系统刚安装完成/var/repo路径是不存在的,如果使用它的话必须先创建并赋予读写执行权限
默认仓库可修改:
./bin/config set repository.default-local-path '/路径/repo'
创建并赋予仓库权限
mkdir /var/repo

chown -R root. /var/tmp/phd
chown -R root. /var/repo
注:不赋予权限可能导致代码库克隆不下来
5)Server Timezone Not Configured(设置phabricator服务器的时区)
该问题是设置服务器的时区的。系统很多操作将会产生时间戳保存到数据库或者其他的通信操作,所以应该设定,否则系统默认使用格林威治标准时间, 一般为"Asia/Shanghai"
php配置:
# 进入php配置文件
vi /etc/php.int
# 修改如下
date.timezone = "Asia/Shanghai"

# 重启httpd
systemctl resatrt httpd
页面配置:
点击此issues问题,点击 issue Edit phabricator.timezone 进入对应页面,在“Value”栏中输入“Asia/Shanghai”。然后保存设置即可
6)Large File Storage Not Configured
因为默认使用mysql存储,需要修改对mysql存储的限制
./bin/config set storage.mysql-engine.max-size 104857600
7) No Sendmail Binary Found(邮件发送问题)
该问题是邮件收发服务问题。系统很多功能后台会执行邮件收发动作,所以必须配置系统使用的邮件收发服务
由于需要邮件收发服务,所以必须安装SendMail
SendMail安装
# 下载SendEmail
wget http://caspian.dotconf.net/menu/Software/SendEmail/sendEmail-v1.56.tar.gz

# 解压安装
tar -xzvf sendEmail-v1.56.tar.gz -C /usr/local/
mv /usr/local/sendEmail-v1.56 /usr/local/sendemail
ln -s /usr/local/sendemail/sendEmail /usr/sbin/sendmail

# 开放端口
firewall-cmd --zone=public --add-port=25/tcp --permanent
firewall-cmd --zone=public --add-port=465/tcp --permanent
# 重启防火墙
firewall-cmd --reload

# 发送邮件测试
sendmail -f [email protected] -t [email protected] -s smtp.163.com -u "邮件主题" -o message-content-type=html -o message-charset=utf8 [email protected] -xp xxxx -m "邮件内容"

————————————————————————————————————————————————————————————
# 命令说明:
sendmail:邮件主程序
    -f [email protected]:发件人邮箱
    -t [email protected]:收件人邮箱
    -s smtp.163.com:发件人的smtp服务器地址
    -u "邮件主题":邮件的标题
    -o message-content-type=html:邮件内容的格式,html表示它是html格式
    -o message-charset=utf8:邮件内容编码
    -xu [email protected]:发件人的邮箱账号
    -xp xxxx:发件人邮箱密码
    -m "邮件内容":邮件的具体内容

————————————————————————————————————————————————————————————
# 发送成功提示如下
Feb 02 17:17:30 localhost sendmail[6652]: Email was sent successfully!

# 可能发送存在的问题:phpmailer error SMTP Error: Could not connect to SMTP host Could not instantiate mail function?

# 可能原因:PHPMailer发送邮件,出现无法连接host,这是因为fsockopen函数被禁用,PHPmailer发送Email依赖此函数

# 上述原因解决办法:修改/var/www/html/pha/phabricator/externals/phpmailer下文件,如下:
# 1、修改class.smtp.php文件
#  将如下片段中fsockopen替换成pfsockopen
this->smtp_conn = @fsockopen(host,    // the host of the server
                                 port,    // the port to use
                                 errno,   // error number if any
                                 errstr,  // error message if any
                                 tval);   // give up after ? secs

# 2、修改class.phpmailer.php文件
# 将如下连个片段中smtp替换成SMTP,或其他地方smtp改为SMTP
switch($this->Mailer) {
        case 'sendmail':
          return $this->SendmailSend($header, $body);
        case 'smtp':
          return $this->SmtpSend($header, $body);
        default:
          return $this->MailSend($header, $body);
      }

public function IsSMTP() {
    $this->Mailer = 'SMTP';
页面中配置
config -->core-->mail-->
设置发件邮箱:
metamta.default-address-->[email protected]
设置邮件适配器 :
metamta.mail-adapter -->PhabricatorMailImplementationPHPMailerAdapter
如下图:

Phabricator中配置
# 发件邮箱
./bin/config set metamta.default-address [email protected]
# 邮件适配器
./bin/config set metamta.mail-adapter PhabricatorMailImplementationPHPMailerAdapter

# 邮箱相关配置
./bin/config set phpmailer.mailer smtp
./bin/config set phpmailer.smtp-protocol SSL
./bin/config set phpmailer.smtp-host smtp.163.com
# 注意:此处邮件端口为465,一般为25或465
./bin/config set phpmailer.smtp-port 465
./bin/config set phpmailer.smtp-user abcdef@163com
./bin/config set phpmailer.smtp-password *******

# 测试是否可正常发送邮件
# 发送
./bin/mail send-test --to [email protected] --subject hello
# 查看发送状态
./bin/mail list-outbound
# 查看发送详情, 以便失败时排查错误
./bin/mail show-outbound --id 25

# 重启守护进程
./bin/phd

——————————————————————————————————————————————————————————————
# 发送邮可能报如下错
*******************************************************************
 Using the default of SSL_verify_mode of SSL_VERIFY_NONE for client
 is deprecated! Please set SSL_verify_mode to SSL_VERIFY_PEER
 possibly with SSL_ca_file|SSL_ca_path for verification.
 If you really don't want to verify the certificate and keep the
 connection open to Man-In-The-Middle attacks please set
 SSL_verify_mode explicitly to SSL_VERIFY_NONE in your application.
*******************************************************************
  at /usr/sbin/sendmail line 1906.
invalid SSL_version specified at /usr/share/perl5/vendor_perl/IO/Socket/SSL.pm line 444.
# 原因   centos7.5默认是 perl的版本是5.16,centos6.8的是5.10,后来把7的版本换成5.10,就可以正常发邮件了。
# 解决如下
wget http://www.cpan.org/src/5.0/perl-5.10.0.tar.gz
tar zxf perl-5.10.0.tar.gz
cd perl-5.10.0
./configure.gnu -des -Dprefix=/usr/local/perl
echo $?    #返回0,编译没问题
make
make test
make install
# 备份原来的Perl
mv /usr/bin/perl /usr/bin/perl.bak
ln -s /usr/local/perl/bin/perl /usr/bin/perl
#查看Perl版本,显示5.10表示已经成功
perl -v
3.4、 配置代码仓库访问方式
3.4.1、配置系统账户
1)账户介绍
Phabricator有三种账户(三种用户身份;):两个用于基本运行,一个用于配置SSH访问。
注意:上述账户是指Phabricator所运行服务器系统的用户,不是Phabricator页面用户。
三个账户分别如下:
www-user:
用于Phabricator Web服务器运行;
大部分情况下,这个账号已经存在了,一般为apache
daemon-user :
daemons (守护进程)运行。
是唯一直接与代码仓库交互的账号,其它账号需要切换到这个账号身份才能操作代码仓库。一般直接用root,因为会需要很多权限(当然这可能不安全)
vcs-user:
用于SSH访问,
需要创建,一般用于SSH克隆代码库
2)设置或创建账户
# daemon-user
./bin/config set phd.user root

# www-user
# 为apache, 系统已有

# vcs-user 创建并设置
useradd git
usermod -p NP git
usermod -s /bin/sh git
3.4.2、 配置SSH
1)Phabricator中配置
# 显示ssh clone地址
./bin/config set diffusion.ssh-user git
#
./bin/phd restart
2)配置git账户运行权限
# 进入 sudoers文件
vi /etc/sudoers
# 添加如下配置
git ALL=(root) SETENV: NOPASSWD: /usr/libexec/git-core/git-http-backend, /usr/bin/git,/usr/bin/git-upload-pack, /usr/bin/git-receive-pack
3)添加并配置脚本
# 添加配置 phabricator-ssh-hook.sh
cp ./resources/sshd/phabricator-ssh-hook.sh /usr/libexec/phabricator-ssh-hook.sh
chmod 755 /usr/libexec/phabricator-ssh-hook.sh
# 进入文件
vi /usr/libexec/phabricator-ssh-hook.sh
# 修改如下配置
# ssh帐户
VCSUSER="git"
# phabricator安装目录路径
ROOT="/var/www/html/pha/phabricator

# 添加配置 sshd_config.phabricator
cp ./resources/sshd/sshd_config.phabricator.example /etc/ssh/sshd_config.phabricator
# 进入文件
vi /etc/ssh/sshd_config.phabricator
# 修改如下配置
#
AuthorizedKeysCommand /usr/libexec/phabricator-ssh-hook.sh
# openSSH6.2以下,此字段为AuthorizedKeysCommandRunAs
AuthorizedKeysCommandUser git
AllowUsers git

# 上述文件默认端口port字段为2222,则phabricator中配置
./bin/config set diffusion.ssh-port 2222

# 开放端口
firewall-cmd --zone=public --add-port=2222/tcp --permanent
# 重启防火墙
firewall-cmd --reload
4)启动phabricator ssh服务
# 查看是否可以启动
/usr/sbin/sshd -d -d -d -f /etc/ssh/sshd_config.phabricator
# 正式启用:此ssh服务跟系统默认ssh不是一个进程
/usr/sbin/sshd -f /etc/ssh/sshd_config.phabricator
./bin/phd restart
# 重启只要执行上面相同的命令即可,若要关闭服务:
ps -ef | grep sshd
kill
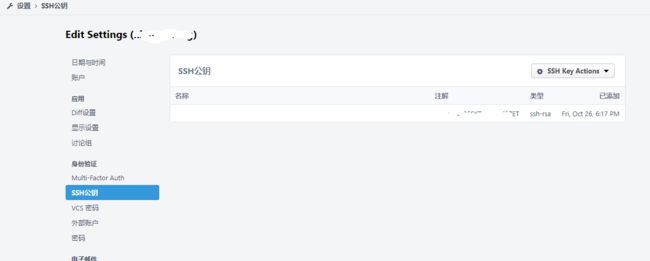
5) Phabricator页面设置ssh公钥
3.4.3、 配置http
1)phabricator中配置
# 显示http clone地址
./bin/config set diffusion.allow-http-auth true
# 添加环境变量,数组可放多个
./bin/config set environment.append-paths '["/usr/libexec/git-core"]'

# 重启守护进程
./bin/phd restart
2)配置apache账户运行权限
# 进入sudoers文件
vi /etc/sudoers
# 添加如下配置
apache ALL=(root) SETENV: NOPASSWD:  /usr/bin/git, /usr/bin/git-upload-pack, /usr/bin/git-receive-pack, /usr/bin/ssh, /usr/libexec/git-core/git-http-backend
注意:git-http-backend:git yum安装时git-http-backend的路径:/usr/libexec/git-core/git-http-backend
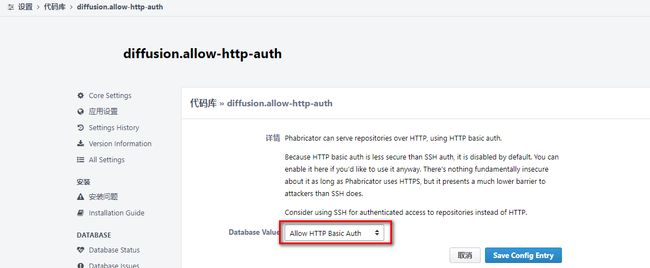
3)页面中设置
config--> all settings-->diffusion.allow-http-auth-->点开,设置值为:Allow HTTP Basic Auth
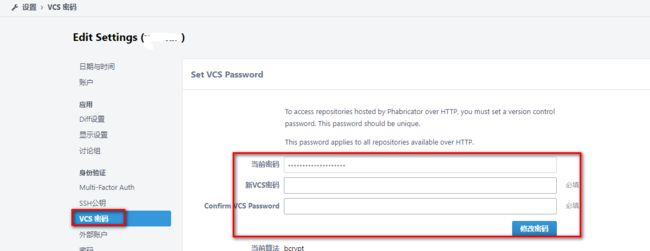
设置git http访问密码
-->Settings-->VCS Password-->设置http访问密码
3.4.4 本地Git操作代码库
1)页面创建仓库
2)git clone url
http:需输入用户名/密码即phabricator用户名/VCS设置的密码
ssh:需要先本地配置phabricator页面公钥或上传公钥到phabricator页面即可
- 进行Git的其他操作
4、参考文档
phabricator 官方文档:
英文:https://secure.phabricator.com/book/phabricator/article/installation_guide/
中文:https://phabricator.webfuns.net/book/phabricator/article/installation_guide/
其他:
https://segmentfault.com/a/1190000011183530
https://yq.aliyun.com/articles/416669
https://blog.csdn.net/a23764996/article/details/53540877
https://www.cnblogs.com/chorulex/p/5381558.html
https://www.jianshu.com/p/d7630e1fe4f9
https://www.cnblogs.com/wangSOA/p/6598758.html