前言
启动一个Android组件时,当App进程还不存在,应先创建一个App进程。追踪Ams源码,在栈监管者startSpecificActivityLocked方法中有判断进程是否存在。
void startSpecificActivityLocked(ActivityRecord r,
            boolean andResume, boolean checkConfig) {
    ProcessRecord app = mService.getProcessRecordLocked(r.processName,
                r.info.applicationInfo.uid, true);
    .....
    if (app != null && app.thread != null) {
        ...//进程存在
        realStartActivityLocked()
    }
    mService.startProcessLocked(r.processName, r.info.applicationInfo, true, 0,
                "activity", r.intent.getComponent(), false, false, true);
}
Ams#getProcessRecordLocked方法查找进程ProcessRecord记录。若未找到,创建进程 。
当用户第一次点击App图标,系统启动App的AndroidManifest中配置action为android.intent.action.MAIN的Activity组件。
ActivityStackSupervisor#startActivityMayWait方法。
final int startActivityMayWait(IApplicationThread caller, int callingUid,
            String callingPackage, Intent intent, String resolvedType,..) {
    if (intent != null && intent.hasFileDescriptors()) {
        throw new IllegalArgumentException
                ("File descriptors passed in Intent");
    }
    boolean componentSpecified = intent.getComponent() != null;
    // Don't modify the client's object!
    intent = new Intent(intent);
    // Collect information about the target of the Intent.
    // 搜集目标Intent的信息
    ActivityInfo aInfo =resolveActivity(intent, resolvedType, startFlags,
                profilerInfo, userId);
    ...
}
栈监管者resolveActivity方法解析Intent信息。注意,这是启动App第一个Activity组件,App进程还未创建。
ActivityInfo resolveActivity(Intent intent, String resolvedType, int startFlags,
            ProfilerInfo profilerInfo, int userId) {
    ActivityInfo aInfo;
    try {
        //AppGlobals获取包管理器IPackageManager。
        ResolveInfo rInfo = AppGlobals.getPackageManager().resolveIntent(
                        intent, resolvedType,
                        PackageManager.MATCH_DEFAULT_ONLY
                                    | ActivityManagerService.STOCK_PM_FLAGS, userId);
        aInfo = rInfo != null ? rInfo.activityInfo : null;
    } catch (RemoteException e) {
        aInfo = null;
    }

    if (aInfo != null) {
        intent.setComponent(new ComponentName(
                    aInfo.applicationInfo.packageName, aInfo.name));
        ...
    }
    return aInfo;
}
从ActivityThread#getPackageManager*获取包管理器,
public static IPackageManager getPackageManager() {
    if (sPackageManager != null) {
        return sPackageManager;
    }
    //从ServiceManager获取包服务,仅初始化一次。
    IBinder b = ServiceManager.getService("package");
    //代理
    sPackageManager = IPackageManager.Stub.asInterface(b);
    return sPackageManager;
}
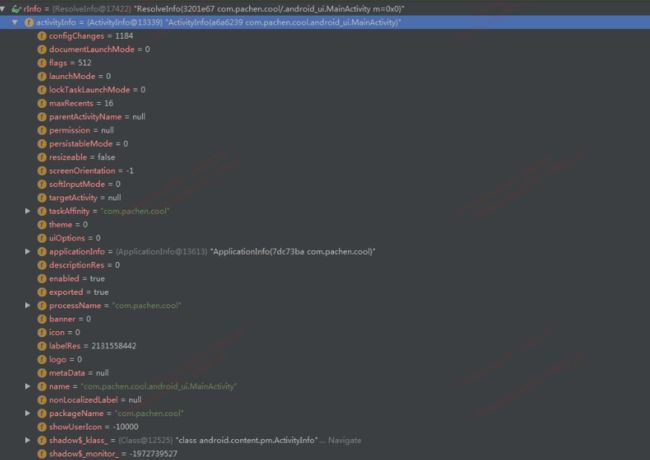
进程名processName,ActivityInfo内部有一个ApplicationInfo对象。
进程创建
进程创建流程图。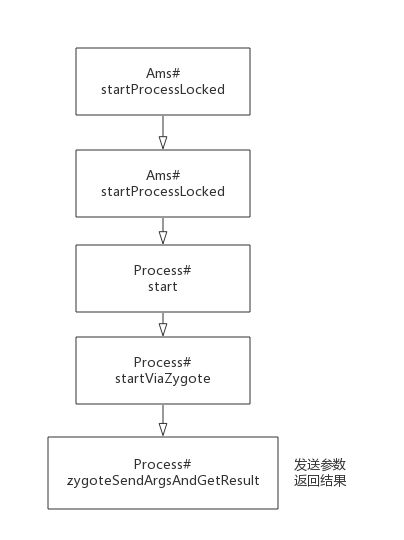
下面是Ams#startProcessLocked方法。
final ProcessRecord startProcessLocked(String processName, ApplicationInfo
                info,boolean knownToBeDead, int intentFlags, String
                hostingType, ComponentName hostingName,boolean
                allowWhileBooting,boolean isolated, int isolatedUid, boolean
                keepIfLarge,String abiOverride, String entryPoint, String[]
                entryPointArgs, Runnable crashHandler) {
    ProcessRecord app;
    if (!isolated) {//非孤立
        //根据进程名查询进程记录ProcessRecord
        app = getProcessRecordLocked(processName, info.uid, keepIfLarge);
        if ((intentFlags & Intent.FLAG_FROM_BACKGROUND) != 0) {
            ...
        } else {
            //当用户显式启动进程时,清除其崩溃计数
            mProcessCrashTimes.remove(info.processName, info.uid);
           ...
        }
    } else {
        // 如果是孤立进程,无法重用存在的进程
        app = null;
    }
    //如果app不空,说明存在进程记录,调用者不认为该进程已经死掉或者没有线程对象,
    //pid存在
    if (app != null && app.pid > 0) {
        if (!knownToBeDead || app.thread == null) {
            //app已经开始运行,则加入新包,返回ProcessRecord
            app.addPackage(info.packageName, info.versionCode, mProcessStats);
            checkTime(startTime, "startProcess: done, added package to proc");
            return app;
        }
        //app记录绑定了以前的进程。清理,需要启动进程
        killProcessGroup(app.info.uid, app.pid);
        handleAppDiedLocked(app, true, true);
    }

    if (app == null) {
        //创建ProcessRecord
        app = newProcessRecordLocked(info, processName, isolated, isolatedUid);
        if (app == null) {
            return null;
        }
        app.crashHandler = crashHandler;
    } else {
        // ProcessRecord存在,则加入新包
        app.addPackage(info.packageName, info.versionCode, mProcessStats);
    }

    //创建进程,Ams#startProcessLocked方法。
    startProcessLocked(app, hostingType, hostingNameStr, abiOverride,
                entryPoint, entryPointArgs);
    return (app.pid != 0) ? app : null;
}
创建ProcessRecord,它当的pid是0,startProcessLocked启动进程。
private final void startProcessLocked(ProcessRecord app, String hostingType,
                String hostingNameStr, String abiOverride, String entryPoint,
                String[] entryPointArgs) {
    ...
    if (entryPoint == null) entryPoint = "android.app.ActivityThread";
    ...
    Process.ProcessStartResult startResult = Process.start(entryPoint,
                    app.processName, uid, uid, gids, debugFlags, mountExternal,
                    app.info.targetSdkVersion, app.info.seinfo, requiredAbi,
                    instructionSet,app.info.dataDir, entryPointArgs);
    ...
}
设置entryPoint为android.app.ActivityThread,ActivityThread类的main方法的是新进程App启动入口。
Process的start方法,向zygote进程发送创建新进程的请求,启动成功的结果是ProcessStartResult中包含新进程pid。
Process#startViaZygote方法,创建一个字符串参数列表,调用Process#zygoteSendArgsAndGetResult方法,将参数列表发送给zygote进程。zygote进程收到后,启动一个子进程,将子进程pid返回。
startViaZygote方法参数图。

private static ProcessStartResult startViaZygote(...String[] extraArgs)
                        throws ZygoteStartFailedEx {
    return zygoteSendArgsAndGetResult(
                        openZygoteSocketIfNeeded(abi), argsForZygote);
}
Process#openZygoteSocketIfNeeded方法,利用ZygoteState#connect返回ZygoteState。
private static ProcessStartResult zygoteSendArgsAndGetResult(
            ZygoteState zygoteState, ArrayList args)
            throws ZygoteStartFailedEx {
    try {
        final BufferedWriter writer = zygoteState.writer;
        final DataInputStream inputStream = zygoteState.inputStream;

        writer.write(Integer.toString(args.size()));
        writer.newLine();

        int sz = args.size();
        for (int i = 0; i < sz; i++) {
            String arg = args.get(i);
            if (arg.indexOf('\n') >= 0) {
                throw new ZygoteStartFailedEx(
                            "embedded newlines not allowed");
            }
            writer.write(arg);
            writer.newLine();
        }
        writer.flush();
        ProcessStartResult result = new ProcessStartResult();
        //读取返回的pid
        result.pid = inputStream.readInt();
        if (result.pid < 0) {
            throw new ZygoteStartFailedEx("fork() failed");
        }
        result.usingWrapper = inputStream.readBoolean();
        return result;
    } catch (IOException ex) {
    }
}
Process保存主ZygoteState和次ZygoteState两个静态对象,代表两个与zygote进程的socket连接。当主ZygoteState连接可用,则直接使用,否则利用次ZygoteState,若都不可用,抛出异常。
通过socket与zygote进程通信,连接与数据流读写链路封装在ZygoteState。主ZygoteState定义的连接地址名称是zygote,次ZygoteState定义的连接地址名称是zygote_secondary。
BufferedWriter和DataInputStream数据流,发送和读取。
与zygote进程Socket通信
与zygote进程的Socket通信结构图。
创建ZygoteState的connect方法。
public static ZygoteState connect(String socketAddress) throws IOException {
    DataInputStream zygoteInputStream = null;
    BufferedWriter zygoteWriter = null;
    final LocalSocket zygoteSocket = new LocalSocket();
    try {
        //到zygote进程的socket连接
        zygoteSocket.connect(new LocalSocketAddress(socketAddress,
                        LocalSocketAddress.Namespace.RESERVED));
        //建立读写数据通道
        zygoteInputStream = new DataInputStream(zygoteSocket.getInputStream());
        zygoteWriter = new BufferedWriter(new OutputStreamWriter(
                        zygoteSocket.getOutputStream()), 256);
    } catch (IOException ex) {
        //socket关闭,抛出异常
    }
    ....
    return new ZygoteState(zygoteSocket, zygoteInputStream, zygoteWriter,
                    Arrays.asList(abiListString.split(",")));
}
1.创建LocalSocket,委托LocalSocketImpl实现类,利用LocalSocketImpl的文件描述符FileDescriptor建立连接。
2.建立读写数据通道,创建ZygoteState对象,封装通道与连接。
LocalSocket#connect方法。
public void connect(LocalSocketAddress endpoint) throws IOException {
    synchronized (this) {
        implCreateIfNeeded();//初始化连接描述符
        impl.connect(endpoint, 0);
        isConnected = true;
        isBound = true;
    }
}
建立连接。implCreateIfNeeded方法,通过LocalSocketImpl#create方法初始化连接描述符Fd。
利用Os.socket(OsConstants.AF_UNIX, osType, 0)。
委托LocalSocketImpl#connect方法。
protected void connect(LocalSocketAddress address, int timeout)
                        throws IOException{
    if (fd == null) {//Fd已在implCreateIfNeeded初始化。
        throw new IOException("socket not created");
    }
    connectLocal(fd, address.getName(), address.getNamespace().getId());
}
JNI#方法进行连接,address就是上面提到过的主ZygoteState定义的zygote。
LocalSocket#getInputStream方法,getOutputStream方法委托LocalSocketImpl的方法创建读写数据流,SocketInputStream与SocketOutputStream,数据流封装在LocalSocketImpl。
数据流返回后,再次封装,BufferedWriter与DataInputStream。
本质:BufferedWriter#write,利用SocketOutputStream向Fd发送数据,DataInputStream#read,利用SocketInputStream从Fd读取数据。
最后,进程创建成功,pid保存在ProcessStartResult。
App入口方法
ActivityThread的main方法是新进程入口。
public static void main(String[] args) {
    .....
    Looper.prepareMainLooper();

    ActivityThread thread = new ActivityThread();
    thread.attach(false);
    //ActivityThread内部H对象,负责处理主线程消息,如AMS,WMS利用Binder发来的消息。
    if (sMainThreadHandler == null) {
        sMainThreadHandler = thread.getHandler();
    }
    ...
    Looper.loop();
    throw new RuntimeException("Main thread loop unexpectedly exited");
}
初始化主线程消息队列,启用主线程Looper,等待消息,创建ActivityThread对象,触发ActivityThread#attach方法。
private void attach(boolean system) {
    sCurrentActivityThread = this;
    mSystemThread = system;
    if (!system) {
        ...
        final IActivityManager mgr = ActivityManagerNative.getDefault();
        try {
            //mAppThread是ApplicationThread类型
            mgr.attachApplication(mAppThread);
        } catch (RemoteException ex) {
        }
        ...
    } else {
       ...
    }
}
非系统应用时,Ams#attachApplication方法,Ams利用ApplicationThread访问App进程,这是刚创建的进程,此时主线程消息队列已经创建,可向队列插入消息,但Loop循环还未起来。
Ams#attachApplicationLocked方法中,先ApplicationThread#bindApplication回调App进程,向主线程消息队列发送BIND_APPLICATION消息,待Looper起来后,就会执行啦。
后续,还会触发ActivityStackSupervisor#attachApplicationLocked方法,进入realStartActivityLocked方法,它就是刚开篇介绍过的,进程存在时代码执行的选择,在realStartActivityLocked继续往下走,启动Activity组件。
总结
创建App进程的核心知识点是建立一个与zygote进程通信的Socket连接,通过向其发送参数,请求zygote创建App进程。
任重而道远