弹性布局(flex布局)
—弹性布局的基本使用—
今天我们将来认识一下弹性布局的基本使用方法。
首先我们简单的认识一下弹性布局:
display:flex;
flex-direction:__;(空白处添加属性)
弹性布局的使用需要由父元素和其子元素同时组成——
容器的属性(父元素)
首先写四个盒子
<html lang="en">
<head>
	<meta charset="UTF-8">
	<title>Documenttitle>
	<style type="text/css">
     #wrapper{

     	width: 200px;
     	height:200px;
     	background-color: pink;


     }
     #content{

     	width:50px;
     	height:50px;
     	background-color: black;
     	color: white;
     }
     #content1{

     	width: 50px;
     	height:50px;
     	background-color: red;
     }
     #content2{

     	width:50px;
     	height:50px;
     	background-color: white;

     }
     #content3{

     	width:50px;
     	height:50px;
     	background-color: #ccc;
    }

	style>
head>
<body>
	<div id="wrapper">
		<div id="content">cdiv>
		<div id="content1">1div>
		<div id="content2">2div>
		<div id="content3">3div>

	div>
body>
html>

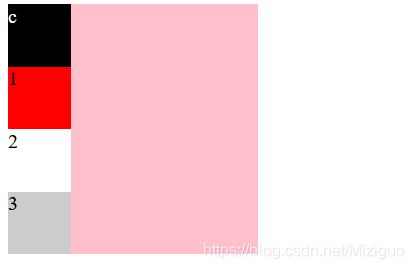
由于< div >的块状元素特性c 1 2 3现在都各自独占一行。
那么我们就可以使用弹性布局(flex布局)进行修改它的布局方式
我们需要对其父元素使用——
display:flex;
flex-direction:;那么第二条代码中就根据自己的需求来相应设置
row (默认值 )在水平方向显示;
row-reverse 在水平方向显示 起点在左端;
column 在垂直方向显示 上方为起点;
column 在垂直方向显示 下方为起点;
接下来让我们看看效果——
<html lang="en">
<head>
	<meta charset="UTF-8">
	<title>Documenttitle>
	<style type="text/css">
     #wrapper{

     	width: 200px;
     	height:200px;
     	background-color: pink;
     	display: flex;
     	flex-direction:row; /* 设置方向*/


     }
     #content{

     	width:50px;
     	height:50px;
     	background-color: black;
     	color: white;
     }
     #content1{

     	width: 50px;
     	height:50px;
     	background-color: red;
     }
     #content2{

     	width:50px;
     	height:50px;
     	background-color: white;

     }
     #content3{

     	width:50px;
     	height:50px;
     	background-color: #ccc;
     }

	style>
head>
<body>
	<div id="wrapper">
		<div id="content">cdiv>
		<div id="content1">1div>
		<div id="content2">2div>
		<div id="content3">3div>

	div>
body>
html>

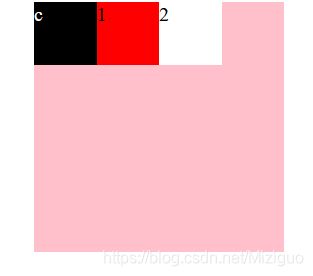
此时c 1 2 3 四块区域已经展现出从左至右的排列方式,我们再来对比一下其他的属性——
<style type="text/css">
     #wrapper{
     	width: 200px;
     	height:200px;
     	background-color: pink;
     	display: flex;
     	flex-direction:row-reverse;/* 设置方向*/

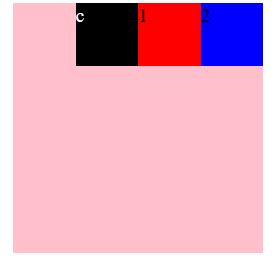
显然c 1 2 3四个区域的顺序已经变为从右至左,那么column以及column-reverse 大家可以自己下去尝试一下增加下印象。
那么我们继续了解其他属性——
nowrap(默认)不换行 给定宽度不够时会将各区块同等挤压;
wrap 换行 第一行在最上方;
wrap-reverse 换行 第一行在最下方;
一:
 #wrapper{
     	width: 200px;
     	height:200px;
     	background-color: pink;
     	display: flex;
     	flex-direction:row;/* 设置方向*/
     	flex-wrap:nowrap; /*换行设置*/

     }
     #content{
     	width:50px;
     	height:50px;
     	background-color: black;
     	color: white;
     }
     #content1{
     	width: 50px;
     	height:50px;
     	background-color: red;
     }
     #content2{
     	width:50px;
     	height:50px;
     	background-color: white;

     }
     #content3{
     	width:50px;
     	height:50px;
     	background-color: #ccc;
    }
    #content4{
    	width:50px;
    	height:50px;
    	background-color: #8B008B;
    }

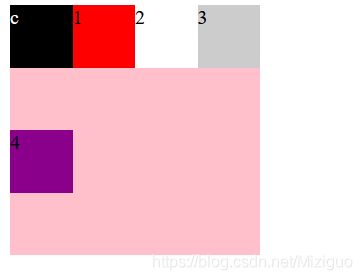
每个小块都设置为50x50的小正方形,粉色的大块为200x200的大正方形 为了在同一行将所有元素放下,每个小块的宽都被压缩了10px。
二:
  #wrapper{
     	width: 200px;
     	height:200px;
     	background-color: pink;
     	display: flex;
     	flex-direction:row;/* 设置方向*/
     	flex-wrap:wrap; /*换行设置*/

     }
#wrapper{
     	width: 200px;
     	height:200px;
     	background-color: pink;
     	display: flex;
     	flex-direction:row;/* 设置方向*/
     	flex-wrap:wrap-reverse; /*换行设置*/

     }
另外 flex-flow,是flex-direction和flex-warp的简写形式默认值是:row nowarp;
2——justify-content
justify-content属性定义了项目在主轴上的对齐方式。
共有五个属性:
1-flex-start(默认值):左对齐
2-flex-end:右对齐
3-center:居中
4-space-between:两端对齐,项目之间的间隔都相等
5-space-around:每个项目两侧的间隔相等。所以,项目之间的间隔比项目与边框的间隔大一倍
flex-start
 #wrapper{
     	width: 200px;
     	height:200px;
     	background-color: pink;
     	display: flex;
     	justify-content:flex-start;


     }
 #wrapper{
     	width: 200px;
     	height:200px;
     	margin:0 auto;
     	background-color: pink;
     	display: flex;
     	justify-content:flex-end;

显然三个盒子已经由左对齐变为右对齐,那么接下来请各位小伙伴自己尝试一下其他属性。
align-items属性定义项目在交叉轴上如何对齐
1——flex-start(交叉轴的起点对齐)
2——flex-end(交叉轴的终点对齐)
3——center(交叉轴的中点对齐)
4——stretch(项目的第一行文字的基线对齐。)
5——baseline((默认值):如果项目未设置高度或设为auto,将占满整个容器的高度)

以上就是容器的属性,后续我们再学习项目的属性。
谢谢大家——Miziguo >_< !!!


