配置Prometheus mysqld_exporter 和Grafana监控MySQL
在受监控MySQL节点上,我们将为mysqld_exporter创建一个系统用户。
[root@prometheus ~]# useradd -m -s /bin/false mysqld_exporter
接下来,前往Prometheus的下载页面,然后下载mysqld_exporter tarball或使用下面的wget命令从命令行下载下来,
[root@prometheus ~]# wget https://github.com/prometheus/mysqld_exporter/releases/download/v0.12.1/mysqld_exporter-0.12.1.linux-amd64.tar.gz
下载mysqld_exporter文件后,继续进行提取,如下所示
[root@prometheus ~]# tar -zxpvf mysqld_exporter-0.12.1.linux-amd64.tar.gz
您可以使用tree命令检查提取的文件夹的内容,如下所示
[root@prometheus ~]# tree mysqld_exporter-0.12.1.linux-amd64
接下来,将名为mysqld_exporter的二进制文件复制到/ usr / local / bin路径
[root@prometheus ~]# cp mysqld_exporter-0.12.1.linux-amd64/mysqld_exporter /usr/local/bin
接下来,设置已复制的mysqld_exporter文件的文件许可权,如下所示
[root@prometheus ~]# chown mysqld_exporter:mysqld_exporter /usr/local/bin/mysqld_exporter
创建 Prometheus mysqld_exporter MySQL数据库用户
CREATE USER 'mysqld_exporter'@'localhost' IDENTIFIED BY 'StrongPassword' WITH MAX_USER_CONNECTIONS 2;
GRANT PROCESS, REPLICATION CLIENT, SELECT ON *.* TO 'mysqld_exporter'@'localhost';
FLUSH PRIVILEGES;
EXIT
配置mysqld_exporter身份验证文件
vi /etc/.mysqld_exporter.cnf
[client]
user=mysqld_exporter
password=StrongPassword
设置.mysqld_exporter.cnf文件的文件许可权
chown mysqld_exporter:mysqld_exporter /etc/.mysqld_exporter.cnf
接下来,我们需要配置mysqld_exporter以作为服务运行。因此,继续进行操作并创建一个systemd服务文件,如下所示
[root@prometheus ~]# vi /etc/systemd/system/mysqld_exporter.service
然后粘贴如下所示的配置并保存文件
[Unit]
Description= Prometheus MySQL Exporter
Wants=network-online.target
After=network-online.target
[Service]
User=mysqld_exporter
Group=mysqld_exporter
Type=simple
Restart=always
ExecStart=/usr/local/bin/mysqld_exporter \
--config.my-cnf /etc/.mysqld_exporter.cnf \
--collect.auto_increment.columns \
--collect.binlog_size \
--collect.engine_innodb_status \
--collect.engine_tokudb_status \
--collect.global_status \
--web.listen-address=0.0.0.0:9104
[Install]
WantedBy=multi-user.target
为了使更改生效,请使用以下命令重新加载systemd Manager:
[root@prometheus ~]# systemctl daemon-reload
接下来,启动并启用mysqld_exporter服务
[root@prometheus ~]# systemctl start mysqld_exporter
[root@prometheus ~]# systemctl enable mysqld_exporter
为了确保该服务正在运行,请执行:
[root@prometheus ~]# systemctl status mysqld_exporter
为了确保该服务正在运行,请使用netstat实用程序检查它是否正在按默认预期在端口9100上侦听。
[root@prometheus ~]# netstat -pnltu | grep 9104
tcp6 0 0 :::9104 :::* LISTEN 9112/mysqld_exporte
[root@prometheus ~]#
完善!Mysqld_exporter服务正在按预期运行。
接下来,如图所示在防火墙中打开端口9104
[root@prometheus ~]# firewall-cmd --add-port=9104/tcp --permanent
success
[root@prometheus ~]# firewall-cmd --reload
success
[root@prometheus ~]#
同样,对其他MySQL也重复上述步骤。
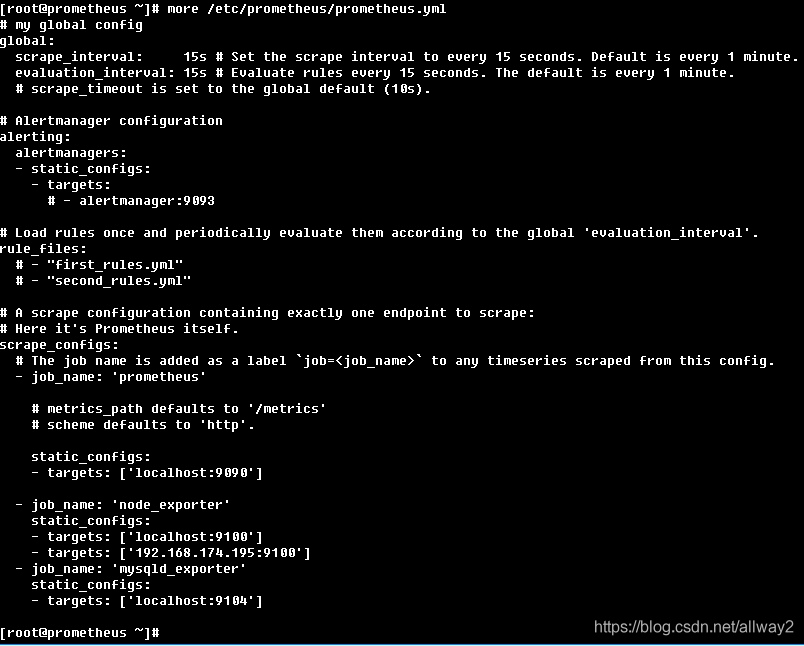
最后,您需要将mysqld_exporter目标添加到prometheus.yml文件。附加以下几行以为Prometheus服务器定义mysqld_exporter
[root@prometheus ~]# vi /etc/prometheus/prometheus.yml
---------
- job_name: 'mysqld_exporter'
static_configs:
- targets: ['localhost:9104']
重新启动Prometheus服务
[root@prometheus ~]# systemctl restart prometheus
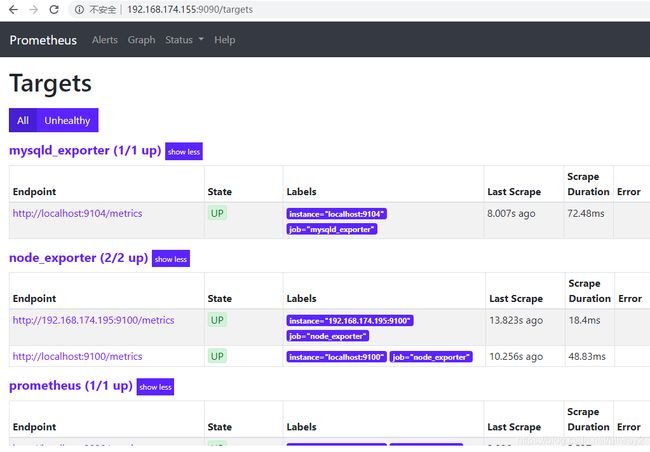
再次转到浏览器,单击“ 状态 ”标签,然后单击“ 目标 ”
确保 在Prometheus服务器的浏览器上观察到名为mysqld_exporter的新端点
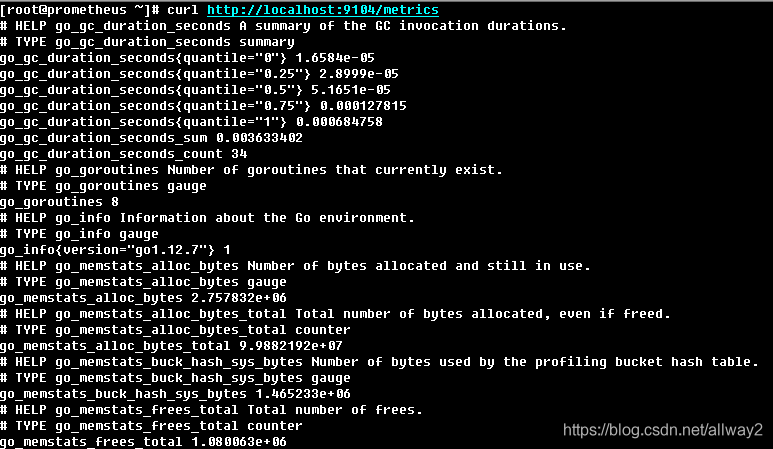
为确保您从配置的节点接收指标。只需使用curl命令,如下所示:
# curl http://node-ip:9104/metrics
例如,要显示来自Prometheus服务器的指标,请运行:
[root@prometheus ~]# curl http://localhost:9104/metrics
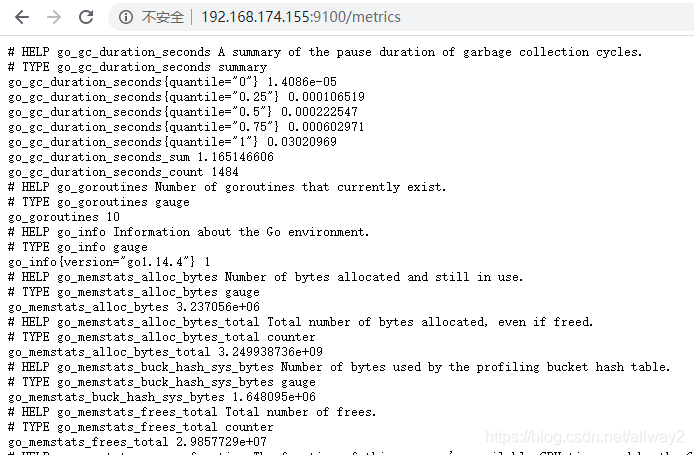
也可以通过打开浏览器并浏览URL来实现
http://192.168.174.155:9100/metrics
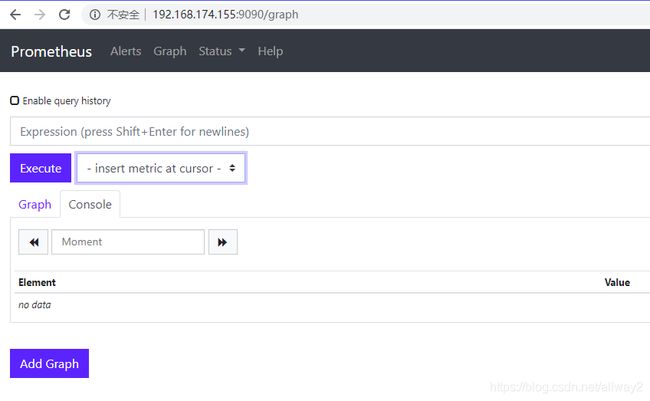
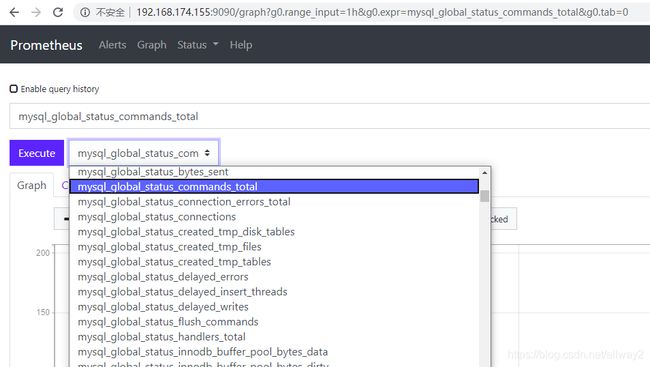
您还可以选择以图形方式绘制所需的指标。只需转到Prometheus服务器的主页,然后单击标记为“ 在光标处插入度量 ”的下拉菜单。
选择要绘制图形的指标,
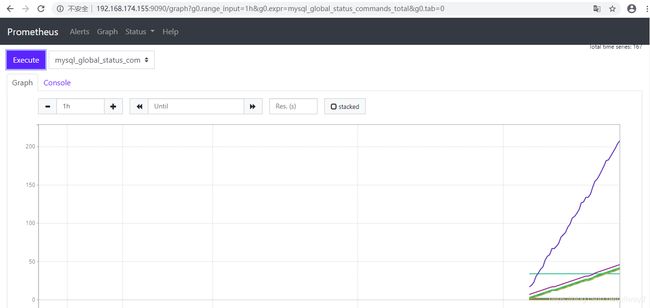
单击“ 执行 ”按钮,然后单击下面的“ 图形 ”选项卡以显示图形
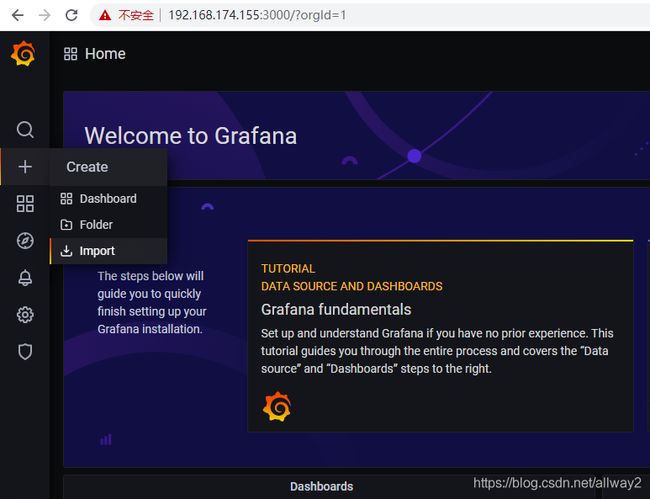
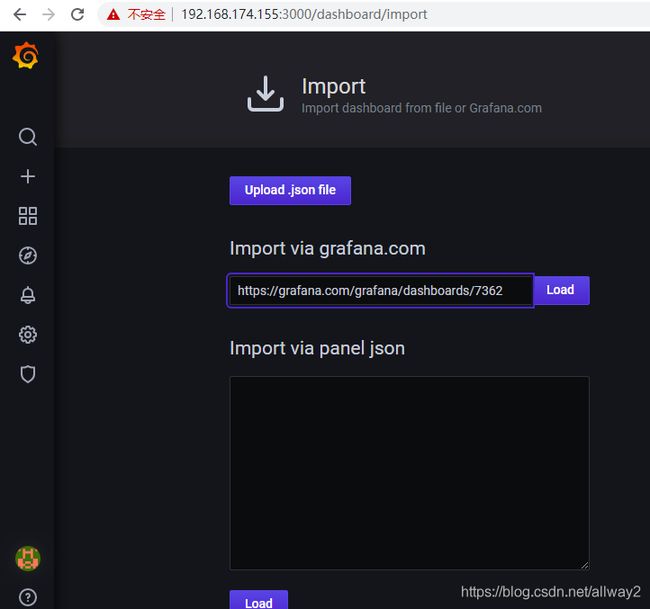
要创建用于可视化指标的仪表板,请点击左侧栏中的加号,然后点击“ 导入 ”
您将需要从Grafana的存储库中填写仪表板的URL。https://grafana.com/grafana/dashboards/7362
将链接粘贴到“ URL”部分
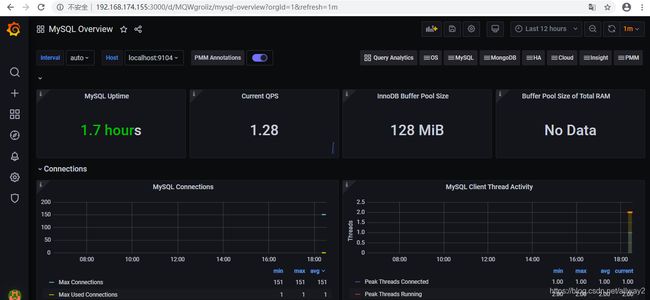
粘贴链接后,请等待几秒钟,然后将生成以下数据。将Prometheus数据源名称更改为“ Prometheus ”,然后单击“ 导入 ”
Grafana将开始从Prometheus服务器获取指标,然后在色彩鲜艳且直观的仪表板中进行可视化。
到此结束了我们的教程。


