JavaEE学习笔记
JavaEE学习笔记
By WHU_LiX 2020
说明:课程笔记,根据黑马程序员的JavaEE视频整理
备忘归档
目录
文章目录
- JavaEE学习笔记
-
- 01 初探spring
-
- 程序的耦合
- 工厂模式解耦
-
- 编写工厂类和配置文件(未用spring)
- IoC(inversion of control)控制反转
- spring基于xml的IoC
-
- 实例
- applicationContext的3个常用实现类
- 核心容器的两个接口引发出的问题
- spring中bean的细节
- spring中的依赖注入
-
- 依赖注入Dependency Injection
- 02 spring基于注解的IoC
-
- 基于注解的IoC配置
-
- 步骤
- 常用IoC注解按照作用分类
- 通过实例实现CRUD
-
- XML方法
- 注解方法(D:Jav
- 用配置类取代xml配置文件
- spring整合Junit问题分析
- 03 spring的AOP
-
- 动态代理
- AOP
- sping中的AOP
-
- spring基于xml的AOP
- 基于注解的AOP配置
- 04
-
- JdbcTemplate
-
- 通过 xml 配置jdbcTemplate
- 通过jdbcTemplate实现CRUD
- Spring的声明式事务控制
-
- Spring事务控制的代码准备
- Spring基于XML的声明式事务控制配置
- 踩坑
-
- 环境配置相关
-
- spring
- JUnit
- 数据库相关
-
- 连接
- 踩坑
-
- 环境配置相关
-
- spring
- JUnit
- 数据库相关
-
- 连接
01 初探spring
程序的耦合
/**
 *程序的耦合
 *      耦合:程序间的依赖关系
 *          包括:
 *              类之间的依赖
 *              方法间的依赖
 *      解耦:降低程序间的依赖关系
 *      实际开发:编译期不依赖,运行时才依赖
 *      解耦的思路:
 *          第一步:使用反射来创建对象,而避免使用"new"关键字
 *          第二步:通过读取配置文件来获取要创建的对象全限定类名
 */
工厂模式解耦
编写工厂类和配置文件(未用spring)
- 创建一个创建Bean对象的工厂
- Bean:可重用组件(cs英语)
- JavaBean:用java语言编写的可重用组件
- javabean != 实体类,javabean>实体类
/**
 * 一个创建Bean对象的工厂
 * 创建service和dao对象
 * 1.需要一个配置文件来配置我们的service和dao
 *      配置的内容:唯一标识=全限定类名(key-value)
 * 2.通过读取配置文件中配置的内容,反射创建对象
 */
- 配置文件:xml、properties
package com.itheima.factory;

import java.io.InputStream;
import java.util.Properties;

/**
 * 一个创建Bean对象的工厂
 * 创建service和dao对象
 * 1.需要一个配置文件来配置我们的service和dao
 *      配置的内容:唯一标识=全限定类名(key-value)
 * 2.通过读取配置文件中配置的内容,反射创建对象
 *
 * 配置文件可以是xml也可以是properties(暂时没用到spring),此处用properties
 */
public class BeanFactory {

    //读取properties
    //定义一个Properties对象
    private static Properties props;
    //使用静态代码块为Properties对象赋值
    static {

        try{

            //实例化对象
            props = new Properties();//不能消除耦合,只能降低
            //获取properties文件的流对象
            InputStream in = BeanFactory.class.getClassLoader().getResourceAsStream("bean.properties");
            props.load(in);
        }
        catch (Exception e){

            throw new ExceptionInInitializerError("初始化properties失败");
        }
    }

    /**
     * 根据Bean的名称获取bean对象
     * @param beanName
     * @return
     */
    public static Object getBean(String beanName){

        Object bean = null;
        try {

            String beanPath = props.getProperty(beanName);
            bean = Class.forName(beanPath).newInstance();

        }
        catch (Exception e){

            e.printStackTrace();
        }
        return bean;
    }

}
-
此时存在的问题:
- 此时创建的类是多例的,执行效率没有单例对象高
-
解决方法:
- 定义一个Map,用于存放我们要创建的对象,我们称之为容器
package com.itheima.factory;

import java.io.InputStream;
import java.util.Enumeration;
import java.util.HashMap;
import java.util.Map;
import java.util.Properties;

/**
 * 一个创建Bean对象的工厂
 * 创建service和dao对象
 * 1.需要一个配置文件来配置我们的service和dao
 *      配置的内容:唯一标识=全限定类名(key-value)
 * 2.通过读取配置文件中配置的内容,反射创建对象
 *
 * 配置文件可以是xml也可以是properties(暂时没用到spring),此处用properties
 */
public class BeanFactory {

    //读取properties
    //定义一个Properties对象
    private static Properties props;

    //定义一个Map,用于存放我们创建的对象,称之为容器
    private static Map<String,Object>beans;

    //使用静态代码块为Properties对象赋值
    static {

        try{

            //实例化对象
            props = new Properties();//不能消除耦合,只能降低
            //获取properties文件的流对象
            InputStream in = BeanFactory.class.getClassLoader().getResourceAsStream("bean.properties");
            props.load(in);
            //实例化容器
            beans=new HashMap<String, Object>();
            //取出配置文件中所有的key
            Enumeration keys = props.keys();
            //遍历枚举
            while(keys.hasMoreElements()){

                //取出每个key
                String key = keys.nextElement().toString();
                //根据key获取value
                String beanPath = props.getProperty(key);
                Object value = Class.forName(beanPath).newInstance();
                //把key和value存入容器中
                beans.put(key,value);
            }
        }
        catch (Exception e){

            throw new ExceptionInInitializerError("初始化properties失败");
        }
    }

    /**
     * 根据bean的名称获取对象(单例)
     * @param beanName
     * @return
     */
    public static Object getBean(String beanName){

        return beans.get(beanName);
    }
    /**
     * 根据Bean的名称获取bean对象
     * @param beanName
     * @return

    public static Object getBean(String beanName){
        Object bean = null;
        try {
            String beanPath = props.getProperty(beanName);
            bean = Class.forName(beanPath).newInstance();

        }
        catch (Exception e){
            e.printStackTrace();
        }
        return bean;
    }*/

}
IoC(inversion of control)控制反转
-
控制反转:把创建对象的权利交给框架,是框架的重要特征,包括依赖注入和依赖查找
-
通过工厂模式,将类来查找创建对象的权限交给工厂,控制权发生转移,所以叫控制反转
-
优点:削减耦合
spring基于xml的IoC
实例
-
maven工程导入dependency:
<dependency> <groupId>org.springframeworkgroupId> <artifactId>spring-contextartifactId> <version>5.2.9.RELEASEversion> dependency> -
创建配置文件(bean.xml),添加如下代码
<beans xmlns="http://www.springframework.org/schema/beans" xmlns:xsi="http://www.w3.org/2001/XMLSchema-instance" xsi:schemaLocation="http://www.springframework.org/schema/beans https://www.springframework.org/schema/beans/spring-beans.xsd"> beans> -
创建bean
<bean id="accountService" class="com.itheima.service.impl.AccountServiceImpl">bean> <bean id="accountDao" class="com.itheima.dao.impl.AccountDaoImpl">bean> -
获取spring容器
ApplicationContext ac = new ClassPathXmlApplicationContext("bean.xml"); -
根据id获取bean对象(两种方式:强转类型和函数参数设置)
IAccountService as = (IAccountService)ac.getBean("accountService");
IAccountDao adao = ac.getBean("accountDao",IAccountDao.class);
applicationContext的3个常用实现类
- ClassPathXmlApplicationContext:可以加载类路径下的配置文件,要求配置文件必须在类路径下,不在的话就加载不了。
- FIleSystemXmlApplicationContext:加载磁盘任意路径下的配置文件(必须有访问权限)
- AnnotationConfiApplicationContext:用于读取注解创建容器
核心容器的两个接口引发出的问题
- ApplicationContext:
- 在构建核心容器时,创建对象采取的策略是采用立即加载的方式,即只要一读取完配置文件马上就创建配置文件中的对象
- 单例对象适用
- 实际开发中更多采用此接口
- BeanFactory:
- 在构建核心容器时,创建对象采取的策略是采用延迟加载的方式,即什么时候根据id获取对象,什么时候才真正创建对象
- 多例对象适用
spring中bean的细节
-
创建bean的三种方式
- 使用默认构造函数创建:在spring的配置文件中使用bean标签,配以id和class属性之后,且没有其他属性和标签时,采用的就是默认构造函数创建bean对象,此时如果类中没有默认构造函数,则对象无法创建。
<bean id="accountService" class="com.itheima.service.impl.AccountServiceImpl">bean>- 使用普通工厂中的方法创建对象(使用某个类中的方法创建对象并存入spring容器)
<bean id="instanceFactory" class="com.itheima.factory.InstanceFactory">bean> <bean id="accountService" factory-bean="instanceFactory" factory-method="getAccountService">bean>- 使用静态工厂中的静态方法创建对象(使用某个类中的静态方法创建对象并存入spring容器)
<bean id="accountService" class="com.itheima.factory.staticFactory" factory-method="getAccountService">bean> -
bean对象的作用范围
-
默认是单例
-
bean标签的scope属性:
作用:用于指定bean的作用范围
取值:常用前两个
singleton:单例的(默认值)
prototype:多例的
request:作用于web应用的请求范围
session:作用于web应用的会话范围
global-session:作用于集群环境的会话范围(全局会话范围),当不是集群环境是,它就是session
-
-
bean对象的生命周期
-
单例对象
- 出生:当容器创建时,对象出生
- 活着:只要容器还在,对象一直生存
- 死亡:容器销毁,对象消亡
单例对象的生命周期和容器相同
-
多例对象
- 出生:当使用对象时,spring框架为我们创建
- 活着:对象只要是在使用过程中就一直活着
- 死亡:当对象长时间不用,且没有别的对象引用时,由java的垃圾回收器回收
-
spring中的依赖注入
依赖注入Dependency Injection
-
IoC的作用:
降低程序间的耦合(依赖关系)
-
依赖关系的管理:都交给spring来维护,依赖关系即在当前类中需要用到其他类的对象,由spring来为我们提供,我们只需要在配置文件中说明
-
依赖关系的维护 即 依赖注入
-
依赖注入:
能注入的数据:三类
- 基本类型和String
- 其他的bean类型(在配置文件中或者注解配置过的bean)
- 复杂类型/集合类型
注入的方式:三种
-
使用构造函数提供
-
使用标签:constructor-arg 出现位置:bean标签内部
-
标签中的属性:
type:用于指定要注入的数据的数据类型,该数据类型也是构造函数中某个或某些函数的原型
index:用于指定要注入的数据给构造函数中指定索引位置的参数赋值,索引的位置是从0开始
name:用于指定给构造函数中指定名称的参数赋值(常用)
-----------------------以上三个用于指定给构造函数中哪个参数赋值-------------------------------------------
value:用于提供基本类型和String类型的数据
ref:用于指定其他的bean类型的数据,它指的就是在spring的IoC核心容器中出现过的bean对象
-
优势:
在获取bean对象时,注入数据是必须的操作,否则对象无法创建成功。
-
弊端:改变了bean对象的实例化方式,使我们在创建对象时如果用不到这些数据也必须提供
    <bean id="accountService" class="com.itheima.service.impl.AccountServiceImpl" >
        <constructor-arg name="name" value="test">constructor-arg>
        <constructor-arg name="age" value="18">constructor-arg>
        <constructor-arg name="birthday" ref="now">constructor-arg>
    bean>

    <bean id="now" class="java.util.Date">bean>
-
-
使用set方法提供(更常用)
-
使用标签:property 出现位置:bean标签的内部
-
标签中的属性:
name:用于调用指定的set函数(常用)
value:用于提供基本类型和String类型的数据
ref:用于指定其他的bean类型的数据,它指的就是在spring的IoC核心容器中出现过的bean对象
-
优势:创建对象时没有明确的限制,可以直接使用默认构造函数
-
弊端:如果某个成员必须有值,则获取对象时有可能set方法没有执行
    <bean id="accountService2" class="com.itheima.service.impl.AccountServiceImpl2" >
        <property name="name" value="TEST">property>
        <property name="age" value="21">property>
        <property name="birthday" ref="now">property>
    bean>
-
-
使用注解提供
注入集合数据
-
使用set方法
<bean id="accountService3" class="com.itheima.service.impl.AccountServiceImpl3"> <property name="myStrs"> <array> <value>AAAvalue> <value>BBBvalue> <value>CCCvalue> array> property> <property name="myList"> <list> <value>AAAvalue> <value>BBBvalue> <value>CCCvalue> list> property> <property name="mySet"> <set> <value>AAAvalue> <value>BBBvalue> <value>CCCvalue> set> property> <property name="myMap"> <map> <entry key="testA" value="AAA">entry> <entry key="testB"> <value>BBBvalue> entry> map> property> <property name="myProps"> <props> <prop key="testC">CCCprop> <prop key="testD">DDDprop> props> property> bean> -
用于给List结构集合注入的标签:List array set
-
用于给map结构集合注入的标签:map props
02 spring基于注解的IoC
基于注解的IoC配置
步骤
-
在xml文件中,告知spring在创建容器时要扫描的包,配置所需要的标签不是在beans的约束中,而是一个名称为context名称空间和约束中
<beans xmlns="http://www.springframework.org/schema/beans" xmlns:xsi="http://www.w3.org/2001/XMLSchema-instance" xmlns:context="http://www.springframework.org/schema/context" xsi:schemaLocation="http://www.springframework.org/schema/beans https://www.springframework.org/schema/beans/spring-beans.xsd http://www.springframework.org/schema/context https://www.springframework.org/schema/context/spring-context.xsd"> <context:component-scan base-package="com.itheima">context:component-scan> beans> -
在想要创建bean对象的类前加上对应注解,如:
/**
 * 账户的业务层实现类
 */
@Component(value = "accountService")
public class AccountServiceImpl implements IAccountService {

    private IAccountDao accountDao = new AccountDaoImpl();

    public void saveAccount(){

        accountDao.saveAccount();
    }
}
常用IoC注解按照作用分类
-
用于创建对象的:作用和xml中编写一个标签实现的功能一样
-
@Component:
作用:用于把当前类对象存入spring容器中
属性:
- value:用于指定bean的id,当我们不写时,它的默认值是当前类名且首字母改为小写
-
@Controller:一般用在表现层
-
@Service:一般用在业务层
-
**@Repository:**一般用在持久层
以上三个注解的作用和属性与Component一模一样,它们三个是spring框架为我们提供明确的三层使用的注释,使我们的三层对象更加清晰
-
-
用于注入数据的:和xml中编写标签的作用一样
-
@Autowired:
作用:自动按照类型注入,只要容器中有唯一的一个bean对象类型和要注入的变量类型匹配,就可以注入成功,如果ioc容器中没有任何bean的类型和要注入的变量类型匹配,则报错。如果ioc容器中有多个匹配时,默认报错:
当有只有一个匹配时,自动按照类型注入。
有多个匹配时,先按类型查找,再按变量名匹配。
出现位置:可以是变量上,也可以是方法上。
细节:在使用注解注入时,set方法就不是必须的了
-
@qualifier
作用:在按照类中注入的基础上再按照名称注入,它在给类成员注入时不能单独使用,但是在给方法参数注入时可以。
属性:value:指定注入bean的id。
-
@Resource
作用:直接按照bean的id注入,它可以独立使用
属性:name:用于指定bean的id
-
/** * 账户的业务层实现类 */ @Service(value = "accountService") public class AccountServiceImpl implements IAccountService { // @Autowired // @Qualifier("accountDao1") @Resource(name = "accountDao1") private IAccountDao accountDao ; public AccountServiceImpl(){ System.out.println("对象创建了"); } public void saveAccount(){ accountDao.saveAccount(); } } -
以上三个注入只能注入其他bean类型的数据,而基本类型和String类型无法使用上述注解实现,另外:集合类型的注入只能通过XML来实现
-
@Value
作用:用于注入基本类型和String类型的数据
属性:value:用于指定数据的值,可以使用spring中的SpEL(spring中的EL表达式)
SpEL的写法:${表达式}
-
-
用于改变作用范围的:和在标签中使用scope属性实现的功能是一样的
-
@Scope
作用:用于指定bean的作用范围
属性:value:指定范围的取值,常用为singleton和prototype,对应单例和多例。
-
-
和生命周期相关(了解):和在标签中使用init-method和destroy-method一样
-
@PreDestroy
作用:用于指定销毁方法
-
@PreConstruct
作用:用于指定初始化方法
-
通过实例实现CRUD
XML方法
-
创建工程文件并且导入必备的dependencies:(pom.xml)
<project xmlns="http://maven.apache.org/POM/4.0.0" xmlns:xsi="http://www.w3.org/2001/XMLSchema-instance" xsi:schemaLocation="http://maven.apache.org/POM/4.0.0 http://maven.apache.org/xsd/maven-4.0.0.xsd"> <modelVersion>4.0.0modelVersion> <groupId>com.itheimagroupId> <artifactId>day02_eesy_02account_xmliocartifactId> <version>1.0-SNAPSHOTversion> <packaging>jarpackaging> <dependencies> <dependency> <groupId>org.springframeworkgroupId> <artifactId>spring-contextartifactId> <version>5.2.9.RELEASEversion> dependency> <dependency> <groupId>commons-dbutilsgroupId> <artifactId>commons-dbutilsartifactId> <version>1.4version> dependency> <dependency> <groupId>mysqlgroupId> <artifactId>mysql-connector-javaartifactId> <version>8.0.21version> dependency> <dependency> <groupId>c3p0groupId> <artifactId>c3p0artifactId> <version>0.9.1.2version> dependency> <dependency> <groupId>junitgroupId> <artifactId>junitartifactId> <version>4.13version> <scope>testscope> dependency> dependencies> project> -
创建对应的业务层、持久层的接口和实现类,此处不赘述。
-
编写配置文件,配置数据源、数据库连接信息,相应的类。
<beans xmlns="http://www.springframework.org/schema/beans" xmlns:xsi="http://www.w3.org/2001/XMLSchema-instance" xsi:schemaLocation="http://www.springframework.org/schema/beans https://www.springframework.org/schema/beans/spring-beans.xsd"> <bean id="accountService" class="com.itheima.service.impl.AccountServiceImpl"> <property name="accountDao" ref="accountDao">property> bean> <bean id="accountDao" class="com.itheima.dao.impl.AccountDaoImpl"> <property name="runner" ref="runner">property> bean> <bean id="runner" class="org.apache.commons.dbutils.QueryRunner" scope="prototype"> <constructor-arg name="ds" ref="dataSource">constructor-arg> bean> <bean id="dataSource" class="com.mchange.v2.c3p0.ComboPooledDataSource"> <property name="driverClass" value="com.mysql.jdbc.Driver">property> <property name="jdbcUrl" value="jdbc:mysql://localhost:3306/eesy?serverTimezone=UTC">property> <property name="user" value="root">property> <property name="password" value="Root@123456">property> bean> beans> -
编写测试类:在test文件夹下创建测试类,并且编写相应代码(Junit)
package com.itheima.test;

import com.itheima.domain.Account;
import com.itheima.service.IAccountService;
import org.junit.Test;
import org.springframework.context.ApplicationContext;
import org.springframework.context.support.ClassPathXmlApplicationContext;

import java.util.List;

/**
 * 使用Junit单元进行测试,测试我们的配置
 */
public class AccountServiceTest {

    @Test
    public void testFindAll() {

        //1.获取容器
        ApplicationContext ac = new ClassPathXmlApplicationContext("Bean.xml");
        //2.得到业务层对象
        IAccountService as = ac.getBean("accountService",IAccountService.class);
        //3.执行方法
        List<Account> accounts = as.findAllAccount();
        for(Account account:accounts){

            System.out.println(account);
        }
    }
    @Test
    public void testFindOne() {

        //1.获取容器
        ApplicationContext ac = new ClassPathXmlApplicationContext("Bean.xml");
        //2.得到业务层对象
        IAccountService as = ac.getBean("accountService",IAccountService.class);
        //3.执行方法
        Account account = as.findAccountbyId(1);
        System.out.println(account);
    }
    @Test
    public void testSave() {

        Account account = new Account();
        account.setName("test");
        account.setMoney(12345f);
        //1.获取容器
        ApplicationContext ac = new ClassPathXmlApplicationContext("Bean.xml");
        //2.得到业务层对象
        IAccountService as = ac.getBean("accountService",IAccountService.class);
        //3.执行方法
        as.saveAccount(account);
    }
    @Test
    public void testUpdate() {

        //1.获取容器
        ApplicationContext ac = new ClassPathXmlApplicationContext("Bean.xml");
        //2.得到业务层对象
        IAccountService as = ac.getBean("accountService",IAccountService.class);
        //3.执行
        Account account = as.findAccountbyId(4);
        account.setMoney(23456f);
        as.updateAccount(account);
    }
    @Test
    public void testDelete() {

        //1.获取容器
        ApplicationContext ac = new ClassPathXmlApplicationContext("Bean.xml");
        //2.得到业务层对象
        IAccountService as = ac.getBean("accountService",IAccountService.class);
        //3.执行
        as.deleteAccount(4);

    }
}
注解方法(D:Jav
基本同上,只是把配置文件改了改,然后在对应的类上加了创建bean对象的注解,然后在实例化对应类的时候加上了@Autowired
用配置类取代xml配置文件
——之前的方法都离不开Bean.xml配置文件,现在尝试拿掉xml配置文件
-
创建一个配置类,取代bean.xml:
-
@Configuration
作用:指定当前类是一个配置类
细节:当配置类作为AnnotationConfigApplicationContext对象创建的参数时,此标签可以不写,即AnnotationConfigApplicationContext可以在忽视Configuration注解的情况下扫描配置类
-
@ComponentScan
作用:通过注解指定spring在创建容器时要扫描的包
属性:value:它和basePackages的作用是一样的,都适用于指定创建容器时要扫描的包。我们使用此注解等同于在xml中配置了
<context:component-scan base-package="com.itheima">context:component-scan> -
@Bean
作用:用于把当前方法的返回值作为bean对象存入spring的ioc容器中。
属性:(因为容器内使用键值对存储,所以要指定bean的id)
name:用于指定bean的id,当不写时,默认值是当前方法的名称。
细节:
- 当我们使用注解配置方法时,如果方法有参数,spring框架会去容器中查找有没有可用的bean对象,查找的方式和@Autowired一样。
- 对应xml的配置,此注解下也可以加上@Scope等标签来说明Bean对象的属性(单例、多例、生命周期等)
-
@Import
作用:用于导入其他的配置类
属性:value:用于指定其他配置类的字节码,当我们使用Import注解之后,有Import注解的类就是父配置类,而导入的都是子配置类
-
@PropertySource
作用:用于指定properties文件的位置
属性:
value:指定文件的名称和路径
关键字:classpath:表示在类路径下
-
-
实例:两个配置类,一个是全局配置类,一个是jdbc配置类
- 全局配置类:
package config; import com.mchange.v2.c3p0.ComboPooledDataSource; import org.apache.commons.dbutils.QueryRunner; import org.springframework.context.annotation.*; import javax.sql.DataSource; /** * 该类是一个配置类,它的作用和bean.xml一样 */ @Configuration @ComponentScan(basePackages = { "com.itheima"}) @Import(JdbcConfig.class) @PropertySource("classpath:jdbcConfig.properties") public class SpringConfiguration { }- jdbc配置类:
package config; import com.mchange.v2.c3p0.ComboPooledDataSource; import org.apache.commons.dbutils.QueryRunner; import org.springframework.beans.factory.annotation.Value; import org.springframework.context.annotation.Bean; import org.springframework.context.annotation.Configuration; import org.springframework.context.annotation.Scope; import javax.sql.DataSource; /** * 和spring连接数据库相关的配置类 */ //@Configuration public class JdbcConfig { @Value("${jdbc.driver}") private String driver; @Value("${jdbc.url}") private String url; @Value("${jdbc.username}") private String username; @Value("${jdbc.password}") private String password; /** * 用于创建一个QueryRunner对象,并没有将此对象存入ioc容器,要使用@Bean * @param dataSource * @return */ @Bean(name = "runner") @Scope("prototype") public QueryRunner createQueryRunner(DataSource dataSource){ return new QueryRunner(dataSource); } /** * 创建数据源对象 * @return */ @Bean(name = "dataSource") public DataSource createDataSource(){ try{ ComboPooledDataSource ds = new ComboPooledDataSource(); ds.setDriverClass(driver); ds.setJdbcUrl(url);; ds.setUser(username); ds.setPassword(password); return ds; } catch(Exception e){ throw new RuntimeException(e); } } }- 对应的properties文件:
jdbc.driver=com.mysql.jdbc.Driver
jdbc.url=jdbc:mysql://localhost:3306/eesy?serverTimezone=UTC
jdbc.username=root
jdbc.password=Root@123456
使用xml还是注解:哪个更方便就用哪个
spring整合Junit问题分析
问题:
- 应用程序的入口:main方法
- junit单元测试中,没有main方法也能执行:junit集成了一个main方法,该方法会判断当前测试类中哪些方法有@Test注解,如果有@Test注解,Junit会让有Test注解的方法执行
- junit不会管我们是否使用spring框架,在执行测试方法时,junit不知道我们是否使用了spring框架,所以也就不会为我们读取配置文件/配置类创建spring核心容器
- 由以上三点可知,没有IoC容器,就算写了@Autowired,也无法注入。
解决方法
-
导入spring整合junit的jar(坐标)(在pom.xml中)
<dependency> <groupId>org.springframeworkgroupId> <artifactId>spring-testartifactId> <version>5.2.9.RELEASEversion> dependency> -
使用Junit提供的一个注解把原有的main方法替换了,替换成spring提供的main方法
@Runwith

-
告知spring的运行器,spring的IoC创建是基于xml还是注解,并且说明位置
@ContextConfiguration:
属性:
location:指定xml文件的位置,加上classpath关键字,表示在类路径下
classes:指定注解类所在的位置
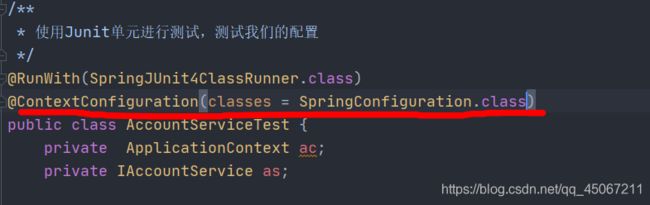
-
此时就可以愉快地使用注解了
03 spring的AOP
动态代理
-
特点:字节码随用随创建,随用随加载
-
作用:在不修改源码的基础上对方法增强
-
分类:
- 基于接口的动态代理
- 基于子类的动态代理
-
基于接口的动态代理:
-
设计的类:Proxy
-
提供者:JDK官方
-
如何创建代理对象:
使用Proxy类的newProxyInstance方法
-
创建代理对象的要求:
被代理类最少实现一个接口,如果没有则不能使用(类没有实现接口时,proxy无法使用)
-
newProxyInstance方法的参数:
-
ClassLoader:类加载器
用于加载代理对象字节码。写的是被代理对象的类加载器(和被代理对象使用相同的类加载器,代理谁就写谁的类加载器,固定写法)
producer.getClass().getClassLoader()-
Class[]
用于让代理对象和被代理对象有相同的方法
producer.getClass().getInterfaces()-
InvocationHandler
他是让我们写如何代理,一般些一个改接口的实现类,通常情况下都是匿名内部类,但不是必须的,此接口的实现类都是谁用谁写(谁要对方法增强写谁)
实例:
package com.itheima.proxy; import java.lang.reflect.InvocationHandler; import java.lang.reflect.Method; import java.lang.reflect.Proxy; public class Client { public static void main(String[] args) { final Producer producer = new Producer(); IProducer proxyProducer = (IProducer)Proxy.newProxyInstance(producer.getClass().getClassLoader(), producer.getClass().getInterfaces(), new InvocationHandler() { /** * 作用:执行被代理对象的任何接口方法都会经过该方法 * 方法参数的含义 * @param proxy 代理对象的引用 * @param method 当前执行的方法 * @param args 当前实行方法所需的参数 * @return 和被代理对象方法有相同的返回值 * @throws Throwable */ public Object invoke(Object proxy, Method method, Object[] args) throws Throwable { //提供增强的代码 Object returnValue = null; //1.获取方法执行的参数 Float money = (Float)args[0]; //2.判断当前方法是不是销售 if("saleProduct".equals(method.getName())){ returnValue = method.invoke(producer,money*0.8f); } return returnValue; } }); proxyProducer.saleProduct(10000f); } } -
-
-
基于子类的动态代理
-
涉及的类:Enhancer
-
提供者:第三方cglib库
-
如何创建代理对象:
使用Enhancer类中的create方法
-
创建代理对象的要求:
被代理类不能时最终类
-
create方法的参数
-
Class:字节码
用于指定被代理对象的字节码
-
Callback:用于提供增强的代码
它是让我们写如何代理,我们一般都是写一个该接口的实现类,通常情况下都是匿名内部类,但不是必须的
此接口的实现类都是谁用谁写
我们一般写的都是该接口的子接口实现类: MethodInterceptor
-
-
实例
package com.itheima.cglib;

import com.itheima.proxy.IProducer;
import net.sf.cglib.proxy.Enhancer;
import net.sf.cglib.proxy.MethodInterceptor;
import net.sf.cglib.proxy.MethodProxy;

import java.lang.reflect.InvocationHandler;
import java.lang.reflect.Method;
import java.lang.reflect.Proxy;

public class Client {

    public static void main(String[] args) {

        final Producer producer = new Producer();

        Producer cglibProducer = (Producer)Enhancer.create(producer.getClass(), new MethodInterceptor() {

            /**
             * 执行被代理对象的任何方法都会经过该方法
             * @param proxy     代理对象的引用
             * @param method    当前执行的方法
             * @param args      当前实行方法所需的参数
             *  以上三个参数和基于接口的动态代理中invoke方法的参数是一样的
             * @param methodProxy
             * @return
             * @throws Throwable
             */
            public Object intercept(Object proxy, Method method, Object[] args, MethodProxy methodProxy) throws Throwable {

                //提供增强的代码
                Object returnValue = null;
                //1.获取方法执行的参数
                Float money = (Float)args[0];
                //2.判断当前方法是不是销售
                if("saleProduct".equals(method.getName())){

                    returnValue = method.invoke(producer,money*0.8f);
                }
                return returnValue;
            }
        });
        cglibProducer.saleProduct(12000f);

    }
}
-
AOP
- 什么是 AOP:AOP:全称是 Aspect Oriented Programming 即:面向切面编程。 简单的说它就是把我们程序重复的代码抽取出来,在需要执行的时候,使用动态代理的技术,在不修改源码的 基础上,对我们的已有方法进行增强。
- AOP的作用:在程序运行期间,不修改源码对已有方法进行增强
- AOP优势:减少重复代码,提高开发效率,维护方便
- AOP实现方式:使用动态代理技术
sping中的AOP
-
AOP相关术语
-
Joinpoint(连接点):所谓连接点是指那些被拦截到的点。在 spring 中,这些点指的是方法,因为 spring 只支持方法类型的连接点。(业务层中所有的方法)
-
Pointcut(切入点): 所谓切入点是指我们要对哪些 Joinpoint 进行拦截的定义。(被增强的方法)
所有的切入点都是连接点,但连接点不一定是切入点
-
Advice(通知/增强): 所谓通知是指拦截到 Joinpoint 之后所要做的事情就是通知。通知的类型:前置通知,后置通知,异常通知,最终通知,环绕通知。
-
Introduction(引介): 引介是一种特殊的通知在不修改类代码的前提下, Introduction 可以在运行期为类动态地添加一些方法或 Field。
-
Target(目标对象): 代理的目标对象。
-
Weaving(织入): 是指把增强应用到目标对象来创建新的代理对象的过程。 spring 采用动态代理织入,而 AspectJ 采用编译期织入和类装载期织入。
-
Proxy(代理): 一个类被 AOP 织入增强后,就产生一个结果代理类。
-
Aspect(切面): 是切入点和通知(引介)的结合。
-
spring基于xml的AOP
-
spring中基于XML的AOP配置步骤:(导入spring坐标)
-
把通知Bean也交给spring来管理
-
使用aop:config标签表示开始AOP的配置
-
使用aop:aspect标签表明配置切面
- id属性:给切面提供一个唯一标识
- ref属性:指定通知类bean的id
-
在aop:aspect标签的内部使用对应的标签来配置通知的类型
(示例中是让printLog方法在切入点方法执行之前执行:前置通知)
aop:before:表示前置通知
method属性:用于指定Logger类中哪个方法是前置通知
pointcut属性:用于指定切入点表达式,该表达式的含义指的是对业务层中哪些方法增强
切入点表达式的写法:
关键字:execution(表达式)
表达式: 访问修饰符 返回值 包名.包名.包名…类名.方法名
标准的表达式写法(例):
public void com.itheima.service.impl.AccountServiceImpl.saveAccount()
<beans xmlns="http://www.springframework.org/schema/beans" xmlns:xsi="http://www.w3.org/2001/XMLSchema-instance" xmlns:aop="http://www.springframework.org/schema/aop" xsi:schemaLocation="http://www.springframework.org/schema/beans https://www.springframework.org/schema/beans/spring-beans.xsd http://www.springframework.org/schema/aop https://www.springframework.org/schema/aop/spring-aop.xsd"> <bean id="accountService" class="com.itheima.service.impl.AccountServiceImpl">bean> <bean id="logger" class="com.itheima.utils.Logger">bean> <aop:config> <aop:aspect id="logAdvice" ref="logger"> <aop:before method="printLog" pointcut="execution(public void com.itheima.service.impl.AccountServiceImpl.saveAccount())">aop:before> aop:aspect> aop:config> beans> -
-
切入点表达式的写法
-
标准的表达式写法: 关键字:execution(表达式)
表达式: 访问修饰符 返回值 包名.包名.包名…类名.方法名
标准的表达式写法(例):
public void com.itheima.service.impl.AccountServiceImpl.saveAccount()
访问修饰符可以省略
void com.itheima.service.impl.AccountServiceImpl.saveAccount()返回值可以使用通配符(*)表示任意返回值
* com.itheima.service.impl.AccountServiceImpl.saveAccount()包名可以使用通配符,表示任意包,但是有几级包,就需要写几个*.
* *.*.*.*.AccountServiceImpl.saveAccount()包名可以使用…表示当前包及其子包
* *..AccountServiceImpl.saveAccount()类名和方法名都可以使用*来实现通配
* *..*.*()参数列表:
可以直接写数据类型
基本类型直接写名称 int
引用类型写包名.类名的方式 java.lang.String
可以使用通配符表示任意类型,但是必须有参数
可以使用…表示有无参数均可,有参数可以是任意类型
以上全部使用,则为下面的方式
-
全通配写法:
* *..*.*(..)一般不要用这个写法,因为所有类的所有方法都会被增强
-
实际开发中切入点表达式的通常写法:
切到业务层实现类下的所有方法:
示例:
* com.itheima.service.impl.*.*(..)
-
-
四种常用通知类型:
-
前置通知
在切入点方法之前执行
-
后置通知
在切入点方法之后执行,和异常通知永远只能执行一个
-
异常通知
在切入点方法执行发生异常之后执行,和后置通知永远只能执行一个
-
最终通知
无论切入点方法是否正常执行都会在其后面执行
-
-
通用化切入点表达式:
<aop:pointcut id="pt1" expression="execution(* com.itheima.service.impl.*.*(..))"/> -
spring中的环绕通知
<aop:around method="aroundPrintLog" pointcut-ref="pt1">aop:around>-
问题:当配置了环绕通知,切入点方法没有执行,通知方法执行了
-
分析:通过对比动态代理中的环绕通知代码,发现动态代理的环绕通知有明确的切入点方法调用,而我们的代码中没有。
-
解决:spring框架为我们提供了一个借口:ProceedingJoinPoint。该接口有一个方法proceed,此方法就相当于明确调用切入点方法。该接口可以作为环绕通知的方法参数,在程序执行时,spring框架会为我们提供该接口的实现了供我们使用。
public Object aroundPrintLog(ProceedingJoinPoint pjp){ Object rtValue = null; try { Object[]args = pjp.getArgs();//明确方法所需参数 System.out.println("Logger类中的aroundPrintLog方法开始记录日志了");//相当于前置通知 rtValue = pjp.proceed(args);//明确调用业务层方法 System.out.println("Logger类中的aroundPrintLog方法开始记录日志了");//相当于后置通知 return rtValue; } catch (Throwable t){ System.out.println("Logger类中的aroundPrintLog方法开始记录日志了");//相当于异常通知 throw new RuntimeException(t); } finally { System.out.println("Logger类中的aroundPrintLog方法开始记录日志了");//相当于最终通知 } }- spring中的环绕通知:spring为我们提供的一种可以在代码中手动控制增强法法合适执行的方式
-
基于注解的AOP配置
使用xml文件
-
在配置文件中配置:
<beans xmlns="http://www.springframework.org/schema/beans" xmlns:xsi="http://www.w3.org/2001/XMLSchema-instance" xmlns:aop="http://www.springframework.org/schema/aop" xmlns:context="http://www.springframework.org/schema/context" xsi:schemaLocation="http://www.springframework.org/schema/beans https://www.springframework.org/schema/beans/spring-beans.xsd http://www.springframework.org/schema/aop https://www.springframework.org/schema/aop/spring-aop.xsd http://www.springframework.org/schema/context https://www.springframework.org/schema/context/spring-context.xsd"> <context:component-scan base-package="com.itheima">context:component-scan> <aop:aspectj-autoproxy>aop:aspectj-autoproxy> beans> -
将对应业务层实现类和方法类添加@Service @Component等注解
-
在方法类对应方法加注解:
重点注意:@Aspect @Pointcut
package com.itheima.utils;

import org.aspectj.lang.ProceedingJoinPoint;
import org.aspectj.lang.annotation.*;
import org.springframework.stereotype.Component;

/**
 * 用于记录日志的工具类,其中提供了公共的代码
 */
@Component("logger")
@Aspect //表示当前类是一个切面类

public class Logger {

    @Pointcut("execution(* com.itheima.service.impl.*.*(..))")
    private void pt1(){
       }
    /**
     * 前置通知:
     */
    @Before("pt1()")
    public void beforePrintLog(){

        System.out.println("前置通知:Logger类中的printLog方法开始记录日志了");
    }
    /**
     * 后置通知
     */
    @AfterReturning("pt1()")
    public void afterReturningPrintLog(){

        System.out.println("后置通知:Logger类中的printLog方法开始记录日志了");
    }
    /**
     * 异常通知
     */
    @AfterThrowing("pt1()")
    public void afterThrowingPrintLog(){

        System.out.println("异常通知:Logger类中的printLog方法开始记录日志了");
    }
    /**
     * 最终通知
     */
    @After("pt1()")
    public void afterPrintLog(){

        System.out.println("最终通知:Logger类中的printLog方法开始记录日志了");
    }

    /**
     * 环绕通知
     */
    @Around("pt1()")
    public Object aroundPrintLog(ProceedingJoinPoint pjp){

        Object rtValue = null;
        try {

            Object[]args = pjp.getArgs();//明确方法所需参数
            System.out.println("Logger类中的aroundPrintLog方法开始记录日志了");
            rtValue = pjp.proceed(args);//明确调用业务层方法
            System.out.println("Logger类中的aroundPrintLog方法开始记录日志了");

            return rtValue;
        }
        catch (Throwable t){

            System.out.println("Logger类中的aroundPrintLog方法开始记录日志了");
            throw new RuntimeException(t);
        }
        finally {

            System.out.println("Logger类中的aroundPrintLog方法开始记录日志了");
        }

    }
}
不使用xml配置:@EnableAspectJAutoProxy(配置类)
@Configuration
@ComponentScan(basePackages="com.itheima")
@EnableAspectJAutoProxy
public class SpringConfiguration {

}
04
JdbcTemplate
-
它是 spring 框架中提供的一个对象,是对原始 Jdbc API 对象的简单封装。
-
spring 框架为我们提供了很多的操作模板类。
- 操作关系型数据的: JdbcTemplate、HibernateTemplate
- 操作 nosql 数据库的: RedisTemplate
- 操作消息队列的: JmsTemplate
- 导包的时候,除了要导入这个jar包 外,还需要导入一个 spring-tx-5.0.2.RELEASE.jar(它是和事务相关的)
-
JdbdTemplate的作用:用于和数据库交互,实现对表的CRUD操作
-
配置POM.xml
导入spring框架以及spring框架中与事务控制相关的jar包还有连接Mysql数据库的jar包。
<project xmlns="http://maven.apache.org/POM/4.0.0"
         xmlns:xsi="http://www.w3.org/2001/XMLSchema-instance"
         xsi:schemaLocation="http://maven.apache.org/POM/4.0.0 http://maven.apache.org/xsd/maven-4.0.0.xsd">
    <modelVersion>4.0.0modelVersion>

    <groupId>com.itheimagroupId>
    <artifactId>day04_eesy_01jdbctemplateartifactId>
    <version>1.0-SNAPSHOTversion>
    <packaging>jarpackaging>

    <dependencies>
        <dependency>
            <groupId>org.springframeworkgroupId>
            <artifactId>spring-contextartifactId>
            <version>5.2.9.RELEASEversion>
        dependency>

        <dependency>
            <groupId>org.springframeworkgroupId>
            <artifactId>spring-jdbcartifactId>
            <version>5.2.9.RELEASEversion>
        dependency>

        <dependency>
            <groupId>org.springframeworkgroupId>
            <artifactId>spring-txartifactId>
            <version>5.2.9.RELEASEversion>
        dependency>

        <dependency>
            <groupId>mysqlgroupId>
            <artifactId>mysql-connector-javaartifactId>
            <version>8.0.21version>
        dependency>
    dependencies>
project>
通过 xml 配置jdbcTemplate
- 配置文件
<beans xmlns="http://www.springframework.org/schema/beans"
       xmlns:xsi="http://www.w3.org/2001/XMLSchema-instance"
       xsi:schemaLocation="http://www.springframework.org/schema/beans
        http://www.springframework.org/schema/beans/spring-beans.xsd">


    <bean id="jdbcTemplate" class="org.springframework.jdbc.core.JdbcTemplate">
        <property name="dataSource" ref="dataSource">property>
    bean>


    <bean id="dataSource" class="org.springframework.jdbc.datasource.DriverManagerDataSource">
        <property name="driverClassName" value="com.mysql.jdbc.Driver">property>
        <property name="url" value="jdbc:mysql://localhost:3306/eesy">property>
        <property name="username" value="root">property>
        <property name="password" value="20000912">property>
    bean>
beans>
- 具体类
package com.itheima.jdbctemplate;

import org.springframework.context.ApplicationContext;
import org.springframework.context.support.ClassPathXmlApplicationContext;
import org.springframework.jdbc.core.JdbcTemplate;

/**
 * JdbcTemplate的最基本用法
 */
public class JdbcTemplateDemo2 {


    public static void main(String[] args) {

        //1.获取容器
        ApplicationContext ac = new ClassPathXmlApplicationContext("bean.xml");
        //2.获取对象
        JdbcTemplate jt = ac.getBean("jdbcTemplate",JdbcTemplate.class);
        //3.执行操作
        jt.execute("insert into account(name,money)values('ddd',2222)");
    }
}
通过jdbcTemplate实现CRUD
-
实例
package com.itheima.jdbctemplate; import com.itheima.domain.Account; import org.springframework.context.ApplicationContext; import org.springframework.context.support.ClassPathXmlApplicationContext; import org.springframework.jdbc.core.JdbcTemplate; import org.springframework.jdbc.core.RowMapper; import java.sql.ResultSet; import java.sql.SQLException; /** * JdbcTemplate的CRUD操作 */ public class JdbcTemplateDemo3 { public static void main(String[] args) { //1.获取容器 ApplicationContext ac = new ClassPathXmlApplicationContext("bean.xml"); //2.获取对象 JdbcTemplate jt = ac.getBean("jdbcTemplate",JdbcTemplate.class); //3.执行操作 //增加 jt.update("insert into account(name,money)values(?,?)","eee",3333f); //更新 jt.update("update account set name=?,money=? where id=?","test",4567,7); //删除 jt.update("delete from account where id=?",8); //查询所有 List<Account> accounts = jt.query("select * from account where money > ?",new AccountRowMapper(),1000f); List<Account> accounts = jt.query("select * from account where money > ?",new BeanPropertyRowMapper<Account>(Account.class),1000f); for(Account account : accounts){ System.out.println(account); } //查询一个 List<Account> accounts = jt.query("select * from account where id = ?",new BeanPropertyRowMapper<Account>(Account.class),1); System.out.println(accounts.isEmpty()?"没有内容":accounts.get(0)); //查询返回一行一列(使用聚合函数,但不加group by子句) Long count = jt.queryForObject("select count(*) from account where money > ?",Long.class,1000f); System.out.println(count); } } /** * 定义Account的封装策略 */ class AccountRowMapper implements RowMapper<Account>{ /** * 把结果集中的数据封装到Account中,然后由spring把每个Account加到集合中 * @param rs * @param rowNum * @return * @throws SQLException */ public Account mapRow(ResultSet rs, int rowNum) throws SQLException { Account account = new Account(); account.setId(rs.getInt("id")); account.setName(rs.getString("name")); account.setMoney(rs.getFloat("money")); return account; } } -
开发中不会直接调用jdbctemplate,而是用dao相关接口及实现
持久层接口:
package com.itheima.dao;

import com.itheima.domain.Account;

/**
 * 账户的持久层接口
 */
public interface IAccountDao {


    /**
     * 根据Id查询账户
     * @param accountId
     * @return
     */
    Account findAccountById(Integer accountId);

    /**
     * 根据名称查询账户
     * @param accountName
     * @return
     */
    Account findAccountByName(String accountName);

    /**
     * 更新账户
     * @param account
     */
    void updateAccount(Account account);
}
持久层实现类:
package com.itheima.dao.impl;

import com.itheima.dao.IAccountDao;
import com.itheima.domain.Account;
import org.springframework.beans.factory.annotation.Autowired;
import org.springframework.jdbc.core.BeanPropertyRowMapper;
import org.springframework.jdbc.core.JdbcTemplate;
import org.springframework.stereotype.Repository;

import java.util.List;

/**
 * 账户的持久层实现类
 */
@Repository
public class AccountDaoImpl2 implements IAccountDao {


    @Autowired
    private JdbcTemplate jdbcTemplate;


    public Account findAccountById(Integer accountId) {

        List<Account> accounts = jdbcTemplate.query("select * from account where id = ?",new BeanPropertyRowMapper<Account>(Account.class),accountId);
        return accounts.isEmpty()?null:accounts.get(0);
    }


    public Account findAccountByName(String accountName) {

        List<Account> accounts = jdbcTemplate.query("select * from account where name = ?",new BeanPropertyRowMapper<Account>(Account.class),accountName);
        if(accounts.isEmpty()){

            return null;
        }
        if(accounts.size()>1){

            throw new RuntimeException("结果集不唯一");
        }
        return accounts.get(0);
    }


    public void updateAccount(Account account) {

        jdbcTemplate.update("update account set name=?,money=? where id=?",account.getName(),account.getMoney(),account.getId());
    }
}
配置XML,说明jdbcTemplate注入数据的来源。
<beans xmlns="http://www.springframework.org/schema/beans"
       xmlns:xsi="http://www.w3.org/2001/XMLSchema-instance"
       xsi:schemaLocation="http://www.springframework.org/schema/beans
        http://www.springframework.org/schema/beans/spring-beans.xsd">


    <bean id="accountDao" class="com.itheima.dao.impl.AccountDaoImpl2">
        <property name="jdbcTemplate" ref="jdbcTemplate">property>

    bean>


    <bean id="jdbcTemplate" class="org.springframework.jdbc.core.JdbcTemplate">
        <property name="dataSource" ref="dataSource">property>
    bean>


    <bean id="dataSource" class="org.springframework.jdbc.datasource.DriverManagerDataSource">
        <property name="driverClassName" value="com.mysql.jdbc.Driver">property>
        <property name="url" value="jdbc:mysql://localhost:3306/eesy">property>
        <property name="username" value="root">property>
        <property name="password" value="20000912">property>
    bean>
beans>
现在我们在执行数据库的CRUD操作时,就不再获取jdbcTemplate对象了,而应该获取dao对象。
package com.itheima.jdbctemplate;

import org.springframework.context.ApplicationContext;
import org.springframework.context.support.ClassPathXmlApplicationContext;
import org.springframework.jdbc.core.JdbcTemplate;

/**
 * JdbcTemplate的最基本用法
 */
public class JdbcTemplateDemo2 {


    public static void main(String[] args) {

        //1.获取容器
        ApplicationContext ac = new ClassPathXmlApplicationContext("bean.xml");
        //2.获取对象
        JdbcTemplate jt = ac.getBean("jdbcTemplate",JdbcTemplate.class);
        //3.执行操作
        jt.execute("insert into account(name,money)values('ddd',2222)");


     /*   //准备数据源:spring的内置数据源
        DriverManagerDataSource ds = new DriverManagerDataSource();
        ds.setDriverClassName("com.mysql.jdbc.Driver");
        ds.setUrl("jdbc:mysql://localhost:3306/eesy");
        ds.setUsername("root");
        ds.setPassword("1234");

        //1.创建JdbcTemplate对象
        JdbcTemplate jt = new JdbcTemplate();
        //给jt设置数据源
        jt.setDataSource(ds);
        //2.执行操作
        jt.execute("insert into account(name,money)values('ccc',1000)");*/
    }
}
Spring的声明式事务控制
Spring事务控制的代码准备
- 配置pom.xml
<project xmlns="http://maven.apache.org/POM/4.0.0"
         xmlns:xsi="http://www.w3.org/2001/XMLSchema-instance"
         xsi:schemaLocation="http://maven.apache.org/POM/4.0.0 http://maven.apache.org/xsd/maven-4.0.0.xsd">
    <modelVersion>4.0.0modelVersion>

    <groupId>com.itheimagroupId>
    <artifactId>day04_eesy_04txartifactId>
    <version>1.0-SNAPSHOTversion>
    <packaging>jarpackaging>

    <dependencies>
        <dependency>
            <groupId>org.springframeworkgroupId>
            <artifactId>spring-contextartifactId>
            <version>5.0.2.RELEASEversion>
        dependency>

        <dependency>
            <groupId>org.springframeworkgroupId>
            <artifactId>spring-jdbcartifactId>
            <version>5.0.2.RELEASEversion>
        dependency>

        <dependency>
            <groupId>org.springframeworkgroupId>
            <artifactId>spring-txartifactId>
            <version>5.0.2.RELEASEversion>
        dependency>

        <dependency>
            <groupId>org.springframeworkgroupId>
            <artifactId>spring-testartifactId>
            <version>5.0.2.RELEASEversion>
        dependency>

        <dependency>
            <groupId>mysqlgroupId>
            <artifactId>mysql-connector-javaartifactId>
            <version>5.1.6version>
        dependency>

        <dependency>
            <groupId>org.aspectjgroupId>
            <artifactId>aspectjweaverartifactId>
            <version>1.8.7version>
        dependency>

        <dependency>
            <groupId>junitgroupId>
            <artifactId>junitartifactId>
            <version>4.12version>
        dependency>
    dependencies>
project>
- 定义业务层接口类:
package com.itheima.service;

import com.itheima.domain.Account;

/**
 * 账户的业务层接口
 */
public interface IAccountService {

    /**
     * 根据id查询账户信息
     * @param accountId
     * @return
     */
    Account findAccountById(Integer accountId);

    /**
     * 转账
     * @param sourceName    转成账户名称
     * @param targetName    转入账户名称
     * @param money         转账金额
     */
    void transfer(String sourceName,String targetName,Float money);
}
- 编写业务层实现类:
package com.itheima.service.impl;

import com.itheima.dao.IAccountDao;
import com.itheima.domain.Account;
import com.itheima.service.IAccountService;

/**
 * 账户的业务层实现类
 *
 * 事务控制应该都是在业务层
 */
public class AccountServiceImpl implements IAccountService{


    private IAccountDao accountDao;

    public void setAccountDao(IAccountDao accountDao) {

        this.accountDao = accountDao;
    }


    public Account findAccountById(Integer accountId) {

        return accountDao.findAccountById(accountId);

    }


    public void transfer(String sourceName, String targetName, Float money) {

        System.out.println("transfer....");
            //2.1根据名称查询转出账户
            Account source = accountDao.findAccountByName(sourceName);
            //2.2根据名称查询转入账户
            Account target = accountDao.findAccountByName(targetName);
            //2.3转出账户减钱
            source.setMoney(source.getMoney()-money);
            //2.4转入账户加钱
            target.setMoney(target.getMoney()+money);
            //2.5更新转出账户
            accountDao.updateAccount(source);

            //int i=1/0;

            //2.6更新转入账户
            accountDao.updateAccount(target);
    }
}
- 配置bean.xml
<beans xmlns="http://www.springframework.org/schema/beans"
       xmlns:xsi="http://www.w3.org/2001/XMLSchema-instance"
       xsi:schemaLocation="http://www.springframework.org/schema/beans
        http://www.springframework.org/schema/beans/spring-beans.xsd">


    <bean id="accountService" class="com.itheima.service.impl.AccountServiceImpl">
        <property name="accountDao" ref="accountDao">property>
    bean>


    <bean id="accountDao" class="com.itheima.dao.impl.AccountDaoImpl">
        <property name="dataSource" ref="dataSource">property>
    bean>


    <bean id="dataSource" class="org.springframework.jdbc.datasource.DriverManagerDataSource">
        <property name="driverClassName" value="com.mysql.jdbc.Driver">property>
        <property name="url" value="jdbc:mysql://localhost:3306/eesy">property>
        <property name="username" value="root">property>
        <property name="password" value="1234">property>
    bean>
beans>
Spring基于XML的声明式事务控制配置
- 配置beam.xml
<beans xmlns="http://www.springframework.org/schema/beans"
       xmlns:xsi="http://www.w3.org/2001/XMLSchema-instance"
       xmlns:aop="http://www.springframework.org/schema/aop"
       xmlns:tx="http://www.springframework.org/schema/tx"
       xsi:schemaLocation="
        http://www.springframework.org/schema/beans
        http://www.springframework.org/schema/beans/spring-beans.xsd
        http://www.springframework.org/schema/tx
        http://www.springframework.org/schema/tx/spring-tx.xsd
        http://www.springframework.org/schema/aop
        http://www.springframework.org/schema/aop/spring-aop.xsd">


    <bean id="accountService" class="com.itheima.service.impl.AccountServiceImpl">
        <property name="accountDao" ref="accountDao">property>
    bean>


    <bean id="accountDao" class="com.itheima.dao.impl.AccountDaoImpl">
        <property name="dataSource" ref="dataSource">property>
    bean>


    <bean id="dataSource" class="org.springframework.jdbc.datasource.DriverManagerDataSource">
        <property name="driverClassName" value="com.mysql.jdbc.Driver">property>
        <property name="url" value="jdbc:mysql://localhost:3306/eesy">property>
        <property name="username" value="root">property>
        <property name="password" value="1234">property>
    bean>


    <bean id="transactionManager" class="org.springframework.jdbc.datasource.DataSourceTransactionManager">
        <property name="dataSource" ref="dataSource">property>
    bean>


    <tx:advice id="txAdvice" transaction-manager="transactionManager">

        <tx:attributes>
            <tx:method name="*" propagation="REQUIRED" read-only="false"/>
            <tx:method name="find*" propagation="SUPPORTS" read-only="true">tx:method>
        tx:attributes>
    tx:advice>


    <aop:config>

        <aop:pointcut id="pt1" expression="execution(* com.itheima.service.impl.*.*(..))">aop:pointcut>

        <aop:advisor advice-ref="txAdvice" pointcut-ref="pt1">aop:advisor>
    aop:config>


beans>
踩坑
环境配置相关
spring
-
基于xml的配置:在配置文件中copy如下代码,或在spring-framework-5.2.9.RELEASE/docs/spring-framework-reference/core.html#spring-core中搜索:xmlns
<beans xmlns="http://www.springframework.org/schema/beans" xmlns:xsi="http://www.w3.org/2001/XMLSchema-instance" xsi:schemaLocation="http://www.springframework.org/schema/beans https://www.springframework.org/schema/beans/spring-beans.xsd"> beans> -
基于注解的配置,在配置文件中粘贴如下代码,或在spring-framework-5.2.9.RELEASE/docs/spring-framework-reference/core.html#spring-core中搜索:xmlns:context
<beans xmlns="http://www.springframework.org/schema/beans"
       xmlns:xsi="http://www.w3.org/2001/XMLSchema-instance"
       xmlns:context="http://www.springframework.org/schema/context"
       xsi:schemaLocation="http://www.springframework.org/schema/beans
        https://www.springframework.org/schema/beans/spring-beans.xsd
        http://www.springframework.org/schema/context
        https://www.springframework.org/schema/context/spring-context.xsd">


    <context:component-scan base-package="com.itheima">context:component-scan>

beans>
JUnit
- 当使用spring 5.x版本时,要求JUnit的jar必须是4.12及以上
数据库相关
连接
-
连接时在 URL 之后要加上TimeZone 声明
Connection conn = DriverManager.getConnection("jdbc:mysql://localhost:3306/eesy?serverTimezone=UTC","root","Root@123456"); -
在数据源的bean对象中设置成prototype
滚。没有默认值。表示任何异常都回滚。
–>
tx:attributes
踩坑
环境配置相关
spring
-
基于xml的配置:在配置文件中copy如下代码,或在spring-framework-5.2.9.RELEASE/docs/spring-framework-reference/core.html#spring-core中搜索:xmlns
<beans xmlns="http://www.springframework.org/schema/beans" xmlns:xsi="http://www.w3.org/2001/XMLSchema-instance" xsi:schemaLocation="http://www.springframework.org/schema/beans https://www.springframework.org/schema/beans/spring-beans.xsd"> beans> -
基于注解的配置,在配置文件中粘贴如下代码,或在spring-framework-5.2.9.RELEASE/docs/spring-framework-reference/core.html#spring-core中搜索:xmlns:context
<beans xmlns="http://www.springframework.org/schema/beans"
       xmlns:xsi="http://www.w3.org/2001/XMLSchema-instance"
       xmlns:context="http://www.springframework.org/schema/context"
       xsi:schemaLocation="http://www.springframework.org/schema/beans
        https://www.springframework.org/schema/beans/spring-beans.xsd
        http://www.springframework.org/schema/context
        https://www.springframework.org/schema/context/spring-context.xsd">


    <context:component-scan base-package="com.itheima">context:component-scan>

beans>
JUnit
- 当使用spring 5.x版本时,要求JUnit的jar必须是4.12及以上
数据库相关
连接
-
连接时在 URL 之后要加上TimeZone 声明
Connection conn = DriverManager.getConnection("jdbc:mysql://localhost:3306/eesy?serverTimezone=UTC","root","Root@123456"); -
在数据源的bean对象中设置成prototype