docker部署jumpserver
环境:centos7系统,2核4G(多多益善)
1.安装docker
下载docker的安装包
下载地址>> https://download.docker.com/linux/static/stable/x86_64/
解压安装包
[root@localhost ~]# tar zxf docker-19.03.9.tgz
复制二进制文件到/usr/bin目录下
[root@localhost ~]# cp docker/* /usr/bin
编写启动脚本
[root@localhost ~]# vim /usr/lib/systemd/system/docker.service
[Unit]
Description=Docker Application Container Engine
Documentation=https://docs.docker.com
After=network-online.target firewalld.service
Wants=network-online.target
[Service]
Type=notify
#the default is not to use systemd for cgroups because the delegate issues still
#exists and systemd currently does not support the cgroup feature set required
#for containers run by docker
ExecStart=/usr/bin/dockerd
ExecReload=/bin/kill -s HUP $MAINPID
#Having non-zero Limit*s causes performance problems due to accounting overhead
#in the kernel. We recommend using cgroups to do container-local accounting.
LimitNOFILE=infinity
LimitNPROC=infinity
LimitCORE=infinity
#Uncomment TasksMax if your systemd version supports it.
#Only systemd 226 and above support this version.
#TasksMax=infinity
TimeoutStartSec=0
#set delegate yes so that systemd does not reset the cgroups of docker containers
Delegate=yes
#kill only the docker process, not all processes in the cgroup
KillMode=process
#restart the docker process if it exits prematurely
Restart=on-failure
StartLimitBurst=3
StartLimitInterval=60s
[Install]
WantedBy=multi-user.target
2.jumpserver部署
启动docker
[root@localhost ~]# systemctl daemon-reload
[root@localhost ~]# systemctl start docker
mysql服务部署
导入镜像
[root@localhost ~] docker load -i mysql5.7.tar.gz
也可以直接下载
[root@localhost ~] docker pull mysql
mysqld.cnf 配置文件
将容器中的 MySQL 配置文件在宿主机通过-v 挂载到容器中
[root@localhost ~] mkdir -p /etc/mysql/mysql.conf.d
[root@localhost ~] vim /etc/mysql/mysql.conf.d/mysqld.cnf


#Copyright (c) 2014, 2016, Oracle and/or its affiliates. All rights reserved.
#
#This program is free software; you can redistribute it and/or modify
#it under the terms of the GNU General Public License as published by
#the Free Software Foundation; version 2 of the License.
#This program is distributed in the hope that it will be useful,
#but WITHOUT ANY WARRANTY; without even the implied warranty of
#MERCHANTABILITY or FITNESS FOR A PARTICULAR PURPOSE. See the
#GNU General Public License for more details.
#
#You should have received a copy of the GNU General Public License
#along with this program; if not, write to the Free Software
#Foundation, Inc., 51 Franklin St, Fifth Floor, Boston, MA 02110-1301 USA
#
#The MySQL Server configuration file.
#
#For explanations see
#http://dev.mysql.com/doc/mysql/en/server-system-variables.html
[mysqld]
pid-file = /var/run/mysqld/mysqld.pid
socket = /var/run/mysqld/mysqld.sock
datadir = /var/lib/mysql
#log-error = /var/log/mysql/error.log
#Disabling symbolic-links is recommended to prevent assorted security risks
symbolic-links=0
character-set-server=utf8
mysql.cnf 配置文件:
[root@localhost ~] mkdir -p /etc/mysql/conf.d/
[root@localhost ~] vim /etc/mysql/conf.d/mysql.cnf

[mysql]
default-character-set=utf8
[root@localhost ~] mkdir /data/mysql -p
运行 MySQL 容器:
[root@localhost ~] docker run -it -d -p 3306:3306 \
    -v /etc/mysql/mysql.conf.d/mysqld.cnf:/etc/mysql/mysql.conf.d/mysqld.cnf \
    -v /etc/mysql/conf.d/mysql.cnf:/etc/mysql/conf.d/mysql.cnf \
    -v /data/mysql:/var/lib/mysql \
    -e MYSQL_ROOT_PASSWORD="123" \
    mysql:5.7
**(mysql查看命令 docker images 输入自己对应的镜像版本号)**
[root@localhost ~] yum -y install mariadb-server
[root@localhost ~] mysql -uroot -p 123 -h 192.168.20.132(自己本身的Ip)
创建 jumpserver 数据库
mysql> create database jumpserver default charset 'utf8';
mysql> grant all on jumpserver.* to 'jumpserver'@'%' identified by 'abc123';
确认 jumpserver 用户有权限访问数据库
[root@localhost ~] mysql -ujumpserver -pabc123 -h192.168.20.132(主机ip)
部署 Redis 服务
下载镜像并安装
[root@localhost ~] docker pull redis:4.0.14(记得查看自己的镜像版本)
[root@localhost ~] docker run -it -d -p 6379:6379 redis:4.0.14
验证 Redis 访问
yum -y install wget gcc epel-release git(万能的安装源)
yum -y  install redis
redis-cli -h 192.168.20.132(本身ip)
部署 jumpserver
下载镜像
[root@localhost ~] docker pull jumpserver/jms_all:1.4.8
#或已经下载镜像后导入
[root@localhost ~] docker load -i jumpserver_jms_all.tar
生成随机加密秘钥和初始化 token。
[root@localhost ~] if [ "$SECRET_KEY" = "" ]; then \
    SECRET_KEY=`cat /dev/urandom | \
    tr -dc A-Za-z0-9 | \
    head -c 50`; \
    echo "SECRET_KEY=$SECRET_KEY" >> ~/.bashrc; \
    echo $SECRET_KEY; \
    else echo $SECRET_KEY; \
    fi
**cZPi5K3utSGiwpK786wbrdZl7UqP0KzfszPBF3NqoATelylqzJ**
[root@localhost ~] if [ "$BOOTSTRAP_TOKEN" = "" ]; then \
    BOOTSTRAP_TOKEN=`cat /dev/urandom | \
    tr -dc A-Za-z0-9 | \
    head -c 16`; \
    echo "BOOTSTRAP_TOKEN=$BOOTSTRAP_TOKEN" >> ~/.bashrc; \
    echo $BOOTSTRAP_TOKEN; \
    else echo $BOOTSTRAP_TOKEN; \
    fi
**yaOz6fQzY0R8vIta**
**
记住你的密钥和初始化token,真的很重要!!!
**
建 Jumpserver 容器
docker run --name jms_all \
    -v /opt/jumpserver:/opt/jumpserver/data/media \
    -p 80:80 \
    -p 2222:2222 \
    -e SECRET_KEY=cZPi5K3utSGiwpK786wbrdZl7UqP0KzfszPBF3NqoATelylqzJ \(**密钥,直接复制的话请去掉这些备注)**
    -e BOOTSTRAP_TOKEN=yaOz6fQzY0R8vIta \(**初始化token,直接复制的话请去掉这些备注)**
    -e DB_HOST=192.168.20.132 \(本身ip)
    -e DB_PORT=3306 \
    -e DB_USER='jumpserver' \
    -e DB_PASSWORD="abc123" \
    -e DB_NAME=jumpserver \
    -e REDIS_HOST=192.168.20.132 \(本身ip)
    -e REDIS_PORT=6379 \
    -e REDIS_PASSWORD= \
    jumpserver/jms_all:1.4.8**(记得去镜像里查看自己对应的版本!!!)**
容器启动完成
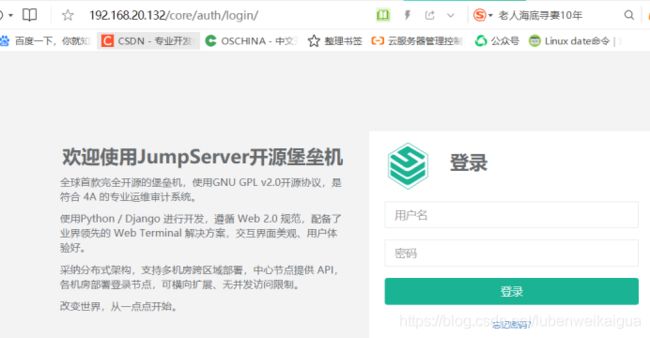
直接输入ip地址查看。
