VUE+Canvas 实现桌面弹球消砖块小游戏
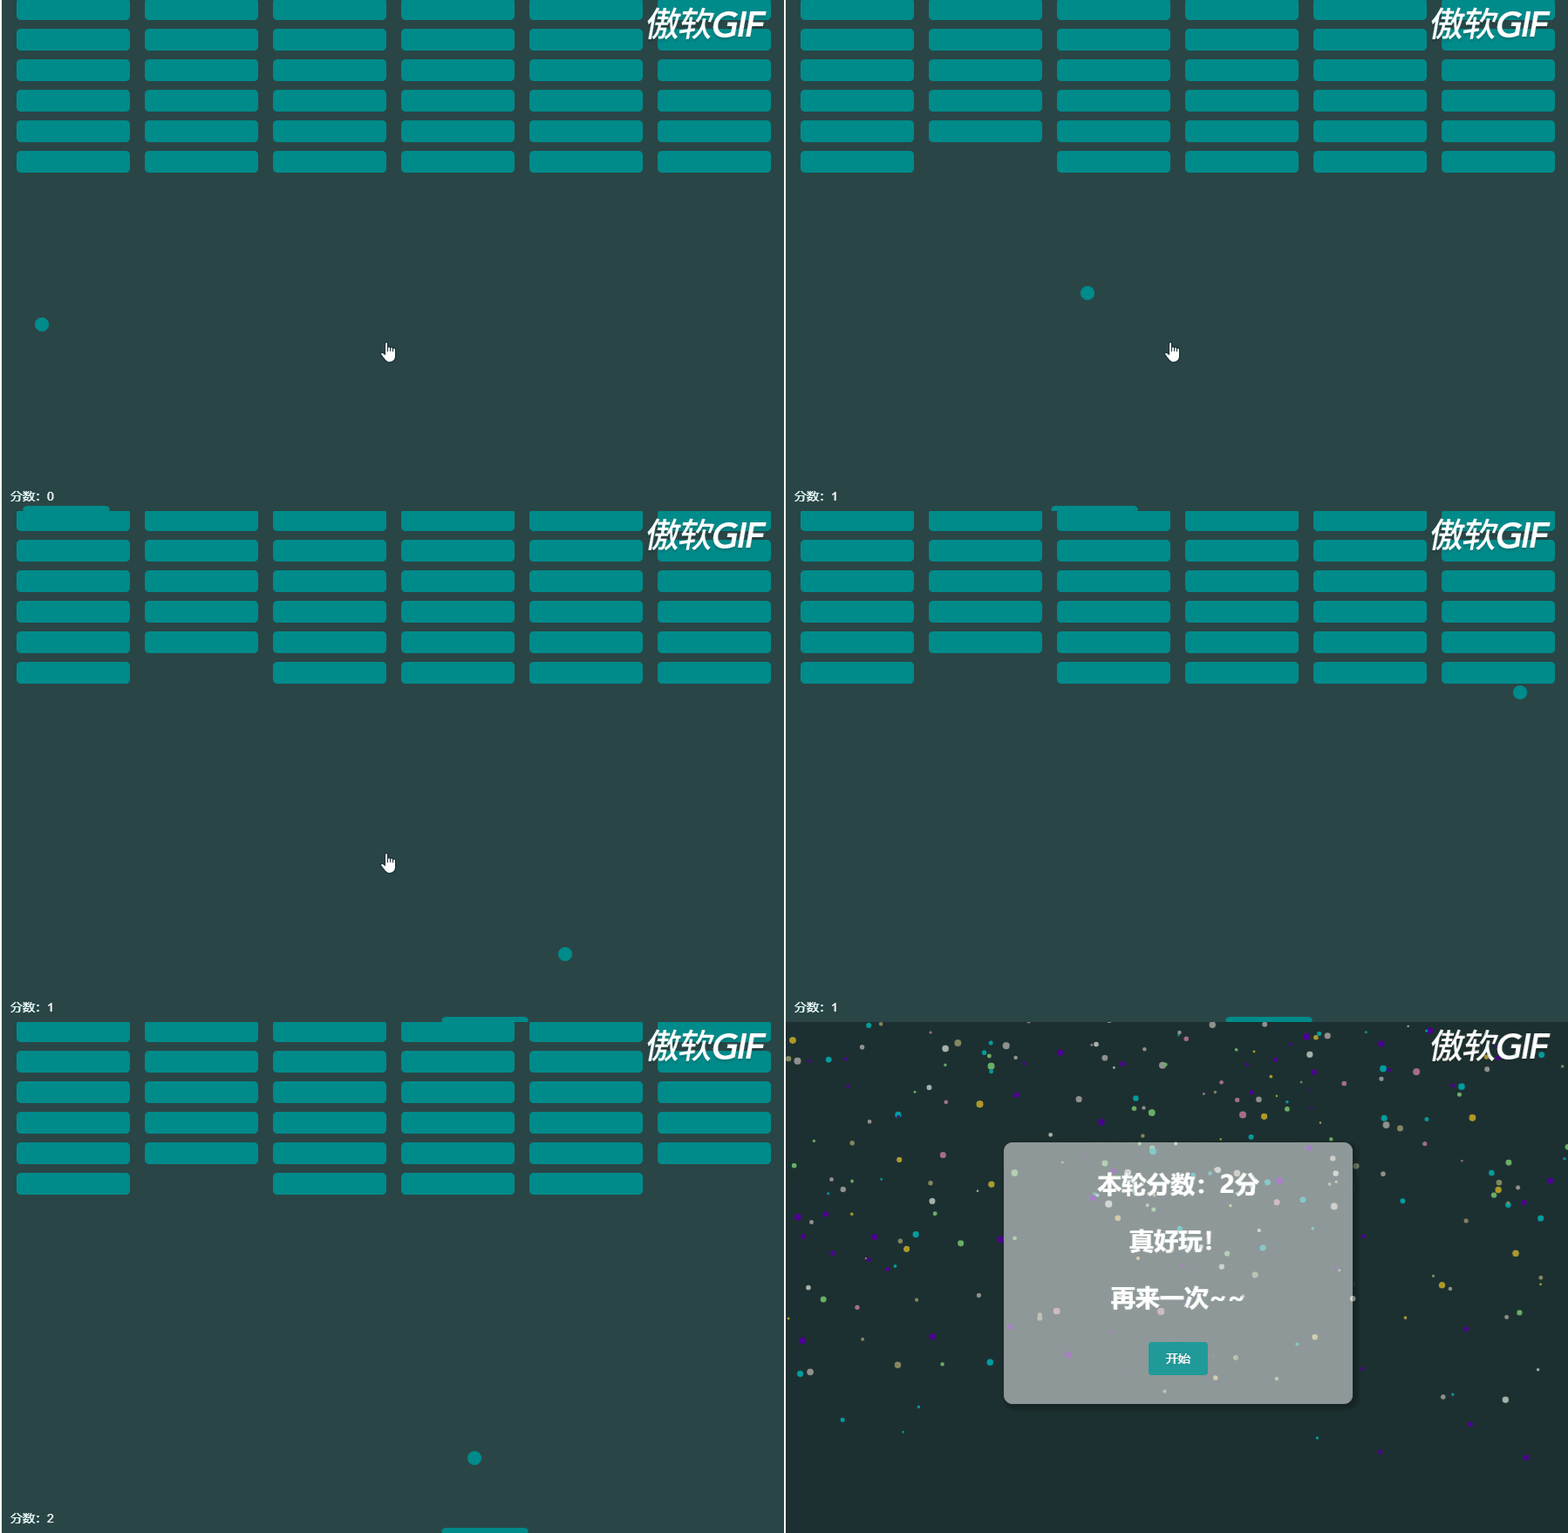
大家都玩过弹球消砖块游戏,左右键控制最底端的一个小木板平移,接住掉落的小球,将球弹起后消除画面上方的一堆砖块。
那么用VUE+Canvas如何来实现呢?实现思路很简单,首先来拆分一下要画在画布上的内容:
(1)用键盘左右按键控制平移的木板;
(2)在画布内四处弹跳的小球;
(3)固定在画面上方,并且被球碰撞后就消失的一堆砖块。
将上述三种对象,用requestAnimationFrame()函数平移运动起来,再结合各种碰撞检查,就可以得到最终的结果。
先看看最终的效果:
一、左右平移的木板
最底部的木板是最简单的一部分,因为木板的y坐标是固定的,我们设置木板的初始参数,包括其宽度,高度,平移速度等,然后实现画木板的函数:
pannel: {
        x: 0,
        y: 0,
        height: 8,
        width: 100,
        speed: 8,
        dx: 0
},

....

drawPannel() {
      this.drawRoundRect(
        this.pannel.x,
        this.pannel.y,
        this.pannel.width,
        this.pannel.height,
        5
      );
},
drawRoundRect(x, y, width, height, radius) { // 画圆角矩形
      this.ctx.beginPath();
      this.ctx.arc(x + radius, y + radius, radius, Math.PI, (Math.PI * 3) / 2);
      this.ctx.lineTo(width - radius + x, y);
      this.ctx.arc(
        width - radius + x,
        radius + y,
        radius,
        (Math.PI * 3) / 2,
        Math.PI * 2
      );
      this.ctx.lineTo(width + x, height + y - radius);
      this.ctx.arc(
        width - radius + x,
        height - radius + y,
        radius,
        0,
        (Math.PI * 1) / 2
      );
      this.ctx.lineTo(radius + x, height + y);
      this.ctx.arc(
        radius + x,
        height - radius + y,
        radius,
        (Math.PI * 1) / 2,
        Math.PI
      );
      this.ctx.fillStyle = "#008b8b";
      this.ctx.fill();
      this.ctx.closePath();
}
程序初始化的时候,监听键盘的左右方向键,来移动木板,通过长度判断是否移动到了左右边界使其不能继续移出画面:
document.onkeydown = function(e) {
      let key = window.event.keyCode;
      if (key === 37) {
        // 左键
        _this.pannel.dx = -_this.pannel.speed;
      } else if (key === 39) {
        // 右键
        _this.pannel.dx = _this.pannel.speed;
      }
};
document.onkeyup = function(e) {
      _this.pannel.dx = 0;
};
....

 movePannel() {
      this.pannel.x += this.pannel.dx;
      if (this.pannel.x > this.clientWidth - this.pannel.width) {
        this.pannel.x = this.clientWidth - this.pannel.width;
      } else if (this.pannel.x < 0) {
        this.pannel.x = 0;
      }
},
二、弹跳的小球和碰撞检测
小球的运动和木板类似,只是不仅有dx的偏移,还有dy的偏移。
而且还要有碰撞检测:
(1)当碰撞的是上、右、左墙壁以及木板上的时候则反弹;
(2)当碰撞到是木板以外的下边界的时候,则输掉游戏;
(3)当碰撞的是砖块的时候,被碰的砖块消失,分数+1,小球反弹。
于是和木板一样,将小球部分分为画小球函数drawBall()和小球运动函数moveBall():
drawBall() {
      this.ctx.beginPath();
      this.ctx.arc(this.ball.x, this.ball.y, this.ball.r, 0, 2 * Math.PI);
      this.ctx.fillStyle = "#008b8b";
      this.ctx.fill();
      this.ctx.closePath();
},
moveBall() {
      this.ball.x += this.ball.dx;
      this.ball.y += this.ball.dy;
      this.breaksHandle();
      this.edgeHandle();
},
breaksHandle() {
      // 触碰砖块检测
      this.breaks.forEach(item => {
        if (item.show) {
          if (
            this.ball.x + this.ball.r > item.x &&
            this.ball.x - this.ball.r < item.x + this.breaksConfig.width &&
            this.ball.y + this.ball.r > item.y &&
            this.ball.y - this.ball.r < item.y + this.breaksConfig.height
          ) {
            item.show = false;
            this.ball.dy *= -1;
            this.score ++ ;
            if(this.showBreaksCount === 0){
              this.gameOver = true;
            }
          }
        }
      });
},
edgeHandle() {
      // 边缘检测
      // 碰到顶部反弹
      if (this.ball.y - this.ball.r < 0) {
        this.ball.dy = -this.ball.dy;
      }
      if (
        // 碰到左右墙壁
        this.ball.x - this.ball.r < 0 ||
        this.ball.x + this.ball.r > this.clientWidth
      ) {
        this.ball.dx = -this.ball.dx;
      }
      if (
        this.ball.x >= this.pannel.x &&
        this.ball.x <= this.pannel.x + this.pannel.width &&
        this.ball.y + this.ball.r >= this.clientHeight - this.pannel.height
      ) {
        // 球的x在板子范围内并触碰到了板子
        this.ball.dy *= -1;
      } else if (
        (this.ball.x < this.pannel.x ||
          this.ball.x > this.pannel.x + this.pannel.width) &&
        this.ball.y + this.ball.r >= this.clientHeight
      ) {
        // 球碰到了底边缘了
        this.gameOver = true;
        this.getCurshBreaks();
      }
}
三、砖块的生成
砖块的生成也比较简单,这里我们初始了一些数据:
breaksConfig: {
        row: 6, // 排数
        height: 25, // 砖块高度
        width: 130, // 砖块宽度
        radius: 5, // 矩形圆角
        space: 0, // 间距
        colunm: 6 // 列数
}
根据这些配置项以及画布宽度,我们可以计算出每个砖块的横向间隙是多少:
// 计算得出砖块缝隙宽度
      this.breaksConfig.space = Math.floor(
        (this.clientWidth -
          this.breaksConfig.width * this.breaksConfig.colunm) /
          (this.breaksConfig.colunm + 1)
      );
于是我们可以得到每个砖块在画布中的x,y坐标(指的砖块左上角的坐标)
for (let i = 0; i < _this.breaksConfig.row; i++) {
        for (let j = 0; j < _this.breaksConfig.colunm; j++) {
          _this.breaks.push({
            x: this.breaksConfig.space * (j + 1) + this.breaksConfig.width * j,
            y: 10 * (i + 1) + this.breaksConfig.height * i,
            show: true
          });
        }
      }
再加上绘制砖块的函数:
drawBreaks() {
      let _this = this;
      _this.breaks.forEach(item => {
        if (item.show) {
          _this.drawRoundRect(
            item.x,
            item.y,
            _this.breaksConfig.width,
            _this.breaksConfig.height,
            _this.breaksConfig.radius
          );
        }
      });
}
四、让上面三个部分动起来
(function animloop() {
      if (!_this.gameOver) {
        _this.movePannel();
        _this.moveBall();
        _this.drawAll();
      } else {
        _this.drawCrushBreaks();
      }
      window.requestAnimationFrame(animloop);
})();
....
 drawAll() {
      this.ctx.clearRect(0, 0, this.clientWidth, this.clientHeight);
      this.drawPannel();
      this.drawBall();
      this.drawScore();
      this.drawBreaks();
}
五、游戏结束后的效果
在最开始的动图里可以看到,游戏结束后,砖块粉碎成了若干的小球掉落,这个其实和画单独的小球类似,思路就是把剩余的砖块中心坐标处生产若干大小不等,运动轨迹不等,颜色不等的小球,然后继续动画。
getCurshBreaks() {
      let _this = this;
      this.breaks.forEach(item => {
        if (item.show) {
          item.show = false;
          for (let i = 0; i < 8; i++) { // 每个砖块粉碎为8个小球
            this.crushBalls.push({
              x: item.x + this.breaksConfig.width / 2,
              y: item.y + this.breaksConfig.height / 2,
              dx: _this.getRandomArbitrary(-6, 6),
              dy: _this.getRandomArbitrary(-6, 6),
              r: _this.getRandomArbitrary(1, 4),
              color: _this.getRandomColor()
            });
          }
        }
      });
},
drawCrushBreaks() {
      this.ctx.clearRect(0, 0, this.clientWidth, this.clientHeight);
      this.crushBalls.forEach(item => {
        this.ctx.beginPath();
        this.ctx.arc(item.x, item.y, item.r, 0, 2 * Math.PI);
        this.ctx.fillStyle = item.color;
        this.ctx.fill();
        this.ctx.closePath();
        item.x += item.dx;
        item.y += item.dy;
        if (
          // 碰到左右墙壁
          item.x - item.r < 0 ||
          item.x + item.r > this.clientWidth
        ) {
          item.dx = -item.dx;
        }
        if (
          // 碰到上下墙壁
          item.y - item.r < 0 ||
          item.y + item.r > this.clientHeight
        ) {
          item.dy = -item.dy;
        }
      });
},
以上就是桌面弹球消砖块小游戏的实现思路和部分代码,实现起来很简单,两三百行代码就可以实现这个小游戏。在小球的运动上可以进行持续优化,并且也可以增加难度选项操作。
最后附上全部的vue文件代码,供大家参考学习:
本轮分数:{
{score}}分
真好玩!
再来一次~~
开始
