道虽迩,不行不至;事虽小,不为不成。
相关阅读
1.iOS-UI控件精讲之UIView(本文)
2.iOS-UI控件精讲之UILabel
...待续
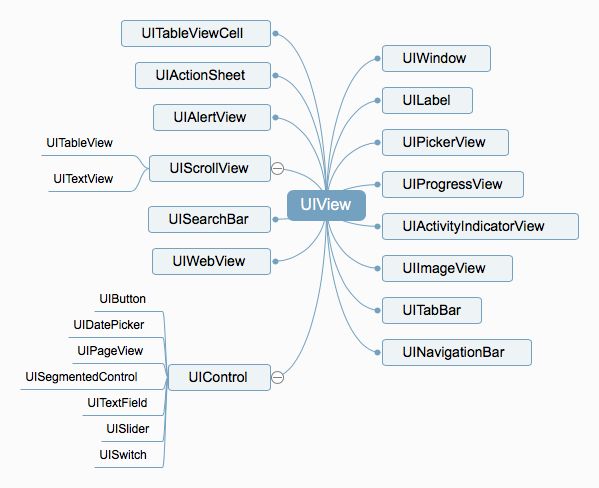
UIView是所有UI控件的基类,在布局的时候通常会使用UIView作为容器对控件进行分组。
1.首先看一下所有的UI控件的继承关系
UIView中的属性和方法定义了所有的UI控件的公共行为,UIView中所有的public属性,你在它的所有的子控件中都可以使用的。
2.UIView中常见的属性和方法
2.1几何相关
//这几个属性都支持隐式动画的
@property(nonatomic) CGRect            frame;//view的相对于父控件的位置(x,y)和大小(width,height)
@property(nonatomic) CGRect            bounds; //view的相对于自身的位置(x,y)和大小(width,height)    (x,y)一般为(0,0)
@property(nonatomic) CGPoint           center;//view的中心点相对于父控件的位置
@property(nonatomic) CGAffineTransform transform; //view的形变属性
//添加一个view并设置红色背景色
UIView *view = [[UIView alloc] init];
view.backgroundColor = [UIColor redColor];
view.frame = CGRectMake(150, 300, 100, 100);
//设置旋转45度的形变属性
view.transform = CGAffineTransformRotate(view.transform, M_PI_4);
[self.view addSubview:view];
2.2视图从属关系
@property(nullable, nonatomic,readonly) UIView       *superview;//所属父类
@property(nonatomic,readonly,copy) NSArray<__kindof UIView *>*subviews;//所有的子类
@property(nullable, nonatomic,readonly) UIWindow     *window;//所属的window

- (void)removeFromSuperview;//从父类中移除
- (void)addSubview:(UIView *)view;//添加子类
- (nullable __kindof UIView *)viewWithTag:(NSInteger)tag;//通过tag搜索子view
2.3其他
@property(nonatomic)                                 NSInteger tag;//设置tag,主要是为了跟别的view进行区分
@property(nonatomic,getter=isUserInteractionEnabled) BOOL userInteractionEnabled;//是否允许交互

@property(nonatomic,readonly,strong)                 CALayer  *layer;//view的图层,view显示的内容layer属性决定的。
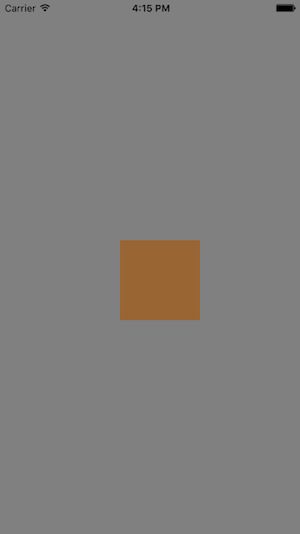
下面看这个layer的例子
UIView *view = [[UIView alloc] init];
//这里我已经设置了backgroundColor为redColor
view.backgroundColor = [UIColor redColor];
//在这里我又设置了layer的backgroundColor为brownColor
view.layer.backgroundColor = [UIColor brownColor].CGColor;

view.frame = CGRectMake(150, 300, 100, 100);
[self.view addSubview:view];
关于layer的应用还有两个比较常见的
//1.圆角
view.layer.cornerRadius = 10;//后面的这个值越大就越圆,等宽高的view的宽度的一半就是一个圆形
设置圆角
设置边框
view.layer.cornerRadius = view.bounds.size.width / 2;
//设置边框的宽度
view.layer.borderWidth = 3;
//设置边框的颜色
view.layer.borderColor = [UIColor blueColor].CGColor;
圆形带蓝色边框
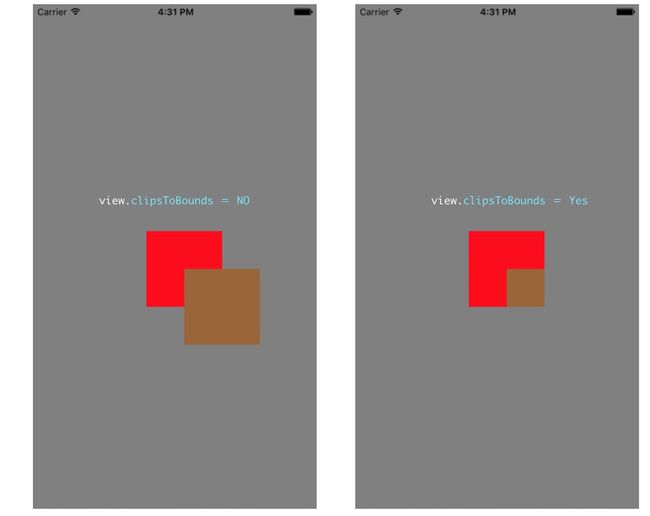
clipsToBounds属性
@property(nonatomic) BOOL clipsToBounds;//超出边框是否剪切
我们先看看超出边框的情况
//红色view
UIView *view = [[UIView alloc] init];
view.backgroundColor = [UIColor redColor];
view.frame = CGRectMake(150, 300, 100, 100);
[self.view addSubview:view];
//往红色的view上面添加棕色view
UIView *v = [[UIView alloc] init];
v.backgroundColor = [UIColor brownColor];
v.frame = CGRectMake(50, 50, 100, 100);
[view addSubview:v];
//设置超出边框裁剪为Yes
view.clipsToBounds = YES;
本文适合iOS开发初学者阅读,大牛们请一笑而过,如果有错误请联系我 。
如果您喜欢这篇文章,请关注我,喜欢或者打赏!您的支持十分重要!


