fer2013人脸表情识别
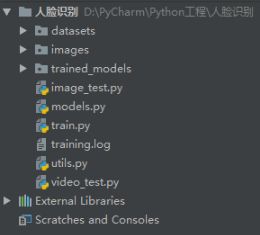
工程目录
一、下载数据集
下载地址:https://www.kaggle.com/c/challenges-in-representation-learning-facial-expression-recognition-challenge/data
解析CSV并保存为图片(之后的模型训练无需这一步,仅为数据集的直观感受):
import pandas as pd
import numpy as np
import scipy.misc as sm
import os

emotions = {
    '0':'anger', #生气
    '1':'disgust', #厌恶
    '2':'fear', #恐惧
    '3':'happy', #开心
    '4':'sad', #伤心
    '5':'surprised', #惊讶
    '6':'normal', #中性
}

#创建文件夹
def createDir(dir):
    if os.path.exists(dir) is False:
        os.makedirs(dir)

def saveImageFromFer2013(file):


    #读取csv文件
    faces_data = pd.read_csv(file)
    imageCount = 0
    #遍历csv文件内容,并将图片数据按分类保存
    for index in range(len(faces_data)):
        #解析每一行csv文件内容
        emotion_data = faces_data.loc[index][0]
        image_data = faces_data.loc[index][1]
        usage_data = faces_data.loc[index][2]
        #将图片数据转换成48*48
        data_array = list(map(float, image_data.split()))
        data_array = np.asarray(data_array)
        image = data_array.reshape(48, 48)

        #选择分类,并创建文件名
        dirName = usage_data
        emotionName = emotions[str(emotion_data)]

        #图片要保存的文件夹
        imagePath = os.path.join(dirName, emotionName)

        # 创建“用途文件夹”和“表情”文件夹
        createDir(dirName)
        createDir(imagePath)

        #图片文件名
        imageName = os.path.join(imagePath, str(index) + '.jpg')

        sm.toimage(image).save(imageName)
        imageCount = index
    print('总共有' + str(imageCount) + '张图片')


if __name__ == '__main__':
    saveImageFromFer2013('fer2013.csv')
二、加载数据集
utils.py
import matplotlib.pyplot as plt
import cv2
import numpy as np
import pandas as pd


from keras.preprocessing import image


# def load_image(image_path, grayscale=False, target_size=None):
#     pil_image = image.load_img(image_path, grayscale, target_size)
#     return image.img_to_array(pil_image)
def load_image(image_path, grayscale=False, target_size=None):
    color_mode = 'grayscale'
    if grayscale == False:
        color_mode = 'rgb'
    else:
        grayscale = False
    pil_image = image.load_img(image_path, grayscale, color_mode, target_size)
    return image.img_to_array(pil_image)


def detect_faces(detection_model, gray_image_array):
    return detection_model.detectMultiScale(gray_image_array, 1.3, 5)


def draw_bounding_box(face_coordinates, image_array, color):
    x, y, w, h = face_coordinates
    cv2.rectangle(image_array, (x, y), (x + w, y + h), color, 2)


def get_coordinates(face_coordinates):
    x, y, width, height = face_coordinates
    return (x, x + width, y, y + height)


def draw_text(coordinates, image_array, text, color, x_offset=0, y_offset=0,
                                                font_scale=2, thickness=2):
    x, y = coordinates[:2]
    cv2.putText(image_array, text, (x + x_offset, y + y_offset),
                cv2.FONT_HERSHEY_SIMPLEX,
                font_scale, color, thickness, cv2.LINE_AA)


def load_data(data_file):
    """ loads fer2013.csv dataset
    # Arguments: data_file fer2013.csv
    # Returns: faces and emotions
            faces: shape (35887,48,48,1)
            emotions: are one-hot-encoded
    """
    data = pd.read_csv(data_file)
    pixels = data['pixels'].tolist()
    width, height = 48,48
    faces = []
    for pixel_sequence in pixels:
        face = [int(pixel) for pixel in pixel_sequence.split(' ')]
        face = np.asarray(face).reshape(width,height)
        faces.append(face)
    faces = np.asarray(faces)
    print(faces.shape)
    # faces = preprocess_input(faces)
    faces = np.expand_dims(faces,-1)
    df = pd.get_dummies(data['emotion'])
    emotions = df.as_matrix()
    return faces, emotions


def preprocess_input(images):
    """ preprocess input by substracting the train mean
    # Arguments: images or image of any shape
    # Returns: images or image with substracted train mean (129)
    """
    images = images/255.0
    return images
三、模型搭建
models.py
from keras.layers import Activation, Convolution2D, Dropout, Dense, Flatten
from keras.layers.advanced_activations import PReLU
from keras.layers import AveragePooling2D, BatchNormalization
from keras.models import Sequential


def simple_CNN(input_shape, num_classes):

    model = Sequential()

    model.add(Convolution2D(16, 7, 7, border_mode='same',
                            input_shape=input_shape))
    model.add(PReLU())
    model.add(BatchNormalization())
    model.add(AveragePooling2D(pool_size=(5, 5),strides=(2, 2), border_mode='same'))
    model.add(Dropout(.5))

    model.add(Convolution2D(32, 5, 5, border_mode='same'))
    model.add(PReLU())
    model.add(BatchNormalization())
    model.add(AveragePooling2D(pool_size=(3, 3),strides=(2, 2), border_mode='same'))
    model.add(Dropout(.5))

    model.add(Convolution2D(32, 3, 3, border_mode='same'))
    model.add(PReLU())
    model.add(BatchNormalization())
    model.add(AveragePooling2D(pool_size=(3, 3),strides=(2, 2), border_mode='same'))
    model.add(Dropout(.5))

    model.add(Flatten())
    model.add(Dense(1028))
    model.add(PReLU())
    model.add(Dropout(0.5))
    model.add(Dense(1028))
    model.add(PReLU())
    model.add(Dropout(0.5))
    model.add(Dense(num_classes))
    model.add(Activation('softmax'))

    return model


if __name__ == "__main__":
    input_shape = (64, 64, 1)
    num_classes = 7

    model = simple_CNN((48, 48, 1), num_classes)
    model.summary()
四、模型训练
train.py
import os

from keras.callbacks import EarlyStopping, ModelCheckpoint, CSVLogger
from keras.optimizers import SGD
from models import simple_CNN
from utils import load_data, preprocess_input
import keras.backend as K
import tensorflow as tf

init = tf.global_variables_initializer()

config = tf.ConfigProto()
config.gpu_options.allow_growth = True
session = tf.Session(config=config)

session.run(init)

data_path = 'datasets/fer2013/fer2013.csv'
model_save_path = 'trained_models/simpler_CNN.{epoch:02d}-{val_accuracy:.2f}.hdf5'

# 加载人脸表情训练数据和对应表情标签
faces, emotions = load_data(data_path)

# 人脸数据归一化,将像素值从0-255映射到0-1之间
faces = preprocess_input(faces)
# 得到表情分类个数
num_classes = emotions.shape[1]

# (48, 48, 1)
image_size = faces.shape[1:]


batch_size = 128
num_epochs = 1000

model = simple_CNN(image_size, num_classes)

# 断点续训
if os.path.exists(model_save_path):
    model.load_weights(model_save_path)
    # 若成功加载前面保存的参数,输出下列信息
    print("checkpoint_loaded")

# 编译模型,categorical_crossentropy多分类选用
model.compile(optimizer='adam', loss='categorical_crossentropy', metrics=['accuracy'])

# 记录日志
csv_logger = CSVLogger('training.log')

# 保存检查点
model_checkpoint = ModelCheckpoint(model_save_path,
                                   monitor='val_acc',
                                   verbose=1,
                                   save_best_only=False)

model_callbacks = [model_checkpoint, csv_logger]

# 训练模型
model.fit(faces, emotions, batch_size, num_epochs,
          verbose=1,
          callbacks=model_callbacks,
          validation_split=.1,
          shuffle=True)
五、图片识别
image_test.py
import cv2
import tensorflow as tf
from keras.models import load_model
import numpy as np
from utils import preprocess_input, load_image, get_coordinates, detect_faces, draw_bounding_box, draw_text

init = tf.global_variables_initializer()

config = tf.ConfigProto()
config.gpu_options.allow_growth = True
session = tf.Session(config=config)

session.run(init)

# parameters for loading data and images
image_path = 'images/r4.jpg'
detection_model_path = 'trained_models/detection_models/haarcascade_frontalface_default.xml'
# emotion_model_path = 'trained_models/emotion_models/simple_CNN.985-0.66.hdf5'
emotion_model_path = 'trained_models/emotion_models/simpler_CNN.960-0.65.hdf5'
# gender_model_path = 'trained_models/gender_models/simple_CNN.81-0.96.hdf5'

emotion_labels = {0: 'angry', 1: 'disgust', 2: 'sad', 3: 'happy', 4: 'sad', 5: 'surprise', 6: 'neutral'}

# 加载人脸识别模型
face_detection = cv2.CascadeClassifier(detection_model_path)
# 加载表情识别模型
emotion_classifier = load_model(emotion_model_path, compile=False)

# 获得模型输入图形宽高尺寸大小
emotion_target_size = emotion_classifier.input_shape[1:3]

# 加载原始图像
rgb_image = load_image(image_path, grayscale=False)
# 加载灰度图像
gray_image = load_image(image_path, grayscale=True)

# 去掉维度为1的维度(只留下宽高,去掉灰度维度)
gray_image = np.squeeze(gray_image)
gray_image = gray_image.astype('uint8')

# 检测出图像中的全部人脸
faces = detect_faces(face_detection, gray_image)

# 对于图像中的每一个人脸
for face_coordinates in faces:
    # 获取人脸在图像中的矩形区域坐标
    x1, x2, y1, y2 = get_coordinates(face_coordinates)
    # 截取人脸图像像素数组
    gray_face = gray_image[y1:y2, x1:x2]

    try:
        # 将人脸reshape成模型需要的尺寸
        gray_face = cv2.resize(gray_face, (emotion_target_size))
    except:
        continue

    # 将人脸数据归一化(像素值归一化到0-1之间)
    gray_face = preprocess_input(gray_face)
    # 扩充第一个维度
    gray_face = np.expand_dims(gray_face, 0)
    # 扩充最后一个维度
    # shape(1,48,48,1)---shape(图片数量,高,宽,通道数),输入1张1通道48 * 48的图像数据
    gray_face = np.expand_dims(gray_face, -1)

    # 通过我们训练的模型预测表情
    emotion_label_arg = np.argmax(emotion_classifier.predict(gray_face))
    emotion_text = emotion_labels[emotion_label_arg]

    color = (0, 0, 255)
    # 画边框
    draw_bounding_box(face_coordinates, rgb_image, color)
    # 画表情说明
    draw_text(face_coordinates, rgb_image, emotion_text, color, 0, face_coordinates[3]+30, 1, 2)


# 将图像转换为BGR模式显示
bgr_image = cv2.cvtColor(rgb_image, cv2.COLOR_RGB2BGR)
cv2.imwrite('images/predicted_image4.png', bgr_image)

# cv2.imshow("img_covert", bgr_image)
# cv2.waitKey()
六、视频识别
video_test.py
import cv2
from keras.models import load_model
import numpy as np
from statistics import mode
from utils import preprocess_input


detection_model_path = 'trained_models/detection_models/haarcascade_frontalface_default.xml'
classification_model_path = 'trained_models/simpler_CNN.985-0.64.hdf5'

frame_window = 10

emotion_labels = {0: 'angry', 1: 'disgust', 2: 'sad', 3: 'happy', 4: 'sad', 5: 'surprise', 6: 'neutral'}

# 加载人脸检测模型
face_detection = cv2.CascadeClassifier(detection_model_path)

# 加载表情识别
emotion_classifier = load_model(classification_model_path)

emotion_window = []
# 调起摄像头
video_capture = cv2.VideoCapture(0)
font = cv2.FONT_HERSHEY_SIMPLEX
cv2.startWindowThread()
cv2.namedWindow('window_frame')

while True:
    # 读取一帧
    _, frame = video_capture.read()
    # 获得灰度图,并且在内存中创建一个图像对象
    gray = cv2.cvtColor(frame, cv2.COLOR_BGR2GRAY)
    # 获取当前帧中的全部人脸
    faces = face_detection.detectMultiScale(gray,1.3,5)
    # 对于所有发现的人脸
    for (x, y, w, h) in faces:
        # 在脸周围画一个矩形框,(255,0,0)是颜色,2是线宽
        cv2.rectangle(gray,(x,y),(x+w,y+h),(255,0,0),2)

        # 获取人脸图像
        face = gray[y:y+h,x:x+w]

        try:
            # shape变为(48,48)
            face = cv2.resize(face,(48,48))
        except:
            continue

        # 扩充维度,shape变为(1,48,48,1)
        face = np.expand_dims(face,0)
        face = np.expand_dims(face,-1)
        # 人脸数据归一化,将像素值从0-255映射到0-1之间
        face = preprocess_input(face)

        # 调用我们训练好的表情识别模型,预测分类
        emotion_arg = np.argmax(emotion_classifier.predict(face))
        emotion = emotion_labels[emotion_arg]

        emotion_window.append(emotion)

        if len(emotion_window) >= frame_window:
            emotion_window.pop(0)

        try:
            # 获得出现次数最多的分类
            emotion_mode = mode(emotion_window)
        except:
            continue

        # 在矩形框上部,输出分类文字
        cv2.putText(gray,emotion_mode,(x,y-30), font, .7,(255,0,0),1,cv2.LINE_AA)

    try:
        # 将图片从内存中显示到屏幕上
        cv2.imshow('window_frame', gray)
    except:
        continue

    if cv2.waitKey(1) & 0xFF == ord('q'):
        break


video_capture.release()
cv2.destroyAllWindows()