1 建立基本SpringMVC工程
1.1 建立SpringMVC Maven工程
web.xml
    spring
    org.springframework.web.servlet.DispatcherServlet

        Servlet Context
        contextConfigLocation
        classpath:spring-config/applicationContext.xml

    1


    spring

    /
1.2 创建一个TestController
package com.study.swagger.control;

@Controller
@RequestMapping("/test")
public class TestController {

    @RequestMapping(value="/hello", method=RequestMethod.GET)
    @ResponseBody
    public String sayHello(String name){
        return "hello " + name;
    }
}
1.3 配置spring bean
applicatonContext.xml
确保该Controller能够正常访问:
2 引入Swagger2
2.1 引入Swagger2依赖
    io.springfox
    springfox-swagger2
    2.7.0


    com.fasterxml.jackson.core
    jackson-databind
    2.8.7
2.2 新增Swagger配置类
package com.study.swagger.config;

@Configuration
@EnableSwagger2
public class SwaggerConfig {

    @Bean
    public Docket swaggerSpringMvcPlugin() {
        return new Docket(DocumentationType.SWAGGER_2)
                .select()
                .apis(RequestHandlerSelectors.any())
                .build()
                .apiInfo(apiInfo());
    }

    private ApiInfo apiInfo() {
        return new ApiInfoBuilder()
                .title("Impler Apis")
                .description("Impler Apis details")
                .license("copyright©impler.cn")
                .version("1.0")
                .build();
    }
}
2.3 配置swagger bean
2.4 添加@ApiOperation注解
在Controller Bean中的@RequestMapping标识的方法上添加@ApiOperation注解。
package com.study.swagger.control;

@Controller
@RequestMapping("/test")
public class TestController {

    @ApiOperation(value = "sayHello")
    @RequestMapping(value="/hello", method=RequestMethod.GET)
    @ResponseBody
    public String sayHello(String name){
        return "hello " + name;
    }
}
2.5 部署启动
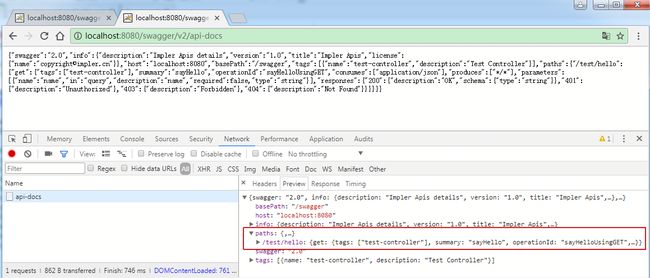
访问http://localhost:8080/swagger/v2/api-docs:
返回的JSON信息中,paths对应Controller中RequestMapping配置的路径
3 引入Swagger UI
上面的配置保证了Swagger后台运作正常。Swagger UI实际就是一套完整的操作页面。可以到https://github.com/swagger-api/swagger-ui将这些静态文件下载下来,然后放到webapp根目录。但是这样显然会增加项目结构复杂度。这里采用另外一种方式,即以依赖jar包的方式引入这些静态文件。
3.1 引入Swagger UI依赖
    io.springfox
    springfox-swagger-ui
    2.7.0
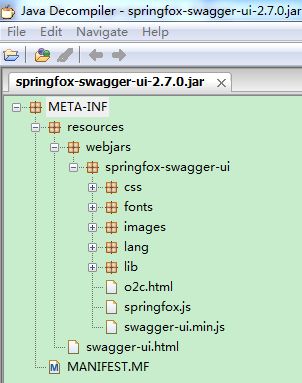
该jar包的结构如下:
这种方式的好处就是不会对现有项目结构造成污染,配置方便。
3.2 部署启动
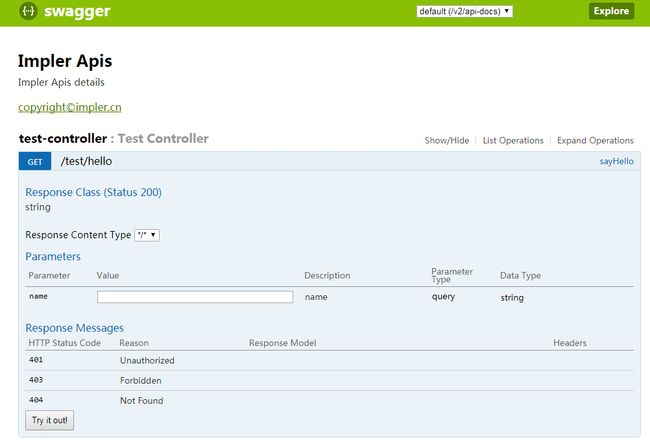
直接访问Swagger UI的首页:http://localhost:8080/swagger/swagger-ui.html。
点开某个接口连接,输入入参信息,点击Try it Out!按钮即可。
完整示例:https://github.com/Impler/SwaggerIntegration/tree/master/swagger-suffix
4 包含后缀的URL配置
上述配置的Spring DispatcherServlet拦截所有请求,包括静态资源,即url-pattern为/。但是现实中有很多将DispatcherServlet专门用来处理.do、.action等后缀结尾的请求,即。url-pattern为.do、.action。对静态资源的请求则交由default servlet来处理。
web.xml
    spring
    *.do
经过观察网络请求发现,Swagger UI在页面加载时会发送如下4个请求:
- /swagger-resources/configuration/ui:swagger配置信息
- /swagger-resources:swagger资源路径,默认default
- /swagger-resources/configuration/security:swagger安全性信息
- /v2/api-docs:项目内的接口信息(重要)
这些请求url均在swagger-ui的jar包内的静态文件中定义,我们一般不去修改。但是swagger的这些请求又需要DispatcherServlet来分发处理,所以需要为这些url配置额外的url-pattern。
    spring
    *.do

    /v2/api-docs
    /swagger-resources
    /swagger-resources/configuration/security
    /swagger-resources/configuration/ui
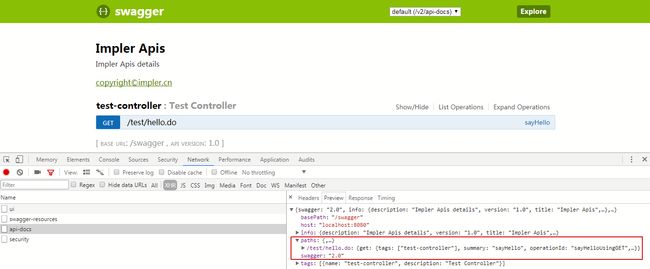
/v2/api-docs请求响应返回的json串的path属性中包含项目内接口的所有url信息,其实现是在springfox.documentation.swagger2.mappers.ServiceModelToSwagger2MapperImpl Bean中,通过扫描所有Controller类中@RequestMapping注解来获取的。所以这里借助Spring强大的AOP功能,在swagger返回后台接口信息前拦截,然后在所有的接口url中拼接指定的请求后缀。
package com.study.swagger.config;

/**
 * 将接口url中追加模式后缀.do
 * @author impler
 * @date 2017年9月30日
 */
@Aspect
@EnableAspectJAutoProxy
@Component
public class SwaggerApiSuffixAspect {

    @AfterReturning(pointcut="execution(public io.swagger.models.Swagger springfox.documentation.swagger2.mappers.ServiceModelToSwagger2MapperImpl.mapDocumentation(..))",
            returning="swagger")
    public void doBeforeBussinessCheck(Swagger swagger){
        Map paths = swagger.getPaths();
        if(null != paths){
            Map newPaths = new HashMap(paths);
            paths.clear();
            Iterator it = newPaths.keySet().iterator();
            while(it.hasNext()){
                String oldKey = it.next();
                // 添加模式后缀 .do
                String newKey = oldKey  + ".do";
                paths.put(newKey, newPaths.get(oldKey));
            }
            newPaths = null;
        }
    }
}
完整示例:https://github.com/Impler/SwaggerIntegration/tree/master/swagger-suffix


