Google Colab实现YOLOv3训练自己的数据集(详细步骤)
1 成功运行界面
2 详细步骤
1 连接上谷歌云盘并把路径指定到谷歌云盘(需要先连接上谷歌云盘)
cd /content/drive/My Drive
2 通过git下载yolov3的pytorch框架
git clone https://github.com/ultralytics/yolov3
3 转到yolov3目录下,安装适合的环境,并查看目录下的文件
cd yolov3
pip install -U -r requirements.txt
ls
4 在yolov3/data目录下新建4个文件夹(初始应该只有一个samples文件夹)
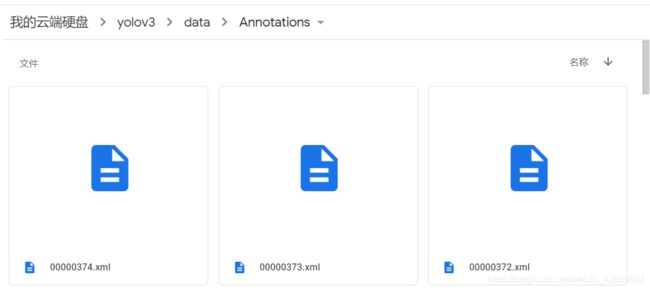
Annotations
images
ImageSets
labels
6 把xml文件上传到Annotations文件夹(是用labelImg软件标注)
注意:
如果有Anaconda软件,下载软件的话,直接打开命令行输入:pip install labelImg
安装完成后,打开软件的话,命令行输入:labelImg
7 在yolov3/data目录下新建2个文件
rbc.data
rbc.names

rbc.data内容(classes数值要改,我是2个类别的训练)
classes=2
train=data/train.txt
valid=data/val.txt
names=data/rbc.names
backup=backup/
eval=coco
rbc.names内容(根据labelImg标注软件的标注的内容改,我第一类标号1,第二类标号2)
1
2
8 执行makeTxt.py文件(这个文件无需改动)
!python3 makeTxt.py
点击-------获取makeTxt.py文件的超链接地址
9 执行voc_label.py文件(文件需要改动)
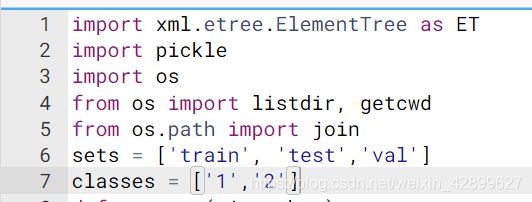
注意:这里的第6行的sets要改成图中样子(貌似不用改),第7行的classes根据labelImg标注的类别更改
!python3 voc_label.py
点击-------获取voc_label.py文件的超链接地址
10 修改 yolo3-spp.cfg 文件(在yolov3/cfg目录下)
注意:
只改yolo层和yolo层前一层的convolutional层!!!!!
yolo层更改classes参数,convolutional层更改filters参数
文件里面yolo有3处,对应的convolutional层也有3处,一共要改6处地方
classes参数根据类别的数目更改,这里classes=2
filters根据3 x(classes+4+1)=21
举一个栗子
[convolutional]
size=1
stride=1
pad=1
filters=21 #该这里
activation=linear

[yolo]
mask = 0,1,2
anchors = 10,13,  16,30,  33,23,  30,61,  62,45,  59,119,  116,90,  156,198,  373,326
classes=2  #改这里
num=9
jitter=.3
ignore_thresh = .7
truth_thresh = 1
random=1
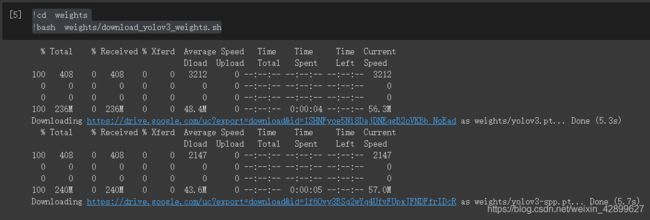
11 下载权重
!cd weights
!bash weights/download_yolov3_weights.sh
#下载权重需要调用yolo目录下的model.py文件
#如果报错:none find module models 把路径转回yolo目录下 cd /content/drive/My Drive/yolov3
12 开始训练
!python3 train.py --data data/rbc.data --cfg cfg/yolov3-spp.cfg --weights weights/yolov3-spp-ultralytics.pt
注意:
这里GPU是随机分配,可能会出现out of memory的情况,那就断开再连接,切换一下GPU,可能会分配更大内存的GPU
一般的做法是调整 batch-size ,使它更小:(原代码默认为 64 )
!python3 train.py --data data/rbc.data --cfg cfg/yolov3-spp.cfg --weights weights/yolov3-spp-ultralytics.pt --batch-size 8
运行结果
Apex recommended for faster mixed precision training: https://github.com/NVIDIA/apex
Namespace(adam=False, batch_size=16, bucket='', cache_images=False, cfg='cfg/yolov3-spp.cfg', data='data/rbc.data', device='', epochs=300, evolve=False, freeze_layers=False, img_size=[320, 640], multi_scale=False, name='', nosave=False, notest=False, rect=False, resume=False, single_cls=False, weights='weights/yolov3-spp-ultralytics.pt')
Using CUDA device0 _CudaDeviceProperties(name='Tesla P100-PCIE-16GB', total_memory=16280MB)

Start Tensorboard with "tensorboard --logdir=runs", view at http://localhost:6006/
2020-10-06 05:20:13.854485: I tensorflow/stream_executor/platform/default/dso_loader.cc:48] Successfully opened dynamic library libcudart.so.10.1
Model Summary: 225 layers, 6.25787e+07 parameters, 6.25787e+07 gradients
Optimizer groups: 76 .bias, 76 Conv2d.weight, 73 other
Caching labels data/train.txt (332 found, 0 missing, 0 empty, 0 duplicate, for 332 images): 100% 332/332 [04:12<00:00,  1.31it/s]
Caching labels data/val.txt (4 found, 0 missing, 0 empty, 0 duplicate, for 4 images): 100% 4/4 [00:02<00:00,  1.38it/s]
Image sizes 320 - 640 train, 640 test
Using 2 dataloader workers
Starting training for 300 epochs...

     Epoch   gpu_mem      GIoU       obj       cls     total   targets  img_size
  0% 0/21 [00:00<?, ?it/s]/usr/local/lib/python3.6/dist-packages/torch/cuda/memory.py:346: FutureWarning: torch.cuda.memory_cached has been renamed to torch.cuda.memory_reserved
  FutureWarning)
     0/299       13G      7.11       5.6      1.86      14.6       124       608: 100% 21/21 [01:31<00:00,  4.35s/it]
               Class    Images   Targets         P         R   mAP@0.5        F1:   0% 0/1 [00:00<?, ?it/s]/content/drive/My Drive/yolov3/test.py:148: UserWarning: This overload of nonzero is deprecated:
	nonzero()
Consider using one of the following signatures instead:
	nonzero(*, bool as_tuple) (Triggered internally at  /pytorch/torch/csrc/utils/python_arg_parser.cpp:766.)
  ti = (cls == tcls_tensor).nonzero().view(-1)  # target indices
               Class    Images   Targets         P         R   mAP@0.5        F1: 100% 1/1 [00:31<00:00, 31.99s/it]
                 all         4        23         0         0   0.00144         0

     Epoch   gpu_mem      GIoU       obj       cls     total   targets  img_size
     1/299     8.42G      5.32      4.42      1.47      11.2       119       320: 100% 21/21 [00:30<00:00,  1.43s/it]
               Class    Images   Targets         P         R   mAP@0.5        F1: 100% 1/1 [00:09<00:00,  9.88s/it]
                 all         4        23     0.498     0.075     0.152      0.13
                  Epoch   gpu_mem      GIoU       obj       cls     total   targets  img_size

  ......中间省略

   299/299     16.1G     0.758     0.527     0.014       1.3       133       320: 100% 21/21 [00:24<00:00,  1.18s/it]
               Class    Images   Targets         P         R   mAP@0.5        F1: 100% 1/1 [00:00<00:00,  2.90it/s]
                 all         4        23     0.518     0.833     0.711     0.633
300 epochs completed in 2.405 hours.
13 更改detect.py文件(在yolov3目录下)
注意:
找到第170行,把coco.names改成rbc.names,如下图 default='data/rbc.names'
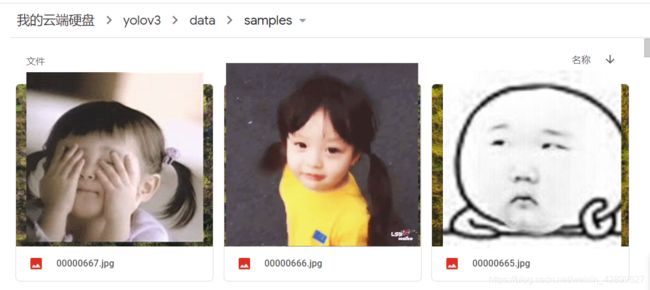
14 往yolov3/data/samples文件夹上传图片(用于检测训练效果)
注意:
这里上传的图片不能是训练的图片,需要的是没训练过的图片
15 开始检测(结果会保存在yolov3/output文件夹里面)
注意:output文件可以提前新建,如果没有代码运行后也会生成,记得刷新谷歌云盘就行
!python3 detect.py --cfg cfg/yolov3-spp.cfg --weights weights/best.pt
运行结果
Namespace(agnostic_nms=False, augment=False, cfg='cfg/yolov3-spp.cfg', classes=None, conf_thres=0.3, device='', fourcc='mp4v', half=False, img_size=512, iou_thres=0.6, names='data/rbc.names', output='output', save_txt=False, source='data/samples', view_img=False, weights='weights/best.pt')
Using CUDA device0 _CudaDeviceProperties(name='Tesla P100-PCIE-16GB', total_memory=16280MB)

Model Summary: 225 layers, 6.25787e+07 parameters, 6.25787e+07 gradients
image 1/147 data/samples/00000413.jpg: 320x512 Done. (0.023s)
image 2/147 data/samples/00000414.jpg: 320x512 Done. (0.021s)
image 3/147 data/samples/00000415.jpg: 320x512 Done. (0.017s)

......中间省略

image 147/147 data/samples/00000667.jpg: 320x512 7 1s, 2 2s, Done. (0.019s)
Results saved to /content/drive/My Drive/yolov3/output
Done. (62.951s)
注意
如果出现以下报错:在运行代码前面加上感叹号!即可
3 总结
1.yolov3训练效果还不错,目前数据集只有不到400张图片,后期还要标注
2.GitHub上面大佬真的多,非常棒
3.白嫖谷歌的GPU,300epoch用时不到3个小时,很舒服
4.Google Colab平台我觉得类似于Linux命令行操作的,感觉命令挺类似的
5.对于结果可视化的代码还需要研究
6.这里只是运行成功,目前代码还没看懂,嘻嘻嘻!
7.这里要特别感谢波哥的鼎力相助,ღ( ´・ᴗ・` )比心
参考链接:(帮助很大的文章)
点击-------Pytorch实现YOLOv3训练自己的数据集


