MAC 下 XAMPP + phpMyAdmin + Xdebug + VScode 开发环境搭建
MAC 下 XAMPP + phpMyAdmin + Xdebug + VScode 开发环境搭建
- 前言
- 安装 XAMPP
-
- 卸载注意事项
- 版本选择
- 下载与安装
- 运行测试
- 配置 XAMPP
-
- 修改 XAMPP 的默认目录
- 设置文件夹的权限
- 启用 Xdebug
-
- 激活 XAMPP 的 Xdebug 扩展
- 启用 VS code 的 Xdebug 功能
- 启用 phpMyAdmin
前言
由于之前安装的 XAMPP 出现了一些 BUG ,决定卸载重装,也把相关的配置记录一下,也能给予新手一些帮助。
安装 XAMPP
卸载注意事项
或许有人认为直接将 Finder 中的 应用程序 目录下的 XAMPP 文件夹放入废纸篓即可,但其实这样直接删除会有一些进程并未关闭,导致与其关联的文件或注册表并未删除,例如,Mysql 服务器可能仍保持运行。所以在卸载 XAMPP 前需要将相关进程关闭,然后进行卸载。关闭相关进程的操作可以借鉴《How to uninstall XAMPP on Mac OS X?》。
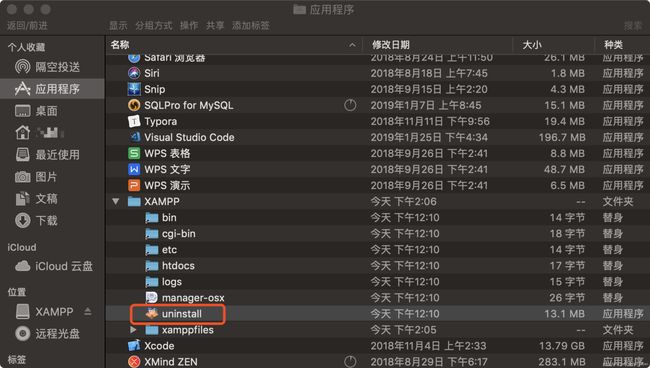
在关闭了相关进程后,可以在 应用程序 中的 XAMPP 文件夹下找到应用程序 uninstall ,通过这个程序可以干净的卸载 XAMPP ,卸载后残留的 XAMPP 文件夹放入废纸篓即可。
版本选择
-
之前是有试过安装
XAMPP-VM版本的,XAMPP-VM是 OS X 的虚拟机。它包括 Apache,PHP 和其他 XAMPP 组件,并在 OS X 系统上的基于 Linux 的虚拟机中运行这些组件。 -
但由于在虚拟机上运行不能设置访问外部文件,所以选择安装
XAMPP for OS X 7.3.1版本,着这是 OS X 的本机安装程序。它直接在 OS X 系统的/Applications/XAMPP文件夹中安装 Apache,PHP 其他 XAMPP 组件。
下载与安装
打开官网连接 https://www.apachefriends.org/download.html 选择相应的 XAMPP 下载安装程序。
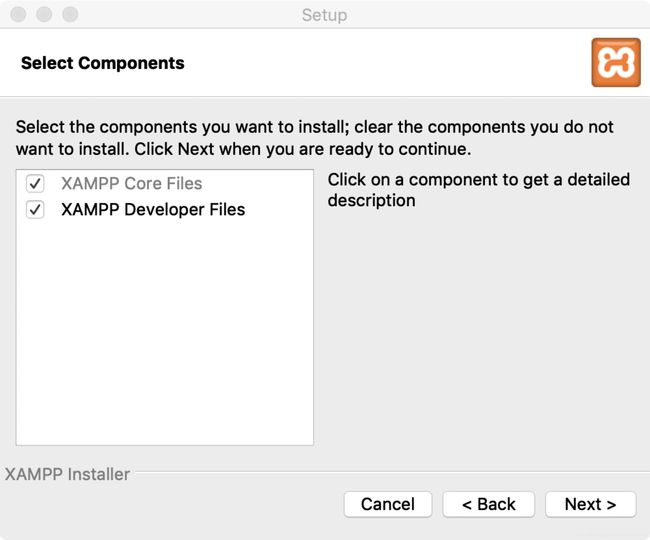
安装过程非常简单,其中值得注意的只有一步是选择相应的组件,不要改动供选择的两个组件,其中 XAMPP Core Files 包括了 Apache 、MySQL 、PHP ,而选择使用 XAMPP 其中一个原因就是包含了这些组件,省下了许多配置动作。这两个组件对于非 XAMPP 开发人员来说是必须的,如果少安装一个组件会导致配置起来相对麻烦些。
运行测试
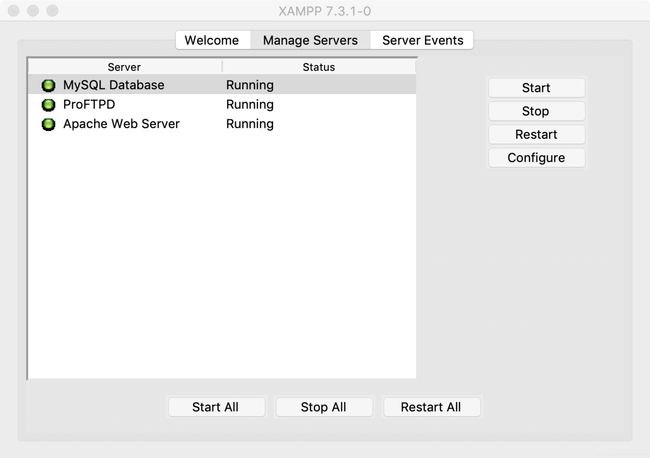
打开软件启动服务器,在 Manage Servers 面板点击 Start all 启动所有服务器,直到三个 Server 状态都为绿色。如果出现 Apache 或 MySQL 无法启动,比较常见的原因是端口被占用了,可以在 Configure 中更改端口再尝试开启,当然具体情况具体分析。
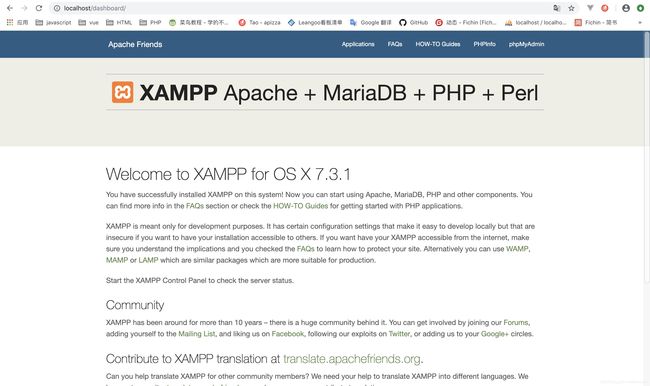
当服务器都开启成功后,点击 Welcome 面板中的 Go to Application ,在浏览器中出现下面的页面,这时 XAMPP 已经可以正常运行了。
配置 XAMPP
修改 XAMPP 的默认目录
- 首先打开文件夹路径
/Applications/XAMPP/xamppfiles/etc找到httpd.conf文件。 - 使用编辑器将文件中下面的路径更改为指向服务器启动目录:
# DocumentRoot: The directory out of which you will serve your
# documents. By default, all requests are taken from this directory, but
# symbolic links and aliases may be used to point to other locations.
#
DocumentRoot "/Applications/XAMPP/xamppfiles/htdocs"


...


------------------------------------------------------------------------
更改为指向服务器启动目录
------------------------------------------------------------------------

# DocumentRoot: The directory out of which you will serve your
# documents. By default, all requests are taken from this directory, but
# symbolic links and aliases may be used to point to other locations.
#
DocumentRoot "服务器启动目录"


...
设置文件夹的权限
- 当修改完默认路径后,如果访问页面出现了禁止访问的错误,是因为在 Mac 中有些文件夹是只对本机用户有读写权限,如果是服务器去访问这样的文件夹的话会显示forbidden :
禁止访问!
您无权访问所请求的目录。 这是由于没有主页或该目录不允许被读取导致的。

如果您认为这是一个服务器错误,请联系网站管理员。

Error 403
localhost
Apache/2.4.37 (Unix) OpenSSL/1.0.2q PHP/7.3.1 mod_perl/2.0.8-dev Perl/v5.16.3
- 这时需要设置用户名,将
httpd.conf中的User daemon修改为User Mac的用户名来获取 Mac 用户的读写权限,修改完成即可在 localhost 看到默认路径目录下的 PHP 文件运行了,如:
#
# If you wish httpd to run as a different user or group, you must run
# httpd as root initially and it will switch.
#
# User/Group: The name (or #number) of the user/group to run httpd as.
# It is usually good practice to create a dedicated user and group for
# running httpd, as with most system services.
#
User fichin
Group daemon
- 需要注意的是不能将
Group daemon也修改了,否则会出现错误,可以在Application log中看到:
AH00544: httpd: bad group name XXXX
启用 Xdebug
-
首先在根目录新建文件
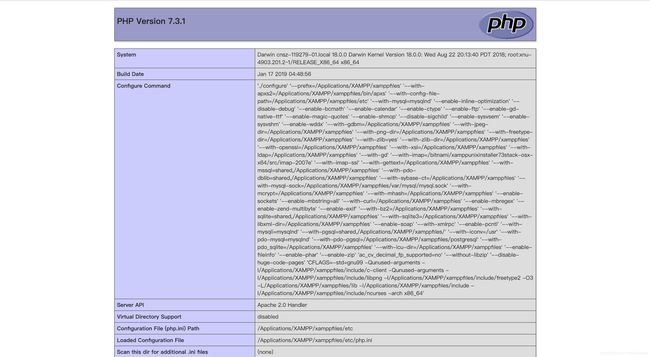
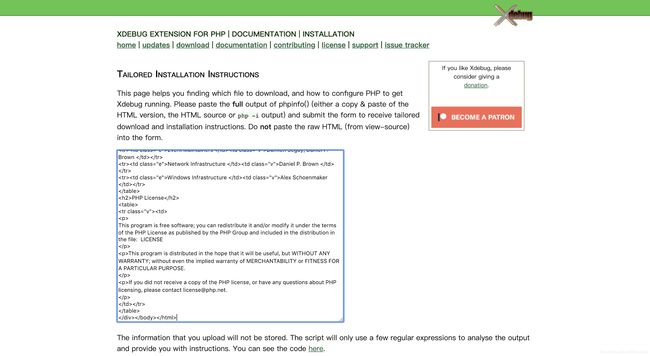
index.php,调用phpinfo()函数输出 PHP 版本信息,打开localhost输出phpinfo(),或者将工作目录指回XAMPP默认目录,然后Go to Application在PHPinfo选项中查看。右键查看网页源码,将源码全部复制,打开链接:https://xdebug.org/wizard.php ,将复制的内容粘贴进空白文本表单中,点击Analyse my phpinfo() output按钮,查看定制下载和安装说明。(也可以使用终端指令输出php -i > info.txt 文件,复制info.txt文件中的内容)

-
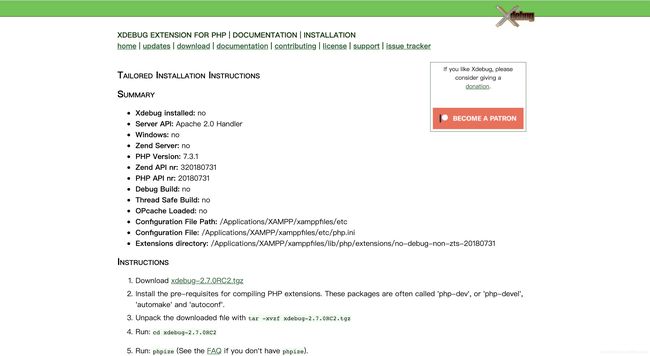
跳转页面后可以看到定制下载和安装说明,
XAMPP中的 PHP 是7.3.1的版本,提示我下载的是xdebug-2.7.0RC2.tgz,接着根据安装说明进行操作,将压缩包解压,打开终端指向路径xdebug-2.7.0RC2。
-
运行 phpize
如果直接在终端输入指令运行phpize,运行的是 Mac 自安装的phpize,这里要找到XAMPP的phpize路径,XAMPP的路径是
$ cd /Users/fichin/Downloads/xdebug-2.7.0RC2/xdebug-2.7.0RC2
$ /Applications/XAMPP/xamppfiles/bin/phpize
Configuring for:
PHP Api Version:         20180731
Zend Module Api No:      20180731
Zend Extension Api No:   320180731
这时在终端输入上面的路径指令运行 XAMPP 的 phpize ,如果顺利则输出编译环境。
如果出现错误
$ /Applications/XAMPP/xamppfiles/bin/phpize
Configuring for:
PHP Api Version:         20180731
Zend Module Api No:      20180731
Zend Extension Api No:   320180731
Cannot find autoconf. Please check your autoconf
installation and the $PHP_AUTOCONF environment
variable. Then, rerun this script.
这是缺少 autoconf 可以参考文章《MAC 安装 PHP 扩展 pcntl 》,先安装 brew ,在终端输入以下指令
$ ruby -e "$(curl -fsSL https://raw.githubusercontent.com/Homebrew/install/master/install)"
(如果以上链接失效的话,可以到 brew 官网查看。http://brew.sh/)
安装完 brew 后,输入下面的指令安装 autoconf :
$ brew install autoconf
之后继续执行
$ /Applications/XAMPP/xamppfiles/bin/phpize
- 使用 Configure 脚本根据系统开发环境生成 Makefile 文件时,不是输入
./configure,而是要使用绝对路径进行编译,找到XAMPP的configure路径,在终端输入:
$ ./configure --with-php-config=/Applications/XAMPP/xamppfiles/bin/php-config
checking for grep that handles long lines and -e... /usr/bin/grep

...

creating libtool
appending configuration tag "CXX" to libtool
configure: creating ./config.status
config.status: creating config.h
- 如果生成 Makefile 文件没有出错就可以进行编译,在终端输入
make执行完成会在modules文件夹下生成一个xdebug.so文件:
$ make
...
...
Build complete.
Don't forget to run 'make test'.
- 将
xdebug.so复制到XAMPP的扩展目录:
$ sudo cp modules/xdebug.so /Applications/XAMPP/xamppfiles/lib/php/extensions/no-debug-non-zts-20180731
Password:
需要 sudo 输入密码以管理员身份运行。(也可以直接在 xdebug-2.7.0RC2 文件下的 modules 文件夹中找到 xdebug.so ,将其复制到 XAMPP 的 PHP 扩展目录。
激活 XAMPP 的 Xdebug 扩展
- 编辑
XAMPP安装目录的/Applications/XAMPP/xamppfiles/etc子目录中的 php.ini 文件。在此文件中,通过向其添加以下行来激活Xdebug作为Zend扩展进行加载:
[XDebug]
zend_extension = xdebug.so
xdebug.remote_enable = 1
xdebug.remote_autostart = 1
- 可能一些安装工具会提议以
extension=xdebug.so来加载Xdebug,但是这种方式并不正确,PHPinfo会提示Xdebug作为PHP扩展而不是作为 Zend 扩展加载。复制上面方式输出的phpinfo()到 https://xdebug.org/wizard.php 分析,能够看到提醒以及解决方式。

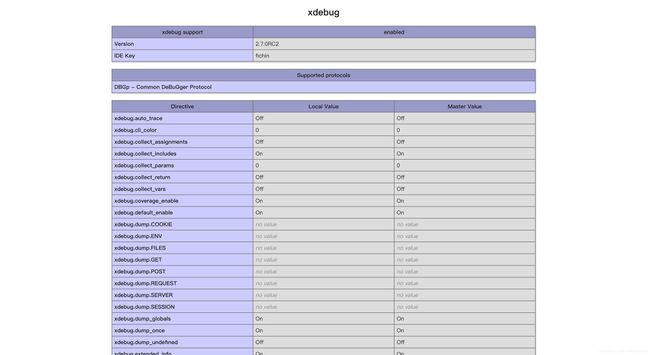
为了让 Xdebug 正常工作,包括断点等,需要将它作为 Zend 扩展加载,而不仅仅是普通的 PHP 扩展。要解决此问题,应该在php.ini文件中将extension=xdebug.so这一行删除,并且加入zend_extension=xdebug.so。能够在PHPinfo看到以Zend扩展进行加载的提示:

启用 VS code 的 Xdebug 功能
-
作为普通扩展的方式并不能启用
VScode的断点调试功能,正确的方式应该是以Zend扩展进行加载。 -
在
VS code下载PHP Debug插件,重新加载。 -
在
User Settings配置 PHP 目录,编写settings.json覆盖默认设置:
"php.executablePath": "/Applications/XAMPP/xamppfiles/bin/php-7.3.1"
- 如果原本就有
launch.json文件,应该将该文件删除。在调试区选择 PHP 环境,调试边上的下拉框,选择Listen for XDebug。
启用 phpMyAdmin
- 虽然
XAMPP已经自带phpMyAdmin,而且在刚安装好XAMPP时,phpMyAdmin可以正常使用,但是当修改了httpd.conf中的User daemon后,会出现错误:
phpMyAdmin - Error
Error during session start; please check your PHP and/or webserver log file and configure your PHP installation properly. Also ensure that cookies are enabled in your browser.
session_start(): open(SESSION_FILE, O_RDWR) failed: Permission denied (13)
session_start(): Failed to read session data: files (path: /Applications/XAMPP/xamppfiles/temp)
- 其实这也是权限问题,修改
httpd.conf中的User daemon是为了获得 Mac 用户的文件夹读写权限,但是却失去了/Applications/XAMPP/xamppfiles/temp的读写权限,所以解决方法是为/Applications/XAMPP/xamppfiles/temp赋予读写权限:
$ sudo chmod -R 777 /Applications/XAMPP/xamppfiles/temp/
- 获取文件夹的读写权限后,打开
phpMyAdmin仍然可能出现错误:
phpMyAdmin - Error
Error during session start; please check your PHP and/or webserver log file and configure your PHP installation properly. Also ensure that cookies are enabled in your browser.
session_start(): Session data file is not created by your uid
session_start(): Failed to read session data: files (path: /Applications/XAMPP/xamppfiles/temp)
- 解决 Session 文件错误的方式是将
/Applications/XAMPP/xamppfiles/temp文件夹下的 Session 文件删除。然后再打开phpMyAdmin即可正常使用。
