webpack从入门到精通(四)优化打包配置总结②
1. tree shaking
tree-shaking的本质是消除无用的js代码。无用代码消除广泛存在于传统的编程语言编译器中,编译器可以判断出某些代码根本不影响输出,然后消除这些代码,这个称之为DCE(dead code elimination)。
Tree-shaking 是 DCE 的一种新的实现,Javascript同传统的编程语言不同的是,javascript绝大多数情况需要通过网络进行加载,然后执行,加载的文件大小越小,整体执行时间更短,所以去除无用代码以减少文件体积,对javascript来说更有意义。
它依赖于 ES2015 模块系统中的静态结构特性,例如 import 和 export。这个术语和概念实际上是兴起于 ES2015 模块打包工具 rollup。
新的 webpack 4 正式版本,扩展了这个检测能力,通过 package.json 的 "sideEffects" 属性作为标记,向 compiler 提供提示,表明项目中的哪些文件是 "pure(纯的 ES2015 模块)",由此可以安全地删除文件中未使用的部分。
在一个纯粹的 ESM 模块世界中,识别出哪些文件有副作用很简单。然而,我们的项目无法达到这种纯度,所以,此时有必要向 webpack 的 compiler 提供提示哪些代码是“纯粹部分”。
如果所有代码都不包含副作用,我们就可以简单地将该属性标记为 false,来告知 webpack,它可以安全地删除未用到的 export 导出。
如果你的代码确实有一些副作用,那么可以改为提供一个数组。
前提:1. 必须使用ES6模块化 2. 开启production环境
在package.json中配置
"sideEffects": ["*.css", "*.less"]index.js
import { mul } from './test';
import '../css/index.css';
function sum(...args) {
return args.reduce((p, c) => p + c, 0);
}
// eslint-disable-next-line
console.log(mul(2, 3));
// eslint-disable-next-line
console.log(sum(1, 2, 3, 4));test.js
export function mul(x, y) {
return x * y;
}
export function count(x, y) {
return x - y;
}可以发现,count()函数我们并没有使用。打包后的文件中将不会包含count()函数。
2. code split
何为Code Split?
webpack从入口文件开始遍历,找到所有依赖文件,然后打包成最终的一个文件,即bundle.js文件,这是我们经常使用的方式,当一个项目慢慢变得复杂的时候会导致这个bundle.js文件越来越大,浏览器加载的速度也会越来越慢,这个过程还不排除我们需要引用的第三方文件,这样每次无论是构建,还是浏览器加载这个最终文件,都会存在效率问题,webpack提供了codesplitting功能来解决这个问题,这可以最大限度的减少浏览器加载必要代码时间(比如首屏渲染优化)。这个过程我们可以分为两种情况来讨论,第三方的分为静态文件处理,浏览器加载必要文件作为动态文件处理(按需加载,懒加载)
常见的 webpack code split 方法有三种。
1)多入口配置
  // 单入口
  // entry: './src/js/index.js',
  entry: {
    // 多入口:有一个入口,最终输出就有一个bundle
    index: './src/js/index.js',
    test: './src/js/test.js'
  }
2)使用plugins配置进行分割
webpack 在4.0版本开始对防重复方式进行了改写,通过配置optimization。
-
可以将node_modules中代码单独打包一个chunk最终输出
-
自动分析多入口chunk中,有没有公共的文件。如果有会打包成单独一个chunk
  optimization: {
    splitChunks: {
      chunks: 'all'
    }
  }
我们下面演示一下:
我们在index.js和test.js中都引入第三方库jquery
index.js
import $ from 'jquery';
import { mul } from './test';
function sum(...args) {
return args.reduce((p, c) => p + c, 0);
}
console.log(sum(1, 2, 3, 4));
console.log($);;
console.log(mul(2,3));test.js
import $ from 'jquery';
// eslint-disable-next-line
console.log($);
export function mul(x, y) {
return x * y;
}
export function count(x, y) {
return x - y;
}单入口配置webpack.config.js
const { resolve } = require('path');
const HtmlWebpackPlugin = require('html-webpack-plugin');
module.exports = {
// 单入口
entry: './src/js/index.js',
output: {
// [name]:取文件名
filename: 'js/[name].[contenthash:10].js',
path: resolve(__dirname, 'build')
},
plugins: [
new HtmlWebpackPlugin({
template: './src/index.html',
minify: {
collapseWhitespace: true,
removeComments: true
}
})
],
/*
1. 可以将node_modules中代码单独打包一个chunk最终输出
2. 自动分析多入口chunk中,有没有公共的文件。如果有会打包成单独一个chunk
*/
optimization: {
splitChunks: {
chunks: 'all'
}
},
mode: 'production'
};打包出的文件如下:

jquery被单独打成一个文件。
注意:如果没有引入optimization插件,则只会生成main.js一个文件,且文件大小会比较大。
多入口配置webpack.config.js
  entry: {
    index: './src/js/index.js',
    test: './src/js/test.js'
  }
打包出的文件如下:

index.js和test.js中引入了同样的jquery,被合并打包成同一个文件。
3)动态导入
上面我们发现,在单入口配置中,index.js中引入了test.js,但是test.js并不会单独打包,我们可以通过import来动态导入。
语法如下:
// 可以通过注释来设置文件名
import(/* webpackChunkName: "home" */ "url文件路径").then((text)=> {
    // do something
})
index.js
function sum(...args) {
return args.reduce((p, c) => p + c, 0);
}
/*
通过js代码,让某个文件被单独打包成一个chunk
import动态导入语法:能将某个文件单独打包
可以通过注释来设置文件名
*/
import(/* webpackChunkName: 'test' */'./test')
.then(({ mul, count }) => {
// 文件加载成功~
// eslint-disable-next-line
console.log(mul(2, 5));
})
.catch(() => {
// eslint-disable-next-line
console.log('文件加载失败~');
});
// eslint-disable-next-line
console.log(sum(1, 2, 3, 4));
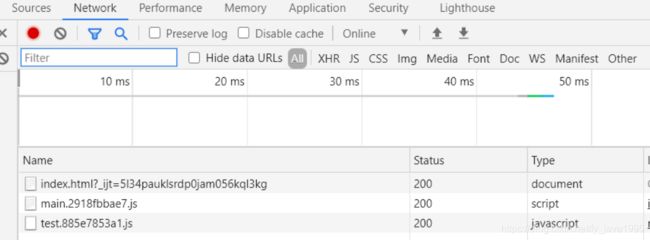
打包出的文件如下:

可以发现,test.js和main.js分别打包成了两个文件。
3. 懒加载和预加载
懒加载或者按需加载,是一种很好的优化网页或应用的方式。这种方式实际上是先把你的代码在一些逻辑断点处分离开,然后在一些代码块中完成某些操作后,立即引用或即将引用另外一些新的代码块。这样加快了应用的初始加载速度,减轻了它的总体体积,因为某些代码块可能永远不会被加载。
通俗来说就是,如果每次加载页面的时候都会加载某些代码块,会重复的请求,造成资源的浪费,影响网站性能。所以提出了懒加载的解决办法:按需加载,初始化不需要加载此代码块,等到具体的执行需要时候,再加载,从而优化性能。
例如:在点击按钮的事件处理中,才需要用到来自print.js的print函数。所以可以将代码写成点击时候触发加载print.js。
正常加载:
即使没有点击,test.js文件也会直接加载。
console.log('index.js文件被加载了~');
import { mul } from './test';
document.getElementById('btn').onclick = function() {
console.log(mul(4, 5));
};懒加载:文件需要使用时才加载
只有点击后,test.js文件才会加载。
console.log('index.js文件被加载了~');
document.getElementById('btn').onclick = function() {
import(/* webpackChunkName: 'test' */'./test').then(({ mul }) => {
console.log(mul(4, 5));
});
};点击前的资源加载如下:

预加载 prefetch:会在使用之前,提前加载 js 文件,等其他资源加载完毕,浏览器空闲了,偷偷加载资源
console.log('index.js文件被加载了~');
document.getElementById('btn').onclick = function() {
import(/* webpackChunkName: 'test', webpackPrefetch: true */'./test').then(({ mul }) => {
console.log(mul(4, 5));
});
};预加载的效果和懒加载是一样的,不过资源文件加载方式如下:
可以发现,虽然没使用test.js,但会提前加载资源
4. 多进程打包
1)下载plugin包
npm install --save-dev thread-loader2)分析
进程启动大概为 600ms,进程通信也有开销,当只有工作消耗时间比较长时,才需要多进程打包
3)配置文件
{
    test: /\.js$/,
        use: [
            {
                loader: 'thread-loader',
                options: {
                    workers: 2 // 进程2个
                }
            }
        ]
}
5. externals
webpack 中的 externals 配置提供了不从 bundle 中引用依赖的方式。解决的是,所创建的 bundle 依赖于那些存在于用户环境(consumer environment)中的依赖。
怎么理解呢,意思是如果需要引用一个库,但是又不想让webpack打包(减少打包的时间),并且又不影响我们在程序中以CMD、AMD或者window/global全局等方式进行使用(一般都以import方式引用使用),那就可以通过配置externals。
这样做的目的就是将不怎么需要更新的第三方库脱离webpack打包,不被打入bundle中,从而减少打包时间,但又不影响运用第三方库的方式,例如import方式等。
例如:
在index.html中引入jquery库
webpack.config.js配置如下:
const { resolve } = require('path');
const HtmlWebpackPlugin = require('html-webpack-plugin');
module.exports = {
entry: './src/js/index.js',
output: {
filename: 'js/built.js',
path: resolve(__dirname, 'build')
},
plugins: [
new HtmlWebpackPlugin({
template: './src/index.html'
})
],
mode: 'production',
externals: {
// 拒绝jQuery被打包进来
jquery: 'jQuery'
}
};
index.js
import $ from 'jquery';
console.log($);排除之后,我们的jquery并没有打包进index.js中。
这样不仅之前对第三方库的用法方式不变,还把第三方库剥离出webpack的打包中,从而加速webpack的打包速度。
6. dll
事先把常用但又构建时间长的代码提前打包好(例如 react、react-dom),取个名字叫 dll。后面再打包的时候就跳过原来的未打包代码,直接用 dll。这样一来,构建时间就会缩短,提高 webpack 打包速度。
使用dll时,可以把构建过程分成dll构建过程和主构建过程(实质也就是如此),所以需要两个构建配置文件,例如叫做webpack.config.js和webpack.dll.config.js。
1)使用DLLPlugin打包需要分离到动态库的模块
DllPlugin是webpack内置的插件,不需要额外安装,直接配置webpack.dll.config.js文件:
/*
使用dll技术,对某些库(第三方库:jquery、react、vue...)进行单独打包
当你运行 webpack 时,默认查找 webpack.config.js 配置文件
需求:需要运行 webpack.dll.js 文件
--> webpack --config webpack.dll.config.js
*/
const { resolve } = require('path');
const webpack = require('webpack');
module.exports = {
entry: {
// 最终打包生成的[name] --> jquery
// ['jquery'] --> 要打包的库是jquery
jquery: ['jquery']
},
output: {
filename: '[name].js',
path: resolve(__dirname, 'dll'),
library: '[name]_[hash]' // 打包的库里面向外暴露出去的内容叫什么名字
},
plugins: [
// 打包生成一个 manifest.json --> 提供和jquery映射
new webpack.DllPlugin({
name: '[name]_[hash]', // 映射库的暴露的内容名称
path: resolve(__dirname, 'dll/manifest.json') // 输出文件路径
})
],
mode: 'production'
};
执行:webpack --config webpack.dll.config,然后到指定的输出文件夹查看输出:
-
jquery.js文件 -
manifest.json文件里,是用来描述对应的dll文件里保存的模块里暴露出刚刚构建的所有模块
{"name":"jquery_a3c4dcd85c404db1c6a0","content":{"../../../node_modules/jquery/dist/jquery.js":{"id":1,"buildMeta":{"providedExports":true}}}}2)在主构建配置文件使用动态库文件
在webpack.config中使用dll要用到DllReferencePlugin,这个插件通过引用 dll 的 manifest 文件来把依赖的名称映射到模块的 id 上。
下面的配置文件还使用了dd-asset-html-webpack-plugin,会让我们的index.html自动引入该资源。
const { resolve } = require('path');
const HtmlWebpackPlugin = require('html-webpack-plugin');
const webpack = require('webpack');
const AddAssetHtmlWebpackPlugin = require('add-asset-html-webpack-plugin');
module.exports = {
entry: './src/index.js',
output: {
filename: 'built.js',
path: resolve(__dirname, 'build')
},
plugins: [
new HtmlWebpackPlugin({
template: './src/index.html'
}),
// 告诉webpack哪些库不参与打包,同时使用时的名称也得变~
new webpack.DllReferencePlugin({
manifest: resolve(__dirname, 'dll/manifest.json')
}),
// 将某个文件打包输出去,并在html中自动引入该资源
new AddAssetHtmlWebpackPlugin({
filepath: resolve(__dirname, 'dll/jquery.js')
})
],
mode: 'production'
};打包前的index.html
hello html
打包后的index.html
hello html