Spring Boot学习笔记10——配置国际化页面
文章目录
- 一、使用Thymeleaf配置国际化页面
-
- 1、编写多语言国际化配置文件
-
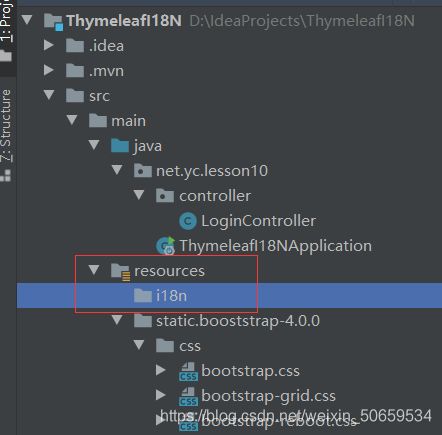
- (1)在resources下创建i18n目录
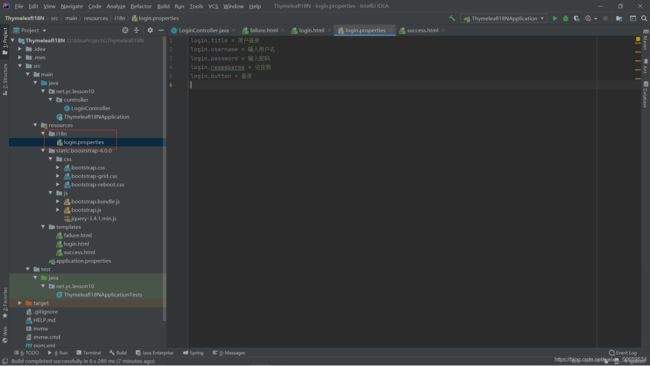
- (2)在i18n目录里创建login.properties
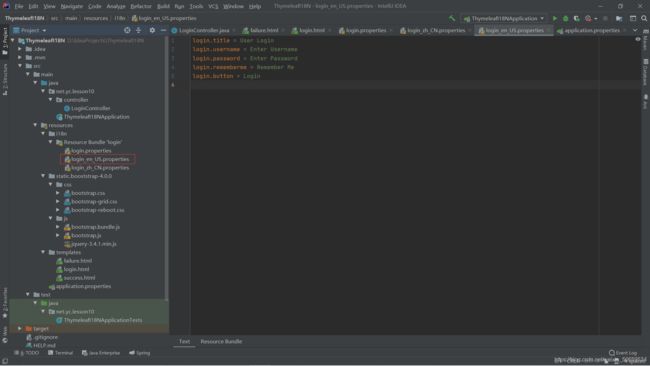
- (3)在i18n目录里创建login_zh_CN.properties
- (4)在i18n目录里创建login_en_US.properties
- 2、编写全局配置文件
- 3、定制区域信息解析器
- 4、页面国际化使用
- 5、整合效果测试
- 二、Thymeleaf复杂数据的展示
-
- 1、创建用户实体类
- 2、创建用户控制器
- 3、创建显示全部用户信息模板页面
- 4、修改登录成功模板页面
- 5、启动项目,查看效果
一、使用Thymeleaf配置国际化页面
1、创建ThymeleafI18N项目

2、将上一讲ThymeleafDemo项目的内容拷贝到新项目里

1、编写多语言国际化配置文件
(1)在resources下创建i18n目录
(2)在i18n目录里创建login.properties
(3)在i18n目录里创建login_zh_CN.properties

(4)在i18n目录里创建login_en_US.properties
2、编写全局配置文件
打开项目的application.properties全局配置文件,在该文件中添加国际化文件基础名设置

3、定制区域信息解析器

1、使用@Configuration注解成一个配置类
2、重写resolveLocale方法,根据请求参数的值来实例化Locale对象
3、使用@Bean把这个配置类交给Spring容器进行管理
package net.yc.lesson10.resolver;
import org.springframework.context.annotation.Bean;
import org.springframework.context.annotation.Configuration;
import org.springframework.web.servlet.LocaleResolver;
import org.thymeleaf.util.StringUtils;
import javax.servlet.http.HttpServletRequest;
import javax.servlet.http.HttpServletResponse;
import java.util.Locale;
@Configuration
public class MyLocaleResolver implements LocaleResolver {

    @Override
    public Locale resolveLocale(HttpServletRequest httpServletRequest) {

        //获取区域标识
        String flag= httpServletRequest.getParameter("flag");
        //获取区域对象
        Locale locale = Locale.getDefault();
        //判断区域标识是否为空
        if(StringUtils.isEmpty(flag)){

            //对区域标识进行处理
            String[] split = flag.split("_");//使用下划线切分出一个数组,如zh_CN,["zh","CN"]
            locale = new Locale(split[0], split[1]);
        }
        return locale;
    }

    @Override
    public void setLocale(HttpServletRequest httpServletRequest, HttpServletResponse httpServletResponse, Locale locale) {


    }

    @Bean
    public LocaleResolver localeResolver() {

        return new MyLocaleResolver();
    }
}
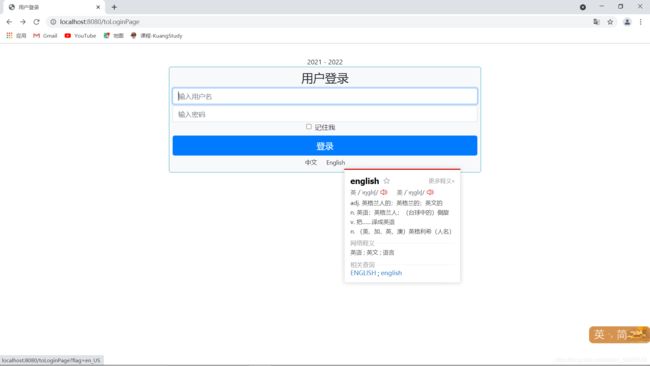
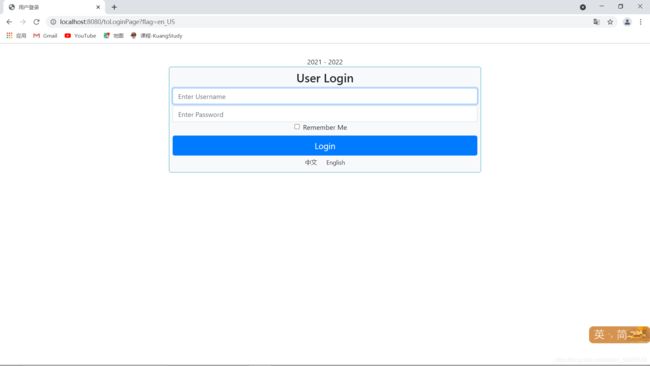
4、页面国际化使用
用户登录页面login.html结合Thymeleaf模板引擎实现国际化功能
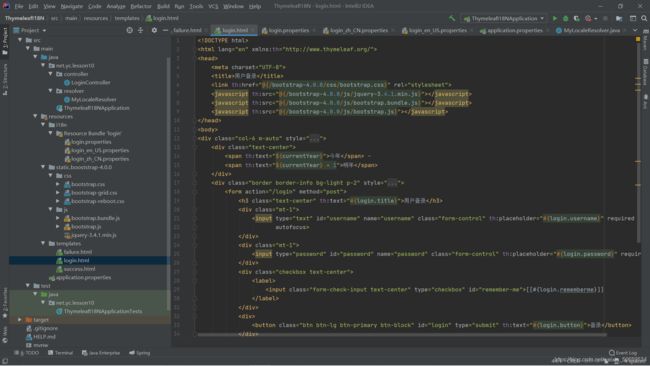
<!DOCTYPE html>
<html lang="en" xmlns:th="http://www.thymeleaf.org/">
<head>
    <meta charset="UTF-8">
    <title>用户登录</title>
    <link th:href="@{/bootstrap-4.0.0/css/bootstrap.css}" rel="stylesheet">
    <javascript th:src="@{/bootstrap-4.0.0/js/jquery-3.4.1.min.js}"></javascript>
    <javascript th:src="@{/bootstrap-4.0.0/js/bootstrap.bundle.js}"></javascript>
    <javascript th:src="@{/bootstrap-4.0.0/js/bootstrap.js}"></javascript>
</head>
<body>
<div class="col-6 m-auto" style="margin-top:30px!important;">
    <div class="text-center">
        <span th:text="${currentYear}">今年</span> -
        <span th:text="${currentYear} + 1">明年</span>
    </div>
    <div class="border border-info bg-light p-2" style="border-radius: 5px">
        <form action="/login" method="post">
            <h3 class="text-center" th:text="#{login.title}">用户登录</h3>
            <div class="mt-1">
                <input type="text" id="username" name="username" class="form-control" th:placeholder="#{login.username}" required
                       autofocus>
            </div>
            <div class="mt-1">
                <input type="password" id="password" name="password" class="form-control" th:placeholder="#{login.password}" required>
            </div>
            <div class="checkbox text-center">
                <label>
                    <input class="form-check-input text-center" type="checkbox" id="remember-me">[[#{
     login.rememberme}]]
                </label>
            </div>
            <div>
                <button class="btn btn-lg btn-primary btn-block" id="login" type="submit" th:text="#{login.button}">登录</button>
            </div>
            <div class="text-center">
                <a class="btn btn-sm" th:href="@{/toLoginPage(flag='zh_CN')}">中文</a>
                <a class="btn btn-sm" th:href="@{/toLoginPage(flag='en_US')}">English</a>
            </div>
        </form>
    </div>
</div>
</body>
</html>
5、整合效果测试
二、Thymeleaf复杂数据的展示
1、创建用户实体类
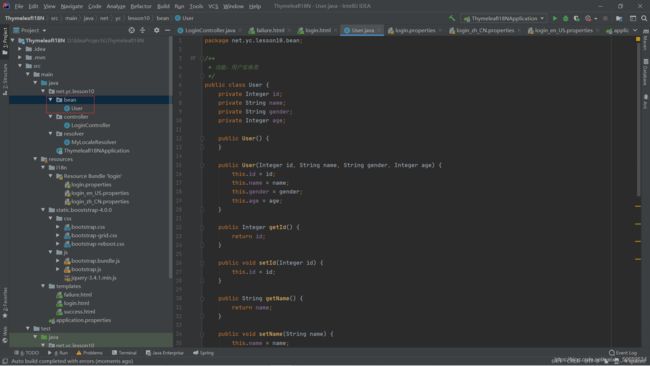
package net.yc.lesson10.bean;

/**
 * 功能:用户实体类
 */
public class User {

    private Integer id;
    private String name;
    private String gender;
    private Integer age;

    public User() {

    }

    public User(Integer id, String name, String gender, Integer age) {

        this.id = id;
        this.name = name;
        this.gender = gender;
        this.age = age;
    }

    public Integer getId() {

        return id;
    }

    public void setId(Integer id) {

        this.id = id;
    }

    public String getName() {

        return name;
    }

    public void setName(String name) {

        this.name = name;
    }

    public String getGender() {

        return gender;
    }

    public void setGender(String gender) {

        this.gender = gender;
    }

    public Integer getAge() {

        return age;
    }

    public void setAge(Integer age) {

        this.age = age;
    }

    @Override
    public String toString() {

        return "User{" +
                "id=" + id +
                ", name='" + name + '\'' +
                ", gender='" + gender + '\'' +
                ", age=" + age +
                '}';
    }
}
2、创建用户控制器
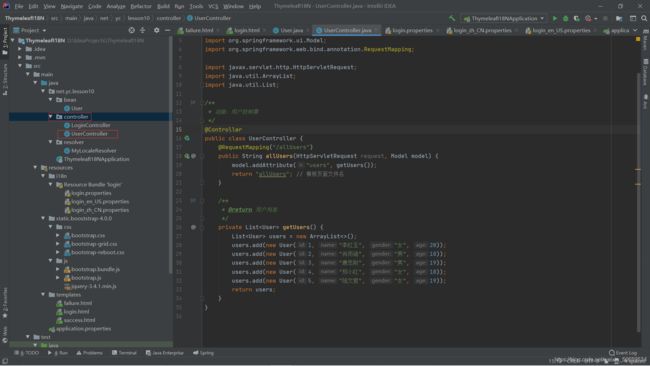
package net.yc.lesson10.controller;
import net.yc.lesson10.bean.User;
import org.springframework.stereotype.Controller;
import org.springframework.ui.Model;
import org.springframework.web.bind.annotation.RequestMapping;
import javax.servlet.http.HttpServletRequest;
import java.util.ArrayList;
import java.util.List;
/**
* 功能:用户控制器
*/
@Controller
public class UserController {
@RequestMapping("/allUsers")
public String allUsers(HttpServletRequest request, Model model) {
model.addAttribute("users", getUsers());
return "allUsers"; // 模板页面文件名
}
/**
* @return 用户列表
*/
private List<User> getUsers() {
List<User> users = new ArrayList<>();
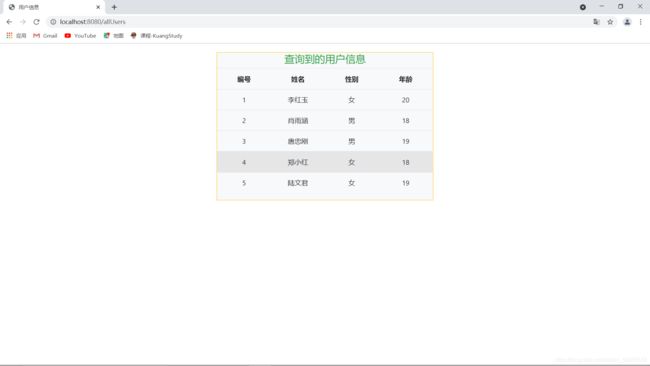
users.add(new User(1, "李红玉", "女", 20));
users.add(new User(2, "肖雨涵", "男", 18));
users.add(new User(3, "唐忠刚", "男", 19));
users.add(new User(4, "郑小红", "女", 18));
users.add(new User(5, "陆文君", "女", 19));
return users;
}
}
3、创建显示全部用户信息模板页面

<!DOCTYPE html>
<html lang="en" xmlns:th="http://www.thymeleaf.org/">
<head>
    <meta charset="UTF-8">
    <title>用户信息</title>
    <!-- 新 Bootstrap4 核心 CSS 文件 -->
    <link rel="stylesheet" href="https://cdn.staticfile.org/twitter-bootstrap/4.3.1/css/bootstrap.min.css">
    <!-- jQuery文件。务必在bootstrap.min.js 之前引入 -->
    <script src="https://cdn.staticfile.org/jquery/3.2.1/jquery.min.js"></script>
    <!-- bootstrap.bundle.min.js 用于弹窗、提示、下拉菜单,包含了 popper.min.js -->
    <script src="https://cdn.staticfile.org/popper.js/1.15.0/umd/popper.min.js"></script>
    <!-- 最新的 Bootstrap4 核心 JavaScript 文件 -->
    <script src="https://cdn.staticfile.org/twitter-bootstrap/4.3.1/js/bootstrap.min.js"></script>
</head>
<body>
<div class="col-sm-12 col-md-8 col-xl-4 text-center m-auto border-warning border bg-light"
     style="margin-top:20px!important;">
    <p class="text-success h4">查询到的用户信息</p>
    <table class="table table-hover">
        <tr class="row">
            <th class="col-sm-3 col-md-3 col-xl-3 text-center">编号</th>
            <th class="col-sm-3 col-md-3 col-xl-3 text-center">姓名</th>
            <th class="col-sm-3 col-md-3 col-xl-3 text-center">性别</th>
            <th class="col-sm-3 col-md-3 col-xl-3 text-center">年龄</th>
        </tr>
        <tr class="row " th:if="${users} ne null" th:each="user:${users}">
            <td class="col-sm-3 col-md-3 col-xl-3 text-center" th:text="${user.id}"></td>
            <td class="col-sm-3 col-md-3 col-xl-3 text-center" th:text="${user.name}"></td>
            <td class="col-sm-3 col-md-3 col-xl-3 text-center" th:text="${user.gender}"></td>
            <td class="col-sm-3 col-md-3 col-xl-3 text-center" th:text="${user.age}"></td>
        </tr>
    </table>
</div>
</body>
</html>
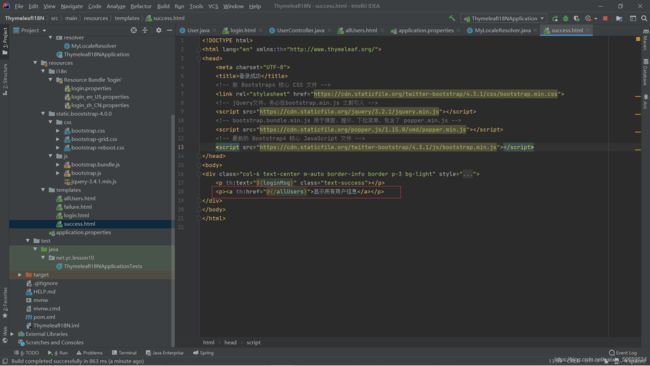
4、修改登录成功模板页面
5、启动项目,查看效果