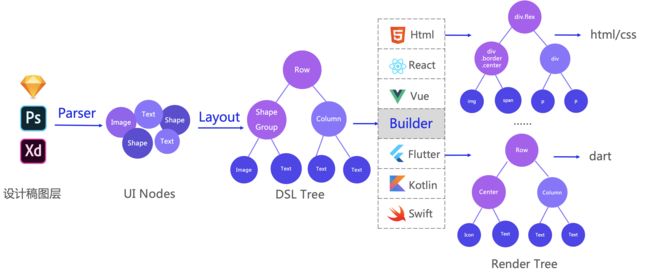
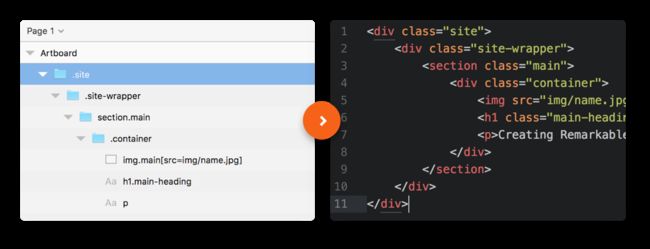
在设计稿生成代码流程中,我们需要先将图层解析为UI节点,而后再通过布局算法生成代码。
作为前端智能化的第一步,解析的UI数据关乎后续的代码还原质量,因此需要一套方案来保证解析阶段能输出通用而有效的UI节点。
针对通用性和有效两个目标,我们将解析过程分为图层抽象和图层优化两个步骤。
图层抽象
为了实现UI Nodes通用性,兼容不同的设计稿类型,如psd,sketch和xd等,我们将设计稿的图层抽象为图片Image、图形Shape、文本Text三种类型的UI节点:
- Shape,可用样式实现的形状图层,如纯色带边框的矩形、圆角矩形、圆形等;
- Text,可用样式实现的文本图层;
- Image,不可用样式实现的图层,如复杂图形、带纹理的形状、位图和艺术字等;
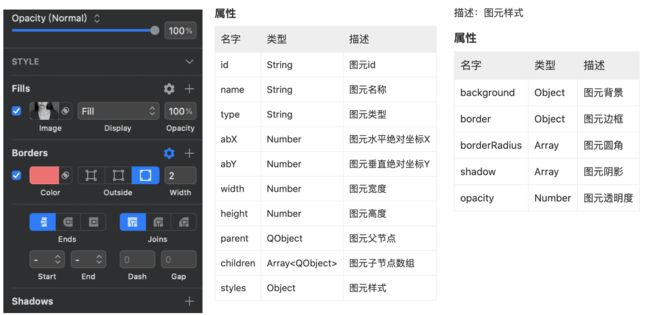
除了图层类型抽象,其它图层信息也将抽象为图元属性,可以分为三种:
- 基础属性,比如名字、id、图层类型
- 位置属性,比如宽高、坐标
- 样式属性,描述图层颜色和边框等
UINode类接口的具体代码如下:
/**
 * 图层类接口
 */
interface UINode {
     // 图层id
      id: string = '';
     // 图层类型,包括Text,Shape,Image,Group
      type: string;
     // 图层名称
      name: string = '';
     // 宽度
      width: number = 0;
     // 高度
      height: number = 0;
     // 位置:距离左边界距离
      abX: number = 0;
     // 位置:距离上边界距离
      abY: number = 0;
     // 图层样式
      styles: UIStyle = {};
}
图层优化
解析后的图层往往包含一些无效的信息,比如图层冗余、图层零散的问题,我们需要通过数据预处理来优化UI节点信息,提高代码还原的精准度。
预处理阶段主要分为两步:1. 图层清洗 2. 图层合并;
1. 图层清洗
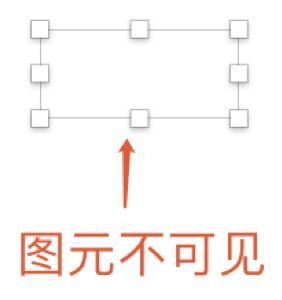
设计稿中会有不可见图层,删除它们不会影响视觉效果,这些图层是冗余的。
图层清洗,就是针对不可见的图层进行剔除,分为以下四种情况:
1.1 图层样式透明无背景;
const isTransparentStyle = function(node: UINode): boolean {
  const { background, border, shadows } = node.styles;
  return (
    !node.childNum
    && (node.isTransparent
      || (background
        && background.hasOpacity
        && background.type === 'color'
        && +background.color.a === 0)
      || (border && +border.color.a === 0)
      || (node.type === UINodeTypes.Shape && !background && !border && !shadows))
  );
};
1.2 图层被其它图元覆盖;
// 节点是否被覆盖
const isCovered = function(node: UINode, nodelist: Array): boolean {
  const index = nodelist.indexOf(node);
  const arr2 = nodelist.slice(index + 1).filter(n => !isContained(n, node)); // 越往后节点的z-index越大
  return arr2.some(brother => brother.type !== QNodeTypes.QLayer
      && isBelong(node, brother)
      && !brother.hasComplexStyle); // 如果节点被兄弟覆盖,并且自己没有其它属性(shadow)影响到兄弟,则移除该节点
};
1.3 图层颜色与底层图元颜色相同;
// 节点颜色是否与背景同色
const isCamouflage = function(node: UINode, nodelist: Array): boolean {
  const { pureColor } = node;
  if (!pureColor) return false;
  const nodeIndex = nodelist.indexOf(node);
  const bgNode = nodelist
    .slice(0, nodeIndex)
    .reverse()
    .find(n => isSameColor(pureColor, n.pureColor)
        && (!n.parent || isBelong(node, n)));
  if (!bgNode) return false;
  const bgNodeIndex = nodelist.indexOf(bgNode);
  if (bgNodeIndex + 1 < nodeIndex) return !nodelist
    .slice(bgNodeIndex + 1, nodeIndex)
    .some(n => isIntersect(node, n));
  return false;
};
1.4 图层位于可视边界外
// 节点是否在边界外
const isOutside = function(node: UINode, rootNode: UINode): boolean {
  return !(
    node.abX >= rootNode.abXops
    || node.abY >= rootNode.abYops
    || node.abX >= rootNode.abXops
    || node.abY >= rootNode.abYops
  );
};
我们定义为一个清洗函数,输入图层节点列表遍历,如果满足上述四个条件之一,则过滤掉该节点。
// 图元冗余清洗
function clean(nodes: UINode[]) {
  const [rootNode] = nodes;
  return nodes.filter((node: UINode) => {
    const needClean =
      isTransparentStyle(node) // 节点是否样式不可见
      || isOutside(node, rootNode) // 节点是否位于边界外
      || isCovered(node, nodes) // 节点是否被覆盖
      || isCamouflage(node, nodes); // 节点是否颜色伪装
    // 满足其中一种情况则视为冗余节点
    return !needClean;
  }
}
2. 图层合并
这个步骤主要是判断设计稿中哪些图层需要合并,比如下图的笑脸icon,如果不对图层进行成组而直接导出,会输出四张零散图。
我们判断合并的思路是根据图层之间空间关系是否相交,主要分为以下两步:
2.1 判断两节点之间的相交关系
如上图,图形eye和face相交,mouth和face相交,得到相交关系A:[eye,face],相交关系B:[mouth,face]两个组,代码如下:
let isCollision = (node: UINode, brother: UINode) => !(
        (node.abY + node.height < brother.abY) || (node.abY > brother.abY + brother.height) ||
        (node.abX + node.width < brother.abX) || (node.abX > brother.abX + brother.width)
    );
2.2 多个节点合并
我们将相交关系的组(边)进行合并,比如边A中的face图层在B关系中也存在,那么将A和B进行合并,得到C:[ eye, face, mouth ]。
mergeJudge(nodelist: UINode[]): Array> {
    // 相交检测
    const groups: Array> = [];
    const relations = [];
    for (let i = 0; i < nodelist.length; i++) {
      const node = nodelist[i];
      for (let j = i + 1; j < nodelist.length; j++) {
        const brother = nodelist[j];
        if (isCollision(node, brother)) { // 判断两节点是否相交
          relations.push([node, brother]); // 相交则加入边列表
        }
      }
    }
    // 关系聚合
    relations.forEach(([node, brother]) => {
      // 查找当前边的两个端点是否已经有过成组
      let res = groups.filter(group => group.has(node) || group.has(brother));
      if (res.length) { // 已成过组
          const unionGroup = res.reduce((p, c) => p.concat([...Array.from(c)]), []);
          res.forEach(g => groups.splice(groups.indexOf(g), 1)); // 剔除原有组
          groups.push(new Set(unionGroup).add(node)
            .add(brother)); // 合并新组
      } else groups.push(new Set([node, brother])); // 否则,自成新组
    });
    return groups;
  }
}
最后根据将这些关系合并成新的节点:
// 零散图元合并
function merge(nodes: UINode[]) {
    // 根据空间关系合并图层
    if ( !nodes.length) return;
    const groupArr = mergeJudge(nodes); // 碰撞检测,输出成组列表 [[node1,node2],[node3,node4],node5]
    groupArr.map((item: UINode | UINode[]) => {
        if (item.size > 1) {
            const newNode = union([...item], UINodeTypes.Image); // 合并成图片节点
            return newNode;
        }
        return item;
    });
});
总结
本文通过图层抽象和优化两个步骤,抽象过程是将不同设计软件图层解析为统一的数据结构,接着通过图层优化,清除冗余节点和合并零散节点,得到“干净”的UI节点集合。
后续我们将介绍如何利用这些UI节点进行布局到生成最终代码。
更多关于前端智能化的课程,可以参考我之前分享的课程:https://ke.qq.com/course/2995626
文章传送:《前端智能化 ——从图片识别UI样式》https://zhuanlan.zhihu.com/p/207308196
各个设计平台的解析文档如下:
Sketch API: https://developer.sketch.com/reference/api/
PhotoShop API: https://www.adobe.com/devnet/photoshop/scripting.html
XD API: https://adobexdplatform.com/plugin-docs/reference/how-to-read.html


