OpenCV2 颜色识别
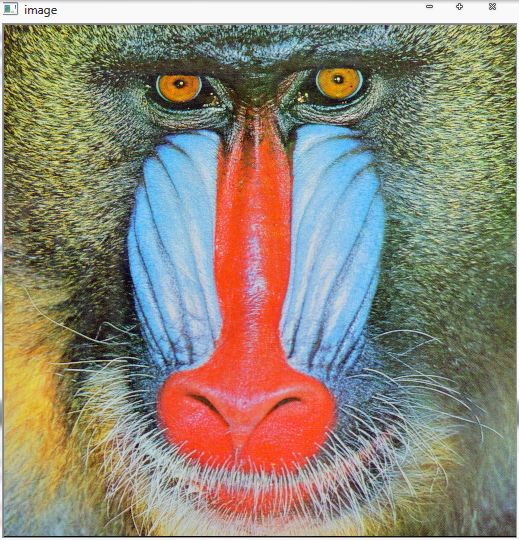
在这个例子中,我们开始选定一种颜色,并设置一个阈值
然后把图片中和所选颜色的差别在阈值中的点标定出来
在这个例子中,主要要注意这两点:
1. OpenCV与QT的结合,包括Mat 与 QImage 的转换
2. 我们使用了类来实现此功能,创建了一个单例模式的类
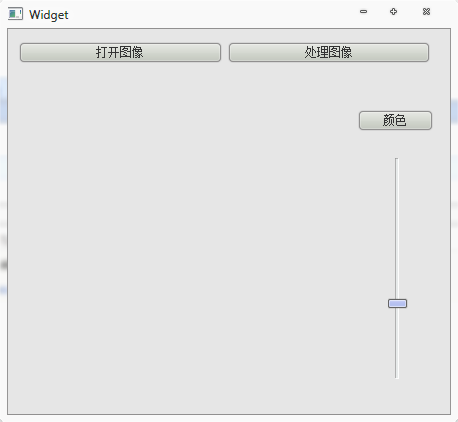
首先我们创建一个简单的图形界面,使用的是QT

创建处理图像用的类
#ifndef COLORDETECTOR_H_
#define COLORDETECTOR_H_

#include <opencv2/core/core.hpp>
#include <opencv2/highgui/highgui.hpp>
#include <string>

class ColorDetector{
private:
        int minDist;
        cv::Vec3b target;
        cv::Mat result;
        cv::Mat image;
        ColorDetector();
        static ColorDetector *singleton;

public:
        static ColorDetector * getInstance();
        static void destory();
        void setColorDistanceThreshold(int);
        int getColorDistanceThreshold() const;
        void setTargetColor(unsigned char, unsigned char, unsigned char);
        void setTargetColor(cv::Vec3b);
        cv::Vec3b getTargetColor() const;
        void process();
        int getDistance(const cv::Vec3b&) const;
        cv::Mat getResult() const;
        bool setInputImage(std::string);
        cv::Mat getInputImage() const;
};


#endif /* COLORDETECTOR_H_ */
将其构造函数声明为private,提供静态的接口来获得ColorDetector对象
void setColorDistanceThreshold(int) 用于设置阈值
void setTargetColor(unsigned char, unsigned char, unsigned char)
void setTargetColor(cv::Vec3b) 用于设置颜色
bool setInputImage(std::string) 用于载入待处理图像
cv::Mat getResult() const 用于返回处理结果,结果用一副图像表示

其具体实现如下
#include "ColorDetector.h"

ColorDetector* ColorDetector::singleton = 0;

ColorDetector::ColorDetector():minDist(100){
        target[0] = target[1] = target[2] = 0;
}

ColorDetector* ColorDetector::getInstance(){
        if(singleton == 0){
                singleton = new ColorDetector;
        }
        return singleton;
}

void ColorDetector::destory(){
        if(singleton!=0){
                delete singleton;
        }
        singleton = 0;
}

void ColorDetector::setColorDistanceThreshold(int distance){
        if(distance < 0){
                distance = 0;
        }
        minDist = distance;
}

int ColorDetector::getColorDistanceThreshold() const{
        return minDist;
}

void ColorDetector::setTargetColor(unsigned char red,
                unsigned char green, unsigned char blue){
        target[2] = red;
        target[1] = green;
        target[0] = blue;
}

void ColorDetector::setTargetColor(cv::Vec3b color){
        target = color;
}

cv::Vec3b ColorDetector::getTargetColor() const{
        return target;
}

int ColorDetector::getDistance(const cv::Vec3b& color) const{
        return abs(color[0]-target[0])+abs(color[1]-target[1])+abs(color[2]-target[2]);
}

void ColorDetector::process(){
        result.create(image.rows, image.cols, CV_8U);
        cv::Mat_<cv::Vec3b>::const_iterator it = image.begin<cv::Vec3b>();
        cv::Mat_<cv::Vec3b>::const_iterator itend = image.end<cv::Vec3b>();
        cv::Mat_<uchar>::iterator itout = result.begin<uchar>();
        for(; it!=itend; ++it, ++itout){
                if(getDistance(*it) < minDist){
                        *itout = 255;
                }else{
                        *itout = 0;
                }
        }
}

cv::Mat ColorDetector::getResult() const{
        return result;
}

bool ColorDetector::setInputImage(std::string filename){
        image = cv::imread(filename);
        if(!image.data){
                return false;
        }
        return true;
}

cv::Mat ColorDetector::getInputImage() const{
        return image;
}
在前面文章中,讲了遍历像素点的方法,这里用迭代器实现
然后是图像界面中的处理函数
#ifndef WIDGET_H
#define WIDGET_H

#include <QWidget>
#include <QFileDialog>
#include <QImage>
#include <opencv2/core/core.hpp>
#include <opencv2/highgui/highgui.hpp>
#include <opencv2/imgproc/imgproc.hpp>
#include "colordetector.h"

namespace Ui {
    class Widget;
}

class Widget : public QWidget
{
    Q_OBJECT

public:
    explicit Widget(QWidget *parent = 0);
    ~Widget();

private:
    Ui::Widget *ui;
    QImage qimage;
    cv::Mat image;

private slots:
    void openImage();
    void dealImage();
    void colorSelect();
    void changeDis(int);
};

#endif // WIDGET_H
其实现
#include "widget.h"
#include "ui_widget.h"
#include <QColorDialog>


Widget::Widget(QWidget *parent) :
    QWidget(parent),
    ui(new Ui::Widget)
{
    ui->setupUi(this);
    connect(ui->openImage,SIGNAL(clicked()),this,SLOT(openImage()));
    connect(ui->dealImage,SIGNAL(clicked()),this,SLOT(dealImage()));
    connect(ui->colorButton,SIGNAL(clicked()),this,SLOT(colorSelect()));
    connect(ui->verticalSlider,SIGNAL(valueChanged(int)),this,SLOT(changeDis(int)));
}

Widget::~Widget()
{
    delete ui;
}


void Widget::openImage(){
    QString fileName = QFileDialog::getOpenFileName(this,
                  tr("Open Image"), ".",
                tr("Image Files (*.png *.jpg *.jpeg *.bmp)"));

    ColorDetector::getInstance()->setInputImage(fileName.toAscii().data());
    cv::namedWindow("image");
    cv::imshow("image",ColorDetector::getInstance()->getInputImage());
    dealImage();
}

void Widget::dealImage(){
    ColorDetector::getInstance()->process();
    cv::cvtColor(ColorDetector::getInstance()->getResult(),image,CV_GRAY2RGB);
    qimage = QImage((const unsigned char*)(image.data),image.cols,image.rows,QImage::Format_RGB888);
    ui->label->setPixmap(QPixmap::fromImage(qimage).scaledToHeight(300));
    //ui->label->resize(ui->label->pixmap()->size());
}

void Widget::colorSelect(){
    QColor color = QColorDialog::getColor(Qt::green,this);
    if(color.isValid()){
        ColorDetector::getInstance()->setTargetColor(
                    color.red(),color.green(),color.blue());
    }
    dealImage();
}

void Widget::changeDis(int value){
    ColorDetector::getInstance()->setColorDistanceThreshold(value);
    dealImage();
}
在QT项目的pro文件中要加入如下几句
INCLUDEPATH += D:\OpenCV\include
LIBS += -LD:\OpenCV\lib \
-lopencv_core230 \
-lopencv_highgui230 \
-lopencv_imgproc230
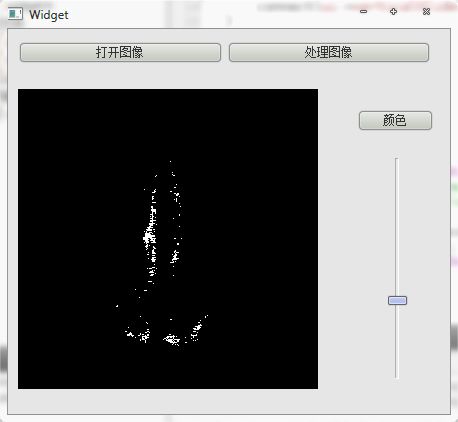
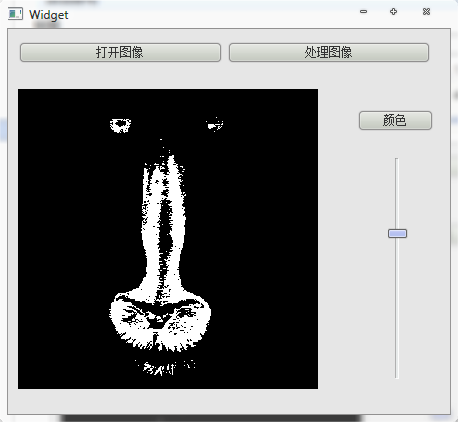
看看最后效果


不同颜色,不同阈值的比较效果