今日作业
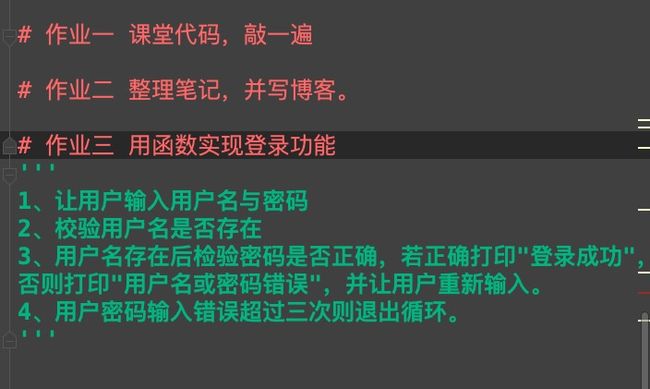
今日作业
1. 文件内容(user_info.txt)
用户名:hy,密码:123456
用户名:admin,密码:123
2. 程序代码
def login():
    '''
    登录功能
    '''
    count = 0

    user = ''
    pwd = ''
    dict = {}
    with open('user_info.txt', 'rt', encoding='utf-8-sig') as f:
        for line in f:
            line = line.split('\n')[0].split(',')
            for info in line:
                if '用户名' in info:
                    user = info[4:]
                else:
                    pwd = info[3:]
                dict[user] = pwd

    while True:
        if count != 3:
            users = input('请输入用户名:').strip()
            pwds = input('请输入密码:').strip()
            if users in dict:
                if pwds == dict[users]:
                    print('登陆成功!')
                    break
                else:
                    print('用户名或密码错误!')
            else:
                print('用户名或密码错误!')
            if count < 2:
                print('请重新输入(剩余%s次机会)!' % (2 - count))
            count += 1
        else:
            print('3次输入错误,退出!')
            break


#调用登陆函数
login()
3. 运行结果
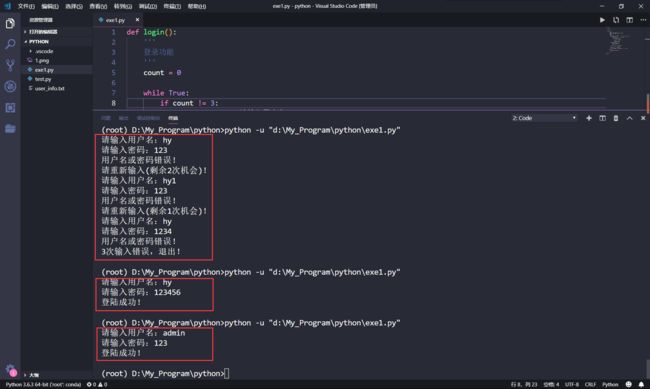
运行结果
1.数据类型剩余内置方法
- 列表类型内置方法
list = ['hy','23','male',190,70]

1. insert()     #插入
>>>list.insert(2,'abc')
>>>prnt(list)
['hy','23','abc','male',190,70]

2. pop()
3. remove()

4. count()    #查看某个值个数
>>>print(list.count('male'))
1

5. index()     #查看某个值的索引
>>>print(list.index('male'))
3

6. clear()     #清空
>>>list.clear()
>>>print(list)

7. copy()     #浅拷贝,仅对外层地址的值进行拷贝到另一地址,深层地址的值仍在原来空间
              #原列表外层值改变对其不影响,但对原列表中可变类型进行修改会影响拷贝的列表
>>>list1 = list.copy()
>>>print(list1)
['hy','23','male',190,70]

>>>list2 = list
>>>print(list2)
['hy','23','male',190,70]

#深拷贝,对列表中所有值完全拷贝到另一新地址,与原列表完全隔离
>>>from copy import deepcopy
>>>list3 = deepcopy(list)
>>>print(list3)

>>>list.append('def')
>>>print(list1)
['hy','23','male',190,70]
>>>print(list2)
['hy','23','male',190,70,'def']

8. extend()     #列表合并
>>>list4 = [1,2,3]
>>>list5 = [4,5,6]
>>>list4.extend(list5)
>>>print(list4)
[1,2,3,4,5,6]

9. reverse()     #反转
>>>list4.reverse()
[3,2,1]

10. sort()     #排序
>>>list6 = [1,5,9,6,7,2,3,8]
>>>list6.sort()          #升序
>>>print(list6)
[1,2,3,5,6,7,8,9]
>>>list6.sort(reverse = True)          #降序
>>>print(list6)
[9,8,7,6,5,3,2,1]

11. 普通赋值
>>>str = 'name:pwd'
>>>list = str.split(':')
>>>username = list[0]
>>>password = list[1]

12. 解压赋值
>>>str = 'name:pwd'
>>>username, password = str.split(':')
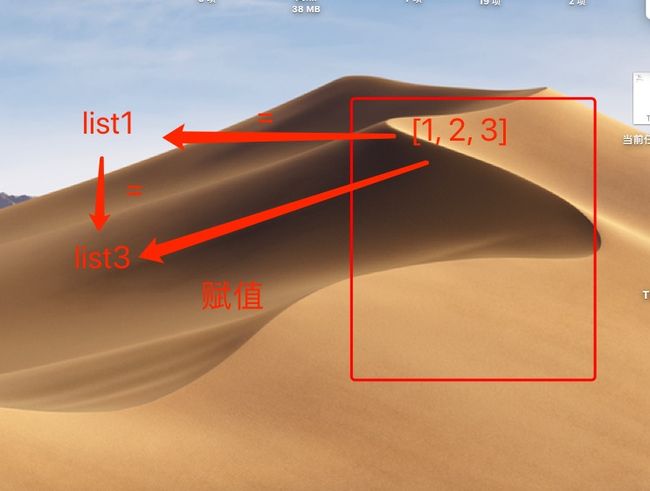
列表赋值
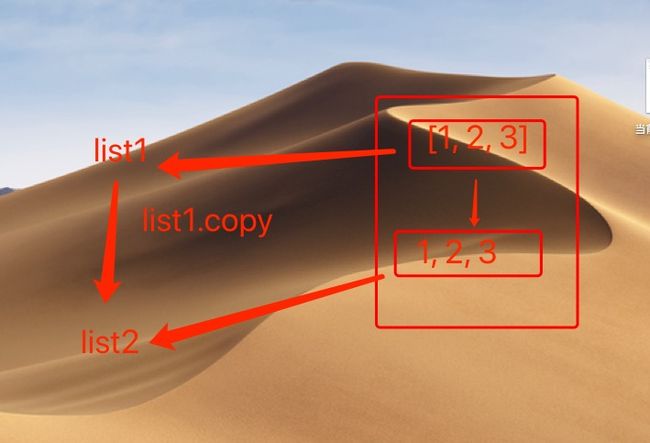
列表copy浅拷贝
- 字典类型内置方法
#字典是无序的
1. 按照key取/存值
>>>dict = {'name' : 'hy', 'age' : 23, 'sex' : 'male', 'school' : 'ahpu'}
>>>print(dict['school'])         #取学校
ahpu

2. get()
>>>print(dict.get('school'))
ahpu
>>>print(dict.get('sal'))
None
>>>print(dict.get('sal','15000'))     #第一个参数是key,第二个参数是默认值,若key存在则取对应值,否则取默认值
15000

3. len()
>>>print(len(dict))
4

4. 成员运算in 和not in
>>>print('name' in dict)
True
>>>print('sal' in dict)
False

5. 删除del
>>>del dict['name']

6. pop()
>>>dict1 = dict.pop('name')
>>>print(dict)
{'age' : 23, 'sex' : 'male', 'school' : 'ahpu'}
>>>print(dict1)
hy

>>>dict.popitem()     #随机pop一个
>>>print(dict)
{'name' : 'hy','age' : 23,'sex' : 'male'}

7. keys(),values(),items()
>>>print(dict.keys())
dict_keys(['name', 'age', 'sex', 'school'])

>>>print(dict.values())
dict_values([ 'hy', 23, 'male', 'ahpu'])

>>>print(dict.items())
dict_items([('name', 'hy'), ('age', 23), ('sex', 'male'), ('school', 'ahpu')])

8. 循环for
#循环字典中所有的key
>>>for i in dict:
       print(i)

9. update()
>>>dict2 = {'work' : 'student'}
>>>dict.update(dict2)
>>>print(dict)
{'name' : 'hy', 'age' : 23, 'sex' : 'male', 'school' : 'ahpu', 'work' : 'student'}
- 元组(在小括号内,以逗号分开)
#元组是不可变类型,赋值后不可变
>>>tuple = (1,2,3,4,5,6)

1. 按索引取值
>>>print(tuple[2])
3

2. 切片
>>>print(tuple[0:6])
(1,2,3,4,5,6)

>>>print(tuple[0:6:2])
(1,3,5)

3. len()
>>>print(len(tuple))
6

4. 成员运算in 和not in
>>>print(1 in tuple)
True
>>>print(1 not in tuple)
False

5. 循环
>>>for i in tuple:
       print(i)
- 集合(在{}内以逗号隔开,可存放多个值,默认去重)
#集合是无序的
>>>set1 = {1, 2, 3, 4, 1, 3, 4}
>>>print(set)
{1, 2, 3, 4}

>>>set2 = set()
>>>set3 = {}          #无法确定set3数据类型
>>>print(set2)
set()
>>>print(set3)
{}
2.文件处理
'''
文件读写基本使用


#对文本进行操作
#open(参数1 : 文件名, 参数2 : 操作模式, 参数3 : 指定字符编码)
# f 称为句柄

# r: read,只读模式,只能读不能写,文件不存在时报错。
# w: 只能写,不能读,文件存在的时候回清空文件后再写入内容;文件不存在的时候会创建文件后写入内容。
# a: 可以追加。文件存在,则在文件的末端写入内容;文件不存在的时候会创建文件后写入内容。
# b模式是通用的模式,因为所有的文件在硬盘中都是以二进制的形式存储的,需要注意的是:b模式读写文件,一定不能加上encoding参数,因为二进制无法再编码。

#文件操作的基础模式有三种(默认的操作模式为r模式):
        # r模式为read
        # w模式为write
        # a模式为append
#文件读写内容的格式有两种(默认的读写内容的模式为b模式):
        # t模式为text
        # b模式为bytes
        #需要注意的是:t、b这两种模式均不能单独使用,都需要与r/w/a之一连用。

#打开会产生两种资源,一种是python解释器和python文件资源,程序结束python会自动回收
#另一种是操作系统打开文件的资源,文件打开后操作系统不会自动回收,需要手动回收资源
'''

'''
1.  文件读写操作
'''
#写文件 w
f = open(FilePath, mode = 'wt', encoding = 'utf-8')     #路径前加 r 可将路径中的转义字符变为普通字符
f.write('hello hy!')
f.close()     #文件资源回收

#读文件 r
f = open(FilePath, 'rt', encoding = 'utf-8')     #默认rt,mode可不写
file = f.read()
print(file)
f.close()

#文件追加 a
f = open(FilePath, 'at', encoding = 'utf-8')     #默认at
f.write('hello yh')
f.close()

'''
写文件与追加的区别:写文件是写入新文件,或覆盖文件原有内容,追加是在已有的文件内容后面添加内容

文件处理之上下文管理
    with自带close()功能,会在文件处理结束后自动调用close()关闭文件
'''

#写文件
with open(FilePath, mode = 'wt', encoding = 'utf-8') as f:
    f.write('life is short, u need python!')

#读文件
with open(FilePath, mode = 'rt', encoding = 'utf-8') as f:
    file = f.read()
    print(file)

#文件追加
with open(FilePath, mode = 'at', encoding = 'utf-8') as f:
    f.write('life is short, u need python!')

'''
2. 图片与视频读写操作
'''

#写入图片
import requests
pic = requests.get(picPath)           #可从bing搜索图片链接
with open(picPath, 'wb') as f:
    f.write(pic.content)

#读图片
with open(picPath, 'rb') as f:
    file = f.read()
    print(file)

#图片拷贝操作
with open(picPath1, 'rb') as f1, open(picPath2, 'wb') as f2:
    pic = f1.read()
    f2.write(pic)

#视频操作同上

#一行一行读文件
with open(picPath1, 'rb') as f1, open(picPath2, 'wb') as f2:
    # f1.read()     #依次打开文件所有内容,若文件的大小超出内存大小会导致内存溢出
    for i in f1:     #一行一行读取文件内容,一行一行写入文件内容,避免内存溢出
        f2.write(i)
3.函数基础
#函数必须先定义,后调用

'''
函数的语法
def:(全称define),用来声明定义函数关键字
函数名:见名知意
():小括号,存放的是接受外界的参数
'''

def cup(参数1, 参数2...) :
    '''
    函数声明
    水杯,用来盛水与喝水
    '''
    函数体代码
    return 返回值

'''
函数在定义阶段发生的事情
    1.先打开 python 解释器
    2.加载 python 的 .py 文件
    3.python 解释器会检测 py 文件中的语法,但是只会检测 python 语法,不会执行函数体代码
'''

#例子
#注册功能

def register():
    '''
    注册功能
    '''
    while True:
        user = input('请输入用户名').strip()
        pwd = input('请输入密码').strip()
        re_pwd = input('请确认密码').strip()

        #判断两次密码是否相同
        if pwd == re_pwd:

            #格式化字符串的三种方法
            user_info1 = '用户名:%s,密码:%s' % (user,pwd)
            user_info2 = '用户名:{},密码:{}'.format(user,pwd)

            #字符串前写一个 f 相当于后面调用 format     python3.6以上可用此方式
            user_info3 = f'用户名:{user},密码:{pwd}'

            #把用户信息写入文件
            with open(f'C:/Users/administortra/Desktop/{user}.txt','w',encoding = 'utf-8') as f:
                f.write(user_info3)

            break

        else:
            print('两次密码不一致,请重新输入!')

#调用函数   函数名() 即调用函数
register()