最近看了很多文章,发现都没有很好的解释如何搭建react环境并使用react-weui,以及webpack打包运行中需要注意的问题点。下面我就基于当前react-weui 1.1.3版本做一个 全面的入门教程。
1.下载 github最新源码
下载地址:https://github.com/weui/react-weui
git clone 也行 下载 zip包也可以。

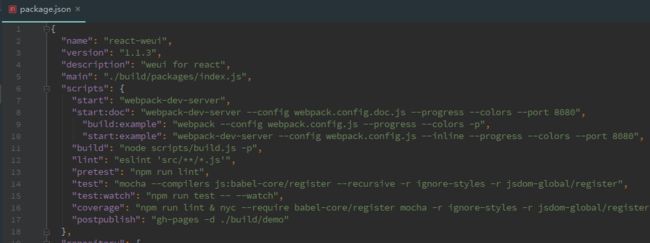
重点就是要看中间的这3个文件
package.json 编辑和运行的脚步都在这个里面
webpack.config.js webpack打包配置文件
webpack.config.doc.js webpack打包配置文件(doc)
2.打开IDE 创建项目
ide采用webstrom, cmd用的是代替品cmder
下载地址:
webstrom:https://www.jetbrains.com/webstorm/
cmder:http://cmder.net/
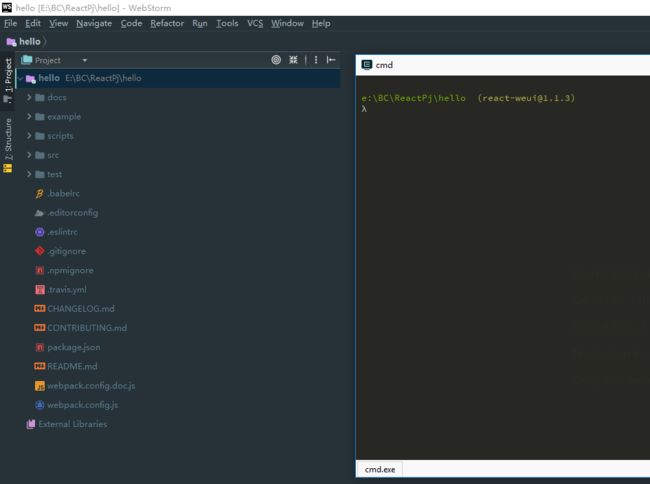
3.初始化项目 加入npm包
这里使用 cnpm 代替npm
淘宝 NPM 镜像 :https://npm.taobao.org/
你可以使用我们定制的 [cnpm](https://github.com/cnpm/cnpm) (gzip 压缩支持) 命令行工具代替默认的 npm:
$ npm install -g cnpm --registry=https://registry.npm.taobao.org
命令如下:
安装项目内部的npm包
cnpm install
安装相关的npm包
cnpm install --save react react-dom
cnpm install --save [email protected] react-weui
#这里一定要指明webpack版本 因为如果使用webpack会自动安装webpack4,后面会产生版本异常*
cnpm install --save webpack@3
#目前版本还是 2.x 不过还是指明出来*
cnpm install  --save webpack-dev-server@2
cnpm install --save autoprefixer
cnpm install --save html-webpack-plugin
cnpm install --save extract-text-webpack-plugin
cnpm install --save open-browser-webpack-plugin
cnpm install --save-dev babel-core babel-loader babel-preset-es2015 babel-preset-react babel-preset-stage-0
4.编译打包
这里不采用,官方提供的build脚本。我们基于webpack创建一个。
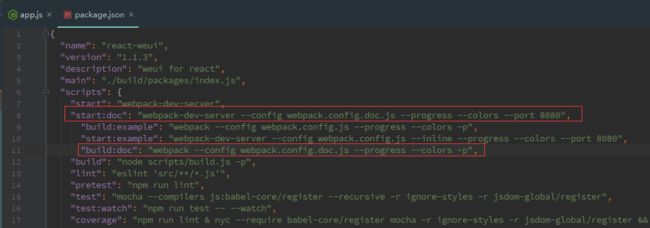
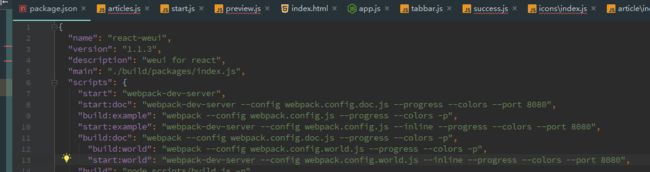
打开**webpack.js 在script中加入下面代码
"build:example": "webpack --config webpack.config.js --progress --colors -p",
"start:example": "webpack-dev-server --config webpack.config.js --inline --progress --colors --port 8080",
如下:
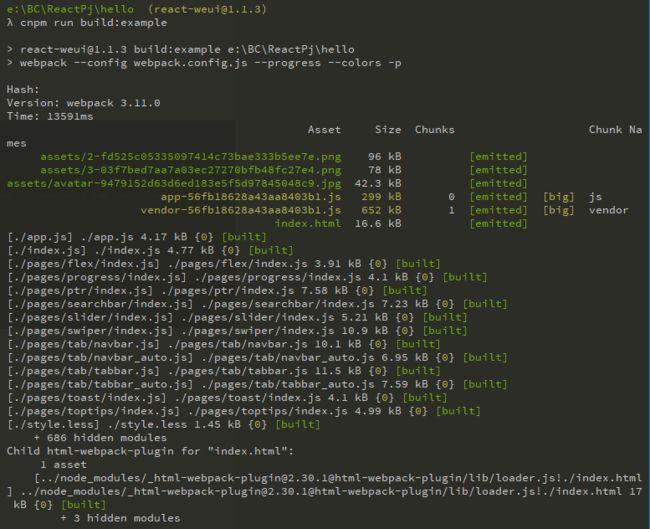
此时运行脚本:
cnpm run build:example
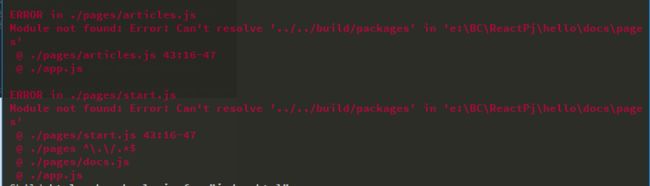
但是会发现报错了:Mudule not found (js)
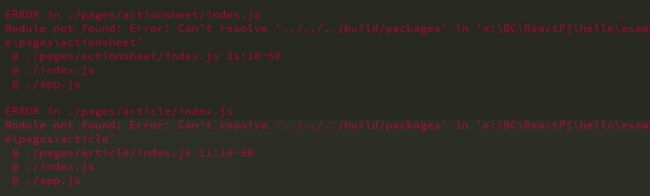
这个没关系仔细看发现时缺少了module,用webpack打包会出现这个问题。
我们需要全局搜索 ../../../build/packages 并修改成 react-weui
文件很多耐心修改:
举个例子:
第5行修改如下:

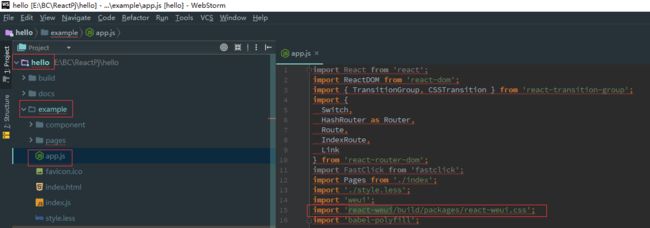
还有个错误:Module not found (css)

打开文件 example/app.js
修改第15行 import 'react-weui/build/packages/react-weui.css';
依次都修改后再运行 cnpm run build:example 完美!
5.运行example示例项目
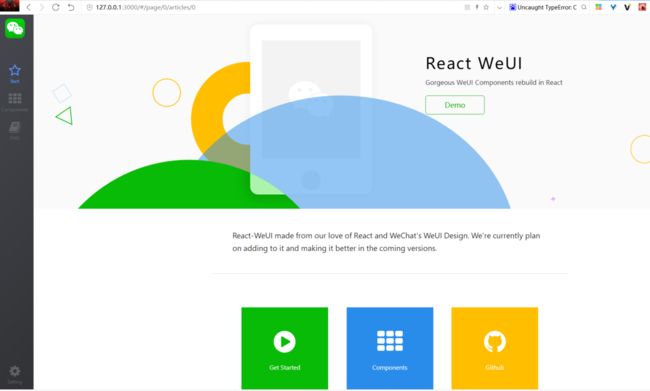
cnpm run start:example
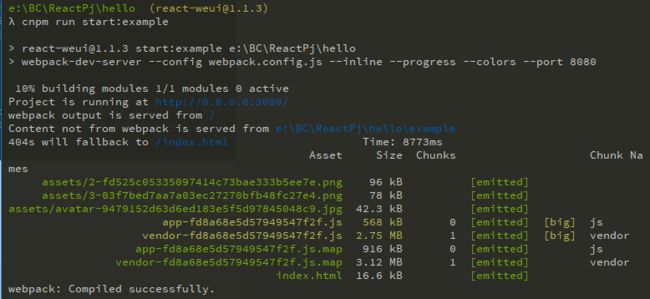
完成,打开浏览器
http://127.0.0.1:3000/

6.构建并运行doc示例项目
因为package.json中有了 start:doc脚本,所以我们只需加入
"build:doc": "webpack --config webpack.config.doc.js --progress --colors -p",
下面运行
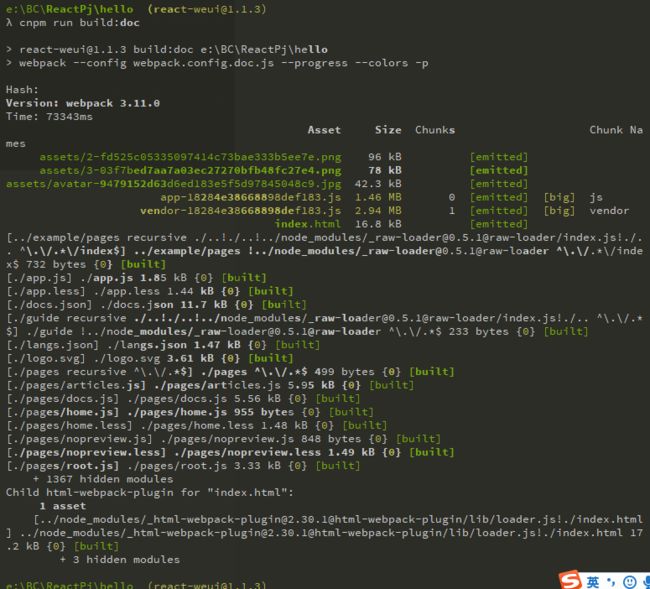
cnpm run build:doc
如果遇到报错../../build/packages修改为react-weui
这个构建时间会稍长些 耐心等待。。。。 完美!
启动doc
cnpm run start:doc
。。。。页面一片空白
F12发现
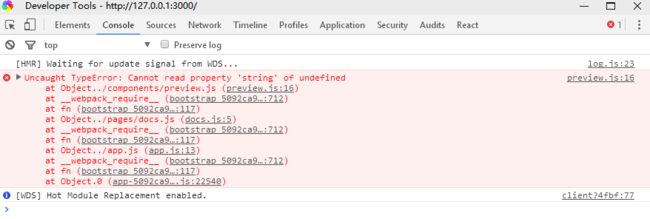
此处原因是 15.5 以后 prop types分开import,当前的react版本已经是16.2.0了

// 15.5 以后
import PropTypes from 'prop-types';
找到报错文件 ***docs/components/preview.js ***修改如下

重新构建&运行
7.构建自己的手脚架
接下来就通过简单的模仿,构建自己的APP脚手架。
1.创建项目world

2.创建文件 index.html和app.js
index.html
world
app.js
import React, { Component } from "react";
import PropTypes from 'prop-types';
import { render } from "react-dom";
import ReactDOMServer from "react-dom/server";
import { transform } from "babel-standalone";

class Preview extends Component {

  static defaultProps = {
    previewComponent: "div"
  };

  static propTypes = {
    code: PropTypes.string.isRequired,
    scope: PropTypes.object.isRequired,
    previewComponent: PropTypes.node,
    noRender: PropTypes.bool,
    context: PropTypes.object
  };

  constructor(props){
      super(props)
      this.state = {
        error: null
      };
  }


  _compileCode = () => {
    const { code, context, noRender, scope } = this.props;
    const generateContextTypes = (c) => {
      return `{ ${Object.keys(c).map(val =>
        `${val}: React.PropTypes.any.isRequired`).join(", ")} }`;
    };

    if (noRender) {
      return transform(`
        ((${Object.keys(scope).join(", ")}, mountNode) => {
          class Comp extends React.Component {
            getChildContext() {
              return ${JSON.stringify(context)};
            }
            render() {
              return (
                ${code}
              );
            }
          }
          Comp.childContextTypes = ${generateContextTypes(context)};
          return Comp;
        });
      `, { presets: ["es2015", "react", "stage-1"] }).code;
    } else {
      return transform(`
        ((${Object.keys(scope).join(",")}, mountNode) => {
          ${code}
        });
      `, { presets: ["es2015", "react", "stage-1"] }).code;
    }

  };

  _setTimeout = (...args) => {
    clearTimeout(this.timeoutID); //eslint-disable-line no-undef
    this.timeoutID = setTimeout.apply(null, args); //eslint-disable-line no-undef
  };

  _executeCode = () => {
    const mountNode = this.refs.mount;
    const { scope, noRender, previewComponent } = this.props;
    const tempScope = [];

    try {
      Object.keys(scope).forEach(s => tempScope.push(scope[s]));
      tempScope.push(mountNode);
      const compiledCode = this._compileCode();
      //console.log(compiledCode);
      if (noRender) {
        /* eslint-disable no-eval, max-len */
        const Comp = React.createElement(
          eval(compiledCode).apply(null, tempScope)
        );
        ReactDOMServer.renderToString(React.createElement(previewComponent, {}, Comp));
        render(
          React.createElement(previewComponent, {}, Comp),
          mountNode
        );
      } else {
        eval(compiledCode).apply(null, tempScope);
      }
      /* eslint-enable no-eval, max-len */

      this.setState({ error: null });
    } catch (err) {
      this._setTimeout(() => {
        this.setState({ error: err.toString() });
      }, 500);
    }
  };

  componentDidMount = () => {
    this._executeCode();
  };

  componentDidUpdate = (prevProps) => {
    clearTimeout(this.timeoutID); //eslint-disable-line
    if (this.props.code !== prevProps.code) {
      this._executeCode();
    }
  };

  render() {
    const { error } = this.state;
    return (

        {error !== null ?
          {error} :
          null}


    );
  }

}

export default Preview;
3.构建build和start脚本
"build:world": "webpack --config webpack.config.world.js --progress --colors -p",
"start:world": "webpack-dev-server --config webpack.config.world.js --inline --progress --colors --port 8080",
4.创建webpack.config.world.js
复制 webpack.config.js 修改 11,12,13行如下
const jsSourcePath = path.join(__dirname, 'world');
const buildPath = path.join(__dirname, 'build/demo/world');
const sourcePath = path.join(__dirname, 'world');
5.run build&start
cnpm run build:world
cnpm run start:world

最后附上代码地址:
https://gitee.com/wmdzkey/react-weui-scaffold
看到这里觉得有帮助的同学给个赞,点点下面的喜欢,有能力的支持下。多谢~