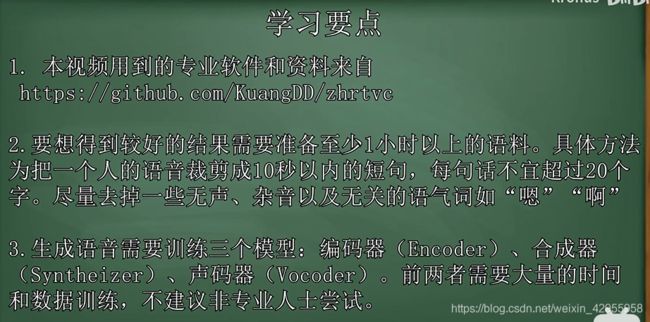
Python+RealTimeVoiceCloning的配置
PyCharm中Directory与Python package的区别
Python 中 (&,|)和(and,or)之间的区别
python中的del用法
列表可以作为集合的元素吗?集合可以作为列表的元素吗?元组可以作为集合的元素吗?字典可以作为集合的元素吗?
List
extend() 函数用于在列表末尾一次性追加另一个序列中的多个值(用新列表扩展原来的列表)
insert() 函数用于将指定对象插入列表的指定位置
list.insert(index, obj)
环境变量
突然报错,我记得之前已经配置好环境变量的
'pip' 不是内部或外部命令,也不是可运行的程序
参考:在win10中,碰到pip不是内部或外部命令,也不是可运行程序的解决方案
啊啊啊,我吐血了啊,突然在命令行输入python,给我跳出Microsoft商店,只好又改回不要Scripts的环境变量!!
然后pip又不能用了
解决方案: 解决win10 cmd下运行python弹出windows应用商店
就是配置两个环境变量,顺序要正确
Pytorch
官网
ModuleNotFoundError: No module named ‘pip’
ModuleNotFoundError: No module named ‘pip’
anaconda
WARNING: The conda.compat module is deprecated and will be removed in a future release.
TypeError: LoadLibrary() argument 1 must be str, not None
就是将环境变量配置下,然后安装tensorflow的时候要使用 conda.bat而不是conda
tensorflow
Could not load dynamic library ‘cudart64_100.dll’; dlerror: cudart64_100.dll not found解决办法
可以现在本地搜下有没有这个文件,没有就去下载
TensorFlow的环境配置与安装
我这边用的是conda.bat
解决pip安装tensorflow慢的问题
ffmpeg的配置
一直报错:
Librosa will be unable to open mp3 files if additional software is not installed.
Please install ffmpeg or add the ‘–no_mp3_support’ option to proceed without support for mp3 files.
Librosa and ffmpeg were already installed how do i fix this?
解决思路:Testing Demo_cli.py
就是要配置ffmpeg的意思
ffmpeg官网
超简单的FFmpeg安装方法
为什么ffmpeg从官网下载不了?
中文版的realtimevoicecloning
运行问题:
百度的大部分方法都能解决,但是我使用错了解释器,注意啊解释器
完美解决 python ImportError: Failed to import any qt binding
问题2:

tensorflow和paddlepaddle所需要的gast不同
问题三及解决:
[机器学习]AttributeError: module ‘tensorflow’ has no attribute ‘ConfigProto’ 报错解决方法
问题四及解决:
为解决github不能展示出图片,就采用了此方法:
解决github上的图片显示不出来的问题
# GitHub Start
140.82.113.3      github.com
140.82.114.20     gist.github.com

151.101.184.133    assets-cdn.github.com
151.101.184.133    raw.githubusercontent.com
151.101.184.133    gist.githubusercontent.com
151.101.184.133    cloud.githubusercontent.com
151.101.184.133    camo.githubusercontent.com
151.101.184.133    avatars.githubusercontent.com
199.232.68.133     avatars.githubusercontent.com
151.101.184.133    avatars0.githubusercontent.com
199.232.68.133     avatars0.githubusercontent.com
199.232.28.133     avatars1.githubusercontent.com
151.101.184.133    avatars1.githubusercontent.com
151.101.184.133    avatars2.githubusercontent.com
199.232.28.133     avatars2.githubusercontent.com
151.101.184.133    avatars3.githubusercontent.com
199.232.68.133     avatars3.githubusercontent.com
151.101.184.133    avatars4.githubusercontent.com
199.232.68.133     avatars4.githubusercontent.com
151.101.184.133    avatars5.githubusercontent.com
199.232.68.133     avatars5.githubusercontent.com
151.101.184.133    avatars6.githubusercontent.com
199.232.68.133     avatars6.githubusercontent.com
151.101.184.133    avatars7.githubusercontent.com
199.232.68.133     avatars7.githubusercontent.com
151.101.184.133    avatars8.githubusercontent.com
199.232.68.133     avatars8.githubusercontent.com

# GitHub End
问题五及解决
TypeError: addWidget(self, QWidget, stretch: int = 0, alignment: Union[Qt.Alignment, Qt.AlignmentFlag] = Qt.Alignment()): argument 1 has unexpected type 'FigureCanv
安装好对应版本的matplotlib
问题六及解决
Your CPU supports instructions that this TensorFlow binary was not compiled to use: AVX2
注:我现在用的tensorflow是cpu版本
win10查看Tensorflow是GPU还是CPU
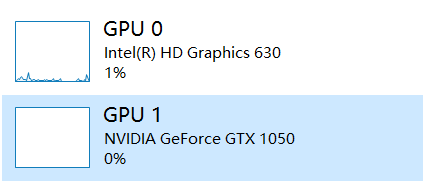
WIN10 环境下 Tensorflow 检测不到GPU (GTX1050笔记本版可以安装CUDA)
安装包:
深度学习入门篇01(Tensorflow-gpu的安装)
cuda10.1-cudnn
问题七

还没解决这个问题,原本想英文版的用这个解释器的:
![]()
解决了,将这两个依赖安装下

问题八及解决

ModuleNotFoundError: No module named ‘pyaudio’
pip install pipwin
pipwin install pyaudio
问题九
我没成功,可能与ipynb的运行的解释器和我现在的解释器不一致的原因,首先要先确认现在我的依赖包
visual studio安装
又重新安装了一次这个,因为之前安装在了c盘
pip

解决:
解决ModuleNotFoundError: No module named 'pip’问题
安装tensorflow-gpu版
先别管这个:
conda.bat create -n tensorflow-gpu python=3.6
问题:
![]()
官网下载相应的程序,升级一下nvidia,就可以了
GEFORCE® 驱动程序
就根据自己的电脑选择相应的下载程序,可参考bilibili:40秒学会更新显卡驱动 NVIDIA官方驱动下载安装教程 步骤详细 简单易懂 RTX GTX 英伟
下载以后,到NVIDIA GetForce Experience里面登录,然后安装最新的驱动程序
借鉴
拯救者Y720-gtx1050-window10-配置tensorflow-gpu环境
我现在是
win10x64 + gtx1050 + cuda10.1+tensorflowgpu1.15.2+cudnn + Anaconda
中文的克隆记录
https://github.com/KuangDD/zhrtvc/blob/master/zhrtvc/README.md
1、
python synthesizer_preprocess_audio.py
# 可带参数

usage: synthesizer_preprocess_audio.py [-h] [--datasets_root DATASETS_ROOT]
                                       [--datasets DATASETS] [-o OUT_DIR]
                                       [-n N_PROCESSES] [-s SKIP_EXISTING]
                                       [--hparams HPARAMS]

把语音信号转为频谱等模型训练需要的数据。

optional arguments:
  -h, --help            show this help message and exit
  --datasets_root DATASETS_ROOT
                        Path to the directory containing your datasets.
                        (default: ../data)
  --datasets DATASETS   Path to the directory containing your datasets.
                        (default: samples)
  -o OUT_DIR, --out_dir OUT_DIR
                        Path to the output directory that will contain the mel
                        spectrograms, the audios and the embeds. Defaults to
                        <datasets_root>/SV2TTS/synthesizer/
  -n N_PROCESSES, --n_processes N_PROCESSES
                        Number of processes in parallel. (default: 0)
  -s SKIP_EXISTING, --skip_existing SKIP_EXISTING
                        Whether to overwrite existing files with the same
                        name. Useful if the preprocessing was interrupted.
                        (default: True)
  --hparams HPARAMS     Hyperparameter overrides as a json string, for
                        example: '"key1":123,"key2":true' (default: )
运行它应该就是 处理 samples下的数据

我将synthesizer_preprocess_audio.py里面的输出目录改成了这个
parser.add_argument("-o", "--out_dir", type=Path, default=Path(r'../data/SV2TTS/synthesizer/a'), help= \
"Path to the output directory that will contain the mel spectrograms, the audios and the "
"embeds. Defaults to /SV2TTS/synthesizer/" )
2、
gpu
免费gpu – colab(需)
pycharm的plugin
Pycharm Plugins加载失败问题解决方案
pytorch
安装CUDA后安装PyTorch,pip install torch 太慢【解决办法】 实测可行torch.cuda.is_available() return True
【E-02】内存不足RuntimeError: CUDA out of memory. Tried to allocate 16.00 MiB (GPU 0; 2.00 GiB total capacity; 1.34 GiB already allocated; 14.76 MiB free; 1.38 GiB reserved in total by PyTorch)


总
现在的gmw的模型用到了torch1.7.1,这需要cuda10.1
这是我用cuda10.0+pytorch1.7.1时运行waveglow_inference.py时会报错,应该就是无法使用gpu的意思,需要将cuda10.0变成cuda10.1
然后通过pycharm里面安装的pytorch1.7.1还是行不通,最后是根据以上方法安装,最后成功的

但是之前的encoder-synthesis-vocoder的toolobox(gmw的toolbox好像和这个一样)都是要用到tensorflowgpu1.15.0,这个对应的是cuda10.0的,这样两个就矛盾了,cuda10.1对应的是2.x版本的tensorflowgpu,1.x和2.x的版本差异较大,代码存在差异
gmw_inference

speaker: (声音的性别取决在素材,而不是speaker, 我试过,就算用女生的作为speaker,比如biaobei就是女声,但是如果原音频是男声,合成的也是男生的声音,男声同理)
源素材的格式好像大多都可以,mp3,wav,m4a,flac等都可以,好像是可以自己转格式,最后输出的文件格式都是wav
文本中包含英文会导致英文那块是奇怪的声音
英文版的问题
克隆的那个代码:
b_demo_trump_voice_sythesis.ipynb在jupyter notebook中运行总是报这个错

我将其转换成b_demo_trump_voice_sythesis.py在pycharm的这个解释器上运行就可以

我感觉这应该和jupyter notebook的解释器有关吧
文章:
SV2TTS(Real-Time-Voice-Cloning)论文简介及中文复现
部署
这个文档可以借鉴下
D:\机器学习\TensorFlow-master
已经在中文语言克隆下写了一个 server.py 文件,可以提供服务了
好像是与 docker+nginx+flask 有关
Docker容器化部署Python应用
flask上线部署————“WARNING: This is a development server. Do not use it in a production deployment. Use a production WSGI server instead.”
Python 生成requirements文件以及使用requirements.txt部署项目
WARNING: Could not generate requirement for distribution -ip 20.3 (d:\python_envs\env01\lib\site-pac
先试试 这个安装环境以后能否运行
pip install -r requirements_gmw.txt
不行,就
pip install -r requirements_me.txt
音乐播放器
网页的音乐播放器请求返回的一般是音乐的url地址
启动服务
flask
Python Flask文件上传/下载
Flask入门之上传文件到服务器
flask官方文档
多进程
gevent启动多进程WSGI


