DCGAN生成动漫人物头像---pytroch版
利用DCGAN网络生成动漫人物头像(pytorch实现)
最近在学习生成式对抗网络(GAN),非常喜欢知乎上看到的一个生成动漫人物头像的例子。但可惜的是,他是利用Tensorflow中已经有人造好的轮子:carpedm20/DCGAN-tensorflow,直接使用这个代码实现的。最近正好学完cs231N的课程,就用它来练练手吧。
一、准备数据
网上有很多GAN原理的介绍,此处不再多说,直接上代码!
首先是导入文件所需要的模块,因为本人萌新一个,所以会有些多于的包,测试使用的。
#加载所需要的模块和库,设定展示图片函数以及其它对图像预处理函数
import torch
import torch.nn as nn
from torch.nn import init
from torch.autograd import Variable
import torchvision
import torchvision.transforms as T
import torch.optim as optim
from torch.utils.data import DataLoader
from torch.utils.data import sampler
import torchvision.datasets as dset
import d2lzh_pytorch as d2l
import numpy as np
from PIL import Image
import matplotlib.pyplot as plt
import matplotlib.gridspec as gridspec
from torchvision.datasets import ImageFolder
import os
from torchvision import transforms
import torchvision
确定使用GPU还是CPU
dtype = torch.cuda.FloatTensor
#cpu用这个
#dtype = torch.FloatTensor
导入图像文件
loader_train.iter().next()中有两个tensor,第一个为图像矩阵,第二个为标签
[0]表读取tensor中的第一个tensor(即图像矩阵),[1]为标签
numpy()将tensor转numpy
squeeze()从数组的形状中删除单维度条目,即把shape中为1的维度去掉,此处加不加均可
plt.rcParams['figure.figsize'] = (10.0, 8.0) # set default size of plots
plt.rcParams['image.interpolation'] = 'nearest'
plt.rcParams['image.cmap'] = 'gray'
#一些参数的设置
NOISE_DIM = 96
batch_size = 128
#加载图像
data_dir = 'D:/data/faces/'
normalize = transforms.Normalize(mean=[0.485, 0.456, 0.406], std=[0.229, 0.224, 0.225])
train_augs = transforms.Compose([
        transforms.Resize(size=28),
        transforms.ToTensor(),
    ])
loader_train = DataLoader(ImageFolder(os.path.join(data_dir,), transform=train_augs),batch_size=batch_size)
der_train.__iter__().next()[0].numpy().squeeze()
图像显示函数
def show_images(images):
    images1 = np.reshape(images, [images.shape[0], -1])
    images = np.reshape(images, [images.shape[0], 3,-1])  # images reshape to (batch_size, D)
    sqrtn = int(np.ceil(np.sqrt(images.shape[0])))#batch_size
    dim = int(images.shape[1])#3
    sqrtimg = int(np.ceil(np.sqrt(images.shape[2])))#96


    fig = plt.figure(figsize=(sqrtn, sqrtn))#Figure(864x864)#figsize=(4,3)为图像英寸宽4高3英寸
    gs = gridspec.GridSpec(sqrtn, sqrtn)#gridspec.GridSpec()创建区域,参数5,5的意思就是每行五个,每列五个
    gs.update(wspace=0.05, hspace=0.05)

    for i, img in enumerate(images1):#enumerate() 函数用于将一个可遍历的数据对象(如列表、元组或字符串)组合为一个索引序列
        ax = plt.subplot(gs[i])
        plt.axis('off')
        ax.set_xticklabels([])
        ax.set_yticklabels( [])
        ax.set_aspect('equal')
        plt.imshow(img.reshape([dim,sqrtimg,sqrtimg]).transpose(1,2,0))#换通道,对于torch中则是permute
    return
show_images(imgs)
plt.show()
一次取128个图像,源图像大小是9696,为了减轻运行负担,我们输入2828的图像。
现在我们来看看这些图片都长啥样

二、定义随机噪声
我们生成一些随机噪声,把它扔给生成器
#Random Noise
def sample_noise(batch_size, dim):
    temp = torch.rand(batch_size, dim) + torch.rand(batch_size, dim) * (-1)
    return temp
定义一些展平、初始化函数,之后会用到
class Flatten(nn.Module):
    def forward(self, x):
        N, C, H, W = x.size()  # read in N, C, H, W
        return x.view(N, -1)  # "flatten" the C * H * W values into a single vector per image


class Unflatten(nn.Module):
    """
    An Unflatten module receives an input of shape (N, C*H*W) and reshapes it
    to produce an output of shape (N, C, H, W).
    """

    def __init__(self, N=-1, C=128, H=7, W=7):
        super(Unflatten, self).__init__()
        self.N = N
        self.C = C
        self.H = H
        self.W = W

    def forward(self, x):
        return x.view(self.N, self.C, self.H, self.W)


def initialize_weights(m):
    if isinstance(m, nn.Linear) or isinstance(m, nn.ConvTranspose2d):
        init.xavier_uniform_(m.weight.data)
好,接下来开始进行DCGAN的核心部分啦
三、定义生成器、辨识器的损失函数
生成器和辨识器的loss值是训练反映效果的重要指标
Bce_loss = nn.BCEWithLogitsLoss()
def discriminator_loss(logits_real,logits_fake):
    #batch size
    N = logits_real.size()
    #目标label,全部设为1表示判别器需要做到的是将正确的全识别正确,错误全识别为错误
    true_labels = Variable(torch.ones(N)).type(dtype)
    real_image_loss = Bce_loss(logits_real,true_labels)#识别正确的为正确
    fake_image_loss = Bce_loss(logits_fake,1-true_labels)#识别错误的为错误
    loss = real_image_loss + fake_image_loss
    return loss

def generator_loss(logits_fake):
    #batch size
    N = logits_fake.size()
    #生成器的作用是将所有假向真靠拢
    true_labels = Variable(torch.ones(N)).type(dtype)
    #计算生成器的损失
    loss=Bce_loss(logits_fake,true_labels)
    return loss

def get_optimizer(model):#定义使用的优化算法
    optimizer = None
    optimizer = optim.Adam(model.parameters(), lr=0.001, betas=(0.5, 0.999))
    return optimizer
四、定义DC生成器和DC辨识器
生成器生成假图片,辨识器分辨出哪些是假图片、哪些是训练图片。当辨识器无法辨别出生成器生成的图片和训练图片时,则达到了我们预期的效果。
def build_dc_classifier():
    """
    Build and return a PyTorch model for the DCGAN discriminator implementing
    the architecture above.
    """
    return nn.Sequential(
        Unflatten(batch_size, 3, 28, 28),
        nn.Conv2d(3, 32,kernel_size=5, stride=1),
        nn.LeakyReLU(negative_slope=0.01),
        nn.MaxPool2d(2, stride=2),
        nn.Conv2d(32, 64,kernel_size=5, stride=1),
        nn.LeakyReLU(negative_slope=0.01),
        nn.MaxPool2d(kernel_size=2, stride=2),
        Flatten(),
        nn.Linear(4*4*64, 4*4*64),
        nn.LeakyReLU(negative_slope=0.01),
        nn.Linear(4*4*64,1)
    )
def build_dc_generator(noise_dim=NOISE_DIM):
    """
    Build and return a PyTorch model implementing the DCGAN generator using
    the architecture described above.
    """
    return nn.Sequential(
        nn.Linear(noise_dim, 1024),
        nn.ReLU(),
        nn.BatchNorm1d(1024),
        nn.Linear(1024, 7*7*128),
        nn.BatchNorm1d(7*7*128),
        Unflatten(batch_size, 128, 7, 7),
        nn.ConvTranspose2d(in_channels=128, out_channels=128, kernel_size=4, stride=2, padding=1),
        nn.ReLU(inplace=True),
        nn.BatchNorm2d(num_features=128),
        nn.ConvTranspose2d(in_channels=128, out_channels=64, kernel_size=3, stride=1, padding=1),
        nn.ReLU(inplace=True),
        nn.BatchNorm2d(num_features=64),
        nn.ConvTranspose2d(in_channels=64, out_channels=3, kernel_size=4, stride=2, padding=1),
        nn.Tanh(),
        Flatten()
    )
定义好生成器和辨识器后,我们开始为其准备训练函数
def run_a_gan(D, G, D_solver, G_solver, discriminator_loss, generator_loss, show_every=250,
              batch_size=128, noise_size=96, num_epochs=10):

    iter_count = 0
    for epoch in range(num_epochs):
        for x, _ in loader_train:
            if len(x) != batch_size:
                continue
            D_solver.zero_grad()
            real_data = Variable(x).type(dtype)
            logits_real = D(2 * (real_data - 0.5)).type(dtype)

            g_fake_seed = Variable(sample_noise(batch_size, noise_size)).type(dtype)
            fake_images = G(g_fake_seed).detach()
            logits_fake = D(fake_images.view(batch_size, 3, 28, 28))

            d_total_error = discriminator_loss(logits_real, logits_fake)

            d_total_error.backward()
            D_solver.step()

            G_solver.zero_grad()
            g_fake_seed = Variable(sample_noise(batch_size, noise_size)).type(dtype)
            fake_images = G(g_fake_seed)

            gen_logits_fake = D(fake_images.view(batch_size, 3, 28, 28))
            g_error = generator_loss(gen_logits_fake)

            g_error.backward()
            G_solver.step()

            if (iter_count % show_every == 0):
                #print(iter_count, d_total_error.data, g_error.data)
                #imgs_numpy = fake_images.data.cpu().numpy()
                #show_images(imgs_numpy[0:16])
                print("iter_count",iter_count,"g_loss", g_error.data, "d_loss", d_total_error.data)
                #plt.show()
                #print()
            iter_count += 1

        imgs_numpy = fake_images.data.cpu().numpy()
        show_images(imgs_numpy[0:16])
        plt.show()
        print("iter_count", iter_count, "g_loss", g_error.data, "d_loss", d_total_error.data)
        print()
当以上准备完毕后,开始训练吧
D_DC = build_dc_classifier().type(dtype)
D_DC.apply(initialize_weights)
G_DC = build_dc_generator().type(dtype)
G_DC.apply(initialize_weights)

D_DC_solver = get_optimizer(D_DC)
G_DC_solver = get_optimizer(G_DC)

run_a_gan(D_DC, G_DC, D_DC_solver, G_DC_solver, discriminator_loss, generator_loss, num_epochs=10)
五、生成结果
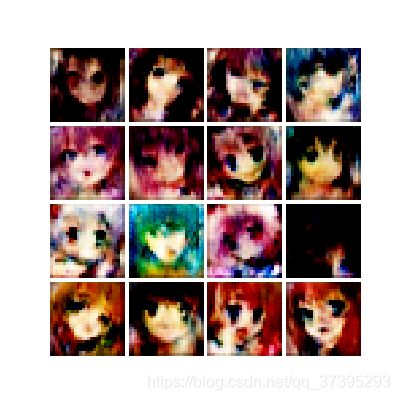
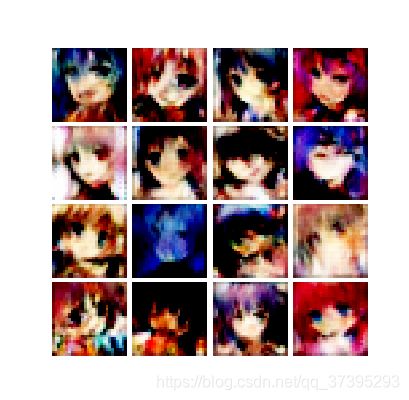
迭代2000左右生成的图像如下


咳咳,虽然有些图片比较崩坏,但是能看到一些动漫头像的轮廓了,部分图片已经有着比较清晰的五官了。
由于这是笔者初学GAN的第一站,无论是判别器和生成器的架构设置,还是训练程度的把握都没有明确的认知,训练过程也没有一个确切的参数衡量图像生成的好坏,导致最后生成的图像仅仅只有一个模糊的轮廓。
想要生成清晰的人物头像可以参考https://blog.csdn.net/york1996/article/details/82776704一文。