Course
PyTorch模型推理及多任务通用范式 课程5:
- 给大家安利了大白老师之前的好文:关于Yolo系列算法的理论知识解读和实战训练代码。
- 根据 pytorch模型推理的三板斧:数据预处理、数据进网络、数据后处理,逐行实现了Yolox的推理代码。
Assignment
必做题
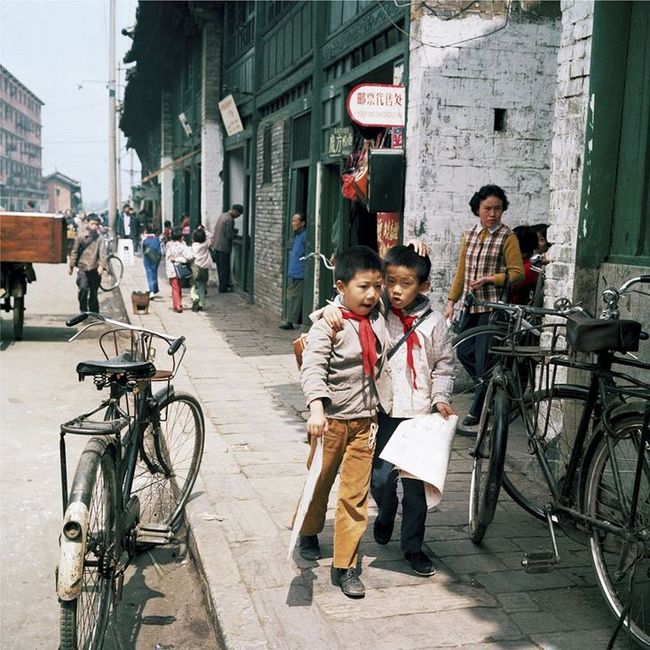
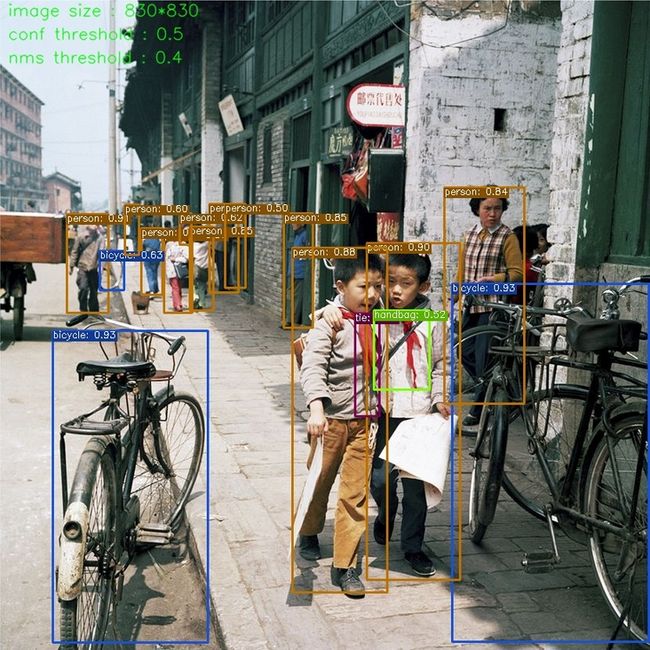
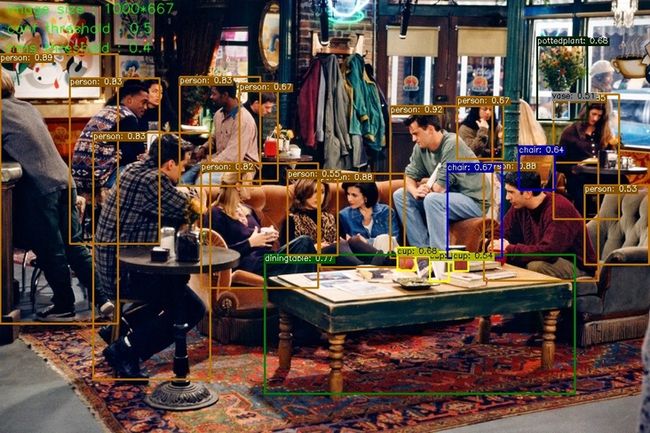
- 自己找2张其他图,用Yolox_s进行目标检测,并注明输入尺寸和两个阈值。
思考题
- Yolox_s:用time模块和for循环,对”./images/1.jpg”连续推理100次,统计时间开销。有CUDA的同学,改下代码:self.device=torch.device('cuda'),统计时间开销。
- 有CUDA的同学,分别用 Yolox_tiny、Yolox_s、Yolox_m、Yolox_l、Yolox_x 对”./images/1.jpg”连续推理100次,统计时间开销。
Solutions
Code
import torch
import torch.nn as nn
import torchvision
import numpy as np
import cv2
from models_yolox.visualize import vis
from models_yolox.yolo_head import YOLOXHead
from models_yolox.yolo_pafpn import YOLOPAFPN
import time

# write output image
def write_output(result, image, output):
    if result is not None:
        bboxes, scores, labels = result
        image = vis(image, bboxes, scores, labels, label_names)
    text1 = 'image size : {}*{}'.format(model_detect.w, model_detect.h)
    text2 = 'conf threshold : {}'.format(model_detect.conf_threshold)
    text3 = 'nms threshold : {}'.format(model_detect.nms_threshold)
    font = cv2.FONT_HERSHEY_SIMPLEX
    cv2.putText(image, text1, (10, 20), font, 0.7, (0, 255, 0), 1, cv2.LINE_AA)
    cv2.putText(image, text2, (10, 50), font, 0.7, (0, 255, 0), 1, cv2.LINE_AA)
    cv2.putText(image, text3, (10, 80), font, 0.7, (0, 255, 0), 1, cv2.LINE_AA)
    cv2.imwrite(output, image)

# run a model multiple times
def run_evl(times, model, device, image):
    image = cv2.imread(image)
    # CPU run 100 times
    model_detect = ModelPipline(device=device, model_name=model)
    t_all=0
    for i in range(times):
        t_start = time.time()
        model_detect.predict(image)
        t_end = time.time()
        t_all += t_end - t_start
    print('{} run model {} {} time lapse: {:.4f} seconds.'.format(device, model, times, t_all))

class YOLOX(nn.Module):
    def __init__(self, num_classes, depth=0.33, width=0.5, in_channels=[256, 512, 1024]):
        super().__init__()
        #yolox_s by default
        self.backbone = YOLOPAFPN(depth=depth, width=width, in_channels=in_channels)
        self.head = YOLOXHead(num_classes=num_classes, width=width, in_channels=in_channels)

    def forward(self, x):
        fpn_outs = self.backbone(x)
        outputs = self.head(fpn_outs)
        return outputs

class ModelPipline(object):
    def __init__(self, device=torch.device('cuda'), model_name='yolox_s'):
        # 进入模型的图片大小:为数据预处理和后处理做准备
        self.inputs_size = (640, 640)  # (h,w)

        # CPU or CUDA:为数据预处理和模型加载做准备
        self.device = device

        # 后处理的阈值
        self.conf_threshold = 0.5
        self.nms_threshold = 0.4

        # 标签载入
        label_names = open('./labels/coco_label.txt', 'r').readlines()
        self.label_names = [line.strip('\n') for line in label_names]

        # image size
        self.w = 0
        self.h = 0

        # for model selection
        self.model_info = {
            'yolox_tiny':   [0.33,  0.375,  './weights/yolox_tiny_coco.pth.tar'],
            'yolox_s':      [0.33,  0.5,    './weights/yolox_s_coco.pth.tar'],
            'yolox_m':      [0.67,  0.75,   './weights/yolox_m_coco.pth.tar'],
            'yolox_l':      [1.0,   1.0,    './weights/yolox_l_coco.pth.tar'],
            'yolox_x':      [1.33,  1.25,   './weights/yolox_x_coco.pth.tar'],
        }

        # 载入模型结构和模型权重
        self.num_classes = 80
        self.model = self.get_model(model_name)

    def predict(self, image):
        # 数据预处理
        inputs, r = self.preprocess(image)
        # 数据进网络
        outputs = self.model(inputs)
        # 数据后处理
        results = self.postprocess(outputs, r)
        return results

    def get_model(self, model_name):
        model_info = self.model_info[model_name]
        depth = model_info[0]
        width = model_info[1]
        path = model_info[2]
        if model_name == 'yolox_tiny':
            self.inputs_size = (416, 416)
        model = YOLOX(self.num_classes, depth, width)
        pretrained_state_dict = torch.load(path, map_location=lambda storage, loc: storage)["model"]
        model.load_state_dict(pretrained_state_dict, strict=True)
        model.to(self.device)
        model.eval()
        return model

    def preprocess(self, image):
        # 原图尺寸
        h, w = image.shape[:2]
        # to print image size
        self.h = h
        self.w = w
        # 生成一张 w=h=640的mask,数值全是114
        padded_img = np.ones((self.inputs_size[0], self.inputs_size[1], 3)) * 114.0
        # 计算原图的长边缩放到640所需要的比例
        r = min(self.inputs_size[0] / h, self.inputs_size[1] / w)
        # 对原图做等比例缩放,使得长边=640
        resized_img = cv2.resize(image, (int(w * r), int(h * r)), interpolation=cv2.INTER_LINEAR).astype(np.float32)
        # 将缩放后的原图填充到 640×640的mask的左上方
        padded_img[: int(h * r), : int(w * r)] = resized_img
        # BGR——>RGB
        padded_img = padded_img[:, :, ::-1]
        # 归一化和标准化,和训练时保持一致
        inputs = padded_img / 255
        inputs = (inputs - np.array([0.485, 0.456, 0.406])) / np.array([0.229, 0.224, 0.225])
        ##以下是图像任务的通用处理
        # (H,W,C) ——> (C,H,W)
        inputs = inputs.transpose(2, 0, 1)
        # (C,H,W) ——> (1,C,H,W)
        inputs = inputs[np.newaxis, :, :, :]
        # NumpyArray ——> Tensor
        inputs = torch.from_numpy(inputs)
        # dtype float32
        inputs = inputs.type(torch.float32)
        # 与self.model放在相同硬件上
        inputs = inputs.to(self.device)
        return inputs, r

    def postprocess(self, prediction, r):
        # prediction.shape=[1,8400,85],下面先将85中的前4列进行转换,从 xc,yc,w,h 变为 x0,y0,x1,y1
        box_corner = prediction.new(prediction.shape)
        box_corner[:, :, 0] = prediction[:, :, 0] - prediction[:, :, 2] / 2
        box_corner[:, :, 1] = prediction[:, :, 1] - prediction[:, :, 3] / 2
        box_corner[:, :, 2] = prediction[:, :, 0] + prediction[:, :, 2] / 2
        box_corner[:, :, 3] = prediction[:, :, 1] + prediction[:, :, 3] / 2
        prediction[:, :, :4] = box_corner[:, :, :4]
        # 只处理单张图
        image_pred = prediction[0]
        # class_conf.shape=[8400,1],求每个anchor在80个类别中的最高分数。class_pred.shape=[8400,1],每个anchor的label index。
        class_conf, class_pred = torch.max(image_pred[:, 5: 5 + self.num_classes], 1, keepdim=True)
        conf_score = image_pred[:, 4].unsqueeze(dim=1) * class_conf
        conf_mask = (conf_score >= self.conf_threshold).squeeze()
        # detections.shape=[8400,6],分别是 x0 ,y0, x1, y1, obj_score*class_score, class_label
        detections = torch.cat((image_pred[:, :4], conf_score, class_pred.float()), 1)
        # 将obj_score*class_score > conf_thre 筛选出来
        detections = detections[conf_mask]
        # 通过阈值筛选后,如果没有剩余目标则结束
        if not detections.size(0):
            return None
        # NMS
        nms_out_index = torchvision.ops.batched_nms(detections[:, :4], detections[:, 4], detections[:, 5],
                                                    self.nms_threshold)
        detections = detections[nms_out_index]
        # 把坐标映射回原图
        detections = detections.data.cpu().numpy()
        bboxes = (detections[:, :4] / r).astype(np.int64)
        scores = detections[:, 4]
        labels = detections[:, 5].astype(np.int64)
        return bboxes, scores, labels


if __name__ == '__main__':

    model_detect = ModelPipline(torch.device('cuda'), 'yolox_s')
    label_names = model_detect.label_names

    # detect image 2
    image = cv2.imread('./images/2.jpg')
    result = model_detect.predict(image)
    write_output(result, image, './demos/2.jpg')

    # detect image 3
    image = cv2.imread('./images/3.jpg')
    result = model_detect.predict(image)
    write_output(result, image, './demos/3.jpg')

    # get time lapse of 100 iteration
    run_evl(100, 'yolox_s', torch.device('cpu'), './images/1.jpg')
    run_evl(100, 'yolox_tiny', torch.device('cuda'), './images/1.jpg')
    run_evl(100, 'yolox_s', torch.device('cuda'), './images/1.jpg')
    run_evl(100, 'yolox_m', torch.device('cuda'), './images/1.jpg')
    run_evl(100, 'yolox_l', torch.device('cuda'), './images/1.jpg')
    run_evl(100, 'yolox_x', torch.device('cuda'), './images/1.jpg')
必做题
思考题
- CPU推理和CUDA推理,各自的时间开销。
运行结果:
cpu run model yolox_s 100 time lapse: 13.2529 seconds.
cuda run model yolox_s 100 time lapse: 3.6188 seconds.
GPU明显比CPU运算快。 - 不同Backbone各自的时间开销。
运行结果:
cuda run model yolox_tiny 100 time lapse: 2.5452 seconds.
cuda run model yolox_s 100 time lapse: 3.6188 seconds.
cuda run model yolox_m 100 time lapse: 4.0251 seconds.
cuda run model yolox_l 100 time lapse: 4.7148 seconds.
cuda run model yolox_x 100 time lapse: 6.5571 seconds.
模型越大时间开销越大。
学习心得
- 这次课程对你的帮助有哪些?技术上、学习方法上、思路上等都行,随意发挥。
很久没写过作业了,督促了我写点东西,熟悉一下之前不重视的细节。推理通用范式有实用价值,后续可以用在试验代码里。 - 对课程的优化改进有什么建议?内容上、流程上、形式上等都行,随意发挥。
本课程给我的感觉是老师们很尽心,内容丰富,讲解清楚,有收获。但限于文字的形式,看得出来一些知识老师想讲但没法讲。希望以后能录视频对着画板写写画画的讲,这样老师讲的清楚,学生学得明白。另外希望授课内容和代码能更贴近生产一线,多一些业界实践,能带入一些偏日常工作可能遇到的问题去思考和解决是最好的了。 - 最好可以附上自己所处的阶段,比如:学生,接触AI一年; 在职,3年AI项目经验 等。
本人研一,接触深度学习不到一年,课题是机器视觉相关。


