CentOS7安装MySQL8(详解)
备注:本节所需MySQL安装包分享如下
链接:https://pan.baidu.com/s/1hYTyOtLEUwqaVj_0g-x_6g
提取码:zjl1
CentOS7安装MySQL8
-
- 一. 案例信息
-
- 1. 实验内容
- 2. 实验目的
- 3. 实验环境
- 二. 实验操作
-
- 01. 步骤一:克隆虚拟机
- 步骤操作说明:
-
- 1. 关闭虚拟机
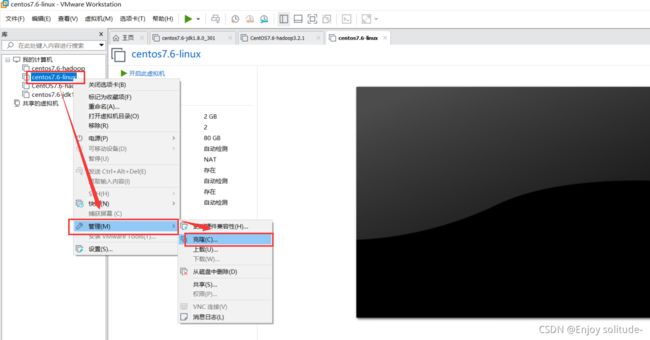
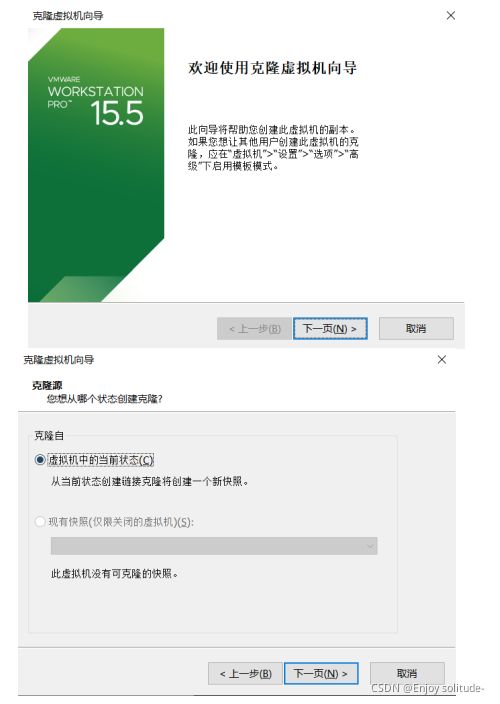
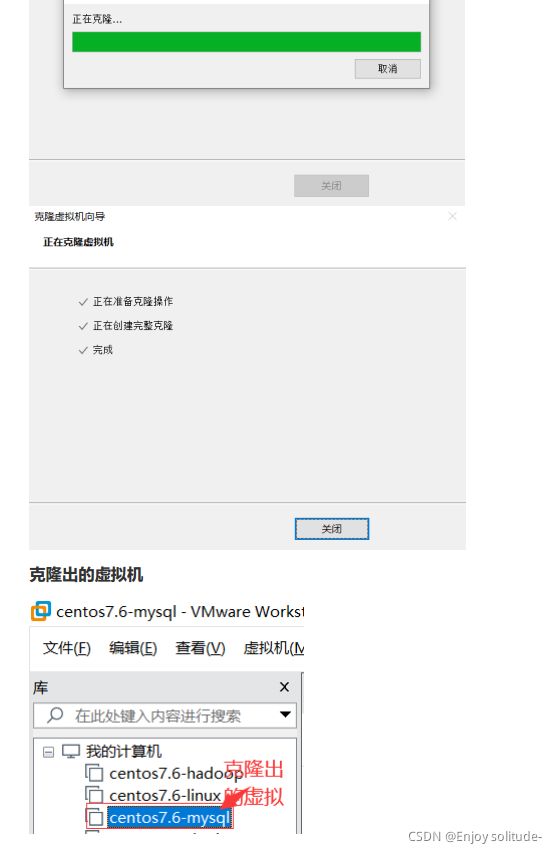
- 2. 开始克隆
- 3. 修改克隆出的虚拟机ip地址
- 02. 步骤二:通过虚拟机离线安装MySQL8
-
- 步骤操作说明
- 1.下载mysql安装包
- 2.通过xftp上传到虚拟机中
- 3.安装
- – the End –
一. 案例信息
1. 实验内容
虚拟机的CentOS7.6完成MySQL8版本的安装。
2. 实验目的
掌握MySQL8在CentOS7.6中的离线安装
3. 实验环境
  VMware workstation pro ~
  CentOS 7.6
二. 实验操作
01. 步骤一:克隆虚拟机
在jdk安装好的镜像基础上进行克隆
步骤操作说明:
1. 关闭虚拟机
shutdown -h now
2. 开始克隆
3. 修改克隆出的虚拟机ip地址
1.开启虚拟机
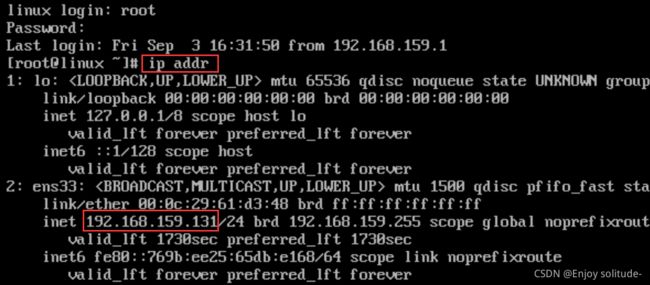
2.查看ip:
3.xshell进行连接
新建会话linux-mysql8,输入刚才查看到的ip,点击确定。
再次双击linux-mysql8,接受并保存。
连接成功。
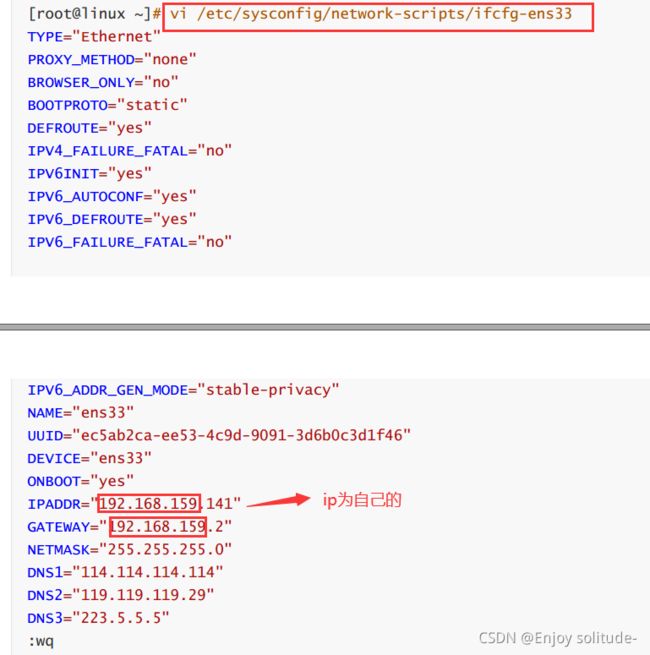
4.修改ip
5.重启网络服务
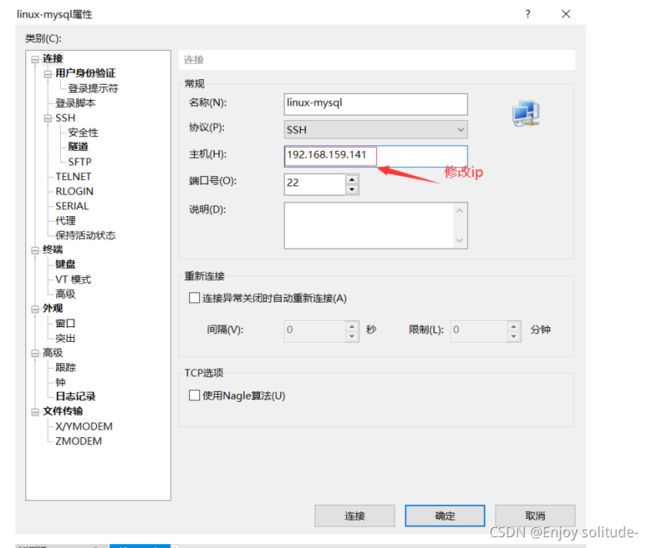
由于此时ip发生了变化,xshell断掉后重新修改属性
02. 步骤二:通过虚拟机离线安装MySQL8
介绍:
MySQL 是世界上最流行的开源数据库。它包括 InnoDB,使其成为一个完全集成的、事务安全的、
符合 ACID 的数据库。此外,MySQL 复制允许您交付高性能和可扩展的应用程序。
MySQL Cluster 是结合了线性可扩展性和高可用性的分布式数据库。它提供内存中的实时访问,并
具有跨分区和分布式数据集的事务一致性。它专为关键任务应用程序而设计
步骤操作说明
1.下载mysql安装包
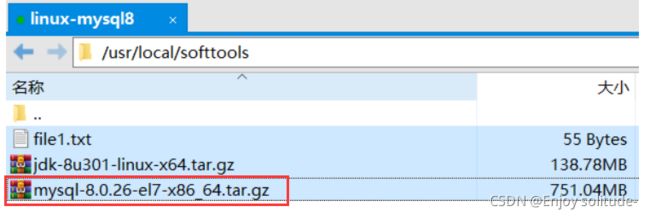
2.通过xftp上传到虚拟机中
创建目录:
[root@linux ~]# mkdir -p /usr/local/softtools
上传:
3.安装
创建安装的目录
[root@linux softtools]# mkdir -p /opt/module
解压缩
[root@linux softtools]# tar -zxvf /usr/local/softtools/mysql-8.0.26-el7- x86_64.tar.gz -C /opt/module
切换到安装的目录
[root@linux softtools]# cd /opt/module/
查看mysql目录下文件
[root@linux module]# ls -l mysql-8.0.26-el7-x86_64/
添加用户组
[root@linux module]# groupadd mysql
添加用户,并将该用户添加到mysql组中
[root@linux module]# useradd -r -g mysql mysql
修改mysql目录的用户及用户组
[root@linux module]# chown -R mysql:mysql /opt/module
对比:
修改mysql目录的名称 (名称太长不好记)
[root@linux module]# mv mysql-8.0.26-el7-x86_64 mysql
切换到mysql/bin目录下面
[root@linux module]# cd mysql/bin
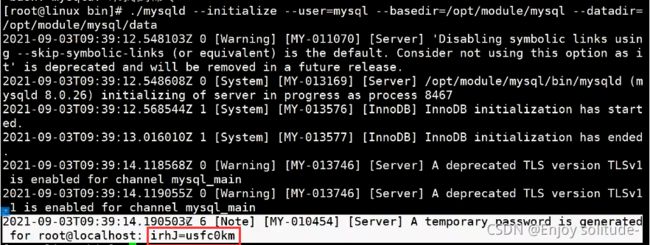
初始mysql
[root@linux bin]# ./mysqld --initialize --user=mysql --basedir=/opt/module/mysql --datadir=/opt/module/mysql/data
此时自动生成了irhJ=usfc0km这样的密码。服务启动后,第一次登录mysql时需要用到该密码。
查看是否生成了my.cnf文件
[root@linux bin]# find / -name my.cnf
/etc/my.cnf
[root@linux bin]# find / -name my.cnf.d
/etc/my.cnf.d
编辑my.cnf文件
[root@linux bin]# vim /etc/my.cnf
查找mysql服务执行的路径并切换
[root@linux bin]# find / -name support-files
/opt/module/mysql/support-files
[root@linux bin]# cd /opt/module/mysql/support-files
创建文件
[root@linux support-files]# mkdir -p /opt/module/mysql/logs
[root@linux support-files]# touch /opt/module/mysql/logs/mysql.log
[root@linux mysql]# chown -R mysql:mysql /opt/module/mysql/logs
复制mysql.server文件到/etc/init.d/mysql
[root@linux support-files]# cp mysql.server /etc/init.d/mysql
/etc/init.d/mysql目录进行可执行授权
[root@linux support-files]# chmod +x /etc/init.d/mysql
添加mysql到chkconfig
[root@linux support-files]# chkconfig --add mysql
启动mysql服务
[root@linux mysql]# service mysql start
显示 (Starting MySQL. SUCCESS!)代表成功。
配置mysql的环境变量
此时已经安装成功,但如果要使用mysql,还需要进行登录修改密码
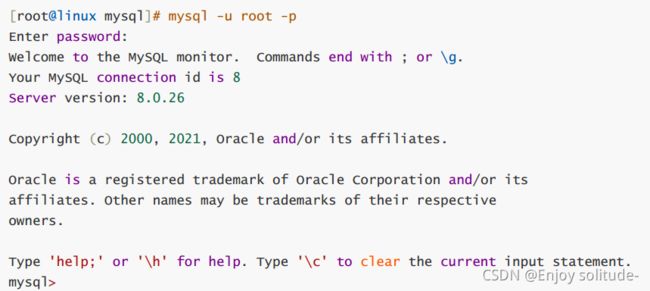
第一次使用临时密码登录后,需要修改root用户的密码
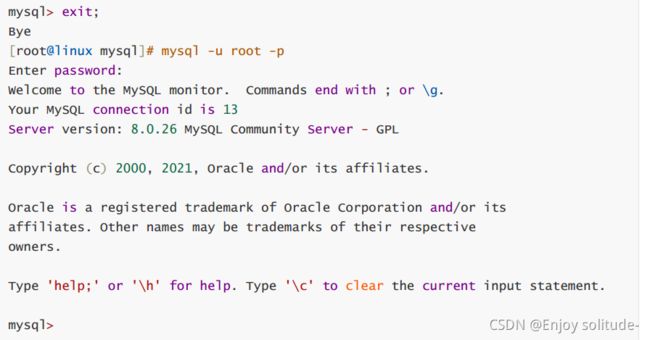
退出并使用新的密码登录:
– the End –
以上就是我分享的安装MySQL8,感谢阅读!
本文收录于专栏:Linux
关注作者,持续阅读作者的文章,学习更多知识!
https://blog.csdn.net/weixin_53306029?spm=1001.2014.3001.5343
2021/11/1
————————————————
推荐阅读
- Linux
—Nginx服务器安装
— Linux磁盘挂载
—实验案例:FTP服务器搭建与配置
—Nginx负载均衡实现
