一.简介
DataBinding是谷歌发布的一个实现数据和UI绑定的框架,从字面意思来看即为数据绑定,是 MVVM 模式在Android上的一种实现,用于降低布局和逻辑的耦合性,使代码逻辑更加清晰。
相对于 MVP,MVVM将Presenter层替换成了ViewModel层,关于MVC、MVP、MVVM架构比较,可以参考文章Android MVC、MVP、MVVM比较分析。
DataBinding 能够省去我们一直以来的 findViewById() 步骤,大量减少 Activity 内的代码,数据能够单向或双向绑定到 layout 文件中。
接下来本文通过一个例子来学习一下DataBinding的用法及原理分析。
二.实例分析
a.加入dataBinding支持
使用DataBinding框架需要在对应Model的build.gradle文件Android{}内加入以下代码,同步后就能引入对 DataBinding的支持:
dataBinding {
    enabled = true
}
AndroidStudio高版本引入方式如下:
buildFeatures {
    dataBinding = true
}
b.xml布局文件转化
将常规的布局文件转化为对应的数据绑定布局文件,在布局文件的根布局上输入Alt+Enter后,选择Convert to data binding layout会将常规布局转换为以下布局文件形式:
//布局文件用到了View相关的方法,需要引入
通过以上转化,已经将常规布局转化为数据绑定布局文件,那么下面就一步一步的来讲解实现。
c.View逻辑实现
将之前常规的UI操作从view里面移到数据绑定布局xml文件中,可以大大减少view的代码量及相关的UI操作逻辑。
使用前,动态设置ImageView的显示,在view里面的操作如下:
ImageView mImg = findViewById(R.id.img);
mImg.setImageResource(R.drawable.rse);
使用databinding后,可以在布局文件中将布局变量赋值以@{}形式给ImageView的src属性。当rightImageRes变化时,ImageView会动态加载对应的资源文件。
使用数据绑定布局文件后,view对应的类变为:
package com.hly.learn.fragments;

import android.os.Bundle;
import android.view.LayoutInflater;
import android.view.View;
import android.view.ViewGroup;

import com.hly.learn.ViewModel;
import com.hly.learn.databinding.KeyboardLayoutBinding;

import com.hly.learn.R;

import androidx.databinding.DataBindingUtil;

public class KeyboardFragment extends BaseFragment {

    private ViewModel mViewModel;

    @Override
    public int getLayoutId() {
        return R.layout.keyboard_layout;
    }

    @Override
    public void initData(View view) {

    }

    @Override
    public View onCreateView(LayoutInflater inflater, ViewGroup container, Bundle savedInstanceState) {
        //-------------------分析1------------------------------------
        KeyboardLayoutBinding binding = DataBindingUtil.inflate(inflater, R.layout.keyboard_layout, container, false);
        //获取布局对应的view
        //--------------------分析2-----------------------------------
        View view = binding.getRoot();
        //-------------------分析3----------------------------------
        mViewModel = new ViewModel(mContext);
        binding.setGuide(mViewModel);
        //-------------------分析4----------------------------------
        view.viewpager.setAdapter(xx);
        return view;
    }
}
通过以上可以发现,主要的分析点如下:
分析1:通过DataBindingUtil来替代inflater来解析数据绑定布局文件,KeyboardLayoutBinding是在编译时根据keyboard_layout生成的(后面会有详细分析);如果为Activity,通过setContentView()方法来解析生成KeyboardLayoutBinding;
分析2:通过getRoot()获取布局文件对应的View;
分析3:创建ViewModel,并通过setGuide()(名字不是固定的)将View与ViewModel里面的变量建立关联;
分析4:直接通过view.idName来获取对应的view,然后进行操作;
使用了数据绑定布局后,view里面除了加载布局后,没有任何相关的findViewById操作,确实减少了不少UI处理逻辑。
d.VM实现
数据绑定框架提供了可观察的变量,像ObservableInt,ObservableBoolean来替代原始数据类型int,boolean,使其具备可观察能力。提供了ObservableField来替代引用数据类型,使其具备可观察能力。具体的代码实现如下:
package com.hly.learn;

import android.content.Context;
import android.graphics.drawable.Drawable;
import android.view.View;

import androidx.databinding.ObservableField;
import androidx.databinding.ObservableInt;

public class ViewModel {

    private Context mContext;
    public ViewModel(Context context) {
        step.set(1);
        mContext = context;
        updateImageInfo(step.get());
    }
    //定义用到的可变变量类型
    public ObservableInt step = new ObservableInt();
    public ObservableField rightImageRes = new ObservableField<>();
    public ObservableField rightImageName = new ObservableField<>();
    public ObservableField rightImageDescription = new ObservableField<>();

    public void nextStep(View view) {
        step.set(step.get() + 1);
        updateImageInfo(step.get());
    }

    public void upStep(View view) {
        step.set(step.get() - 1);
        updateImageInfo(step.get());
    }
    //更新ObservableField对应的变量值
    private void updateImageInfo(int step) {
        rightImageRes.set(ModalData.getDrawable(mContext, step));
        rightImageName.set(ModalData.getImageName(mContext, step));
        rightImageDescription.set(ModalData.getImageDes(mContext, step));
    }
}
DataBinding框架用在MVVM模式下,View是加载布局,ViewModel来处理布局对应的交互,Model是来加载数据。ViewModel从Model里面去数据,供UI显示。
最后加入Model模块:
e.Model实现
package com.hly.learn;

import android.content.Context;
import android.graphics.drawable.Drawable;

public class ModalData {

    public static Drawable getDrawable(Context context, int index) {
        if (index == 1) {
            return context.getResources().getDrawable(R.drawable.ic_chuancai);
        } else if (index == 2) {
            return context.getResources().getDrawable(R.drawable.ic_lucai);
        } else {
            return context.getResources().getDrawable(R.drawable.ic_xiangcai);
        }
    }

    public static String getImageName(Context context, int index) {
        if (index == 1) {
            return context.getResources().getString(R.string.chuancai);
        } else if (index == 2) {
            return context.getResources().getString(R.string.lucai);
        } else {
            return context.getResources().getString(R.string.xiangcai);
        }
    }

    public static String getImageDes(Context context, int index) {
        if (index == 1) {
            return context.getResources().getString(R.string.chuancaides);
        } else if (index == 2) {
            return context.getResources().getString(R.string.lucaides);
        } else {
            return context.getResources().getString(R.string.xiangcaides);
        }
    }
}
f.事件绑定
事件绑定也是一种变量绑定,只不过设置的变量是回调接口而已。
点击TextView响应,在view里面的操作如下:
TextView tv = view.findViewById(R.id.tv);
tv.setOnClickListener(new View.OnClickListener() {
      @Override
      public void onClick(View v) {
          upStep();
      }
});
使用databinding后,可以在布局文件中将TextView的onClick属性加入执行方法即可,当TextView点击后,会执行相应的方法。
三.DataBinding原理分析
DataBinding实现了数据与UI绑定,那是如何绑定的呢?数据变化后是如何对应UI进行更新的呢?一起看一下实现过程。
使用AndroidStudio进行开发时,对应用编译后,会在对应目录下生成额外的文件:
在build/generated/ap_generated_sources/debug/out目录下会生成对应的文件:DataBinderMapperImpl.java(两个),KeyboardLayoutBindingImpl.java文件;
在build/generated/data_binding_base_class_source_out/debug/out目录下会生成对应的文件:KeyboardLayoutBinding.java;
在build/intermediates/incremental/mergeDebugResources/stripped.dir/layout目录下会生成对应的布局文件:keyboard_layout.xml;
接下来会一一进行分析。
上面我们看到,在KeyBoardFragment内部的onCreateView()内部执行的逻辑,再一起看一下:
public View onCreateView(LayoutInflater inflater, ViewGroup container, Bundle savedInstanceState) {
    KeyboardLayoutBinding binding = DataBindingUtil.inflate(inflater, R.layout.keyboard_layout, container, false);
    View view = binding.getRoot();
    mViewModel = new ViewModel(mContext);
    binding.setGuide(mViewModel);
    return view;
}
a.DataBindingUtil.java
在Fragement的onCreateView()内部通过DataBindingUtil.inflate()来创建KeyboardLayoutBinding对象binding,先看一下DataBindingUtil的inflate()实现:
private static DataBinderMapper sMapper = new DataBinderMapperImpl();

public static  T inflate(@NonNull LayoutInflater inflater,
            int layoutId, @Nullable ViewGroup parent, boolean attachToParent) {
    return inflate(inflater, layoutId, parent, attachToParent, sDefaultComponent);
}

public static  T inflate(
            @NonNull LayoutInflater inflater, int layoutId, @Nullable ViewGroup parent,
            boolean attachToParent, @Nullable DataBindingComponent bindingComponent) {
     final boolean useChildren = parent != null && attachToParent;
     final int startChildren = useChildren ? parent.getChildCount() : 0;
     final View view = inflater.inflate(layoutId, parent, attachToParent);
     if (useChildren) {
         return bindToAddedViews(bindingComponent, parent, startChildren, layoutId);
     } else {
         return bind(bindingComponent, view, layoutId);
     }
}

static  T bind(DataBindingComponent bindingComponent, View root,
            int layoutId) {
    return (T) sMapper.getDataBinder(bindingComponent, root, layoutId);
}
inflate()内部会通过inflater,inflate()来加载对应layoutId的view,由于attachToParent为false,所以在inflate()内部直接执行bind()方法,在bind()内部会通过sMapper.getDataBinder()来返回ViewDataBinding的实现类对象,sMapper是DataBinderMapperImpl对象,接下来看一下DataBinderMapperImpl实现。
b.DataBinderMapperImpl.java
前面说到,DataBinderMapperImpl.java是编译生成的文件,继承了MergedDataBinderMapper类,内部就一个构造方法内执行了addMapper()方法:
package androidx.databinding;

public class DataBinderMapperImpl extends MergedDataBinderMapper {
  DataBinderMapperImpl() {
    addMapper(new com.hly.learn.DataBinderMapperImpl());
  }
}
在创建DataBinderMapperImpl对象的时候,在构造方法内执行addMapper()将创建com.hly.learn.DataBinderMapperImpl()对象作为参数传入,后续通过sMapper.getDataBinder()来获取对应的ViewDataBinding的实现类时,会最终调用到com.hly.learn.DataBinderMapperImpl.java中的getDataBinder()方法,接下来看一下com.hly.learn.DataBinderMapperImpl.java这个类的逻辑实现:
c.DataBinderMapperImpl.java
此DataBinderMapperImpl.java不同于b步的DataBinderMapperImpl.java,注意区分,该类是主要的实现类:
public class DataBinderMapperImpl extends DataBinderMapper {
    private static final int LAYOUT_KEYBOARDLAYOUT = 1;
    private static final SparseIntArray INTERNAL_LAYOUT_ID_LOOKUP = new SparseIntArray(1);
    static {
        INTERNAL_LAYOUT_ID_LOOKUP.put(com.hly.learn.R.layout.keyboard_layout, LAYOUT_KEYBOARDLAYOUT);
    }

  @Override
  public ViewDataBinding getDataBinder(DataBindingComponent component, View view, int layoutId) {
    int localizedLayoutId = INTERNAL_LAYOUT_ID_LOOKUP.get(layoutId);
    if(localizedLayoutId > 0) {
      final Object tag = view.getTag();
      if(tag == null) {
        throw new RuntimeException("view must have a tag");
      }
      switch(localizedLayoutId) {
        case  LAYOUT_KEYBOARDLAYOUT: {
          if ("layout/keyboard_layout_0".equals(tag)) {
            return new KeyboardLayoutBindingImpl(component, view);
          }
          throw new IllegalArgumentException("The tag for keyboard_layout is invalid. Received: " + tag);
        }
      }
    }
    return null;
  }
  ......
}
DataBinderMapperImpl实现了DataBinderMapper类,定义了静态变量LAYOUT_KEYBOARDLAYOUT和静态数组INTERNAL_LAYOUT_ID_LOOKUP(可能有多个使用databinding的layout),在静态代码块内将R.layout.keyboard_layout与LAYOUT_KEYBOARDLAYOUT建立映射关系存入INTERNAL_LAYOUT_ID_LOOKUP内,在执行getDataBinder时,通过创建时传入的layoutId从INTERNAL_LAYOUT_ID_LOOKUP找到对应的localizedLayoutId,然后根据view的tag关系来创建KeyboardLayoutBindingImpl对象,该tag体现在对应生成的布局文件:
简单总结一下:在onCreateView()内部执行DataBindingUtil.inflate(),通过一步一步的调用后,最终返回的是KeyboardLayoutBindingImpl对象,该类是KeyboardLayoutBinding的实现类。
接下来看一下KeyboardLayoutBindingImpl.java这个类:
d.KeyboardLayoutBindingImpl.java
public class KeyboardLayoutBindingImpl extends KeyboardLayoutBinding  {
    private KeyboardLayoutBindingImpl(androidx.databinding.DataBindingComponent bindingComponent, View root, Object[] bindings) {
        super(bindingComponent, root, 5
            , (android.widget.TextView) bindings[1]
            );
        this.mboundView0 = (android.widget.RelativeLayout) bindings[0];
        this.mboundView0.setTag(null);
        this.mboundView2 = (android.widget.ImageView) bindings[2];
        this.mboundView2.setTag(null);
        this.mboundView3 = (android.widget.TextView) bindings[3];
        this.mboundView3.setTag(null);
        this.mboundView4 = (android.widget.TextView) bindings[4];
        this.mboundView4.setTag(null);
        this.mboundView5 = (android.widget.TextView) bindings[5];
        this.mboundView5.setTag(null);
        this.mboundView6 = (android.widget.TextView) bindings[6];
        this.mboundView6.setTag(null);
        this.name.setTag(null);
        setRootTag(root);
        // listeners
        invalidateAll();
    }

    @Override
    public void invalidateAll() {
        synchronized(this) {
                mDirtyFlags = 0x40L;
        }
        requestRebind();
    }

    public void setGuide(@Nullable com.hly.learn.viewmodel.ViewModel Guide) {
        this.mGuide = Guide;
        synchronized(this) {
            mDirtyFlags |= 0x20L;
        }
        notifyPropertyChanged(BR.guide);
        super.requestRebind();
    }

    @Override
    protected boolean onFieldChange(int localFieldId, Object object, int fieldId) {
        switch (localFieldId) {
            case 0 :
                return onChangeGuideRightImageDescription((androidx.databinding.ObservableField) object, fieldId);
       ......
    }

    @Override
    protected void executeBindings() {
        ......
        //注册观察者
        updateRegistration(0, guideRightImageDescription);
        ......
        //回调后进行UI更新
        androidx.databinding.adapters.TextViewBindingAdapter.setText(this.mboundView3, guideRightImageDescriptionGet);
        ......
    }
}
该类继承了KeyboardLayoutBinding类,在构造方法内,会调用父类的构造方法,将root view[即对应R.layout.keyboard_layout进行inflate生成的view]传给父类,在Fragment内部的onCreateView()中通过getRoot()返回对应layoutId创建的View,其他方法的逻辑执行会在接下来的数据与UI绑定时进行介绍。
e.KeyboardLayoutBinding.java
public abstract class KeyboardLayoutBinding extends ViewDataBinding {
  @NonNull
  public final TextView name;

  @Bindable
  protected ViewModel mGuide;

  protected KeyboardLayoutBinding(Object _bindingComponent, View _root, int _localFieldCount,
      TextView name) {
    super(_bindingComponent, _root, _localFieldCount);
    this.name = name;
  }

  public abstract void setGuide(@Nullable ViewModel guide);

  @Nullable
  public ViewModel getGuide() {
    return mGuide;
  }
  .......
  .......
}
KeyboardLayoutBinding是个抽象类,继承了ViewDataBinding。
f.ViewDataBinding.java
public abstract class ViewDataBinding extends BaseObservable implements ViewBinding {
    .......
    .......
    private final View mRoot;
    .......
    protected ViewDataBinding(DataBindingComponent bindingComponent, View root, int localFieldCount) {
        mBindingComponent = bindingComponent;
        mLocalFieldObservers = new WeakListener[localFieldCount];
        this.mRoot = root;
        if (Looper.myLooper() == null) {
            throw new IllegalStateException("DataBinding must be created in view's UI Thread");
        }
       .......
    }

    public View getRoot() {
        return mRoot;
    }
    .......
    .......
在创建KeyboardLayoutBindingImpl后,构造方法会一步一步的向上传,最终将root view保存在ViewDataBinding中,然后通过getRoot()获取到view。
四.数据与UI绑定分析
通过上述分析可以看到了DataBindingUtil.inflate创建KeyboardLayoutBinding的整个过程,那数据与UI任何绑定的呢?
在KeyboardLayoutBindingImpl的构造方法内,会调用 invalidateAll(),接下来看一下绑定流程:
a.ObservableField进行observe()
DataBinding使用的是观察者模式,ObservableField数据注册观察者是在创建DataBinding的时候在构造方法中就执行了,先创建了对应ObservableField数量的WeakListener数组,然后执行流程如下:
------>invalidateAll()
------>requestRebind()
------>executePendingBindings()
------>executeBindingsInternal()
------> executeBindings()[Impl]
------>updateRegistration(localFieldId, Observable observable)
------>updateRegistration(localFieldId, observable, CREATE_PROPERTY_LISTENER)[创建WeakPropertyListener]
------>registerTo()[将上步中创建的WeakPropertyListener赋值给执行创建的WeakListener对应的数组值]
------>listener.setTarget(observable)
------>WeakPropertyListener.addListener(Observable)
------>Observable.addOnPropertyChangedCallback(this);
经过以上逻辑执行,Observable[ObservableField]注册了OnPropertyChanged callback,如果数据变化后,会回调OnPropertyChanged()方法,流程图如下:
以上就是数据与UI绑定过程,那数据变化后,是如何反馈到UI上呢?接下来看一下数据变化后UI更新流程:
b.ObservableField数据变化后UI更新
ObservableFiled数据变化后,最终UI更新执行流程如下:
------>set(value)
------>notifyChange()
------>mCallbacks.notifyCallbacks(this, 0, null)[mCallbacks是PropertyChangeRegistry,通过上述addOnPropertyChangedCallback()加入mCallbacks列表]
------>mNotifier.onNotifyCallback(mCallbacks.get(i), sender, arg, arg2)
------>callback.onPropertyChanged(sender, arg)
------>WeakPropertyListener.onPropertyChanged()
------>handleFieldChange()
------>onFieldChange()------>requestRebind()----->......
------>executeBindings()[Impl]
在ObservableField数据变化后,最终会调用到Impl类里面的executeBindings()来更新UI,流程图如下:
以上就是数据变化后UI更新的整个流程。
五.BindingAdapter
DataBinding提供了BindingAdapter这个注解用于支持自定义属性,或者是修改原有属性。注解值可以是已有的 xml 属性,例如 android:src、android:text等,也可以自定义属性然后在 xml 中使用。
例如,对于一个TextView ,希望在某个变量值发生变化时,可以动态改变显示的文字,此时就可以通过 BindingAdapter来实现。
需要先定义一个静态方法,为之添加 BindingAdapter 注解,注解值是为TextView控件自定义的属性名,而该静态方法的两个参数可以这样来理解:当TextView控件的 step属性值发生变化时,DataBinding 就会将TextView实例以及新的step值传递给setProperty() 方法,从而可以根据此动态来改变TextView的相关属性。
BindingAdapter实现如下:
package com.hly.learn;

import android.util.Log;
import android.widget.TextView;

import androidx.databinding.BindingAdapter;
//可以单独写一个类,统一处理所有使用BindingAdapter注解的控件
public class ViewBinding {
    @BindingAdapter(value = {"app:step"})
    public static void setProperty(TextView textView, int step) {
        Log.e("Seven", "step is: " + step);
        //可以根据step来设置textView的属性,例如改变文字,设置宽高等...
        textView.setText(xxx);
    }

    @BindingAdapter(value = {"app:url"})
    public static void updateImg(ImageView imageView, String url) {
        Glide.with(imageView.getContext()).load(url).into(imageView);
    }
}
六.效果图
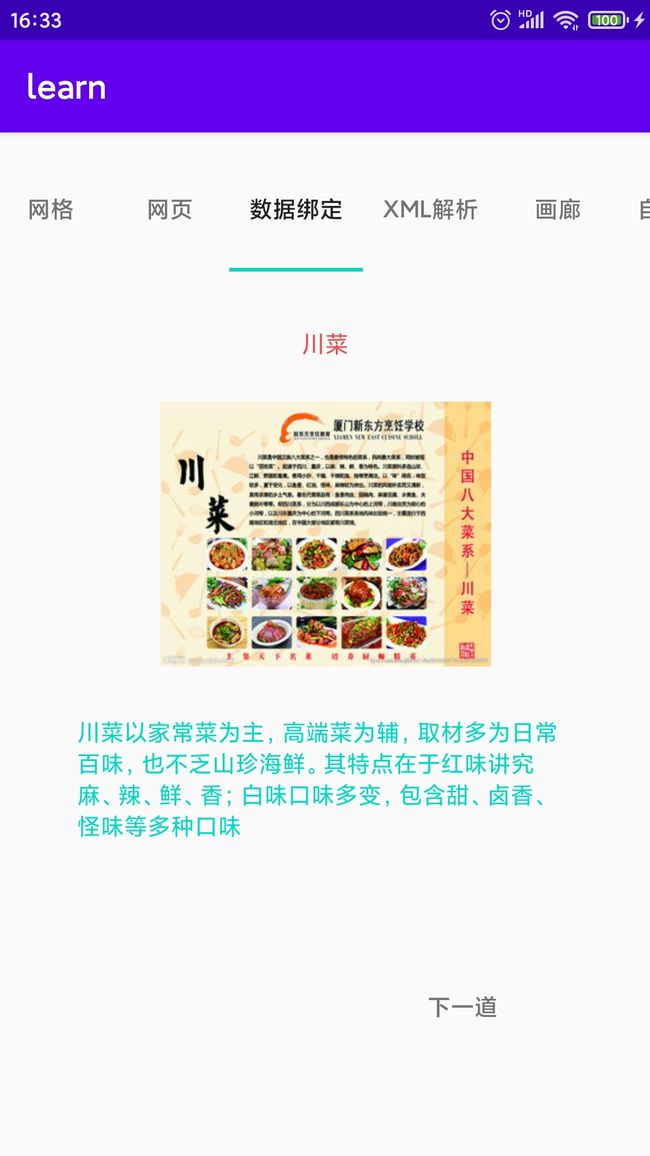
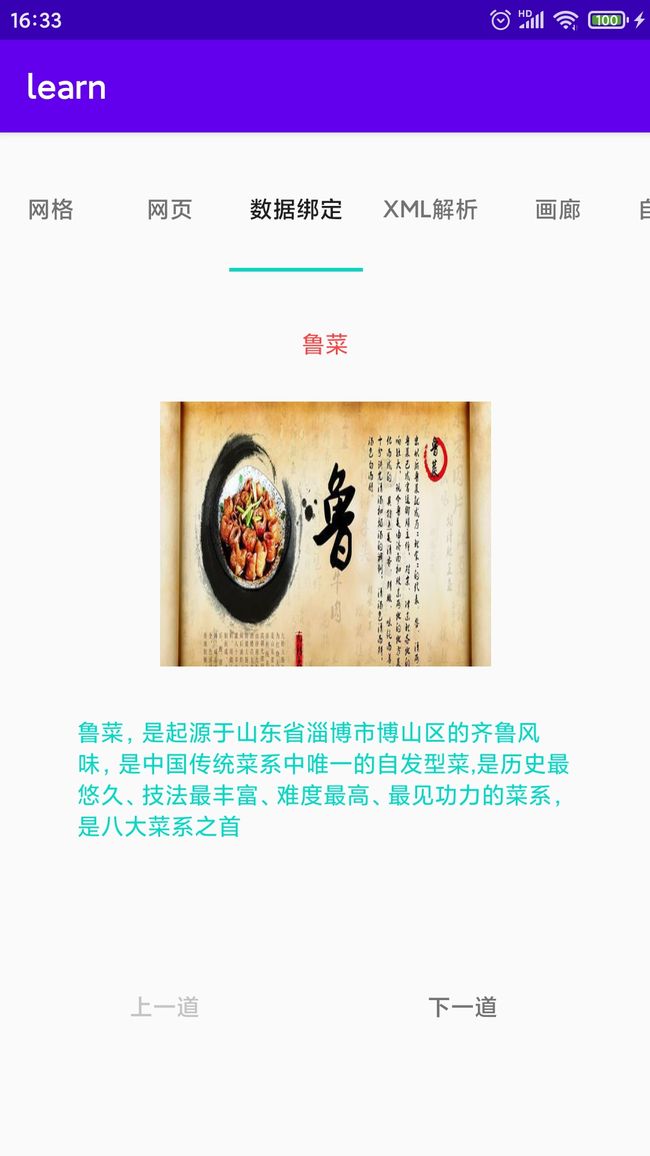
以上是结合实例及源码对DataBinding及ObservableField进行UI绑定及更新进行了分析,详细过程还需阅读ViewDataBinding、BaseObservable、PropertyChangeRegistry、CallbackRegistry等类文件来进一步分析。


