移动端table固定头部和左侧栏
前言
下面实现的demo 代码,命名有一些左右相反了,当时写到一半才知道,但是功能是完好无缺的,各位套用demo代码的时候注意一下哈~(主要是懒得改)
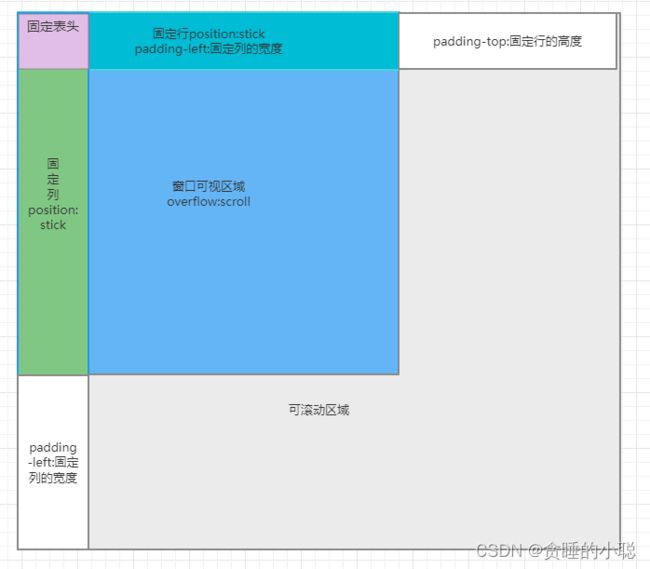
使用sticky实现
原理
实现效果
上代码
<template>
  <div class="main">
        <table  cellspacing="0" >
            <thead>
            <tr>
                <th>固定头1th>
                <th>固定头2th>
                <th>固定头3th>
                <th>固定头4th>
                <th>固定头5th>
                <th>固定头6th>
                <th>固定头7th>
                <th>固定头8th>
                <th>固定头9th>
            tr>
            thead>
            <tbody>
            <tr v-for="(item, index) in 30" :key="index">
                <td>固定列{{index}}td>
                <td> td>
                <td> td>
                <td> td>
                <td> td>
                <td> td>
                <td> td>
                <td> td>
                <td> td>
            tr>
            tbody>
        table>
    div>
template>

<script>

script>

<style lang="less" scoped>
.main{
        width: 500px;
        overflow:auto;
        height:208px;  /* 设置固定高度 */
    }
td, th {
    /* 设置td,th宽度高度 */
    border:1px solid gray;
    width:100px;
    height:30px;
}
th {
    background-color:lightblue;
}
table {
    table-layout: fixed;
    width: 200px; /* 固定宽度 */
}
td:first-child, th:first-child {
    position:sticky;
    left:0; /* 首行永远固定在左侧 */
    z-index:1;
    background-color:lightpink;
}
thead tr th {
    position:sticky;
    top:0; /* 列首永远固定在头部  */
}
th:first-child{
    z-index:2;
    background-color:lightblue;
}
style>
缺点
stick实现是可以实现的,但是问题在于移动端的ios 会滚出去边界的时候有回弹效果,就很操蛋
我看简书上有人尝试了挺多种方法去解决,但是效果并不好
https://www.jianshu.com/p/6863ae08c76c
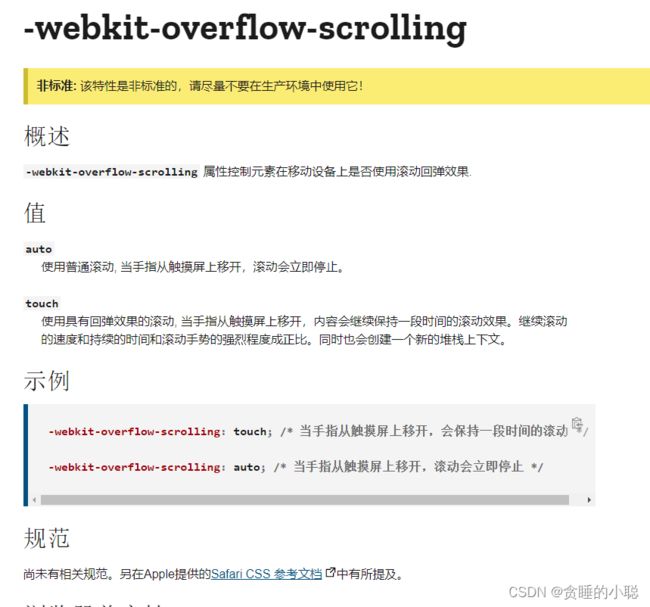
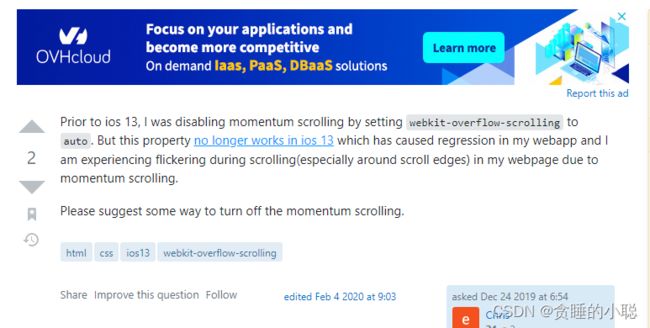
有人可能会说直接用wekit-overflow-scrolling 配置解决就好了鸭

以前还是可以这样去设置的,但是我查阅了很多的资料

在ios13的版本之后就不再支持这个属性配置
导致缺点的原因
那到底如何解决呢,我们先来分析一下为什么ios会产生回弹效果
.box-contant {
	overflow: scroll
}
没错,就是万恶的overflow Scroll 引发的回弹效果,只要一用到滚动条就会有触边回弹的效果,像下面这样
那不用scroll 怎么解决,用tranfrom也不是不可以的
下面安利一波 IScroll 和 Better-scroll(基于IScroll上面封装)
使用better-scroll实现
效果图
demo代码(初始版)
<template>
  <div class="layout">
    <div class="header">
      <div class="title_child3">
        头部
      div>
      <div ref="titleTop" class="title_box1">
        <div class="title-contant">
          <div class="title_child2">0头部div>
          <div class="title_child2">1头部div>
          <div class="title_child2">2头部div>
          <div class="title_child2">3头部div>
        div>
      div>
    div>
    <div id="div_page">
      <div id="right" ref="right">
        <div class="right_data">
          <div v-for="(item, index) in 150" :key="index">
            <div class="title_child">左侧{{ index }}div>
          div>
        div>
      div>
      <div id="left" ref="left">
        <div class="left_box">

          <div v-for="(item, index) in 150" :key="index" class="title_box">
            <div class="title_child1">内容1div>
            <div class="title_child1">内容2div>
            <div class="title_child1">内容3div>
            <div class="title_child1">内容4div>
          div>

        div>
      div>
    div>
  div>
template>

<script>
import BScroll from 'better-scroll'; // 1.引入滚动插件

export default {
  data() {
    return {
      flag: true,
      BSleft: {},
      top: 0
    };
  },

  mounted() {
    this.$nextTick(()=>{
      this.init()
    })
  },

  methods: {
    init(){
      this.BSleft = new BScroll(this.$refs.left, {
      probeType: 3,
      scrollY: true, // Y轴滚动
      scrollX: true, // X轴滚动
      click: true, // 允许点击事件
      bounce: false, // 回弹效果
      mouseWheel: true,
      momentumLimitDistance: 5
    });
    let rightScroll = null;
    // let leftScroll = null;
    let topScroll = null;
    // leftScroll = this.$refs.left;
    rightScroll = this.$refs.right; // 滚动开始的事件
    topScroll = this.$refs.titleTop;

    this.BSleft.on('scrollStart', pos => {
      console.log(pos);
    }); // 滚动的事件

    this.BSleft.on('scroll', pos => {
      console.log(topScroll.scrollLeft);
      rightScroll.scrollTop = -pos.y;
      topScroll.scrollLeft = -pos.x;

      console.log(pos);
    }); // 滚动结束后的事件

    this.BSleft.on('scrollEnd', pos => {
      console.log(pos);
    });
    }
  }
};
script>

<style lang="less" scoped>

.layout{
  width: 100%;
  height: 100%;
}
#div_page {
  position: relative;
  width: 100%;
  height: 6rem;
  overflow: hidden;
  display: flex;
  justify-self: left;
}

#right {
  width: 20%;

  height: 100vh;

  overflow: hidden;

  box-sizing: border-box;
}

.title_child3 {
  width: 20%;

  height: 20px;

  line-height: 20px;

  background: rgb(136, 136, 201);

  text-align: center;

  box-sizing: border-box;

}

.title_child {
  width: 100%;

  height: 20px;

  line-height: 20px;

  text-align: center;

  box-sizing: border-box;

}

.title_child1 {
  display: inline-block;
  width: 150px;

  height: 20px;

  line-height: 20px;

  text-align: center;

  box-sizing: border-box;
}

#left {
  background: #b2e4d7;

  width: 80%;

  height: 100vh;

  overflow: hidden;

  box-sizing: border-box;
}

.left_box {
  position: relative;
  width: 600px;

  height: auto;
}

.title_box {
  width: 600px;

  height: 20px;

  line-height: 20px;
}

.title_box1 {
  width: 80%;
  height: 20px;
  line-height: 20px;
  background: rgb(136, 136, 201);
  overflow: hidden;
}

.header {
  display: flex;
  width: 100%;
}

.title_child2 {
  display: inline-block;
  width: 150px;
  height: 20px;
  text-align: center;
}

.title-contant {
  width: 600px;
  height: 20px;
}
style>
缺点
缺点还是有的,在代码里面明显有点拖拉,就是滚动的时候 固定列,和固定头由于是修改scroll的值,所以有拖动延迟,不太美观,就是三个滑动区域不联动
因为实现联动的方法,是监听scroll的时候,同步更改scroll top
	  this.BSleft.on('scroll', pos => {
      console.log(topScroll.scrollLeft);
      rightScroll.scrollTop = -pos.y;
      topScroll.scrollLeft = -pos.x;
      console.log(pos);
    });
indicators
为了解决上述联动问题,我们使用better-scroll 官方的indicators 插件
https://better-scroll.github.io/docs/zh-CN/plugins/indicators.html
联动问题解决了,那么,还有什么优化点没做到位呢,就还差固定列上面的触摸滑动的时候,是没有反应的,那我们,需要做的是把这些事件监听补充上去
示例
- 先把事件监听代码去掉
  // this.BSleft.on('scroll', pos => {
    //   console.log(topScroll.scrollLeft);
    //   rightScroll.scrollTop = -pos.y;
    //   topScroll.scrollLeft = -pos.x;

    //   console.log(pos);
    // }); // 滚动结束后的事件
- 安装indicators插件,详情看上面的文档
- 添加配置项
     this.BSleft = new BScroll(this.$refs.left, {
      probeType: 3,
      scrollY: true, // Y轴滚动
      scrollX: true, // X轴滚动
      click: true, // 允许点击事件
      bounce: false, // 回弹效果
      mouseWheel: true,
      momentumLimitDistance: 5,
      indicators: [
            {
              relationElement: this.$refs.right,
              relationElementHandleElementIndex: 0,
              interactive: false
            },
            {
              relationElement: this.$refs.titleTop,
              relationElementHandleElementIndex: 0,
              interactive: false
            }
          ]
    });
不过有些应用场景,不仅仅在移动端,可能有些业务也可以在PC端打开,那我们在PC端打开的时候就监听不了touch时间了,但是我们可以监听滚轮事件mousewheelMove,mouse-wheel可以很好的解决这些问题
mouse-wheel
better-scroll 官方的mouse-wheel插件 可以为我们很好的解决鼠标飞轮的问题
https://better-scroll.github.io/docs/zh-CN/plugins/mouse-wheel.html
- 安装mouse-wheel,看上面文档
- 使用了插件就可以自动监听了
部分优化点
1. 在左边区域用鼠标滚轮无效
其实解决办法也很简单,左边的固定区域是衍生区域,我们可以在生成一个实例一个better-scroll给他,但是我觉得这样相互联动太麻烦了,就索性监听鼠标滚动轮事件吧
rightScroll.addEventListener(
            'wheel',
            (event) => {
              if (!this.BSleft) {
                return;
              }
              // 位移量
              let offsetY = this.BSleft.y - Math.ceil(event.deltaY / 4);
              // 有效滚动
              if (offsetY >= this.BSleft.maxScrollY && offsetY <= 0) {
                this.BSleft.scrollTo(this.BSleft.x, offsetY, 0);
              }
              event.preventDefault();
            },
            true
          );
上面就可以实现了
2. 在左边touch事件失效
同上面方法一样,添加touch事件
		  // 计算手指偏移量
          rightScroll.addEventListener(
            'touchstart',
            event => {
              event.preventDefault();
              this.touchY = event.changedTouches[0].clientY;
            },
            true
          );
          rightScroll.addEventListener(
            'touchmove',
            event => {
              event.preventDefault();
              if (!this.BSleft) {
                return;
              }
              let offsetY = event.changedTouches[0].clientY - this.touchY;
              offsetY = offsetY + this.BSleft.y;
              console.log(offsetY, this.BSleft.y, this.BSleft.maxScrollY);
              // 有效滚动
              if (offsetY >= this.BSleft.maxScrollY && offsetY <= 0) {
                this.BSleft.scrollTo(0, offsetY, 0);
              }
              this.touchY = event.changedTouches[0].clientY;
            },
            true
          );
注意,一个是使用scrollTo,一个是使用scrollBy,两者区别可以去看better-scroll文档
结尾
最后,有问题可以联系小聪哦,欢迎大家一起探讨
