从零开始实现yolox二:网络搭建与导入
网络结构
- 1 YOLOX网络结构概览
- 2 Backbone
- 3 Neck
- 4 Head
- 5 YOLOBody
- 6 权重导入
-
- (1)下载模型权重文件
- (2)解析模型
- (3)导入模型
这篇博客是YOLOX系列中最核心的,也是让人越看越明白的。各个模型最大的区别就是网络结构,其次是损失函数,其他的数据增强、mAP值的计算都是一样的。
1 YOLOX网络结构概览
当然,还有更接近代码的版本:
2 Backbone
再yolox_from_scratch下新建一个名为nets的程序包,并再下面新建一个名为darknet.py的文件,新建后项目结构如下:
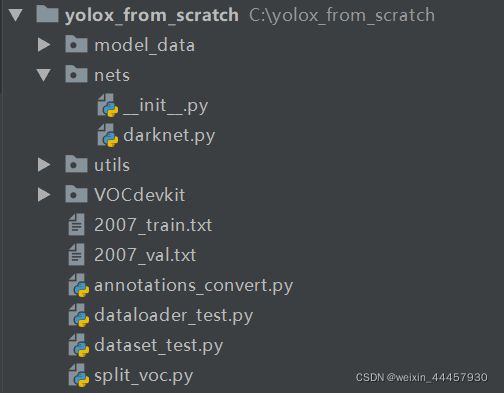
在darknet.py文件中,我们构建backbone的网络结构。
首先是激活函数:
import torch
from torch import nn


class SiLU(nn.Module):      # 其实pytorch1.7以后的版本集成了silu激活函数,可以直接通过nn.SiLU调用,但这里我们按原版代码
    @staticmethod           # 静态方法,在此之后可以通过类名调用该函数
    def forward(x):
        return x * torch.sigmoid(x)


def get_activation(name="silu", inplace=True):
    """
    获取激活函数
    Args:
        name:激活函数的名称
        inplace:是否对输入进行原地替换,原地替换指的是将运算结果写回输入变量然后返回,
                达到节约内存/显存的目的,详情可看:https://blog.csdn.net/manmanking/article/details/104830822
                因为激活函数输入的往往不是图片,而是卷积之后的结果,因此不会对图片产生影响。
    Returns:

    """
    if name == "silu":
        module = SiLU()
    elif name == "relu":
        module = nn.ReLU(inplace=inplace)
    elif name == "lrelu":
        module = nn.LeakyReLU(0.1, inplace=inplace)
    else:
        raise AttributeError("Unsupported act type: {}".format(name))
    return module
然后是基本的卷积模块:
class BaseConv(nn.Module):
    """基本的卷积模块,CBA,即 Conv+BN+Activation """
    def __init__(self, in_channels, out_channels, ksize, stride, groups=1, bias=False, act="silu"):
        """

        Args:
            in_channels: 输入通道
            out_channels: 输出通道
            ksize: 卷积核尺寸
            stride: 卷积步长
            groups: 分组卷积的组数,关于分组卷积可以看这个:https://blog.csdn.net/qq_34243930/article/details/107231539
            bias:
            act:
        """
        super().__init__()
        pad = (ksize - 1) // 2
        self.conv = nn.Conv2d(in_channels, out_channels, kernel_size=ksize, stride=stride, padding=pad, groups=groups,
                              bias=bias)
        self.bn = nn.BatchNorm2d(out_channels)
        self.act = get_activation(act, inplace=True)

    def forward(self, x):
        return self.act(self.bn(self.conv(x)))

    def fuseforward(self, x):
        return self.act(self.conv(x))
接下来是基本的卷积块,它由卷积Conv、标准化BN、激活函数Activation 三个模块构成,简称CBA,CBA又可以根据激活函数的不同分为CBS和CBL,前者的激活函数是SiLU,后者为ReLU。基本卷积块的代码如下:
class BaseConv(nn.Module):
    """基本的卷积模块,CBA,即 Conv+BN+Activation """
    def __init__(self, in_channels, out_channels, ksize, stride, groups=1, bias=False, act="silu"):
        """

        Args:
            in_channels: 输入通道
            out_channels: 输出通道
            ksize: 卷积核尺寸
            stride: 卷积步长
            groups: 分组卷积的组数,关于分组卷积可以看这个:https://blog.csdn.net/qq_34243930/article/details/107231539
            bias:
            act:
        """
        super().__init__()
        pad = (ksize - 1) // 2
        self.conv = nn.Conv2d(in_channels, out_channels, kernel_size=ksize, stride=stride, padding=pad, groups=groups,
                              bias=bias)
        self.bn = nn.BatchNorm2d(out_channels)
        self.act = get_activation(act, inplace=True)

    def forward(self, x):
        return self.act(self.bn(self.conv(x)))

    def fuseforward(self, x):
        return self.act(self.conv(x))
依据BaseConv模块,可以构建YOLOX中的另一个基础模块:DWConv,它可以用来做下采样。
下采样有两种:“3x3卷积” 和 “3x3+1x1卷积”,后者的参数量相比前者明显减少,这就是DWConv的作用,具体代码如下:
class DWConv(nn.Module):
    """组合卷积模块"""
    def __init__(self, in_channels, out_channels, ksize, stride=1, act="silu"):
        super().__init__()
        self.dconv = BaseConv(in_channels, in_channels, ksize=ksize, stride=stride, groups=in_channels, act=act, )
        self.pconv = BaseConv(in_channels, out_channels, ksize=1, stride=1, groups=1, act=act)      # 1x1卷积

    def forward(self, x):
        x = self.dconv(x)
        return self.pconv(x)
接下来是Focus模块:
class Focus(nn.Module):
    """Focus模块,只使用一次"""
    def __init__(self, in_channels, out_channels, ksize=1, stride=1, act="silu"):
        super().__init__()
        self.conv = BaseConv(in_channels * 4, out_channels, ksize, stride, act=act)

    def forward(self, x):
        patch_top_left = x[..., ::2, ::2]
        patch_bot_left = x[..., 1::2, ::2]
        patch_top_right = x[..., ::2, 1::2]
        patch_bot_right = x[..., 1::2, 1::2]
        x = torch.cat((patch_top_left, patch_bot_left, patch_top_right, patch_bot_right,), dim=1, )
        return self.conv(x)
再往下是Bottleneck模块,其用来构建CSP模块
class Bottleneck(nn.Module):
    def __init__(self, in_channels, out_channels, shortcut=True, expansion=0.5, depthwise=False, act="silu", ):
        """

        Args:
            in_channels: 输入通道
            out_channels: 输出通道
            shortcut: 是否进行短连接
            expansion:隐藏层的通道数与输出层的比例
            depthwise:是否使用更深的网络进行下采样(若使用更深的网络,则是DWConv,否则BaseConv)
            act:激活函数
        """
        super().__init__()
        hidden_channels = int(out_channels * expansion)
        Conv = DWConv if depthwise else BaseConv
        self.conv1 = BaseConv(in_channels, hidden_channels, 1, stride=1, act=act)
        self.conv2 = Conv(hidden_channels, out_channels, 3, stride=1, act=act)
        self.use_add = shortcut and in_channels == out_channels

    def forward(self, x):
        y = self.conv2(self.conv1(x))
        if self.use_add:
            y = y + x
        return y
有了Bottleneck模块,就可以写CSP模块了:
class CSPLayer(nn.Module):
    def __init__(self, in_channels, out_channels, n=1, shortcut=True, expansion=0.5, depthwise=False, act="silu", ):
        """

        Args:除了n,其他参数都和 Bottleneck 一样
            in_channels:
            out_channels:
            n: 表示中间有多少个Bottleneck对象
            shortcut:
            expansion:
            depthwise:
            act:
        """
        super().__init__()
        hidden_channels = int(out_channels * expansion)  # hidden channels
        self.conv1 = BaseConv(in_channels, hidden_channels, 1, stride=1, act=act)
        self.conv2 = BaseConv(in_channels, hidden_channels, 1, stride=1, act=act)

        self.conv3 = BaseConv(2 * hidden_channels, out_channels, 1, stride=1, act=act)

        module_list = [Bottleneck(hidden_channels, hidden_channels, shortcut, 1.0, depthwise, act=act) for _ in
                       range(n)]
        self.m = nn.Sequential(*module_list)

    def forward(self, x):
        x_1 = self.conv1(x)
        x_2 = self.conv2(x)
        x_1 = self.m(x_1)
        x = torch.cat((x_1, x_2), dim=1)
        return self.conv3(x)
接下来还要建一个SPP模块,它在Backbone中只使用一次:
class SPPBottleneck(nn.Module):
    """SPP模块,只使用一次"""
    def __init__(self, in_channels, out_channels, kernel_sizes=(5, 9, 13), activation="silu"):
        """

        Args:
            in_channels:
            out_channels:
            kernel_sizes: SPP三个池化窗口的宽度
            activation:
        """
        super().__init__()
        hidden_channels = in_channels // 2
        self.conv1 = BaseConv(in_channels, hidden_channels, 1, stride=1, act=activation)
        self.m = nn.ModuleList([nn.MaxPool2d(kernel_size=ks, stride=1, padding=ks // 2) for ks in kernel_sizes])
        conv2_channels = hidden_channels * (len(kernel_sizes) + 1)
        self.conv2 = BaseConv(conv2_channels, out_channels, 1, stride=1, act=activation)

    def forward(self, x):
        x = self.conv1(x)
        x = torch.cat([x] + [m(x) for m in self.m], dim=1)
        x = self.conv2(x)
        return x
现在我们可以构建Backbone了,就是把上面的模块串起来:
class CSPDarknet(nn.Module):
    """将以上部分组合起来"""
    def __init__(self, dep_mul, wid_mul, out_features=("dark3", "dark4", "dark5"), depthwise=False, act="silu", ):
        """

        Args:
            dep_mul:模型的深度因子,因为YOLOX有好几个版本,它们的区别在于深度和宽度不同
            wid_mul:模型的宽度因子
            out_features:输出到Neck部分的特征
            depthwise:是否使用更深的网络进行下采样(若使用更深的网络,则是DWConv,否则BaseConv)
            act:激活函数
        """
        super().__init__()
        assert out_features, "please provide output features of Darknet"
        self.out_features = out_features
        Conv = DWConv if depthwise else BaseConv

        base_channels = int(wid_mul * 64)  # 64
        base_depth = max(round(dep_mul * 3), 1)  # 3

        # stem
        self.stem = Focus(3, base_channels, ksize=3, act=act)

        # dark2
        self.dark2 = nn.Sequential(
            Conv(base_channels, base_channels * 2, 3, 2, act=act),
            CSPLayer(base_channels * 2, base_channels * 2, n=base_depth, depthwise=depthwise, act=act),
        )

        # dark3
        self.dark3 = nn.Sequential(
            Conv(base_channels * 2, base_channels * 4, 3, 2, act=act),
            CSPLayer(base_channels * 4, base_channels * 4, n=base_depth * 3, depthwise=depthwise, act=act),
        )

        # dark4
        self.dark4 = nn.Sequential(
            Conv(base_channels * 4, base_channels * 8, 3, 2, act=act),
            CSPLayer(base_channels * 8, base_channels * 8, n=base_depth * 3, depthwise=depthwise, act=act),
        )

        # dark5
        self.dark5 = nn.Sequential(
            Conv(base_channels * 8, base_channels * 16, 3, 2, act=act),
            SPPBottleneck(base_channels * 16, base_channels * 16, activation=act),
            CSPLayer(base_channels * 16, base_channels * 16, n=base_depth, shortcut=False, depthwise=depthwise,
                     act=act),
        )

    def forward(self, x):
        """返回一个字典,该字典的键为要输出的特征层名称,值为对应的特征层张量"""
        outputs = {}
        x = self.stem(x)        # Focus层的输出
        outputs["stem"] = x
        x = self.dark2(x)
        outputs["dark2"] = x
        x = self.dark3(x)
        outputs["dark3"] = x
        x = self.dark4(x)
        outputs["dark4"] = x
        x = self.dark5(x)
        outputs["dark5"] = x
        return {k: v for k, v in outputs.items() if k in self.out_features}
最后,我们来写一个测试脚本:
if __name__ == '__main__':
    backbone = CSPDarknet(1, 1, depthwise=True)
    input_data = torch.rand(8, 3, 640, 640)
    output = backbone(input_data)
    for k, v in output.items():
        print(k)
        print(v.shape)
输出
dark3
torch.Size([8, 256, 80, 80])
dark4
torch.Size([8, 512, 40, 40])
dark5
torch.Size([8, 1024, 20, 20])
至此,backbone部分构建完毕
3 Neck
在yolox_from_scratch下新建一个名为yolo.py的文件
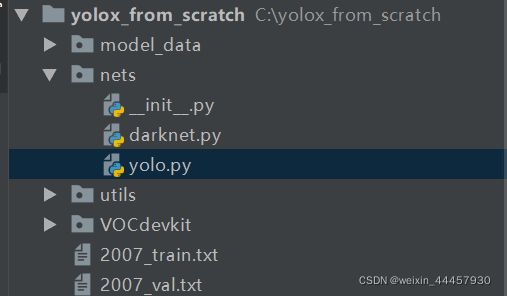
先把要使用的包写进去
import torch
import torch.nn as nn

from .darknet import BaseConv, CSPDarknet, CSPLayer, DWConv
接下来写一个名为YOLOPAFPN的类,它包括Backbone和Neck,Backbone上一节已经介绍完了,这里只需要新建一个Backbone对象作为YOLOPAFPN的成员变量就行。初始化函数中的主要内容,是新建Neck的各个部分的组件,初始化函数如下:
class YOLOPAFPN(nn.Module):
    def __init__(self, depth=1.0, width=1.0, in_features=("dark3", "dark4", "dark5"), in_channels=[256, 512, 1024],
                 depthwise=False, act="silu"):
        """

        Args:
            depth:模型的深度因子,因为YOLOX有好几个版本,它们的区别在于深度和宽度不同
            width:模型的宽度因子
            in_features:Backbone的输出特征层名称构成的元组,相对于Neck部分来说则是输入的特征层
            in_channels: dark3,dark4,dark5三个特征层的输出通道构成的列表,相对于Neck部分来说则是输入通道
            depthwise:是否使用更深的网络进行下采样(若使用更深的网络,则是DWConv,否则BaseConv)
            act:激活函数
        """
        super().__init__()

        self.in_features = in_features                  # 输入到neck部分的各个特征层名字组成的元组
        self.in_channels = in_channels                  # 输入到neck部分的各个特征层通道组成的列表
        self.backbone = CSPDarknet(depth, width, depthwise=depthwise, act=act)      # 主干网络
        self.upsample = nn.Upsample(scale_factor=2, mode="nearest")                 # 上采样层

        Conv = DWConv if depthwise else BaseConv
        self.lateral_conv0 = BaseConv(int(in_channels[2] * width), int(in_channels[1] * width), 1, 1, act=act)

        self.C3_p4 = CSPLayer(
            int(2 * in_channels[1] * width),
            int(in_channels[1] * width),
            round(3 * depth),
            False,
            depthwise=depthwise,
            act=act,
        )

        self.reduce_conv1 = BaseConv(int(in_channels[1] * width), int(in_channels[0] * width), 1, 1, act=act)
        self.C3_p3 = CSPLayer(
            int(2 * in_channels[0] * width),
            int(in_channels[0] * width),
            round(3 * depth),
            False,
            depthwise=depthwise,
            act=act,
        )

        # bottom-up conv
        self.bu_conv2 = Conv(int(in_channels[0] * width), int(in_channels[0] * width), 3, 2, act=act)
        self.C3_n3 = CSPLayer(
            int(2 * in_channels[0] * width),
            int(in_channels[1] * width),
            round(3 * depth),
            False,
            depthwise=depthwise,
            act=act,
        )

        # bottom-up conv
        self.bu_conv1 = Conv(int(in_channels[1] * width), int(in_channels[1] * width), 3, 2, act=act)

        self.C3_n4 = CSPLayer(
            int(2 * in_channels[1] * width),
            int(in_channels[2] * width),
            round(3 * depth),
            False,
            depthwise=depthwise,
            act=act,
        )
接下来是forward方法,它主要是把各个组件串起来:
    def forward(self, input):
        """
        输出一个元组,这个元组包含三个张量,分别送给三个检测头
        """
        out_features = self.backbone.forward(input)                 # 获得Backbone部分的输出
        features = [out_features[f] for f in self.in_features]      # 各个特征层张量构成的列表
        [x2, x1, x0] = features

        fpn_out0 = self.lateral_conv0(x0)  # 1024->512/32
        f_out0 = self.upsample(fpn_out0)  # 512/16
        f_out0 = torch.cat([f_out0, x1], 1)  # 512->1024/16
        f_out0 = self.C3_p4(f_out0)  # 1024->512/16

        fpn_out1 = self.reduce_conv1(f_out0)  # 512->256/16
        f_out1 = self.upsample(fpn_out1)  # 256/8
        f_out1 = torch.cat([f_out1, x2], 1)  # 256->512/8
        pan_out2 = self.C3_p3(f_out1)  # 512->256/8

        p_out1 = self.bu_conv2(pan_out2)  # 256->256/16
        p_out1 = torch.cat([p_out1, fpn_out1], 1)  # 256->512/16
        pan_out1 = self.C3_n3(p_out1)  # 512->512/16

        p_out0 = self.bu_conv1(pan_out1)  # 512->512/32
        p_out0 = torch.cat([p_out0, fpn_out0], 1)  # 512->1024/32
        pan_out0 = self.C3_n4(p_out0)  # 1024->1024/32

        outputs = (pan_out2, pan_out1, pan_out0)
        return outputs
4 Head
在yolox_from_scratch\nets\yolo.py中新建一个名为YOLOXHead的类,它需要实现下面的结构:

数据进入检测头之后,先进入卷积模块(图中的方框1),输出再分两个分支,一个是分类分支(方框2和方框3),另一个是回归分支(方框4),其中回归分支又可以分成2个分支,一个是预测目标框的中心点坐标(方框5),另一个是预测置信度(方框6)。
其初始化方法如下:
class YOLOXHead(nn.Module):
    def __init__(self, num_classes, width=1.0, strides=[8, 16, 32], in_channels=[256, 512, 1024], act="silu",
                 depthwise=False, ):
        """

        Args:
            num_classes:类数
            width:模型的宽度因子
            strides:Neck输出的特征层中
            in_channels:Neck中每条分支的输出通道,相对于Head而言是输入通道
            act:激活函数
            depthwise:是否使用更深的网络进行下采样(若使用更深的网络,则是DWConv,否则BaseConv)
        """
        super().__init__()
        self.n_anchors = 1
        self.num_classes = num_classes

        self.stems = nn.ModuleList()            # 每个yolo头最开始部分的卷积模块,图中方框1
        # 这个卷积模块之后有两个分支,第一个分支是目标分类,第二个分支是目标框回归

        # 分类分支
        self.cls_convs = nn.ModuleList()        # 卷积,图中方框2
        self.cls_preds = nn.ModuleList()        # 预测,图中方框3

        # 回归分支
        self.reg_convs = nn.ModuleList()        # 卷积,图中方框4
        self.reg_preds = nn.ModuleList()        # 目标框中心点和高宽预测,图中方框5
        self.obj_preds = nn.ModuleList()        # 目标置信度预测,图中方框6

        Conv = DWConv if depthwise else BaseConv

        for i in range(len(in_channels)):
            """检测头最前面的卷积模块"""
            self.stems.append(
                BaseConv(in_channels=int(in_channels[i] * width), out_channels=int(256 * width), ksize=1, stride=1,
                         act=act))

            """分类分支"""
            self.cls_convs.append(nn.Sequential(*[
                Conv(in_channels=int(256 * width), out_channels=int(256 * width), ksize=3, stride=1, act=act),
                Conv(in_channels=int(256 * width), out_channels=int(256 * width), ksize=3, stride=1, act=act),
            ]))
            self.cls_preds.append(
                nn.Conv2d(in_channels=int(256 * width), out_channels=self.n_anchors * self.num_classes, kernel_size=1,
                          stride=1, padding=0)
            )

            """回归分支"""
            self.reg_convs.append(nn.Sequential(*[
                Conv(in_channels=int(256 * width), out_channels=int(256 * width), ksize=3, stride=1, act=act),
                Conv(in_channels=int(256 * width), out_channels=int(256 * width), ksize=3, stride=1, act=act)
            ]))
            # 目标框中心点和高宽预测
            self.reg_preds.append(
                nn.Conv2d(in_channels=int(256 * width), out_channels=4, kernel_size=1, stride=1, padding=0)
            )
            # 目标置信度预测
            self.obj_preds.append(
                nn.Conv2d(in_channels=int(256 * width), out_channels=self.n_anchors * 1, kernel_size=1, stride=1,
                          padding=0)
            )
它的forward方法如下:
    def forward(self, inputs):
        """返回一个列表,里面的元素为每个检测头的输出张量"""
        outputs = []
        for k, x in enumerate(inputs):
            x = self.stems[k](x)

            cls_feat = self.cls_convs[k](x)
            cls_output = self.cls_preds[k](cls_feat)

            reg_feat = self.reg_convs[k](x)
            reg_output = self.reg_preds[k](reg_feat)
            obj_output = self.obj_preds[k](reg_feat)

            output = torch.cat([reg_output, obj_output, cls_output], 1)
            outputs.append(output)
        return outputs
5 YOLOBody
好的,现在有Backbone、Neck和Head了,我们可以将它们串起来,组件整个YOLOBody了,其代码如下:
class YoloBody(nn.Module):
    def __init__(self, num_classes, phi):
        """

        Args:
            num_classes: 数据集有多少个类别
            phi: yolox的子模型编号,比如yolox_s,那么phi='s'
        """
        super().__init__()
        depth_dict = {'s': 0.33, 'm': 0.67, 'l': 1.00, 'x': 1.33, }     # yolox四种标准模型的深度
        width_dict = {'s': 0.50, 'm': 0.75, 'l': 1.00, 'x': 1.25, }     # yolox四种标准模型的宽度
        depth, width = depth_dict[phi], width_dict[phi]                 # 获得所使用模型的深度和宽度

        self.backbone = YOLOPAFPN(depth, width)                         # 根据深度和宽度获得Backbone
        self.head = YOLOXHead(num_classes, width)                       # 获得yolox的检测头

    def forward(self, x):
        fpn_outs = self.backbone.forward(x)
        outputs = self.head.forward(fpn_outs)
        return outputs
写一个测试代码,看看其能否正常输出:
if __name__ == '__main__':
    backbone_and_neck = YOLOPAFPN(1, 1)
    model = YoloBody(20, 's')

    # 利用模拟数据查看能否正常输出
    input_data = torch.rand(8, 3, 640, 640)
    outputs = model(input_data)
    for output in outputs:
        print(output.shape)
输出:
torch.Size([8, 25, 80, 80])
torch.Size([8, 25, 40, 40])
torch.Size([8, 25, 20, 20])
正是我们想要的输出!
至此,网络结构搭建完毕。
6 权重导入
这里我们以yolox_s为例,介绍一下模型文件的导入。我们使用的数据集只有4个类别,因此这里就不使用官方预训练模型了,而是使用本项目的预训练模型来做预测。
(1)下载模型权重文件
下载yolox原作者在GitHub上发布的在COCO数据集上的预训练模型,Github页面为:https://github.com/Megvii-BaseDetection/YOLOX
我们这里为了演示,只下载最小的标准模型

如果打不开GitHub,可以将这个链接地址复制到迅雷,用迅雷下载:https://github.com/Megvii-BaseDetection/YOLOX/releases/download/0.1.1rc0/yolox_s.pth
下载好模型后,先把模型文件yolox_s.pth复制到yolox_from_scratch/model_data目录下
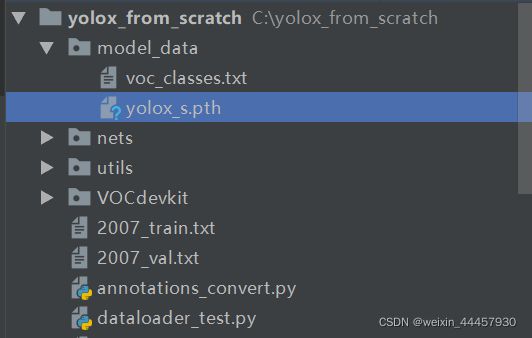
(2)解析模型
我们不知道模型的结构,直接导入不太合适,这里我们新建一个jupyter notebook,来解析模型,看看里面有什么(需要说明的是,本篇博客通过截图的方式给出的代码,都是实验性质的,类似于用的梯子,翻过去了就可以扔了,所以不需要复制):
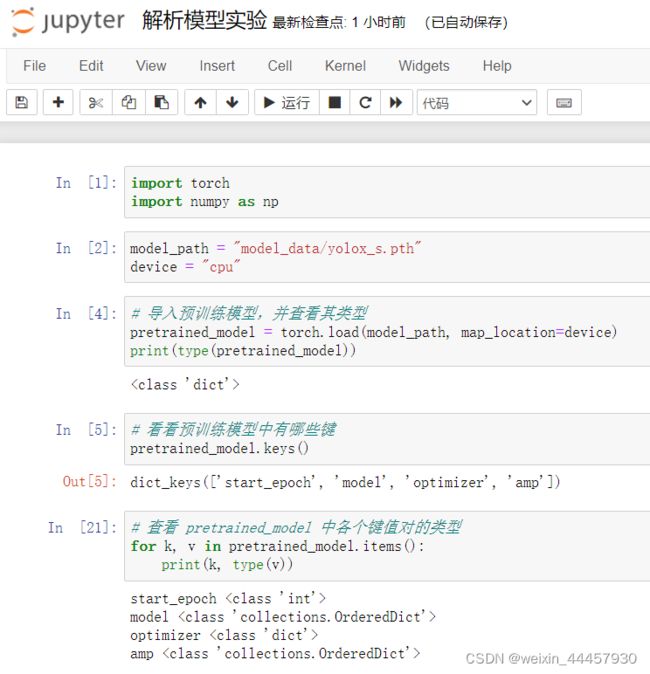
其中三个是字典,导入模型,暂时用不着优化器,所以我们就看看model和amp对应的值


amp是啥,我现在也不太清楚,但是有model就足够了,它包含了我们之前定义的模型组件的参数。
(3)导入模型
好的,我们现在可以根据刚刚解析的结果,新建一个模型对象,并导入权重了。
在刚刚建立的jupyter notebook中,增加下面的代码:
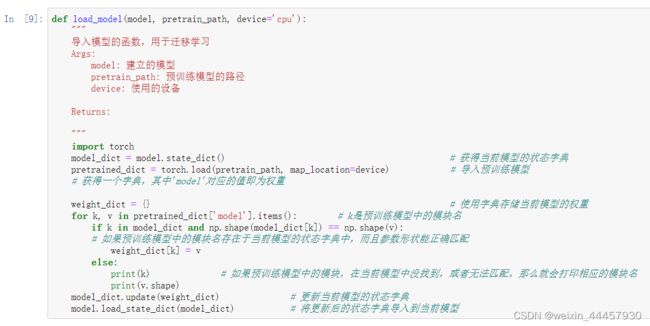
然后写一个测试代码:

测试代码没有输出,说明预训练模型中的所有组件,在当前模型(自己创建的模型)中都存在。
我们也可以在建立模型的时候,修改一下要检测的类别数目,看看能不能检测出来:

OK,如果要用我们自己的数据集,那么模型的结构仅仅在最后的检测头上有所不同。
当然,我们自己建立的模型和官方预训练模型,还不能说是完全相同,因为还有一种情况没有考虑到,即可能自己建立的模型中的某些模块,在预训练模型中并没有出现。为此,我们再写一个导入模型的函数:

下面的测试代码,注意,此时导入模型的函数名为 load_model2

上述的测试代码也没有输出,说明我们自己建立的模型和官方预训练模型,在结构上是完全相同的。
在yolox_from_scratch/utils/utils.py中,加入下面的函数,作为模型的导入函数:
def load_model(model, pretrain_path, device='cpu'):
    """
    导入模型的函数,用于迁移学习
    Args:
        model: 建立的模型
        pretrain_path: 预训练模型的路径
        device: 使用的设备

    Returns:

    """
    import torch
    model_dict = model.state_dict()                                             # 获得当前模型的状态字典
    pretrained_dict = torch.load(pretrain_path, map_location=device)            # 导入预训练模型
    # 获得一个字典,其中'model'对应的值即为权重

    weight_dict = {}                                                            # 使用字典存储当前模型的权重
    for k, v in pretrained_dict['model'].items():        # k是预训练模型中的模块名
        if k in model_dict and np.shape(model_dict[k]) == np.shape(v):
            # 如果预训练模型中的模块名存在于当前模型的状态字典中,而且参数形状能正确匹配
            weight_dict[k] = v
        else:
            print(k)              # 如果预训练模型中的模块,在当前模型中没找到,或者无法匹配,那么就会打印相应的模块名
            print(v.shape)
    model_dict.update(weight_dict)              # 更新当前模型的状态字典
    model.load_state_dict(model_dict)           # 将更新后的状态字典导入到当前模型
在yolox_from_scratch目录下新建一个名为load_test.py的文件

可以看到,目录结构中多了一个文件,这是刚刚建立jupyter notebook时自动生成的,不用管它。
在load_test.py中,将下面的代码加入进去:
import torch

from utils.utils import load_model
from nets.yolo import YoloBody

if __name__ == '__main__':
    """模型的导入"""
    # 模型路径
    model_path = "model_data/yolox_s.pth"
    # 新建模型
    model = YoloBody(80, 's')     # 's'表示新建的为yolox_s模型
    # 导入模型权重
    load_model(model, model_path, 'cpu')

    """生成模拟数据"""
    image_data = torch.rand(8, 3, 640, 640)

    """将图片(模拟数据)输入到模型中"""
    outputs = model(image_data)
    for output in outputs:
        print(output.shape)
输出为:
torch.Size([8, 85, 80, 80])
torch.Size([8, 85, 40, 40])
torch.Size([8, 85, 20, 20])
说明预训练模型导入成功!