python实现对图片的处理--图像处理课设
实现的东西
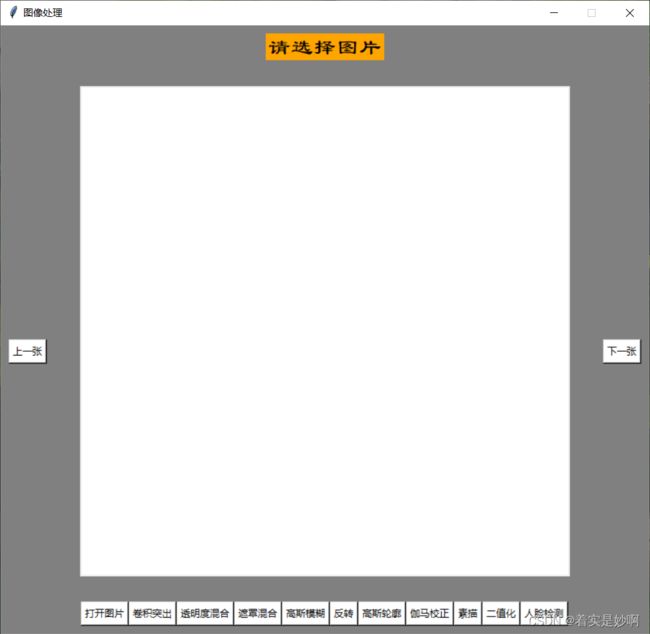
1.从左到右第一个按钮是打开一张图片
2.第二个按钮是二维卷积突出图像边缘:使用一个5*5的卷积核,以步长为1,边缘填充为0的方式对图像进行卷积,输入通道数和输出通道数都3(RGB)
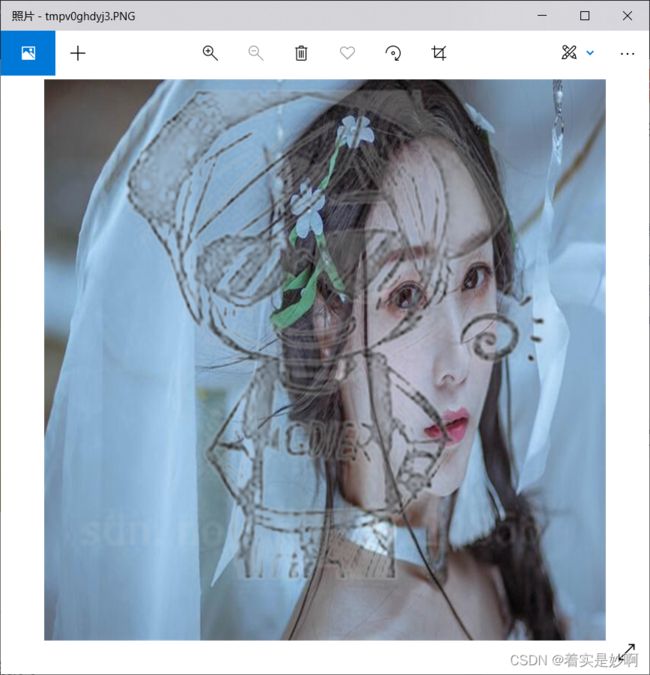
3.第三个按钮是透明度混合:使用一张橙色图片与被打开的图片在RGB三个通道上,分别以0.5的比例对应相加
4.第四个按钮是遮罩混合:原理应该和透明度混合差不多,我设置了0.7与0.3的比例相加,但效果并不好,所以最后是调库实现的
5.第五个按钮和第七个按钮都是调库,可自查
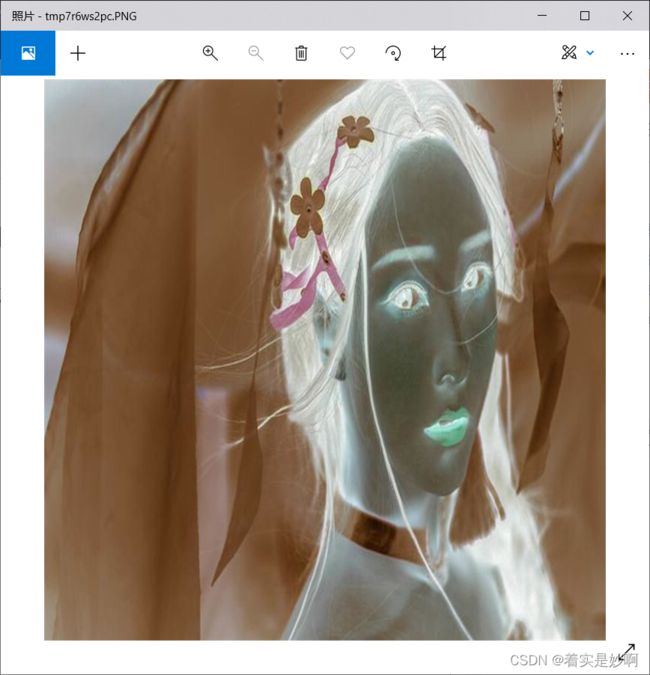
6.第六个按钮是反转:就是255-像素值
7.第七个按钮是伽马校正:直接使用伽马的非线性公式改变颜色值就行,他是对RGB做了一个统一的增强
8.素描:灰度图->取反->高斯滤波->再取反(除法里面)->除法运算(divide)(是一个颜色减弱的效果)
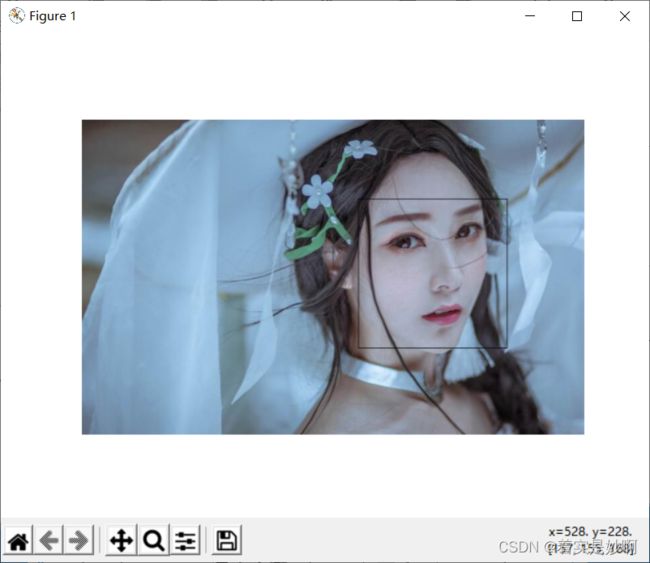
9.人脸检测:调用face的库
10.二值化:使用的是OSTU算法来取得对应的阈值,在阈值之上的全变为255,阈值之下的全变为0
截图
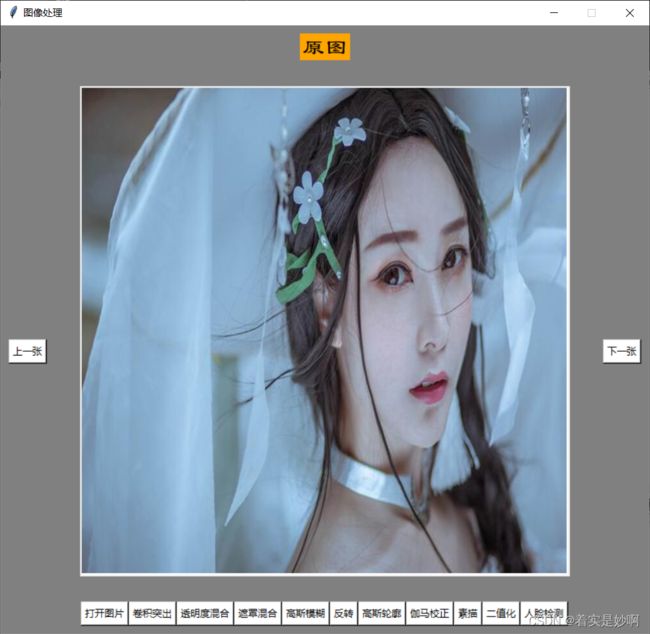
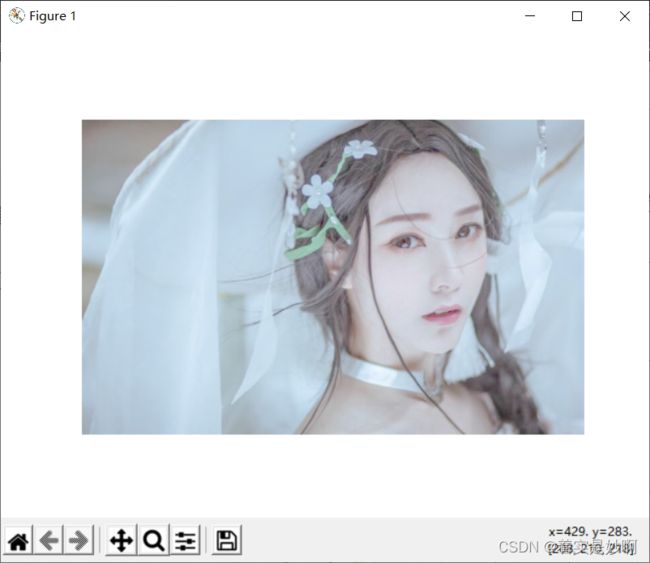
原图
卷积突出
透明度混合
遮罩混合
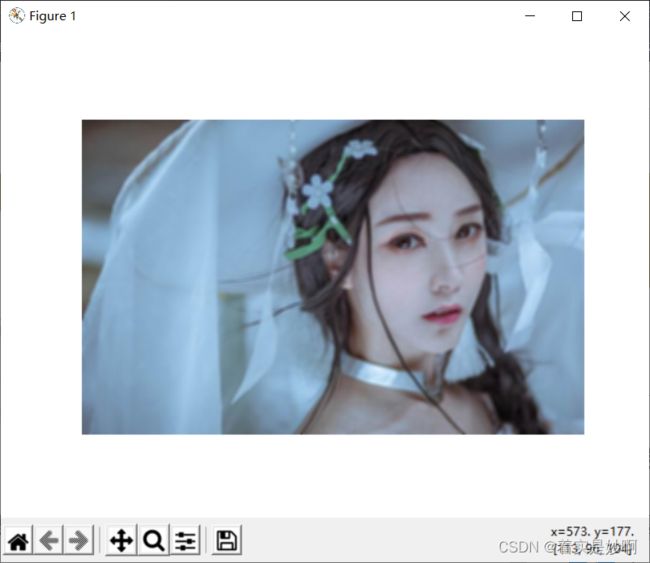
高斯模糊
反转
高斯轮廓
伽马校正
素描
二值化
人脸检测
所有代码
import face_recognition
import numpy
import numpy as np
import cv2
import imageio
import torch
from PIL import Image, ImageTk,ImageFilter,ImageChops
from matplotlib import pyplot as plt
from torch import nn
from torch.nn import Conv2d,MaxPool2d,Flatten,Linear,Sequential
import tkinter as tk
import shutil


def conv(image, kernel, mode='same'):
    if mode == 'fill':#选择是否进行边缘填充
        h = kernel.shape[0] // 2#卷积核的列除以2取整
        w = kernel.shape[1] // 2#卷积核的行除以2取整
#在原始图像边缘进行填充,常数填充,填数值0,假设原始图像600*600,卷积核大小5*5,则填充后图像大小604*604
        image = np.pad(image, ((h, h), (w, w), (0, 0)), 'constant')
 #进行卷积运算
    conv_b = _convolve(image[:, :, 0], kernel)
    conv_g = _convolve(image[:, :, 1], kernel)
    conv_r = _convolve(image[:, :, 2], kernel)
    print("con",conv_r.shape)
    res = np.dstack([conv_b, conv_g, conv_r])
    print("res", res.shape)
    return res


def _convolve(image, kernel):
    h_kernel, w_kernel = kernel.shape#获取卷积核的长宽,也就是行数和列数
    h_image, w_image = image.shape#获取欲处理图片的长宽
 #计算卷积核中心点开始运动的点,因为图片边缘不能为空
    res_h = h_image - h_kernel + 1
    res_w = w_image - w_kernel + 1
#生成一个0矩阵,用于保存处理后的图片
    res = np.zeros((res_h, res_w), np.uint8)
    for i in range(res_h):
        for j in range(res_w):
#image处传入的是一个与卷积核一样大小矩阵,这个矩阵取自于欲处理图片的一部分
            #这个矩阵与卷核进行运算,用i与j来进行卷积核滑动
            res[i, j] = normal(image[i:i + h_kernel, j:j + w_kernel], kernel)

    return res

def normal(image, kernel):
#np.multiply()函数:数组和矩阵对应位置相乘,输出与相乘数组/矩阵的大小一致(点对点相乘)
    res = np.multiply(image, kernel).sum()
    if res > 255:
        return 255
    elif res<0:
        return 0
    else:
        return res

shutil.rmtree('./tupian')
os.mkdir('./tupian')
file_path="baiban.jpg"
root = tk.Tk()
root.title("图像处理")
var=tk.StringVar()#实例化一个TK int的变量
var.set("请选择图片")
textLabel = tk.Label(root,textvariable=var,
justify = tk.CENTER,font=("隶书",20),bg="orange")#左对齐
textLabel.pack(expand="yes")#自动对齐,side:方位
frame3 = tk.Frame(root)
frame3.pack(side="left", padx=10, pady=10)  # side用来设置该控件出现的位置,有四种;padx用来控制x坐标
frame4 = tk.Frame(root)
frame4.pack(side="right", padx=10, pady=10)  # side用来设置该控件出现的位置,有四种;padx用来控制x坐标
root.configure(bg="grey")
root.geometry('800x750+300+50')
root.resizable(False, False)
frame2 = tk.Frame(root)
frame2.pack(expand="yes", padx=10, pady=10)  # side用来设置该控件出现的位置,有四种;padx用来控制x坐标
canvas_root = tk.Canvas(frame2, width=600, height=600, bg="white")
im_root = Image.open(file_path)  ##文件存在的路径
im_root = im_root.resize((600, 600), Image.ANTIALIAS)  # 转化图片
im_root = im_root.convert('RGB')  # 保存为.jpg格式才需要
im = ImageTk.PhotoImage(im_root)
canvas_root.create_image(600, 600, image=im)
canvas_root.pack()
frame1 = tk.Frame(root)
frame1.pack(side="bottom", padx=10, pady=10)  # side用来设置该控件出现的位置,有四种;padx用来控制x坐标


def dakaiwenjian():
    default_dir = r"文件路径"
    global file_path,root,canvas_root,im_root,im
    file_path = tkinter.filedialog.askopenfilename(title=u'选择文件', initialdir=(os.path.expanduser(default_dir)))
    im_root = Image.open(file_path)  ##文件存在的路径
    im_root = im_root.resize((600, 600), Image.ANTIALIAS)  # 转化图片
    im_root = im_root.convert('RGB')  # 保存为.jpg格式才需要
    im = ImageTk.PhotoImage(im_root)
    canvas_root.create_image(300, 300, image=im)
    canvas_root.pack()
    plt.axis('off')
    plt.imshow(im_root)
    plt.savefig('./tupian/原图.jpg')
    var.set("原图")


def bianyuanlunkuo():
    path = file_path  # 原图像路径
    image = cv2.imread(path)
    print(image.shape)
    # kernel 是一个3x3的边缘特征提取器,可以提取各个方向上的边缘
    # kernel2 是一个5x5的浮雕特征提取器。

    kernel1 = np.array([
        [1, 1, 1],
        [1, -7.5, 1],
        [1, 1, 1]
    ])
    sobel = np.array([
        [-1, 0, 1],
        [-2, 0, 2],
        [-1, 0, 1]
    ])  # sobel
    scharr = np.array([
        [-3, 0, 3],
        [-10, 0, 10],
        [-3, 0, 3]
    ])  # sobel
    kernel2 = np.array([[-1, -1, -1, -1, 0],
                        [-1, -1, -1, 0, 1],
                        [-1, -1, 0, 1, 1],
                        [-1, 0, 1, 1, 1],
                        [0, 1, 1, 1, 1]])
    kernel3=np.array([[-1, -1,-1],
                        [-1, 8, -1],
                        [-1, -1, -1]
                        ])
    res = conv(image, kernel2, 'fill')
    print(res.shape)
    plt.imshow(res)
    plt.axis('off')
    plt.savefig('./tupian/边缘轮廓.jpg')
    plt.show()

def xFunc1(event):
    print("鼠标左键点击了一次坐标是:", event.x, event.y)


def toumingduhunhe():
    path = file_path  # 原图像路径
    image = cv2.imread(path)
    im1 = Image.open(path).convert(mode='RGB')
    print(im1)
    # 创建一个和im1大小一样的图像
    im2 = Image.new('RGB', im1.size, 'orange')
    im2.save('./tupian/orange.jpg')
    print(im2)
    # 混合图片,并显示
    abb=Image.blend(im1, im2, 0.5)#该函数的原理image=img1∗(1−alpha)+img2∗alpha
    abb.show()
    abb.save('./tupian/透明度混合.jpg')

def _convolve2(image,image2):
    h_image, w_image = image.shape  # 获取欲处理图片的长宽
    # 生成一个0矩阵,用于保存处理后的图片
    res = np.zeros((h_image, w_image), np.uint8)
    for i in range(h_image):
        for j in range(w_image):
            # image处传入的是一个与卷积核一样大小矩阵,这个矩阵取自于欲处理图片的一部分
            # 这个矩阵与卷核进行运算,用i与j来进行卷积核滑动
            res[i][j] = image[i][j]*(1-0.5)+image2[i][j]*0.5

    return res
def _convolve3(image,image2):
    h_image, w_image = image.shape  # 获取欲处理图片的长宽
    # 生成一个0矩阵,用于保存处理后的图片
    res = np.zeros((h_image, w_image), np.uint8)
    for i in range(h_image):
        for j in range(w_image):
            # image处传入的是一个与卷积核一样大小矩阵,这个矩阵取自于欲处理图片的一部分
            # 这个矩阵与卷核进行运算,用i与j来进行卷积核滑动
            res[i][j] = image[i][j]*(1-0.3)+image2[i][j]*0.7

    return res

def toumingduhunhe2():
    path = file_path  # 原图像路径
    image = cv2.imread(path)
    im1 = Image.open('123.jpg').convert(mode='RGB')
    # 创建一个和im1大小一样的图像
    im2 = Image.new('RGB', im1.size, 'orange')
    im2.save('./tupian/orange.jpg')
    image2 = cv2.imread('./tupian/orange.jpg')
    # 混合图片,并显示
    conv_b = _convolve2(image[:, :, 0],image2[:, :, 0])
    conv_g = _convolve2(image[:, :, 1],image2[:, :, 1])
    conv_r = _convolve2(image[:, :, 2],image2[:, :, 2])
    res = np.dstack([conv_b, conv_g, conv_r])
    plt.axis('off')
    plt.imshow(res)
    plt.savefig("./tupian/透明度混合.jpg")
    plt.show()
    #abb=Image.blend(im1, im2, 0.5)
    #abb.show()
    #abb.save('./tupian/3.jpg')


def zhezhaohunhe():
    im1 = Image.open(file_path)
    # 打开图像2
    default_dir2 = r"文件路径"
    file_path2 = tkinter.filedialog.askopenfilename(title=u'选择文件', initialdir=(os.path.expanduser(default_dir2)))
    im2 = Image.open(file_path2)
    im1 = im1.resize((600, 600), Image.ANTIALIAS)  # 转化图片
    im2 = im2.resize((600, 600), Image.ANTIALIAS)  # 转化图片
    im1 = im1.convert('RGB')  # 保存为.jpg格式才需要
    im2 = im2.convert('RGB')  # 保存为.jpg格式才需要
    # 将图像2的三个色道分离,其中r、g、b都为Image对象
    r, g, b = im2.split()
    r1, g1, b1 = im1.split()
    # 遮罩混合
    Image.composite(im1, im2, b).show()
    ass = Image.composite(im1, im2, b)
    ass.save('./tupian/遮罩混合.jpg')


def zhezhaohunhe2():
    im1 = Image.open('123.jpg')
    # 打开图像2
    default_dir2 = r"文件路径"
    file_path2 = tkinter.filedialog.askopenfilename(title=u'选择文件', initialdir=(os.path.expanduser(default_dir2)))
    im2 = Image.open('18.png')
    im1 = im1.resize((600, 600), Image.ANTIALIAS)  # 转化图片
    im2 = im2.resize((600, 600), Image.ANTIALIAS)  # 转化图片
    im1 = im1.convert('RGB')  # 保存为.jpg格式才需要
    im2 = im2.convert('RGB')  # 保存为.jpg格式才需要
    im1.save("zhuanhua1.jpg")
    im2.save("zhuanhua2.jpg")
    # 将图像2的三个色道分离,其中r、g、b都为Image对象
    image = cv2.imread("zhuanhua1.jpg")
    image2 = cv2.imread('zhuanhua2.jpg')
    # 混合图片,并显示
    conv_b = _convolve3(image[:, :, 0], image2[:, :, 0])
    conv_g = _convolve3(image[:, :, 1], image2[:, :, 1])
    conv_r = _convolve3(image[:, :, 2], image2[:, :, 2])
    res = np.dstack([conv_b, conv_g, conv_r])
    plt.axis('off')
    plt.imshow(res)
    plt.show()


def gaosimohu():
    im1 = Image.open(file_path)
    # 创建一个im1两倍宽的图像
    # img = Image.new('RGB', (im1.width * 2, im1.height), 'red')
    # 高斯模糊处理
    im2 = im1.filter(ImageFilter.BLUR)
    # 将im1粘贴到img上
    # img.paste(im1, (0, 0))
    # 将im2(高斯模糊后的图像)粘贴到img上
    # img.paste(im2, (im1.width, 0))
    # img.show()
    plt.axis('off')
    plt.imshow(im2)
    plt.savefig('./tupian/高斯模糊.jpg')
    plt.show()


def jianfa():
    im1 = Image.open(file_path)
    im2 = Image.open('18.png')
    im1 = im1.resize((600, 600), Image.ANTIALIAS)  # 转化图片
    im2 = im2.resize((600, 600), Image.ANTIALIAS)  # 转化图片
    im1 = im1.convert('RGB')  # 保存为.jpg格式才需要
    im2 = im2.convert('RGB')  # 保存为.jpg格式才需要
    # 合成图像并显示
    im3 = im0 = ImageChops.invert(im1)#反转一个图像,就是把像素值全都减去255
    im3.show()
    im3.save('./tupian/反转.jpg')


def jianfa2():
    img = cv2.imread(file_path)
    #gray = cv2.cvtColor(img, cv2.COLOR_BGR2GRAY)  # 灰度化
    inv = 255 - img  # 取反
    plt.axis('off')
    plt.imshow(inv)
    plt.show()

def gaosilunkuo():
    path = file_path  # 原图像路径
    image = cv2.imread(path)
    print(image.shape)
    # kernel 是一个3x3的边缘特征提取器,可以提取各个方向上的边缘
    # kernel2 是一个5x5的浮雕特征提取器。

    kernel1 = np.array([
        [1, 1, 1],
        [1, -7.5, 1],
        [1, 1, 1]
    ])
    sobel = np.array([
        [-1, 0, 1],
        [-2, 0, 2],
        [-1, 0, 1]
    ])  # sobel
    scharr = np.array([
        [-3, 0, 3],
        [-10, 0, 10],
        [-3, 0, 3]
    ])  # sobel
    kernel2 = np.array([[-1, -1, -1, -1, 0],
                        [-1, -1, -1, 0, 1],
                        [-1, -1, 0, 1, 1],
                        [-1, 0, 1, 1, 1],
                        [0, 1, 1, 1, 1]])
    kernel3=np.array([[-1, -1,-1],
                        [-1, 8, -1],
                        [-1, -1, -1]
                        ])
    res = conv(image, kernel3, 'fill')
    print(res.shape)
    plt.imshow(res)
    plt.axis('off')
    plt.gcf().set_size_inches(600 / 100, 600 / 100)
    plt.gca().xaxis.set_major_locator(plt.NullLocator())
    plt.gca().yaxis.set_major_locator(plt.NullLocator())
    plt.subplots_adjust(top=1, bottom=0, right=0.93, left=0, hspace=0, wspace=0)
    plt.margins(0, 0)
    plt.axis('off')
    plt.savefig('./tupian/高斯轮廓.jpg')
    plt.show()


def gaosilunkuo2():
    im1 = Image.open(file_path)
    # 创建一个im1两倍宽的图像
    # img = Image.new('RGB', (im1.width * 2, im1.height), 'red')
    # 高斯模糊处理
    im2 = im1.filter(ImageFilter.CONTOUR)
    # 将im1粘贴到img上
    # img.paste(im1, (0, 0))
    # 将im2(高斯模糊后的图像)粘贴到img上
    # img.paste(im2, (im1.width, 0))
    # img.show()
    plt.axis('off')
    plt.imshow(im2)
    plt.savefig('./tupian/高斯轮廓.jpg')
    plt.show()


def GammaCorrection(img,c=1.0,g=2.2):

    # 伽马校正
    out = (np.power(img/255, 1.0/g)/c)*255#伽马校正通过预先增大 RGB 的值来排除显示器的影响,达到对图像修正的目的

    return out.astype(np.uint8)


def gamajiaozheng():
    img = imageio.imread(file_path)

    # 伽马校正
    imageio.imsave("GammaCorrection.jpg", GammaCorrection(img))
    plt.axis('off')
    plt.imshow(GammaCorrection(img))
    plt.savefig("./tupian/伽马校正.jpg")
    plt.show()


def sumiaofuzhu():
    img = cv2.imread(file_path)
    gray = cv2.cvtColor(img, cv2.COLOR_BGR2GRAY)#灰度化
    inv = 255 - gray#取反
    blur = cv2.GaussianBlur(inv, ksize=(15, 15), sigmaX=50, sigmaY=50)#高斯滤波
    res = cv2.divide(gray, 255 - blur, scale=255)#颜色减淡效果,灰度图->取反->高斯滤波->再取反(除法里面)->除法运算(divide)
    plt.axis('off')
    plt.imshow(res)
    plt.show()

def sumiao():
    a = np.asarray(Image.open(file_path).convert('L')).astype('float')
    depth = 10.  # (0-100)
    grad = np.gradient(a)  # 取图像灰度的梯度值
    grad_x, grad_y = grad  # 分别取横纵图像梯度值
    grad_x = grad_x * depth / 100.
    grad_y = grad_y * depth / 100.
    A = np.sqrt(grad_x ** 2 + grad_y ** 2 + 1.)
    uni_x = grad_x / A
    uni_y = grad_y / A
    uni_z = 1. / A
    # 建立一个位于图像斜上方的虚拟光源
    vec_el = np.pi / 2.2  # 光源的俯视角度,弧度值
    vec_az = np.pi / 4.  # 光源的方位角度,弧度值
    dx = np.cos(vec_el) * np.cos(vec_az)  # 光源对x 轴的影响
    dy = np.cos(vec_el) * np.sin(vec_az)  # 光源对y 轴的影响
    dz = np.sin(vec_el)  # 光源对z 轴的影响
    # 计算各点新的像素值
    b = 255 * (dx * uni_x + dy * uni_y + dz * uni_z)  # 光源归一化
    b = b.clip(0, 255)  # clip函数将区间外的数字剪除到区间边缘
    im = Image.fromarray(b.astype('uint8'))  # 重构图像
    im.save("./tupian/素描.jpg")
    im.show()


def OSTUerzhihua():
    image = cv2.imread(file_path)
    gray = cv2.cvtColor(image, cv2.COLOR_BGR2GRAY)

    plt.subplot(121)
    plt.hist(image.ravel(), 256)
    plt.xticks([])
    plt.yticks([])
    ret1, th1 = cv2.threshold(gray, 0, 255, cv2.THRESH_OTSU)  # 方法选择为THRESH_OTSU
    plt.subplot(122)
    plt.imshow(th1, "gray")
    plt.xticks([])
    plt.yticks([])
    plt.savefig("./tupian/二值化.jpg")
    plt.show()


jilushunxu=0
tupianshuzu=[]
def walkFile(file):
    global tupianshuzu
    for root, dirs, files in os.walk(file):

        # root 表示当前正在访问的文件夹路径
        # dirs 表示该文件夹下的子目录名list
        # files 表示该文件夹下的文件list

        # 遍历文件
        for f in files:
            aa=[f]
            tupianshuzu+=aa


def shangyizhang():
    global jilushunxu,tupianshuzu
    global file_path, root, canvas_root, im_root, im
    walkFile("F:/dasanshang/tuxiangchuli/tupian")
    jilushunxu-=1
    if(jilushunxu==-1):
        jilushunxu=len(tupianshuzu)-1
    im_root = Image.open("./tupian/{}".format(tupianshuzu[jilushunxu]))  ##文件存在的路径
    indexdou = tupianshuzu[jilushunxu].find('.')
    chuan1 = tupianshuzu[jilushunxu][0:indexdou]
    var.set(chuan1)
    im_root = im_root.resize((600, 600), Image.ANTIALIAS)  # 转化图片
    im_root = im_root.convert('RGB')  # 保存为.jpg格式才需要
    im = ImageTk.PhotoImage(im_root)
    canvas_root.create_image(300, 300, image=im)
    canvas_root.pack()


def xiayizhang():
    global jilushunxu,tupianshuzu
    global file_path, root, canvas_root, im_root, im
    walkFile("F:/dasanshang/tuxiangchuli/tupian")
    jilushunxu+=1
    if(jilushunxu==10):
        jilushunxu=0
    im_root = Image.open("./tupian/{}".format(tupianshuzu[jilushunxu]))  ##文件存在的路径
    indexdou = tupianshuzu[jilushunxu].find('.')
    chuan1 = tupianshuzu[jilushunxu][0:indexdou]
    var.set(chuan1)
    im_root = im_root.resize((600, 600), Image.ANTIALIAS)  # 转化图片
    im_root = im_root.convert('RGB')  # 保存为.jpg格式才需要
    im = ImageTk.PhotoImage(im_root)
    canvas_root.create_image(300, 300, image=im)
    canvas_root.pack()


def renlianjiance():
    # 1.通过load_image_file方法加载待识别的图像
    image = face_recognition.load_image_file(file_path)
    # 加载后的形式是Numpy 128维度的数组
    print(image)
    # 2.通过face_locations方法得到图像中所有的人脸的位置信息
    face_loactions = face_recognition.face_locations(image)
    print(face_loactions)  # [(98, 184, 142, 141), (106, 265, 142, 229), (106, 101, 142, 65), (98, 347, 142, 304)]
    # 因为有4个人,所以有4个元组

    # 3.找到所有人脸,截出来

    for face_loaction in face_loactions:  # 得到每一个人脸的坐标信息[上,右,下,左]
        top, right, bottom, left = face_loaction  # 解包操作,得到每张人脸的位置信息
        print("已识别到人脸部位,像素区域为:Top:{}, right:{}, bottom:{}, left:{}".format(top, right, bottom, left))
        # 把每一个人的头像扣出来,抠图
        # face_image = image[top:bottom, left:right] # 通过切片形式把坐标取出来
        # pil_image = Image.fromarray(face_image) #使用PIL库的fromarray方法,生成一张图片
        # pil_image.show()

        start = (left, top)  # 左上
        end = (right, bottom)  # 右下
        # 在图片上绘制矩形框,从start坐标开始,end坐标结束,矩形框的颜色为红色(0,255,255),矩形框粗细为2
        cv2.rectangle(image, start, end, (0, 0, 0), thickness=1)

    plt.axis('off')
    plt.imshow(image)
    plt.savefig("./tupian/人脸检测.jpg")
    plt.show()
    #cv2.imshow('window', image)
    #cv2.imwrite("./tupian/人脸检测.jpg", image)
    #cv2.waitKey()


hi_t = tk.Button(frame1, text="打开图片", bg="white", fg="black",
                          command=dakaiwenjian)  # 使用command来设置事件
hi_t.pack(side=tk.LEFT)
hi_t2 = tk.Button(frame1, text="卷积突出", bg="white", fg="black",
                           command=bianyuanlunkuo)  # 使用command来设置事件
hi_t2.pack(side=tk.LEFT)
file_path = 0
hi_t3 = tk.Button(frame1, text="透明度混合", bg="white", fg="black",
                           command=toumingduhunhe)  # 使用command来设置事件
hi_t3.pack(side=tk.LEFT)
hi_t4 = tk.Button(frame1, text="遮罩混合", bg="white", fg="black",
                           command=zhezhaohunhe)  # 使用command来设置事件
hi_t4.pack(side=tk.LEFT)
hi_t5 = tk.Button(frame1, text="高斯模糊", bg="white", fg="black",
                           command=gaosimohu)  # 使用command来设置事件
hi_t5.pack(side=tk.LEFT)
hi_t6 = tk.Button(frame1, text="反转", bg="white", fg="black",
                           command=jianfa)  # 使用command来设置事件
hi_t6.pack(side=tk.LEFT)
hi_t7 = tk.Button(frame1, text="高斯轮廓", bg="white", fg="black",
                           command=gaosilunkuo2)  # 使用command来设置事件
hi_t7.pack(side=tk.LEFT)
hi_t8 = tk.Button(frame1, text="伽马校正", bg="white", fg="black",
                           command=gamajiaozheng)  # 使用command来设置事件
hi_t8.pack(side=tk.LEFT)
hi_t9 = tk.Button(frame1, text="素描", bg="white", fg="black",
                           command=sumiao)  # 使用command来设置事件
hi_t9.pack(side=tk.LEFT)
hi_t10 = tk.Button(frame1, text="二值化", bg="white", fg="black",
                           command=OSTUerzhihua)  # 使用command来设置事件
hi_t10.pack(side=tk.LEFT)
hi_t11 = tk.Button(frame3, text="上一张", bg="white", fg="black",
                           command=shangyizhang)  # 使用command来设置事件
hi_t11.pack(expand="yes")
hi_t12 = tk.Button(frame4, text="下一张", bg="white", fg="black",
                           command=xiayizhang)  # 使用command来设置事件
hi_t12.pack(expand="yes",side="right")
hi_t13 = tk.Button(frame1, text="人脸检测", bg="white", fg="black",
                           command=renlianjiance)  # 使用command来设置事件
hi_t13.pack(expand="yes",side="right")
root.mainloop()
