机器学习-学习笔记 学习总结归纳(第十四周)
Cifar10
Cifar10是Caffe自带Demo里的一个数据集,我们先按照之前的MNIST来进行下载数据集,并且进行训练。
下载数据集
有了上次MNIST的例子,这次就很简单啦~
首先,我们需要运行data/cifar10/get_cifar10.sh
./data/cifar10/get_cifar10.sh运行后会下载一些数据,放在examples下。
我们先看看examples/cifar10下多了什么。
ls ./examples/cifar10运行create_cifar10.sh
./examples/cifar10/create_cifar10.sh接着将cifar10_quick_solver.prototxt文件里修改GPU改为CPU。
运行train_quick.sh
./examples/cifar10/train_quick.sh接着就是漫长的等待了,是不是等不及了呢- -我之前跑了full,跑了二天还没跑完,只跑了5w次迭代,最后我会把这个5w次迭代的快照发出来,今天再跑跑看quick,应该四五个小时就能跑完了。
现在先拿5w的快照跑一下test,感受一下- -
./build/tools/caffe test -model ./examples/cifar10/cifar10_full_train_test.prototxt -weights ./examples/cifar10/cifar10_full_iter_50000.caffemodel.h5 -iterations 20![]()
./build/tools/caffe test -model ./examples/cifar10/cifar10_full_train_test.prototxt -weights ./examples/cifar10/cifar10_full_iter_10000.caffemodel.h5 -iterations 20![]()
可以看到,1w到5w次,成功率只是上升了百分之三,full来说,总共需要跑6w次迭代,接着再跑lr1,lr2,总共19w次迭代,不过77%目前来说还可以,我们先试一试,找个图片,跑一跑。
我们先看一下cifar10的数据集是什么样的。
CIFAR-10
![]()
根据上面的描述,说的是一个二进制文件里有1w个彩色图片(每个图片3072个基本单位(numpy ‘s uint8s)),并且标签占一位,在每个图片的开头是一个单位的标签,所以一个图片就占3073个单位,读取代码如下
别忘了先创建cifar10_test文件夹。
mkdir ./cifar10_test期间需要使用一些类库,可以使用以下代码进行下载。
pip install --upgrade setuptools
pip install numpy Matplotlib
pip install opencv-python
下面才是正题,主要就是先提取数据(Label,R, G, B),接着使用merge将三个维度合并,接着使用Iamge.fromarray转换为图片,并进行保存。
import numpy as np
import struct
import matplotlib.pyplot as plt
import Image
import cv2 as cv


def unzip(filename):
    binfile = open(filename, 'rb')
    buf = binfile.read()

    index = 0
    numImages = 10000
    i = 0
    for image in range(0, numImages):
        label = struct.unpack_from('>1B', buf, index)
        index += struct.calcsize('>1B')
        imR = struct.unpack_from('>1024B', buf, index)
        index += struct.calcsize('>1024B')
        imR = np.array(imR, dtype='uint8')
        imR = imR.reshape(32, 32)
        imG = struct.unpack_from('>1024B', buf, index)
        imG = np.array(imG, dtype='uint8')
        imG = imG.reshape(32, 32)
        index += struct.calcsize('>1024B')
        imB = struct.unpack_from('>1024B', buf, index)
        imB = np.array(imB, dtype='uint8')
        imB = imB.reshape(32, 32)
        index += struct.calcsize('>1024B')
        im = cv.merge((imR, imG, imB))
        im = Image.fromarray(im)
        im.save('cifar10_test/train_%s_%s.png' % (label , image), 'png')

unzip("./caffe/data/cifar10/data_batch_1.bin")![]()
那具体label对应的是什么,去哪里找呢?
cat ./caffe/data/cifar10/batches.meta.txt以下是输出结果(一共10个)
airplane
automobile
bird
cat
deer
dog
frog
horse
ship
truck
验证
我们现在得到了图片,也得到了训练好的网络,我们先仿照MNIST进行实验看看。
#coding=utf-8

import sys
sys.path.insert(0, './caffe/python');
import numpy as np
import struct
import matplotlib.pyplot as plt
import Image
import cv2 as cv


def unzip(filename):
    binfile = open(filename, 'rb');
    buf = binfile.read();

    import caffe
    index = 0;
    numImages = 10000;
    i = 0;
    n = np.zeros(10);
    for image in range(0, numImages):
        label = struct.unpack_from('>1B', buf, index);
        index += struct.calcsize('>1B');
        imR = struct.unpack_from('>1024B', buf, index);
        index += struct.calcsize('>1024B');
        imR = np.array(imR, dtype='uint8');
        imR = imR.reshape(32, 32);
        imG = struct.unpack_from('>1024B', buf, index);
        imG = np.array(imG, dtype='uint8');
        imG = imG.reshape(32, 32);
        index += struct.calcsize('>1024B');
        imB = struct.unpack_from('>1024B', buf, index);
        imB = np.array(imB, dtype='uint8');
        imB = imB.reshape(32, 32);
        index += struct.calcsize('>1024B');
        im = cv.merge((imR, imG, imB));
        im = Image.fromarray(im);
        im.save('cifar10_test/train_%s_%s.png' % (label , n[label]), 'png');
        n[label] += 1;

def getType(file):
    img = caffe.io.load_image(file, color=True);
    net = caffe.Classifier('./caffe/examples/cifar10/cifar10_full.prototxt',
     './caffe/examples/cifar10/cifar10_full_iter_50000.caffemodel.h5', channel_swap=(2, 1, 0),
     raw_scale=255,image_dims=(32, 32));
    pre = net.predict([img]);
    caffe.set_mode_cpu();
    return pre[0].argmax();

#unzip("./caffe/data/cifar10/data_batch_1.bin")
import fileinput
labelName = './caffe/data/cifar10/batches.meta.txt';
file = open(labelName, 'r');
lines = file.read(100000);
import re
label = re.split('\n', lines);
import caffe
import random
for i in range(1, 21):
    fileName = 'cifar10_test/train_(%d,)_%d.0.png' % (random.choice(range(0, 10)), random.choice(range(0, 100)));
    img = caffe.io.load_image(fileName);
    plt.subplot(4, 5, i);
    plt.imshow(img);
    plt.title(label[getType(fileName)]);
plt.show();![]()
结果还是可以的,不过这些都是训练集的数据,我们随便在网上找一张图片试试看。
#coding=utf-8

import sys
sys.path.insert(0, './caffe/python');
import numpy as np
import struct
import matplotlib.pyplot as plt
import Image
import cv2 as cv


def unzip(filename):
    binfile = open(filename, 'rb');
    buf = binfile.read();

    import caffe
    index = 0;
    numImages = 10000;
    i = 0;
    n = np.zeros(10);
    for image in range(0, numImages):
        label = struct.unpack_from('>1B', buf, index);
        index += struct.calcsize('>1B');
        imR = struct.unpack_from('>1024B', buf, index);
        index += struct.calcsize('>1024B');
        imR = np.array(imR, dtype='uint8');
        imR = imR.reshape(32, 32);
        imG = struct.unpack_from('>1024B', buf, index);
        imG = np.array(imG, dtype='uint8');
        imG = imG.reshape(32, 32);
        index += struct.calcsize('>1024B');
        imB = struct.unpack_from('>1024B', buf, index);
        imB = np.array(imB, dtype='uint8');
        imB = imB.reshape(32, 32);
        index += struct.calcsize('>1024B');
        im = cv.merge((imR, imG, imB));
        im = Image.fromarray(im);
        im.save('cifar10_test/train_%s_%s.png' % (label , n[label]), 'png');
        n[label] += 1;

def getType(file):
    img = caffe.io.load_image(file, color=True);
    net = caffe.Classifier('./caffe/examples/cifar10/cifar10_full.prototxt',
     './caffe/examples/cifar10/cifar10_full_iter_50000.caffemodel.h5', channel_swap=(2, 1, 0),
     raw_scale=255,image_dims=(32, 32));
    pre = net.predict([img]);
    caffe.set_mode_cpu();
    return pre[0].argmax();

def getLabel(labelName):
    file = open(labelName, 'r');
    lines = file.read(100000);
    import re
    label = re.split('\n', lines);
    return label;

# 定义缩放resize函数
def resize(image, width=None, height=None, inter=cv.INTER_AREA):
    # 初始化缩放比例,并获取图像尺寸
    dim = None
    (h, w) = image.shape[:2]

    # 如果宽度和高度均为0,则返回原图
    if width is None and height is None:
        return image

    # 宽度是0
    if width is None:
        # 则根据高度计算缩放比例
        r = height / float(h)
        dim = (int(w * r), height)

    # 如果高度为0
    else:
        # 根据宽度计算缩放比例
        r = width / float(w)
        dim = (width, int(h * r))

    # 缩放图像
    resized = cv.resize(image, dim, interpolation=inter)

    # 返回缩放后的图像
    return resized

import caffe
fileName = 'cifar10_test/timg.jpeg';
img = caffe.io.load_image(fileName);
plt.subplot(1, 2, 1);
plt.imshow(img);
plt.title('Test Image');
img = resize(img, 32, 32);
plt.subplot(1, 2, 2);
plt.imshow(img);
plt.title(getLabel('./caffe/data/cifar10/batches.meta.txt')[getType(fileName)]);
plt.show();![]()
Fine-tuning(Finetune|微调)
很多时候,我们的电脑跑不了那么多的数据,就可以去下载别人已经训练好的网络进行第二次训练,达到准确率更高,或者增加一个新的类别,让我们一步一步来。
在原有数据集上进行微调
我们之前训练好了mnist,我们可以修改lenet_solver.prototxt如下
# The train/test net protocol buffer definition
net: "examples/mnist/lenet_train_test.prototxt"
# test_iter specifies how many forward passes the test should carry out.
# In the case of MNIST, we have test batch size 100 and 100 test iterations,
# covering the full 10,000 testing images.
test_iter: 10 # 测试时迭代几次
# Carry out testing every 500 training iterations.
test_interval: 500 # 每迭代多少次进行测试
# The base learning rate, momentum and the weight decay of the network.
base_lr: 0.001 #这里是学习速率,调小
momentum: 0.9
weight_decay: 0.0005
# The learning rate policy
lr_policy: "inv"
gamma: 0.0001
power: 0.75
# Display every 100 iterations
display: 100
# The maximum number of iterations
max_iter: 2000 # 最大迭代次数
# snapshot intermediate results
snapshot: 5000 # 这是快照,即5000次迭代进行一次快照
snapshot_prefix: "examples/mnist/lenet" # 快照前面的名字
# solver mode: CPU or GPU
solver_mode: CPU
我们这里主要是将学习速率调低,使其更加精确,迭代次数减少(因为也不用那么多次了- -)。
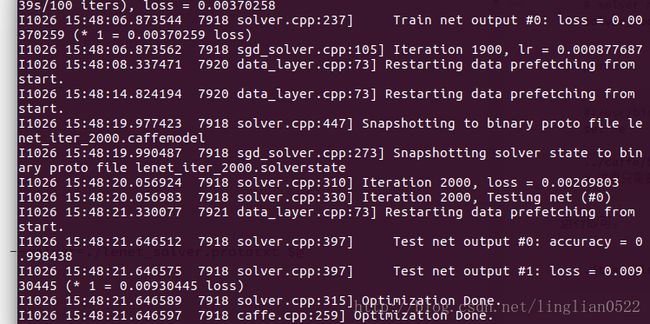
sudo ./build/tools/caffe train --solver ./examples/mnist/lenet_solver.prototxt --weights ./examples/mnist/lenet_iter_10000.caffemodel - 微调前
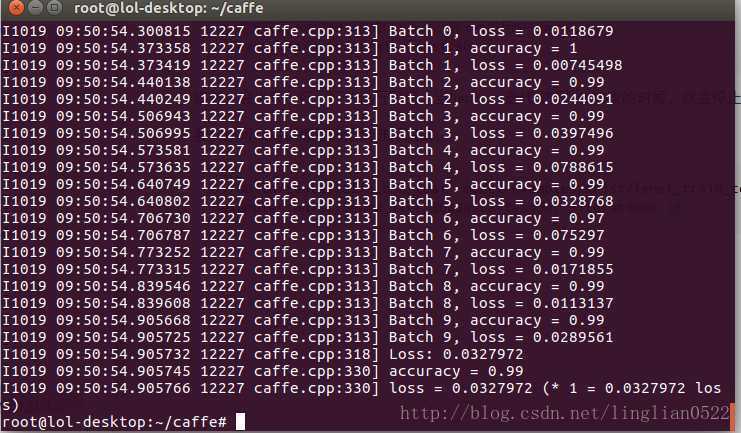
- 微调后
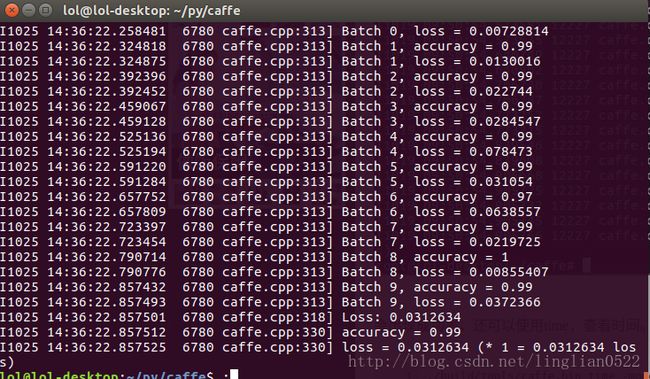
增加了0.1%- -,在试试看将学习策略改成step。
继续修改lenet_solver.prototxt文件如下
# The train/test net protocol buffer definition
net: "examples/mnist/lenet_train_test.prototxt"
# test_iter specifies how many forward passes the test should carry out.
# In the case of MNIST, we have test batch size 100 and 100 test iterations,
# covering the full 10,000 testing images.
test_iter: 100
# Carry out testing every 500 training iterations.
test_interval: 500
# The base learning rate, momentum and the weight decay of the network.
base_lr: 0.001
momentum: 0.9
weight_decay: 0.0005
# The learning rate policy
lr_policy: "step"
gamma: 0.0001
stepsize: 100
# Display every 100 iterations
display: 100
# The maximum number of iterations
max_iter: 2000
# snapshot intermediate results
snapshot: 5000
snapshot_prefix: "examples/mnist/lenet"
# solver mode: CPU or GPU
solver_mode: CPU
sudo ./build/tools/caffe.bin train -solver examples/mnist/lenet_solver.prototxt -weights examples/mnist/lenet_iter_2000.caffemodel![]()
可以看到有进步了- -而且训练时间非常短。
我们试试看将数字0123456剔除,只训练789,接着用789的模型,训练0,看看能不能成功。
我们之前提取了mnist的图片,这次我们根据给出的标签,来进行分类。
首先需要创建文件夹
mkdir mnist_test
mkdir ./mnist_test/0
mkdir ./mnist_test/1
mkdir ./mnist_test/2
mkdir ./mnist_test/3
mkdir ./mnist_test/4
mkdir ./mnist_test/5
mkdir ./mnist_test/6
mkdir ./mnist_test/7
mkdir ./mnist_test/8
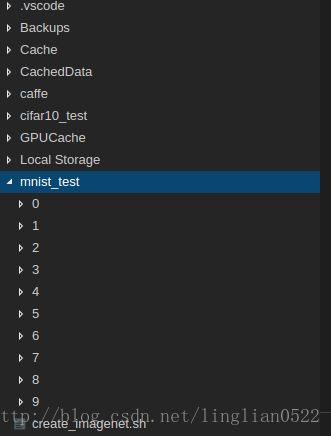
mkdir ./mnist_test/9![]()
import numpy as np
import struct
import matplotlib.pyplot as pyplot
import Image


def unzip(fileName, labelName):
    binfile = open(fileName, 'rb')
    buf = binfile.read()
    binfileOfLabel = open(labelName, 'rb')
    bufOfLabel = binfileOfLabel.read()

    index = 0
    index2 = 0
    magic, numImages, numRows, numColumns = struct.unpack_from(
        '>IIII', buf, index)
    index += struct.calcsize('>IIII')
    index2 += struct.calcsize('>II')
    n = [0 for x in range(0, 10)];
    for image in range(0, numImages):
        im = struct.unpack_from('>784B', buf, index)
        label = struct.unpack_from('>1B', bufOfLabel, index2)
        index += struct.calcsize('>784B')
        index2 += struct.calcsize('>1B')
        im = np.array(im, dtype='uint8')
        im = im.reshape(28, 28)

        im = Image.fromarray(im)
        im.save('mnist_test/%d/train_%s.bmp' % (label[0], n[label[0]]), 'bmp')
        n[label[0]] += 1


unzip('./caffe/data/mnist/t10k-images-idx3-ubyte', './caffe/data/mnist/t10k-labels-idx1-ubyte')![]()
好了,把数字分割开来以后,我们需要将要测试数据随机存入mdb
接上回制作lmdb开始,我们把数据都分好了,现在开始制作lmdb即可。
首先制作train.txt 和 val.txt,参照教程深度学习caffe平台–制作自己.lmdb格式数据集及分类标签文件
制作数据集和标签
# coding=utf-8

def checkDir(dirName):
    import os
    if os.path.exists(dirName) == False:
        os.mkdir(dirName)

def checkFile(dirFile):
    import os
    if os.path.exists(dirFile) == True:
        os.remove(dirFile)

# copy form fileName to copyName
def copy(fileName, copyName):
    f = open(fileName, 'rb')
    checkFile(copyName)
    c = open(copyName, 'wb')
    line = f.read(8196)
    while line:
        c.write(line)
        line = f.read(8196)
    f.close()
    c.close()

n = [0 for x in range(0, 10)];

def makeTrain(numberArray):
    import random
    import os
    checkDir('mnist_test/train')

    for i in range(0, 10):
        checkDir('mnist_test/train/%d' % i)

    for i in range(0, 5000):
        number = random.choice(numberArray)
        fileName = '%d/train_%d.bmp' % (number, n[number])
        if os.path.exists('./mnist_test/%s' % fileName):
            copy('./mnist_test/%s' % fileName, './mnist_test/train/%s' % fileName)
        n[number] += 1;

def makeVal(numberArray):
    import random
    import os
    checkDir('mnist_test/val')
    for i in range(0, 10):
        checkDir('mnist_test/val/%d' % i)

    for i in range(0, 5000):
        number = random.choice(numberArray)
        fileName = '%d/train_%d.bmp' % (number, n[number])
        if os.path.exists('./mnist_test/%s' % fileName):
            copy('./mnist_test/%s' % fileName, './mnist_test/val/%s' % fileName)
        n[number] += 1;

def makeTrainTxT(numberArray):
    import os
    n = []
    for i in range(0, 10):
        n.append(os.listdir('./mnist_test/train/%d' % i))

    checkFile('./mnist_test/train.txt')
    f = open('./mnist_test/train.txt', 'wb')

    import random
    m = numberArray
    while len(m) != 0:
        number = random.choice(m)
        i = m.index(number)
        f.write('train/%d/%s %d\n' % (number, n[number][0], number))
        del n[number][0]
        if len(n[number]) == 1:
            del m[i]

    f.close()

def makeValTxT(numberArray):
    import os
    n = []
    for i in range(0, 10):
        n.append(os.listdir('./mnist_test/val/%d' % i))

    checkFile('./mnist_test/val.txt')
    f = open('./mnist_test/val.txt', 'wb')
    import random
    m = numberArray
    while len(m) != 0:
        number = random.choice(m)
        i = m.index(number)
        f.write('val/%d/%s %d\n' % (number, n[number][0], number))
        del n[number][0]
        if len(n[number]) == 1:
            del m[i]

    f.close()

m = [0, 1, 2]
makeTrain(m)
m = [0, 1, 2]
makeVal(m)
m = [0, 1, 2]
makeTrainTxT(m)
m = [0, 1, 2]
makeValTxT(m)
运行完可以使用tree看看(也可以用可视化的看)。
tree ./train可以看到只有0, 1, 2文件夹里有图片,其他的都没有。
运行create_imagenet
接着将caffe/examples/imagenet/create_imagenet.sh移动到mnist_test目录下
cp ../examples/imagenet/create_imagenet.sh ./create_imagenet.sh我的目录结构如下:
接着编辑create_imagenet.sh
sudo vim ./create_imagenet.sh编辑成如下形式
#!/usr/bin/env sh
# Create the imagenet lmdb inputs
# N.B. set the path to the imagenet train + val data dirs
set -e

EXAMPLE=./ # 当前目录,就是lmdb要在哪里
DATA=./ # txt文件放在哪里
TOOLS=../caffe/build/tools

TRAIN_DATA_ROOT=./ # 就是train.txt表中的路径的根目录
VAL_DATA_ROOT=./ # 就是val.txt表中的路径的根目录

# Set RESIZE=true to resize the images to 256x256. Leave as false if images have
# already been resized using another tool.
RESIZE=false
if $RESIZE; then
  RESIZE_HEIGHT=256
  RESIZE_WIDTH=256
else
  RESIZE_HEIGHT=0
  RESIZE_WIDTH=0
fi

if [ ! -d "$TRAIN_DATA_ROOT" ]; then
  echo "Error: TRAIN_DATA_ROOT is not a path to a directory: $TRAIN_DATA_ROOT"
  echo "Set the TRAIN_DATA_ROOT variable in create_imagenet.sh to the path" \
       "where the ImageNet training data is stored."
  exit 1
fi

if [ ! -d "$VAL_DATA_ROOT" ]; then
  echo "Error: VAL_DATA_ROOT is not a path to a directory: $VAL_DATA_ROOT"
  echo "Set the VAL_DATA_ROOT variable in create_imagenet.sh to the path" \
       "where the ImageNet validation data is stored."
  exit 1
fi

echo "Creating train lmdb..."

# 删除上一次残留的文件
rm -rf $EXAMPLE/train_lmdb
rm -rf $EXAMPLE/val_lmdb

# 这里一定要加上-gray=true
GLOG_logtostderr=1 $TOOLS/convert_imageset -gray=true \
    --resize_height=$RESIZE_HEIGHT \
    --resize_width=$RESIZE_WIDTH \
    --shuffle \
    $TRAIN_DATA_ROOT \
    $DATA/train.txt \ # 这里是train.txt的名字
    $EXAMPLE/train_lmdb # 这里是生成的名字,根据上面删除的进行更改即可

echo "Creating val lmdb..."

# 这里一定要加上-gray=true
GLOG_logtostderr=1 $TOOLS/convert_imageset -gray=true \
    --resize_height=$RESIZE_HEIGHT \
    --resize_width=$RESIZE_WIDTH \
    --shuffle \
    $VAL_DATA_ROOT \
    $DATA/val.txt \ # 这里是val.txt的名字
    $EXAMPLE/val_lmdb # 这里是生成的名字,根据上面删除的进行更改即可

echo "Done."
保存后运行
./create_imagenet.sh使用caffe的convert_imageset生成lmdb文件
训练
首先,我们需要把训练用的网格(lenet_train_test.prototxt)、运行参数(lenet_solver.prototxt)、运行脚本(train_lenet.sh)复制过来。
具体复制过程就不讲了,很简单。
主要我们需要改这三个文件的内容,与我们训练的数据集进行配对。
lenet_train_test.prototxt,只需要更改Data就行。
layer {
  name: "mnist"
  type: "Data" # 数据
  top: "data"
  top: "label"
  include {
    phase: TRAIN # 用于Train阶段
  }
  transform_param {
    scale: 0.00390625
  }
  data_param {
    source: "train_lmdb" # 这里需要些lmdb文件夹路径,在哪里运行就怎么写,这里的当前路径运行,所以直接写名字即可
    batch_size: 64 # 一次用多少个
    backend: LMDB # 什么格式的数据(后缀)
  }
}
layer {
  name: "mnist"
  type: "Data"
  top: "data"
  top: "label"
  include {
    phase: TEST
  }
  transform_param {
    scale: 0.00390625
  }
  data_param {
    source: "val_lmdb" # 这里需要些lmdb文件夹路径,在哪里运行就怎么写
    batch_size: 64 # 一次用多少个
    backend: LMDB # 什么格式的数据(后缀)
  }
}
lenet_solver.prototxt
# The train/test net protocol buffer definition
net: "lenet_train_test.prototxt" # 网格信息在哪里就写上面
# test_iter specifies how many forward passes the test should carry out.
# In the case of MNIST, we have test batch size 100 and 100 test iterations,
# covering the full 10,000 testing images.
test_iter: 30 # 测试阶段迭代次数
# Carry out testing every 500 training iterations.
test_interval: 500 # 每迭代多少次进行测试
# The base learning rate, momentum and the weight decay of the network.
base_lr: 0.001 # 学习速率
momentum: 0.9
weight_decay: 0.0005
# The learning rate policy
lr_policy: "inv"
gamma: 0.0001
power: 0.75
# Display every 100 iterations
display: 100 # 每次迭代100次输出信息
# The maximum number of iterations
max_iter: 200 # 迭代多少次
# snapshot intermediate results
snapshot: 5000 # 迭代5000次弄一次快照
snapshot_prefix: "lenet" # 结果出来的路径和名字
# solver mode: CPU or GPU
solver_mode: CPU
train_lenet.sh
#!/usr/bin/env sh
set -e

../caffe/build/tools/caffe train --solver=./lenet_solver.prototxt $@
# 这里只需要找到caffe路径即可。
运行即可。
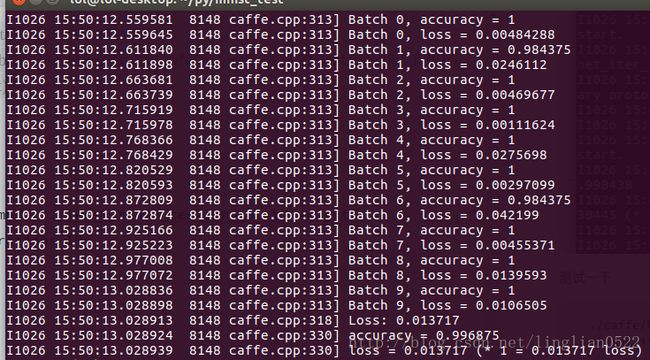
./train_lenet.sh测试一下
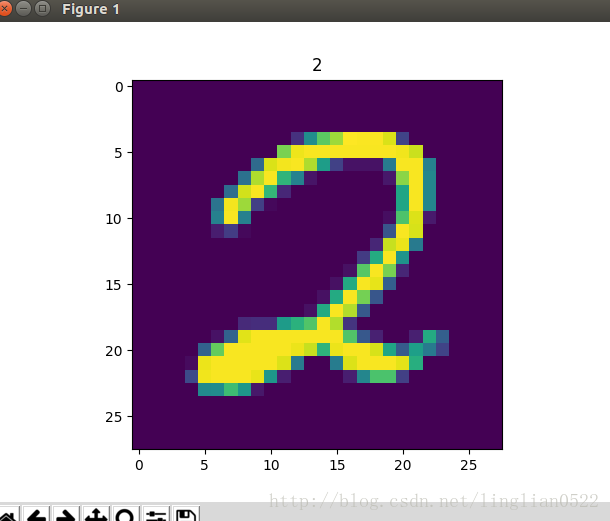
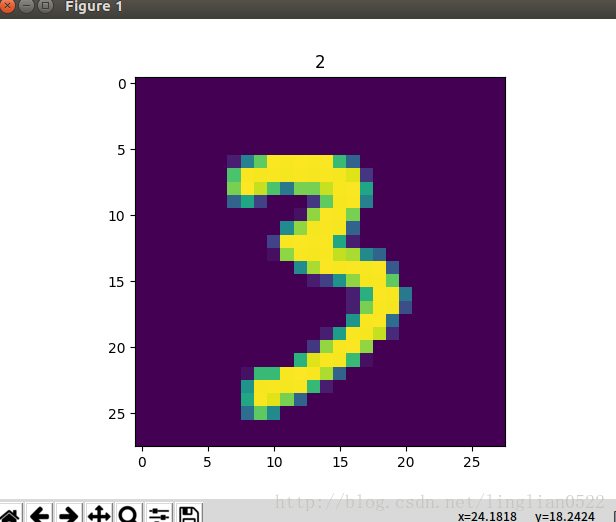
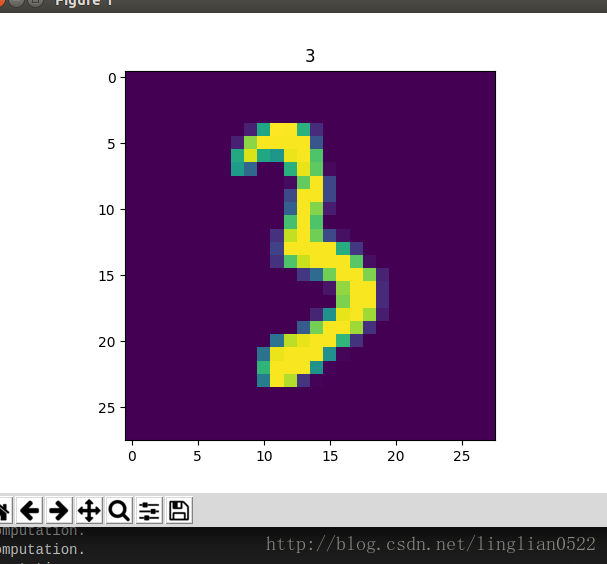
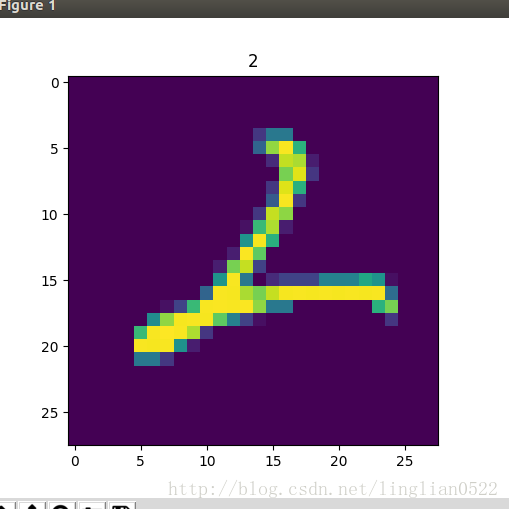
../caffe/build/tools/caffe test -model ./lenet_train_test.prototxt -weights ./lenet_iter_200.caffemodel -iterations 10ok, 成功了,记住这个数据集里没有3,我们拿具体图片进行测试一下。
# coding=utf-8


def getNumber(IMAGE_FILE, flag):
    import os
    import sys
    import Image
    import numpy as np
    from scipy.misc import imread, imresize
    import matplotlib.pyplot as plt
    caffe_root = './caffe/'
    sys.path.insert(0, caffe_root + "python")
    import caffe
    MODEL_FILE = './mnist_test/lenet.prototxt'  # 网络信息
    PRETRAINED = './mnist_test/lenet_iter_200.caffemodel'  # 训练后的结果
    input_image = caffe.io.load_image(IMAGE_FILE, color=False)
    net = caffe.Classifier(MODEL_FILE, PRETRAINED, raw_scale=255, image_dims=(28, 28))  # 载入分类器
    prediction = net.predict([input_image])  # 对图片进行预测,分类
    caffe.set_mode_cpu()  # 使用CPU模式
    if (flag):
        img = imread(IMAGE_FILE)
        plt.imshow(img)
        plt.title(prediction[0].argmax())
        plt.show()
    return prediction[0].argmax()

print(getNumber('./mnist_test/2/train_1.bmp', True))
试试看数字3,即没有学习的数字
接下来进行Fine-tuning,加入3试试看。
利用上面的,制作0, 1, 2, 3的lmdb。
m = [0, 1, 2, 3]
makeTrain(m)
m = [0, 1, 2, 3]
makeVal(m)
m = [0, 1, 2, 3]
makeTrainTxT(m)
m = [0, 1, 2, 3]
makeValTxT(m)
接着执行,也可以修稿lenet_solver.prototxt的相关属性,我这里之前那个是迭代500次,这次是迭代200次
sudo ./create_imagenet.sh
sudo ../caffe/build/tools/caffe train --solver ./lenet_solver.prototxt --weights ./lenet_iter_500.caffemodel
测试函数跟上面的一样,只需要改点东西即可。
Caffe学习系列(7):solver及其配置
