如何debug linux 系统内核
1. 目的
本文章是写给有兴趣debug linux 操作系统内核的开发者
2. 使用的开源应用
- linux
- busybox
- qemu
- eclipse
3. 步骤
3.1 编译linux
3.1.1 下载linux
执行如下命令:
wget https://mirrors.edge.kernel.org/pub/linux/kernel/v4.x/linux-4.15.tar.xz
3.1.2 解压缩
tar xvf linux-4.15.tar.xz
3.1.3 编译linux
3.1.3.1 修改编译参数
假设当前解压缩后的目录存放的目录为:/home/openSource,
那可执行如下命令:
cd linux-4.15/
sudo make O=out_x86_64 menuconfig
在弹出的菜单中,作如下修改

Device Drivers —>
Networking support —>
[M] Universal TUN/TAP device driver support
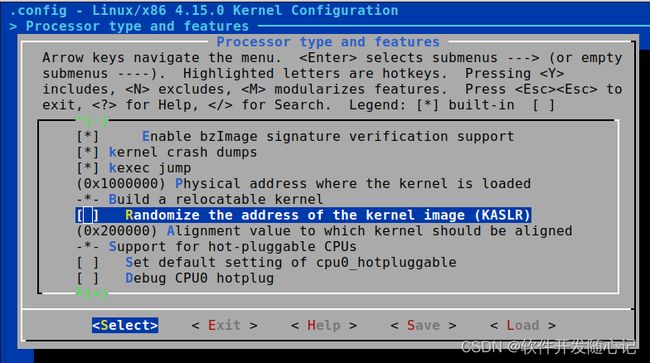
Processor type and features —>
[ ] Randomize the address of the kernel image (KASLR)
去掉前面的勾
General setup —>
----> [*] Initial RAM filesystem and RAM disk (initramfs/initrd) support
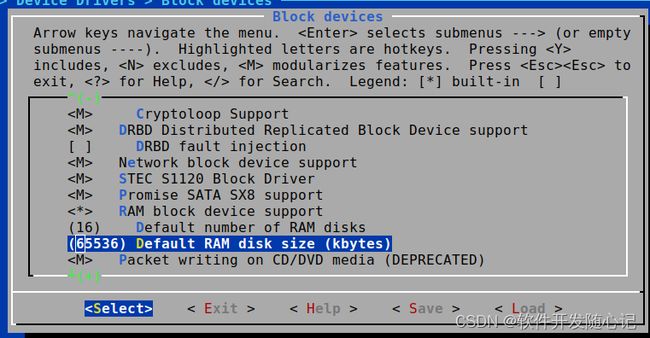
Device Drivers —>
[] Block devices —>
<> RAM block device support
(65536) Default RAM disk size (kbytes)
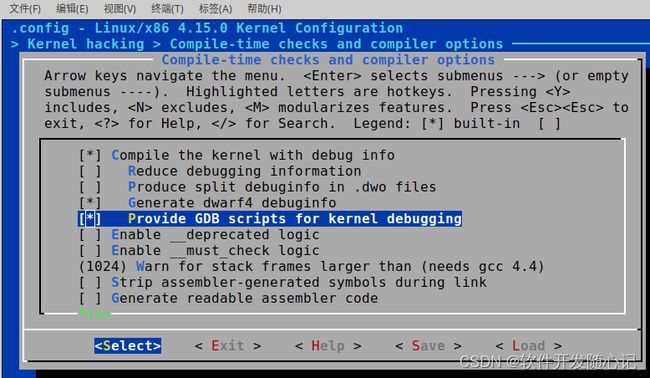
kernel hacking
compile-time checks and compiler option
[] compile the kernel with debug info
[] Privide GDB scripts for kernel debugging
修改完配置后,执行如下命令:
make O=out_x86_64 bzImage -j32
3.2 安装busybox
3.2.1 安装busybox
wget https://busybox.net/downloads/busybox-1.24.2.tar
tar -xvf busybox-1.24.2.tar
sudo make menuconfig
在弹出地界面中作如下配置
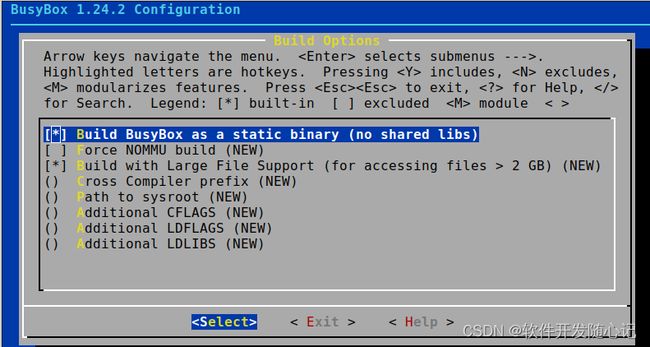
BusyBox Settings —->
Build Options
[*] Build Busybox as a static binary (no shared libs)
执行编译安装:
sudo make install
3.2.2 配置ramfs
在/home/openSource目录下,执行如下命令
mkdir rootfs
cd rootfs
vim  mk_ramdisk.sh
文件内容如下:
#!/bin/bash

sudo rm -rf rootfs
sudo rm -rf tmpfs
sudo rm -rf ramdisk*

sudo mkdir rootfs
sudo cp ../busybox-1.24.2/_install/*  rootfs/ -raf

sudo mkdir -p rootfs/proc/
sudo mkdir -p rootfs/sys/
sudo mkdir -p rootfs/tmp/
sudo mkdir -p rootfs/root/
sudo mkdir -p rootfs/var/
sudo mkdir -p rootfs/mnt/

sudo cp etc rootfs/ -arf
sudo mkdir -p rootfs/lib

sudo cp -arf /lib/i386-linux-gnu/* rootfs/lib/

sudo rm rootfs/lib/*.a
sudo strip rootfs/lib/*

sudo mkdir -p rootfs/dev/
sudo mknod rootfs/dev/tty1 c 4 1
sudo mknod rootfs/dev/tty2 c 4 2
sudo mknod rootfs/dev/tty3 c 4 3
sudo mknod rootfs/dev/tty4 c 4 4
sudo mknod rootfs/dev/console c 5 1
sudo mknod rootfs/dev/null c 1 3

sudo dd if=/dev/zero of=ramdisk bs=1M count=32
sudo mkfs.ext4 -F ramdisk

sudo mkdir -p tmpfs
sudo mount -t ext4 ramdisk ./tmpfs/  -o loop
sudo cp -raf rootfs/*  tmpfs/
sudo umount tmpfs

sudo gzip --best -c ramdisk > ramdisk.gz
随后执行如下命令:
./mk_ramdisk.sh
3.3 安装qemu
安装qemu模拟器.
linux 系统的运行需要在一个完整的电脑上运行,而我们在debug时,需要有这样一个硬件模拟软件,
一般我们会选择较轻量级的qemu作为硬件模拟软件.
3.3.1 qemu安装
apt-get install qemu
apt-get install qemu-system
3.3.2 运行linux
执行如下命令:
cd /home/openSource/linux-4.15
vim debug.sh
内容如下:
sudo qemu-system-x86_64 -kernel /home/opbusybox-1.24.2/initramfs-busybox-x86.cpio.gzenSource/linux-4.15/out_x86_64/arch/x86/boot/bzImage -initrd /home/openSource/rootfs/ramdisk.gz -device e1000,netdev=dev0,mac='00:00:00:01:00:01' -netdev tap,ifname=tap-int,id=dev0,script=no,downscript=no,vhost=on -s -S
3.4 通过eclipse调试linux
3.4.1 创建eclipse项目

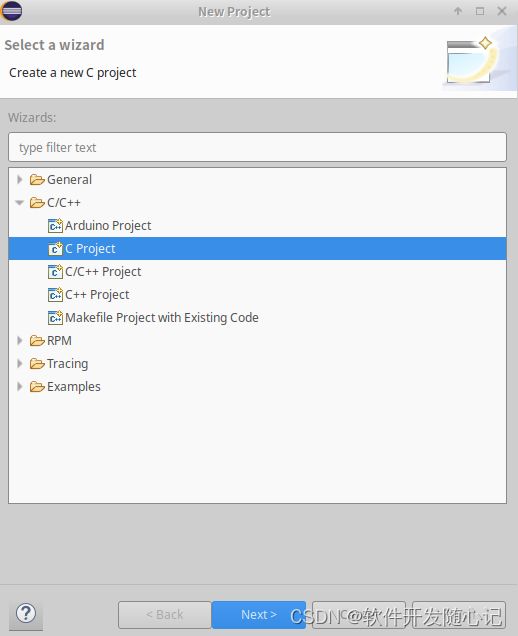
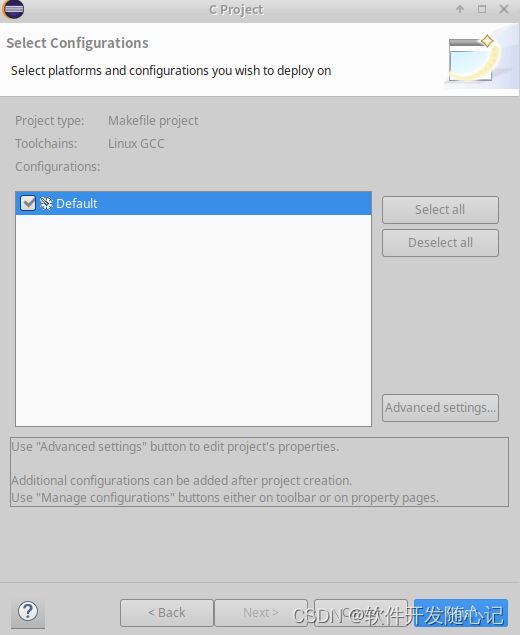
选择Makefile project ->Empty Project
在右边的窗口选择; Linux GCC

去掉 Generate Makefiles automatically前面的勾
完成生成项目
