VSCode + Visual Studio + Unity3D 自动添加头部注释内容
VSCode 使用Auto-Header自动添加头部注释
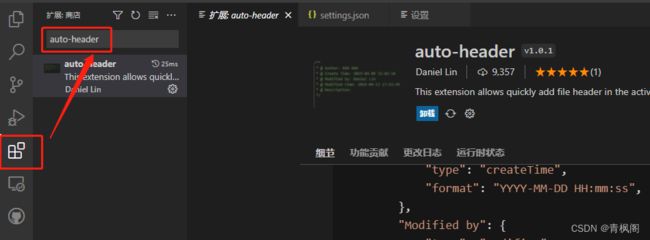
1、在VSCode中打开插件安装扩展区域,输入auto-header,然后安装该插件即可。
2、开始配置
按下快捷键 Ctrl-Shift-P (Windows, Linux) or Cmd-Shift-P (OSX),输入Settings打开配置文件
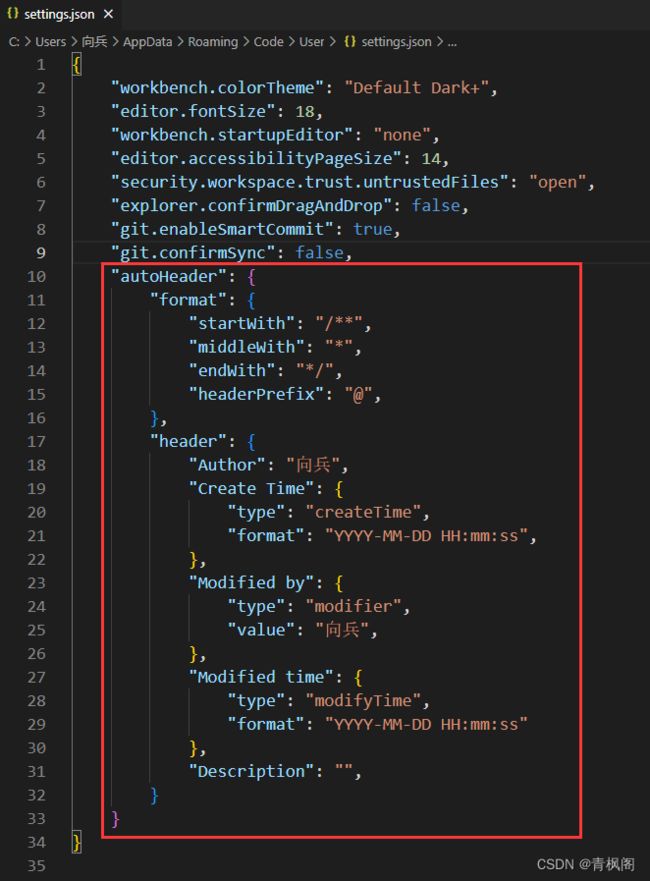
配置信息如下,把该配置信息粘贴到Settings文件中,并修改姓名,注意原配置文件后加一个逗号。
使用atrl+alt+i 插入注释
"autoHeader": {
    "format": {
        "startWith": "/**",
        "middleWith": "*",
        "endWith": "*/",
        "headerPrefix": "@",
    },
    "header": {
        "Author": "Daniel Lin",
        "Create Time": {
            "type": "createTime",
            "format": "YYYY-MM-DD HH:mm:ss",
        },
        "Modified by": {
            "type": "modifier",
            "value": "Daniel Lin",
        },
        "Modified time": {
            "type": "modifyTime",
            "format": "YYYY-MM-DD HH:mm:ss"
        },
        "Description": "",
    }
}
Visual Studio 添加头部注释
找到Visual Studio安装目录下的
C:\Program Files (x86)\Microsoft Visual Studio\2019\Professional\Common7\IDE\ItemTemplates\CSharp\Code\2052\Class\Class.cs文件,修改创建人为自己名字
using System;
using System.Collections.Generic;
$if$ ($targetframeworkversion$ >= 3.5)using System.Linq;
$endif$using System.Text;
$if$ ($targetframeworkversion$ >= 4.5)using System.Threading.Tasks;
$endif$

#region 注释
/* ===============================================
* 功能描述:$safeitemrootname$
* 创 建 人:XXX
* 创建日期:$time$
* CLR版本:$clrversion$
* 机器名称:$machinename$
* 用户所在域:$userdomain$
* 注册组织名:$registeredorganization$
* 命名空间名称:$rootnamespace$
* 当前登录用户名:$username$
* ================================================*/
#endregion

namespace $rootnamespace$
{
    class $safeitemrootname$
    {
    }
}
Unity3D添加头部注释
找到Unity3D的安装目录
C:\Program Files\Unity\Editor\Data\Resources\ScriptTemplates文件夹
先复制该文件到桌面,并打开粘贴如下内容
using System.Collections;
using System.Collections.Generic;
using UnityEngine;
/**
 * ==========================================
 * FileName:#FileName#
 * Author:#Name#
 * CreatTime:#CreateTime#
 * NowPath:#path#
 * ==========================================
 */
public class #SCRIPTNAME# : MonoBehaviour
{
    // Start is called before the first frame update
    void Start()
    {
        #NOTRIM#
    }

    // Update is called once per frame
    void Update()
    {
        #NOTRIM#
    }
}
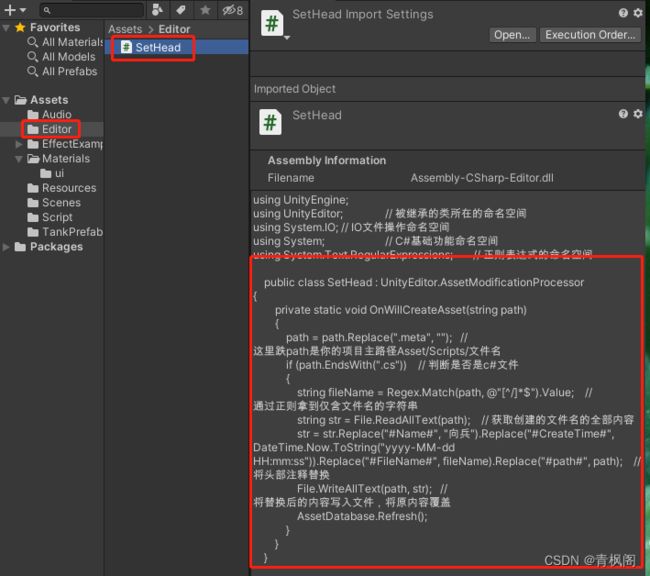
然后在Unity3D工程中,创建Editor文件夹,只能是这个名,并创建一个任意名的cs文件,注意该文件继承UnityEditor.AssetModificationProcessor,然后对照图修改用户名之后,重启Unity3D,即可实现创建文件时自动添加头部注释。
using UnityEngine;
using UnityEditor;	// 被继承的类所在的命名空间
using System.IO;	// IO文件操作命名空间
using System;		// C#基础功能命名空间
using System.Text.RegularExpressions;	// 正则表达式的命名空间

public class TitleSet : UnityEditor.AssetModificationProcessor
{
   private static void OnWillCreateAsset(string path)
   {
       path = path.Replace(".meta", "");   // 这里跌path是你的项目主路径Asset/Scripts/文件名
       if (path.EndsWith(".cs"))    // 判断是否是c#文件
       {
           string fileName = Regex.Match(path, @"[^/]*$").Value;    // 通过正则拿到仅含文件名的字符串
           string str = File.ReadAllText(path);    // 获取创建的文件名的全部内容
           str = str.Replace("#Name#", "向兵").Replace("#CreateTime#", DateTime.Now.ToString("yyyy-MM-dd HH:mm:ss")).Replace("#FileName#", fileName).Replace("#path#", path);    // 将头部注释替换
           File.WriteAllText(path, str);   // 将替换后的内容写入文件,将原内容覆盖
           AssetDatabase.Refresh();
       }
   }
}
参考文献
VS Code 折腾记 - (16) 推荐一波实用的插件集 - 云+社区 - 腾讯云
Unity脚本自动添加头部注释的全过程 / 张生荣
给VS自动添加注释 - 大壮他哥 - 博客园


