27年,我送你个静态资源导入不过分吧?
学 习 S p r i n g B o o t \textcolor{Orange}{学习SpringBoot} 学习SpringBoot
学 习 过 程 中 的 笔 记 , 方 便 查 阅 学 习 \textcolor{green}{学习过程中的笔记,方便查阅学习} 学习过程中的笔记,方便查阅学习
重 点 在 静 态 资 源 导 入 \textcolor{green}{重点在静态资源导入} 重点在静态资源导入
欢迎各位小伙伴关注点赞⭐️收藏留言
双剑合璧
-
- SpringBootWeb开发
-
- 1. 静态资源导入
-
- webjars
- 使用自己的静态资源
- 总结
- 2.制作特殊的首页
-
- 图标转变
- Thymeleaf模板引擎
-
- 引入Thymeleaf
- 取值
-
- 有无转义
- 循环
SpringBootWeb开发
回顾一下:
springboot帮助我们配置了什么,能不能进行修改,能修改哪些,能否扩展?
- xxxAutoConfiguration:向容器中自动配置组件
- xxxProperties:自动配置类,装配配置文件中自定义的一些内容
开发要解决的问题:
- 导入静态资源
- 首页
- jsp
- 装配扩展springmvc
- 增删改查
- 拦截器
1. 静态资源导入
先创建一个普通的springboot项目,主需要加入web即可。
我们在进行项目之前首先要确保环境正确,我们先用helloController测试一下。如果能跳转成功则进行接下来的步骤
@RestController
public class HelloController {
    @GetMapping("/hello")
    public String hello(){
        return "HelloWord";
    }
}
静态资源的映射规则:
springmvc的web配置都在WebMvcAutoConfiguration 这个配置类里面;进去查看我们发现有一个添加资源处理的方法addResourceHandlers我把代码拿了过来。不知道怎么搜的可以看下面
public void addResourceHandlers(ResourceHandlerRegistry registry) {
            if (!this.resourceProperties.isAddMappings()) {
                logger.debug("Default resource handling disabled");
            } else {
                Duration cachePeriod = this.resourceProperties.getCache().getPeriod();
                CacheControl cacheControl = this.resourceProperties.getCache().getCachecontrol().toHttpCacheControl();
                if (!registry.hasMappingForPattern("/webjars/**")) {
                    this.customizeResourceHandlerRegistration(registry.addResourceHandler(new String[]{"/webjars/**"}).addResourceLocations(new String[]{"classpath:/META-INF/resources/webjars/"}).setCachePeriod(this.getSeconds(cachePeriod)).setCacheControl(cacheControl));
                }

                String staticPathPattern = this.mvcProperties.getStaticPathPattern();
                if (!registry.hasMappingForPattern(staticPathPattern)) {
                    this.customizeResourceHandlerRegistration(registry.addResourceHandler(new String[]{staticPathPattern}).addResourceLocations(WebMvcAutoConfiguration.getResourceLocations(this.resourceProperties.getStaticLocations())).setCachePeriod(this.getSeconds(cachePeriod)).setCacheControl(cacheControl));
                }

            }
        }
快速搜索内容:双击Shift键,框中直接搜你想搜的类或者方法。
第一种:使用原本的,也就是第一个if
在里面我们可以看到所有的/webjars/**, 都需要去classpath:/META-INF/resources/webjars/找对应的资源;
webjars
Webjars本质就是以jar包的方式引入我们的静态资源 , 我们以前要导入一个静态资源文件,直接导入即可。
使用SpringBoot需要使用Webjars,我们可以去搜索一下:
网站:https://www.webjars.org 进去直接搜索需要的东西即可
要使用jQuery,我们只要要引入jQuery对应版本的pom依赖即可!
<dependency>
    <groupId>org.webjarsgroupId>
    <artifactId>jqueryartifactId>
    <version>3.4.1version>
dependency>
导入完毕之后我们可以查看webjars的目录结构,并且此时可以访问jquery.js文件了。
导入完成后我们进行查看,运行之后输入链接http://localhost:8080/webjars/jquery/3.4.1/jquery.js
使用自己的静态资源
上述是第一种if,那么没找到怎么办呢,就出现了下面的情况
String staticPathPattern = this.mvcProperties.getStaticPathPattern();
if (!registry.hasMappingForPattern(staticPathPattern)) {
    this.customizeResourceHandlerRegistration(registry.addResourceHandler(new String[]{staticPathPattern}).addResourceLocations(WebMvcAutoConfiguration.getResourceLocations(this.resourceProperties.getStaticLocations())).setCachePeriod(this.getSeconds(cachePeriod)).setCacheControl(cacheControl));
我们去查看staticPathPattern发现第二种映射规则 :/** , 访问当前的项目任意资源,它会去找 resourceProperties 这个类,
发现里面的有对应的四个位置。ResourceProperties 可以设置和我们静态资源有关的参数;这里面指向了它会去寻找资源的文件夹。
private static final String[] CLASSPATH_RESOURCE_LOCATIONS = {
    "classpath:/META-INF/resources/",
  "classpath:/resources/",
    "classpath:/static/",
    "classpath:/public/"
};
在这四个目录下的静态资源同样可以被我们识别到
但是会有优先级,resources优先级最高,static其次,public最低
总结
- 在springboot我们可以使用一下方式处理静态资源
- webjars,
localhost:8080/webjars/ - public,static,/**,resources
localhost:8080/
- webjars,
- 优先级resources优先级最高,static其次,public最低
2.制作特殊的首页
我们什么都不管的时候,访问"localhost:8080"会是默认的页面
而原理也就在下方这个代码中
我们让首页进行改变。需要添加一个静态资源,让首页换一个样子
增加一个界面,重新运行
成功后的结果
这样就是实现了首页界面的定制
欢迎页,静态资源文件夹下的所有 index.html 页面;被 /** 映射。
比如我访问 http://localhost:8080/ ,就会找静态资源文件夹下的 index.html
新建一个 index.html ,在我们上面的3个目录中任意一个;然后访问测试 http://localhost:8080/看结果!
图标转变
这个在新的版本代码已经变成了下图的样子
之前是可以在springboot的配置静态内容位置中找到favicon.ico,它将自动用作应用程序的favicon。图标名字就是favicon.ico
#关闭默认图标
spring.mvc.favicon.enabled=false
然后可以自己换一个图标放在public目录下,清楚缓存,刷新网页就可以了。
Thymeleaf模板引擎
模板引擎的作用就是我们来写一个页面模板,比如有些值呢,是动态的,我们写一些表达式。而这些值,从哪来呢,就是我们在后台封装一些数据。然后把这个模板和这个数据交给我们模板引擎,模板引擎按照我们这个数据帮你把这表达式解析、填充到我们指定的位置,然后把这个数据最终生成一个我们想要的内容给我们写出去,这就是我们这个模板引擎
如果我们没有模板引擎的话,在页面中会提示500
引入Thymeleaf
在项目中加入依赖
<dependency>
    <groupId>org.springframework.bootgroupId>
    <artifactId>spring-boot-starter-thymeleafartifactId>
dependency>
Thymeleaf 官网:https://www.thymeleaf.org/
Thymeleaf 在Github 的主页:https://github.com/thymeleaf/thymeleaf
Spring官方文档:找到我们对应的版本
https://docs.spring.io/spring-boot/docs/2.3.7.RELEASE/reference/htmlsingle/#using-boot-starter
我们可以有通过上述的页面找到我们需要的依赖,进而复制粘贴即可。
引入之后我们再次运行。nice
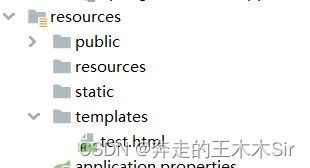
注意: 使用Thymeleaf,只需要导入对应的依赖即可。同时我们的html页面试放在我们的templates目录下的。
至于为什么,我们看源码,这段源码在ThymeleafProperties下。
private String prefix = "classpath:/templates/";
private String suffix = ".html";
取值
那么我们应该怎么取值呢
首先在controller下编写代码
@Controller
public class HelloController {
    @RequestMapping("/test")
    public String hello(Model model){
        model.addAttribute("msg","王木木");
        return "test";
    }
}
接下来我们在html页面中编写
因为我们要使用thymeleaf,需要在html文件中导入命名空间的约束。
<html lang="en" xmlns:th="http://www/thymeleaf.org">
DOCTYPE html>
<html lang="en" xmlns:th="http://www/thymeleaf.org">
<head>
    <meta charset="UTF-8">
    <title>Titletitle>
head>
<body>
<div th:text="${msg}">div>
body>
html>
成功运行后
这里需要这个的th标签。所有的html元素都科一被thymeleaf替换接管,格式为th:元素名
有无转义
从controller传一段信息
model.addAttribute("msg","王木木
");
html中使用转义和不转义的情况
<div th:text="${msg}">div>
<div th:utext="${msg}">div>
运行结果
循环
同样在controller里传一段信息
model.addAttribute("users", Arrays.asList("wangmumu","王木木"));
接下来在html中进行取值
<h2 th:each="user:${users}" th:text="${user}">h2>
运行结果


