基于C++的OpenCV3.3图像处理源码整理
OpenCV3.3.0配置完整教程请点击
VTK8.0配置完整教程请点击
本文章全部源码和用到的素材下载
目录:
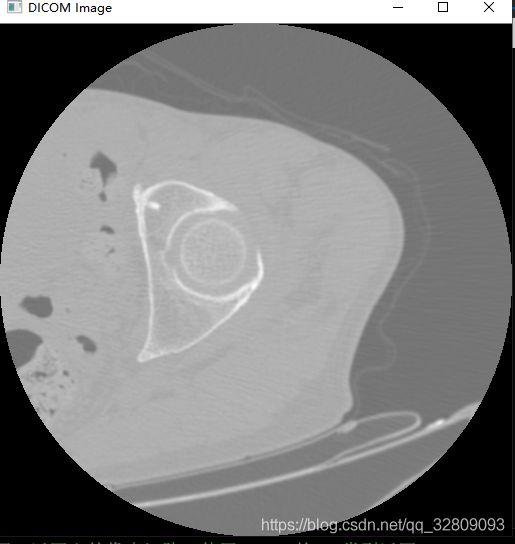
实例1:opencv对单张DCM文件的读取并显示
实例2:opencv读取DCM图像并另存为JPG图像
实例3:opencv批量读取指定路径DCM图像并显示
实例4:opencv读取指定路径DCM并批量另存为JPG图像
实例5:opencv命名方式读取指定路径DCM并批量另存为JPG图像
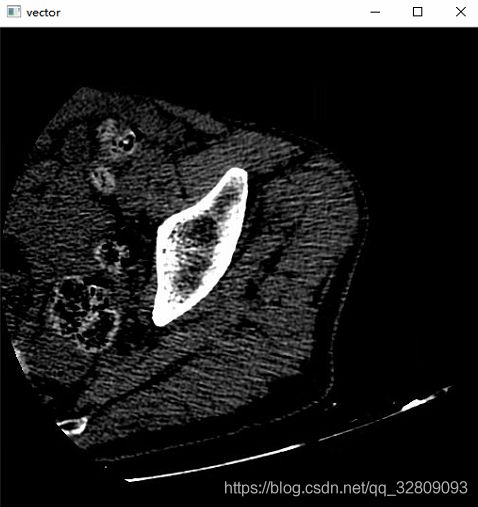
实例6:opencv指定路径批量读取JPG图像并构建容器显示
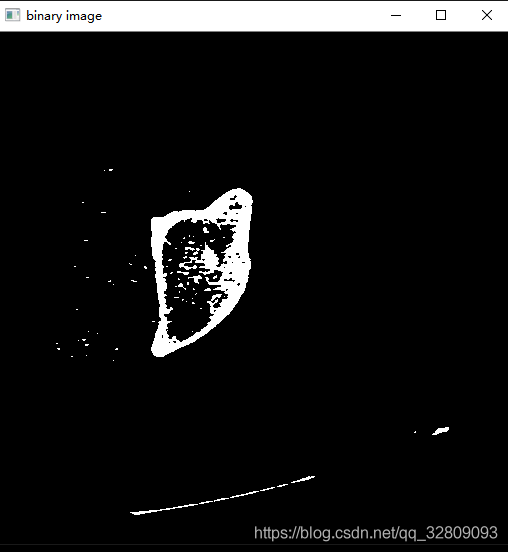
实例7:opencv通过进度条阈值选定分割JPG图像并显示保存
实例8:opencv批量阈值分割JPG图像并显示保存
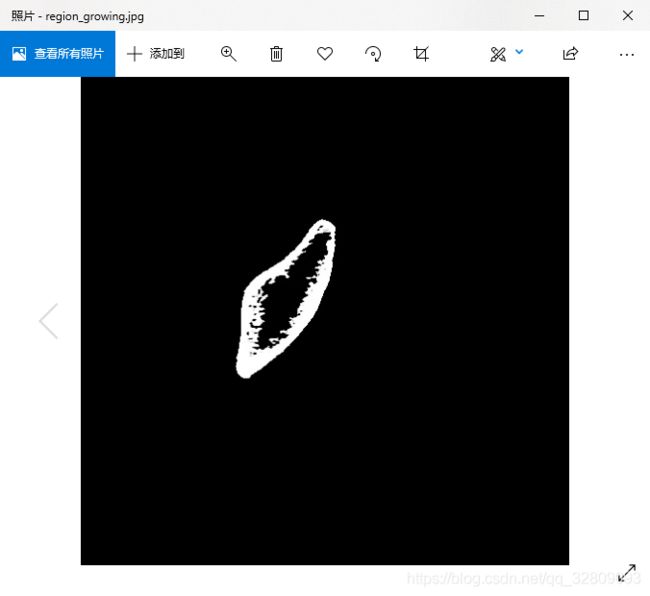
实例9:opencv区域增长算法分割JPG图像并显示保存
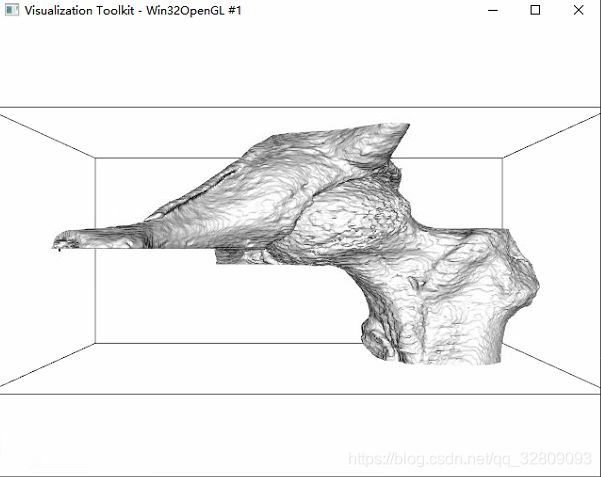
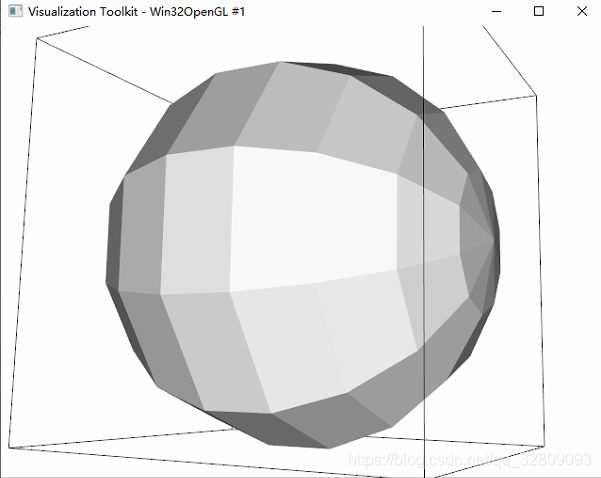
实例10:VTK格式文件的读取与渲染显示
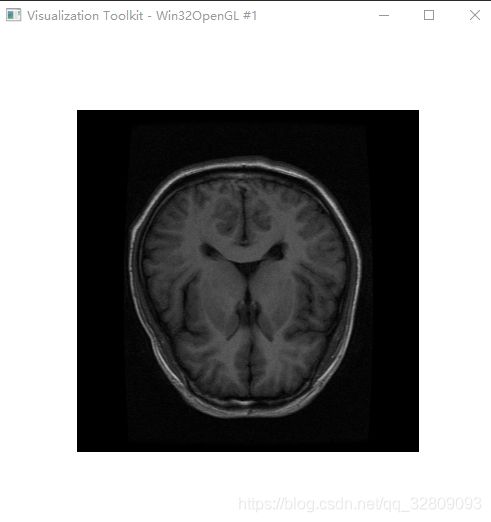
实例11:基于VTK对MHD格式文件单张切片的鼠标滑动提取显示
实例12:基于VTK对MHA格式文件三维感兴趣区域裁剪及MHA格式保存
实例1:opencv对单张DCM文件的读取并显示
#include
#include   // 当中含有_finddata_t
#include
#include

#include
#include
#include

#include
#include
#include
#include
#include
#include
#include
#include
#include

using namespace std;
using namespace cv;

// 读入一个CT图,返回它的像素矩阵,使用OpenCV的Mat类型返回
// VTK读取DICOM图像并将像素值转给OpenCV的Mat对象
void dicomread(string inputFilename, Mat& img, vtkSmartPointer& reader)
{
	img.create(512, 512, CV_32SC1);

	vtkSmartPointer imageCast =
		vtkSmartPointer::New();

	reader->SetFileName(inputFilename.c_str());

	reader->Update();

	imageCast->SetInputConnection(reader->GetOutputPort());
	imageCast->SetOutputScalarTypeToInt();
	imageCast->Update();

	// 图像的基本信息
	int dims[3];
	reader->GetOutput()->GetDimensions(dims);

	//图像的像素值
	for (int k = 0; k < dims[2]; k++)
	{
		for (int j = 0; j < dims[1]; j++)
		{
			for (int i = 0; i < dims[0]; i++)
			{
				//转换数据类型,使用imagecast转到double(或float)
				int* pixel =
					(int*)(imageCast->GetOutput()->GetScalarPointer(i, j, k)); // 第i列第j行的像素值
				img.at(j, i) = int(*pixel); // 第j行第i列的像素值
			}
		}
	}
}
//可视化DICOM图像
void showdicom(Mat I)
{
	double maxx = 0, minn = 0;
	double* max = &maxx;
	double* min = &minn;
	I.convertTo(I, CV_64FC1);
	minMaxIdx(I, min, max);
	for (int i = 0; i < I.rows; i++)
	{
		for (int j = 0; j < I.cols; j++)
		{
			I.at(i, j) = 255 * (I.at(i, j) - minn) * 1 / (maxx - minn);
		}
	}

	minMaxIdx(I, min, max);
	for (int i = 0; i < I.rows; i++)
	{
		for (int j = 0; j < I.cols; j++)
			I.at(i, j) = (I.at(i, j) - minn) * 1 / (maxx - minn);
	}
	//cout << I < reader =
			vtkSmartPointer::New();
		// 读入dicom图
		dicomread(filename, I1, reader);
		//反转图像
		flip(I1, I1, 0);
		//显示得到的Mat对象I1的信息*(单通道 大小512*512)
		cout << I1.channels() << "  " << I1.size() << endl;
		showdicom(I1);
}
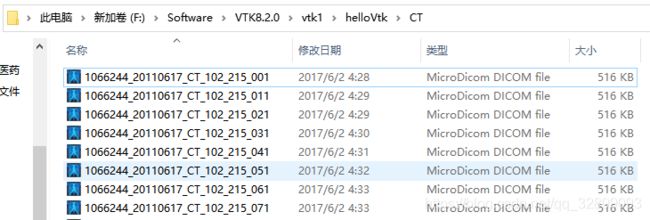
要读取的dcm文件放在工程目录下:
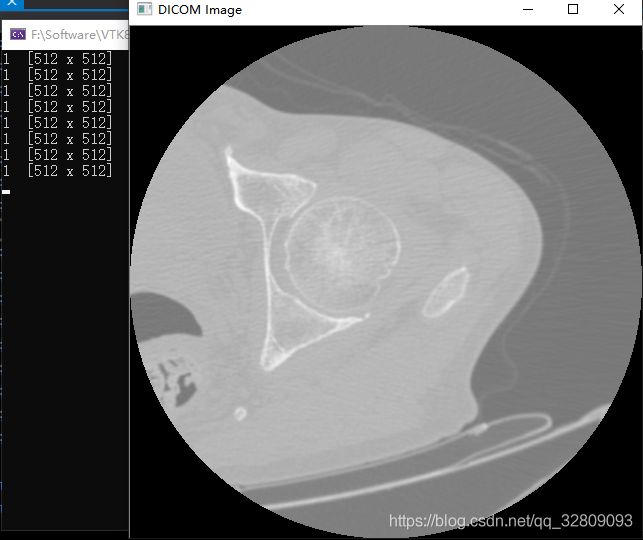
可见读取的为单通道的512*512像素大小的图像:
实例2:opencv读取DCM图像并另存为JPG图像
#include
#include   // 当中含有_finddata_t
#include
#include

#include
#include
#include

#include
#include
#include
#include
#include
#include
#include
#include
#include

using namespace std;
using namespace cv;

// 读入一个CT图,返回它的像素矩阵,使用OpenCV的Mat类型返回
// VTK读取DICOM图像并将像素值转给OpenCV的Mat对象
void dicomread(string inputFilename, Mat& img, vtkSmartPointer& reader)
{
	img.create(512, 512, CV_32SC1);

	vtkSmartPointer imageCast =
		vtkSmartPointer::New();

	reader->SetFileName(inputFilename.c_str());

	reader->Update();

	imageCast->SetInputConnection(reader->GetOutputPort());
	imageCast->SetOutputScalarTypeToInt();
	imageCast->Update();

	// 图像的基本信息
	int dims[3];
	reader->GetOutput()->GetDimensions(dims);

	//图像的像素值
	for (int k = 0; k < dims[2]; k++)
	{
		for (int j = 0; j < dims[1]; j++)
		{
			for (int i = 0; i < dims[0]; i++)
			{
				//转换数据类型,使用imagecast转到double(或float)
				int* pixel =
					(int*)(imageCast->GetOutput()->GetScalarPointer(i, j, k)); // 第i列第j行的像素值
				img.at(j, i) = int(*pixel); // 第j行第i列的像素值
			}
		}
	}
}
//可视化DICOM图像
void showdicom(Mat I)
{
	double maxx = 0, minn = 0;
	double* max = &maxx;
	double* min = &minn;
	I.convertTo(I, CV_64FC1);
	minMaxIdx(I, min, max);
	for (int i = 0; i < I.rows; i++)
	{
		for (int j = 0; j < I.cols; j++)
		{
			I.at(i, j) = 255 * (I.at(i, j) - minn) * 1 / (maxx - minn);
		}
	}

	minMaxIdx(I, min, max);
	for (int i = 0; i < I.rows; i++)
	{
		for (int j = 0; j < I.cols; j++)
			I.at(i, j) = (I.at(i, j) - minn) * 1 / (maxx - minn);
	}
	//cout << I < reader =
			vtkSmartPointer::New();
		// 读入dicom图
		dicomread(filename, I1, reader);
		//反转图像
		flip(I1, I1, 0);
		//显示得到的Mat对象I1的信息*(单通道 大小512*512)
		cout << I1.channels() << "  " << I1.size() << endl;
		showdicom(I1);
		//将DCM图像另存为JPG图像
		imwrite("1.jpg", I1);
}
读取的为单通道的512*512像素大小的DCM图像:
生成的JPG图像:
实例3:opencv批量读取指定路径DCM图像并显示
#include
#include   // 当中含有_finddata_t
#include
#include

#include
#include
#include

#include
#include
#include
#include
#include
#include
#include
#include
#include

using namespace std;
using namespace cv;

// 读入一个CT图,返回它的像素矩阵,使用OpenCV的Mat类型返回
// VTK读取DICOM图像并将像素值转给OpenCV的Mat对象
void dicomread(string inputFilename, Mat &img,vtkSmartPointer &reader)
{
    img.create(512,512,CV_32SC1);

	vtkSmartPointer imageCast =
		vtkSmartPointer::New();

    reader->SetFileName(inputFilename.c_str());

    reader->Update();

	imageCast->SetInputConnection(reader->GetOutputPort());
	imageCast->SetOutputScalarTypeToInt();
	imageCast->Update();

	// 图像的基本信息
	int dims[3];
	reader->GetOutput()->GetDimensions(dims);

	//图像的像素值
	for(int k=0;kGetOutput()->GetScalarPointer(i,j,k)); // 第i列第j行的像素值
				img.at(j,i) = int(*pixel); // 第j行第i列的像素值
			}
		}
	}
}
//可视化DICOM图像
void showdicom(Mat I)
{
	double maxx=0,minn=0;
    double *max = &maxx;
	double *min = &minn;
	I.convertTo(I,CV_64FC1);
	minMaxIdx(I,min,max);
	for(int i=0;i(i,j) = 255*(I.at(i,j)-minn)*1/(maxx-minn);
		}
	}

	minMaxIdx(I,min,max);
	for(int i=0;i(i,j) = (I.at(i,j)-minn)*1/(maxx-minn);
	}
	//cout << I < reader =
			vtkSmartPointer::New();
		// 读入dicom图
		dicomread(filename, I1, reader);
		//翻转图像
		flip(I1, I1, 0);
		//显示得到的Mat对象I1的信息*(单通道 大小512*512)
		cout << I1.channels() << "  " << I1.size() << endl;
		showdicom(I1);
	}
}
读取DCM图像路径:
每按下空格,进行下一张图像读取和显示:
实例4:opencv读取指定路径DCM并批量另存为JPG图像
#include
#include   // 当中含有_finddata_t
#include
#include

#include
#include
#include

#include
#include
#include
#include
#include
#include
#include
#include
#include

using namespace std;
using namespace cv;

// 读入一个CT图,返回它的像素矩阵,使用OpenCV的Mat类型返回
// VTK读取DICOM图像并将像素值转给OpenCV的Mat对象
void dicomread(string inputFilename, Mat &img,vtkSmartPointer &reader)
{
    img.create(512,512,CV_32SC1);

	vtkSmartPointer imageCast =
		vtkSmartPointer::New();

    reader->SetFileName(inputFilename.c_str());

    reader->Update();

	imageCast->SetInputConnection(reader->GetOutputPort());
	imageCast->SetOutputScalarTypeToInt();
	imageCast->Update();

	// 图像的基本信息
	int dims[3];
	reader->GetOutput()->GetDimensions(dims);

	//图像的像素值
	for(int k=0;kGetOutput()->GetScalarPointer(i,j,k)); // 第i列第j行的像素值
				img.at(j,i) = int(*pixel); // 第j行第i列的像素值
			}
		}
	}
}
//可视化DICOM图像
void showdicom(Mat I)
{
	double maxx=0,minn=0;
    double *max = &maxx;
	double *min = &minn;
	I.convertTo(I,CV_64FC1);
	minMaxIdx(I,min,max);
	for(int i=0;i(i,j) = 255*(I.at(i,j)-minn)*1/(maxx-minn);
		}
	}

	minMaxIdx(I,min,max);
	for(int i=0;i(i,j) = (I.at(i,j)-minn)*1/(maxx-minn);
	}
	//cout << I < reader =
			vtkSmartPointer::New();
		// 读入dicom图
		dicomread(filename, I1, reader);
		//翻转图像
		flip(I1, I1, 0);
		//显示得到的Mat对象I1的信息*(单通道 大小512*512)
		cout << I1.channels() << "  " << I1.size() << endl;
		showdicom(I1);
		//指定路径对图像进行批量另存为JPG格式图像
		//给的另存路径和文件格式
		sprintf_s(ad, "F:\\Software\\VTK8.2.0\\vtk1\\helloVtk\\JPG_images\\%d.jpg", j);
		//保存
		imwrite(ad, I1);
	}
}
每按下空格,进行下一张图像读取和显示:
程序运行完后,在F:\Software\VTK8.2.0\vtk1\helloVtk\JPG_images路径下便可以查看另存的JPG图像:
实例5:opencv命名方式读取指定路径DCM并批量另存为JPG图像
#include
#include   // 当中含有_finddata_t
#include
#include

#include
#include
#include

#include
#include
#include
#include
#include
#include
#include
#include
#include

#define NUMBER 72//(CT文件数量为NUMBER-1)

using namespace std;
using namespace cv;

// 读入一个CT图,返回它的像素矩阵,使用OpenCV的Mat类型返回
// VTK读取DICOM图像并将像素值转给OpenCV的Mat对象
void dicomread(string inputFilename, Mat &img,vtkSmartPointer &reader)
{
    img.create(512,512,CV_32SC1);

	vtkSmartPointer imageCast =
		vtkSmartPointer::New();

    reader->SetFileName(inputFilename.c_str());

    reader->Update();

	imageCast->SetInputConnection(reader->GetOutputPort());
	imageCast->SetOutputScalarTypeToInt();
	imageCast->Update();

	// 图像的基本信息
	int dims[3];
	reader->GetOutput()->GetDimensions(dims);

	//图像的像素值
	for(int k=0;kGetOutput()->GetScalarPointer(i,j,k)); // 第i列第j行的像素值
				img.at(j,i) = int(*pixel); // 第j行第i列的像素值
			}
		}
	}
}
//可视化DICOM图像
void showdicom(Mat I)
{
	double maxx=0,minn=0;
    double *max = &maxx;
	double *min = &minn;
	I.convertTo(I,CV_64FC1);
	minMaxIdx(I,min,max);
	for(int i=0;i(i,j) = 255*(I.at(i,j)-minn)*1/(maxx-minn);
		}
	}

	minMaxIdx(I,min,max);
	for(int i=0;i(i,j) = (I.at(i,j)-minn)*1/(maxx-minn);
	}
	//cout << I < images;
	char ad[128] = { 0 };
	for (int j = 1;j < NUMBER;j+=10) {
		string filename = format("F:\\Software\\VTK8.2.0\\vtk1\\helloVtk\\CT\\1066244_20110617_CT_102_215_%03d.dcm", j);
		Mat I1, G1;//I1为原图,G1为转化图
		vtkSmartPointer reader =
			vtkSmartPointer::New();
		// 读入dicom图,并将像素值传递给Mat对象I1
		dicomread(filename, I1, reader);
		flip(I1, I1, 0);
		//显示得到的Mat对象I1的信息*(单通道 大小512*512)
		cout << I1.channels() << "  " << I1.size() << endl;
		showdicom(I1);
		//保存图像
		sprintf_s(ad, "F:\\Software\\VTK8.2.0\\vtk1\\helloVtk\\JPG_images\\%d.jpg", j);
		imwrite(ad, I1);
	}
}
每按下空格,进行下一张图像读取和显示:
程序运行完后,在F:\Software\VTK8.2.0\vtk1\helloVtk\JPG_images路径下便可以查看另存的JPG图像:
实例6:opencv指定路径批量读取JPG图像并构建容器显示
#include
#include   // 当中含有_finddata_t
#include
#include

#include
#include
#include

#define NUMBER 9 //(CT文件数量为NUMBER-1)

using namespace std;
using namespace cv;

int main()
{
		vector images;
		for (int a = 1; a < NUMBER;a++)  // a <=Count would do one too many...
		{
			string filename = format("F:\\Software\\VTK8.2.0\\vtk1\\helloVtk\\JPG_images\\%d.jpg", a);
			Mat img = imread(filename); // pgm implies grayscale, maybe even: imread(name,0); to return CV_8U
			if (img.empty())      // please, *always check* resource-loading.
			{
				cerr << "whaa " << filename << " can't be loaded!" << endl;
				continue;
			}
			images.push_back(img);
		}
		//将读取在容器中的图像进行逐张显示
		for(int k=1;k< NUMBER;k++)
		{
			imshow("vector", images[k-1]);
			waitKey();//等待键盘输入
		}
		return 0;
}
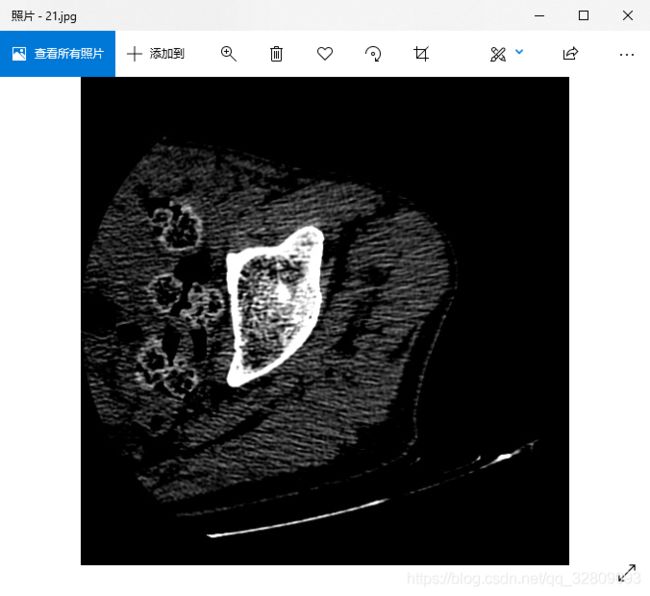
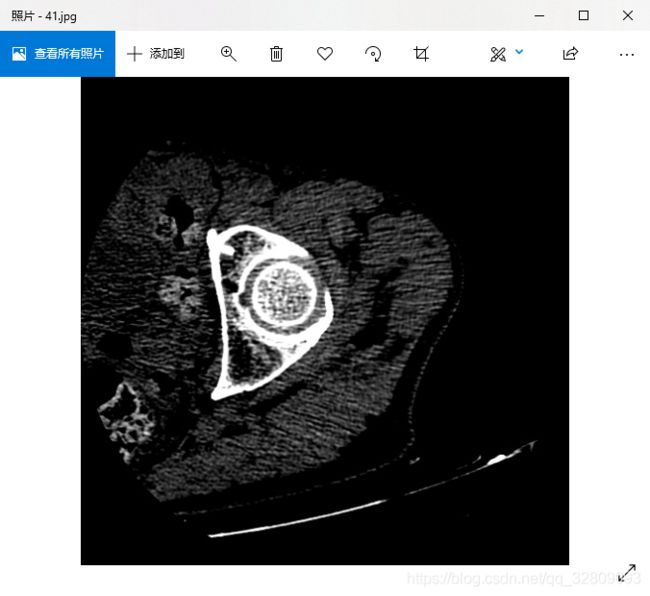
读取JPG图像路径:
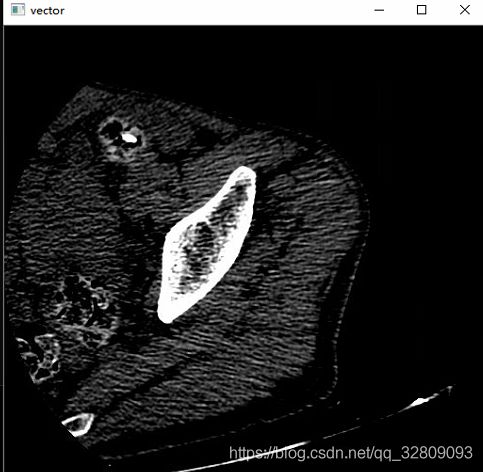
图像显示:
实例7:opencv通过进度条阈值选定分割JPG图像并显示保存
#include
#include
#include

using namespace cv;
Mat src, gray_src, dst;//定义Mat对象
int threshold_value = 178;//设置阈值  127
int threshold_max = 255;//RGB(0~255)最大值
int type_value = 2;
int type_max = 4;
const char* output_title = "binary image";//定义输出标题为二进制图像
void Threshold_Demo(int, void*);//定义函数
int main(int argc, char** argv) {
	src = imread("1.jpg");//读入图像
	if (!src.data) { //如果没有数据
		printf("could not load image...\n");
		return -1;
	}
	namedWindow("input image", CV_WINDOW_AUTOSIZE);//创建一个窗口,自动设置窗口大小
	namedWindow(output_title, CV_WINDOW_AUTOSIZE);
	imshow("input image", src);//在"input image"窗口显示原图像
	//设置拖动棒  (手动拖动的阈值
	createTrackbar("Threshold Value:", output_title, &threshold_value, threshold_max, Threshold_Demo);
	createTrackbar("Type Value:", output_title, &type_value, type_max, Threshold_Demo);
	Threshold_Demo(0, 0);

	waitKey(0);//键盘任意键关闭
	return 0;
}

void Threshold_Demo(int, void*) {
	cvtColor(src, gray_src, CV_BGR2GRAY);//RGB图像对象src转换为灰度图像对象gray_src
	//imshow("GRAY", gray_src);//显示灰度图像
	//threshold(gray_src, dst, threshold_value, threshold_max, type_value);
	threshold(gray_src, dst, threshold_value, threshold_max, THRESH_BINARY);
	//保存阈值后图像
	imwrite("threshold_1.jpg", dst);
	imshow(output_title, dst);
}
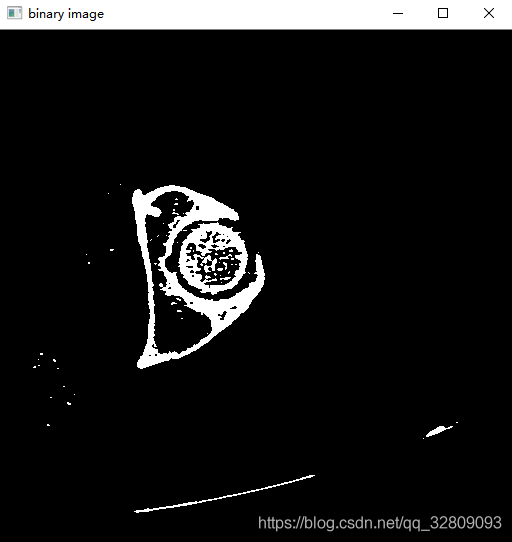
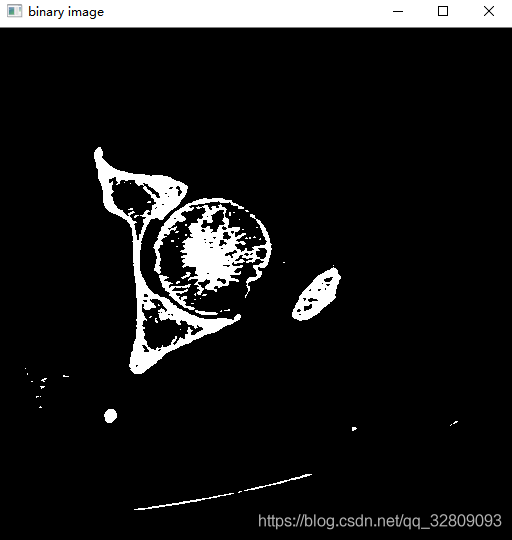
阈值通过进度条手动调整为106和178时的效果:
保存阈值分割后的图像:
实例8:opencv批量阈值分割JPG图像并显示保存
#include
#include   // 当中含有_finddata_t
#include
#include

#include
#include
#include

#define NUMBER 80 //(JPG文件数量为NUMBER-1)

using namespace std;
using namespace cv;

void Threshold_Demo(vector imag)
{
	char ad[128] = { 0 };
	Mat gray_src,dst;
	const char* output_title = "binary image";//定义输出标题为二进制图像
	for(int i=0;i images;
		for (int a = 1; a < NUMBER;a+=10)  // a <=Count would do one too many...
		{
			string filename = format("F:\\Software\\VTK8.2.0\\vtk1\\helloVtk\\JPG_images\\%d.jpg", a);//JPG文件的存储路径
			Mat img = imread(filename); //读取图像
			if (img.empty())      // 如果图像为空
			{
				cerr << "whaa " << filename << " can't be loaded!" << endl;
				continue;
			}
			images.push_back(img);//图像保存进容器
		}
		//进行批量阈值分割与保存
		Threshold_Demo(images);
		return 0;
}
原图像和阈值设定阈值分割后的图像:
阈值分割后保存图像:
实例9:opencv区域增长算法分割JPG图像并显示保存
#include "opencv2/highgui/highgui.hpp"
#include "opencv2/imgproc.hpp"
#include "opencv2/imgcodecs.hpp"
#include
#include "math.h"

using namespace cv;
using namespace std;

Point recent_Point, recent_Point1;

Mat RegionGrow(Mat src, Point2i pt, int th)
{
    Point2i ptGrowing;                        //待生长点位置
    int nGrowLable = 0;                                //标记是否生长过
    int nSrcValue = 0;                                //生长起点灰度值
    int nCurValue = 0;                                //当前生长点灰度值
    Mat matDst = Mat::zeros(src.size(), CV_8UC1);    //创建一个空白区域,填充为黑色
    //生长方向顺序数据
    int DIR[8][2] = { { -1, -1 }, { 0, -1 }, { 1, -1 }, { 1, 0 }, { 1, 1 }, { 0, 1 }, { -1, 1 }, { -1, 0 } };
    vector vcGrowPt;                        //生长点栈
    vcGrowPt.push_back(pt);                            //将生长点压入栈中
    matDst.at(pt.y, pt.x) = 255;                //标记生长点
    nSrcValue = src.at(pt.y, pt.x);            //记录生长点的灰度值

    while (!vcGrowPt.empty())                        //生长栈不为空则生长
    {
        pt = vcGrowPt.back();                        //取出一个生长点
        vcGrowPt.pop_back();

        //分别对八个方向上的点进行生长
        for (int i = 0; i < 9; ++i)
        {
            ptGrowing.x = pt.x + DIR[i][0];
            ptGrowing.y = pt.y + DIR[i][1];
            //检查是否是边缘点
            if (ptGrowing.x < 0 || ptGrowing.y < 0 || ptGrowing.x >(src.cols - 1) || (ptGrowing.y > src.rows - 1))
                continue;

            nGrowLable = matDst.at(ptGrowing.y, ptGrowing.x);        //当前待生长点的灰度值

            if (nGrowLable == 0)                    //如果标记点还没有被生长
            {
                nCurValue = src.at(ptGrowing.y, ptGrowing.x);
                if (abs(nSrcValue - nCurValue) < th)                    //在阈值范围内则生长
                {
                    matDst.at(ptGrowing.y, ptGrowing.x) = 255;        //标记为白色
                    vcGrowPt.push_back(ptGrowing);                    //将下一个生长点压入栈中
                }
            }
        }
    }
    return matDst.clone();
}

void On_mouse(int event, int x, int y, int flags, void*)//每次点击左键,在相应位置画红点
{
    if (event == EVENT_LBUTTONDOWN)
    {
        recent_Point = Point(x, y);
        cout << "img_x" << " " << recent_Point.x << " " << "img_y" << " " << recent_Point.y << endl;
        //circle(srcimg, recent_Point, 2, Scalar(0, 0, 255), -1);
        //imshow("srcImg", srcimg);
    }
}

int main() //区域生长
{
    Mat binaryimg, greyimg;
    Mat regiongrow, regiongrow1, regiongrow2;
    Mat dst;
    int th = 10;
    Mat src = imread("1.jpg");
    cvtColor(src, greyimg, COLOR_BGR2GRAY);   //转化为灰度图
    Mat temp_regiongrow = Mat::zeros(src.size(), CV_8UC1);    //创建一个空白区域,填充为黑色
    //转化为二值图
    threshold(greyimg, binaryimg, 200, 255, THRESH_BINARY);
    namedWindow("srcImg", 0);
    imshow("srcImg", src);

    namedWindow("binaryImg", 0);
    imshow("binaryImg", binaryimg);
    cout << "select one point in binaryImg" << endl;
    setMouseCallback("binaryImg", On_mouse);

    for (int i = 0;i < 1;i++) {
        char c = (char)waitKey(0);
        cout << "select one point in binaryImg" << endl;
        setMouseCallback("binaryImg", On_mouse);
        if (c == 'b') {
            regiongrow1 = RegionGrow(binaryimg, recent_Point, th);
            bitwise_or(regiongrow1, temp_regiongrow, regiongrow);    //和前一个分割的图做或运算
            temp_regiongrow = regiongrow1.clone();    //保存前一个分割图
        }
        bitwise_and(greyimg, regiongrow, dst);   //与原图做与运算
        namedWindow("dstimg", 0);
        imshow("dstimg", dst);
        imwrite("region_growing.jpg", dst);
    }
    waitKey(0);
    return 0;
}
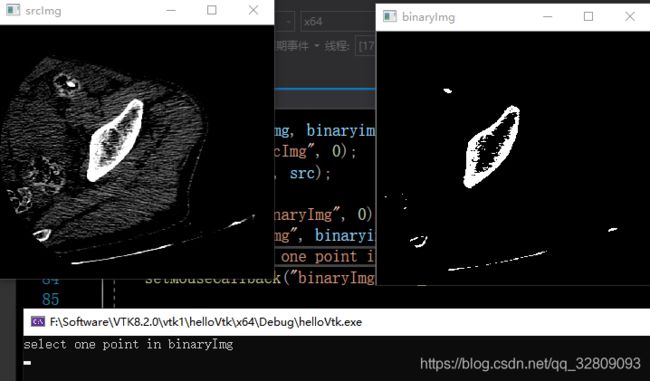
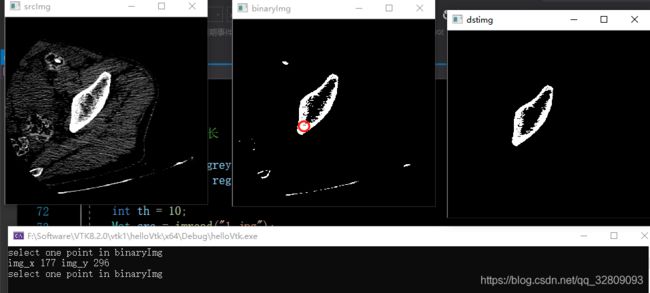
在binaryImag图像中选择区域增长的初始种子点(鼠标左键一下红色区域选取):
出现位置坐标后,键盘输入字母‘b'进行区域增长算法运行,dstimg为区域增长分割后图像:
实例10:VTK格式文件的读取与渲染显示
#include "vtkAutoInit.h"
VTK_MODULE_INIT(vtkRenderingOpenGL2);
VTK_MODULE_INIT(vtkInteractionStyle);

#include "vtkRenderer.h"//绘制器
#include "vtkRenderWindow.h"//绘制窗口
#include "vtkRenderWindowInteractor.h"//加入交互机制类
#include "vtkDICOMImageReader.h"//DCM医学文件读取类
#include "vtkPolyDataMapper.h"//数据映射
#include "vtkActor.h"//演员
#include "vtkOutlineFilter.h"
#include "vtkCamera.h"//照相机
#include "vtkProperty.h"//属性设置类
#include "vtkPolyDataNormals.h"//vtkPolyData为多边形数据
#include "vtkContourFilter.h"//等值面提取类(可以接受任何的数据类型生成等值线或者等值面)

#include "vtkPolyDataWriter.h"//保存为.vtk图像类
#include "vtkPolyDataReader.h"//读取.vtk图像类

void main()
{

    // Create the renderer, the render window, and the interactor. The renderer
    // draws into the render window, the interactor enables mouse- and
    // keyboard-based interaction with the data within the render window.
    //创建渲染器、渲染窗口和交互器。
    //绘制到渲染窗口,交互器启用,渲染窗口内的数据进行基于鼠标和键盘的交互。
    vtkRenderer* aRenderer = vtkRenderer::New();
    vtkRenderWindow* renWin = vtkRenderWindow::New();
    renWin->AddRenderer(aRenderer);
    vtkRenderWindowInteractor* iren = vtkRenderWindowInteractor::New();
    iren->SetRenderWindow(renWin);

    //读取vtk格式图像
    vtkPolyDataReader* v16 = vtkPolyDataReader::New();
    v16->SetFileName("spine.vtk");

    vtkPolyDataMapper* skinMapper = vtkPolyDataMapper::New();
    skinMapper->SetInputConnection(v16->GetOutputPort());
    skinMapper->ScalarVisibilityOff();//这样不会带颜色
    vtkActor* skin = vtkActor::New();
    skin->SetMapper(skinMapper);

    // An outline provides context around the data.
    vtkOutlineFilter* outlineData = vtkOutlineFilter::New();
    outlineData->SetInputConnection(v16->GetOutputPort());
    vtkPolyDataMapper* mapOutline = vtkPolyDataMapper::New();
    mapOutline->SetInputConnection(outlineData->GetOutputPort());
    vtkActor* outline = vtkActor::New();
    outline->SetMapper(mapOutline);
    outline->GetProperty()->SetColor(0, 0, 0);

    // It is convenient to create an initial view of the data. The FocalPoint
    // and Position form a vector direction. Later on (ResetCamera() method)
    // this vector is used to position the camera to look at the data in
    // this direction.
    //相机设置
    vtkCamera* aCamera = vtkCamera::New();
    aCamera->SetViewUp(0, 0, -1);
    aCamera->SetPosition(0, 1, 0);
    aCamera->SetFocalPoint(0, 0, 0);
    aCamera->ComputeViewPlaneNormal();

    // Actors are added to the renderer. An initial camera view is created.
    // The Dolly() method moves the camera towards the FocalPoint,
    // thereby enlarging the image.
    //渲染
    aRenderer->AddActor(outline);
    aRenderer->AddActor(skin);
    aRenderer->SetActiveCamera(aCamera);
    aRenderer->ResetCamera();
    aCamera->Dolly(1.5);

    // Set a background color for the renderer and set the size of the
    // render window (expressed in pixels).
    //设置背景色和窗口大小
    aRenderer->SetBackground(1, 1, 1);
    renWin->SetSize(640, 480);

    // Note that when camera movement occurs (as it does in the Dolly()
    // method), the clipping planes often need adjusting. Clipping planes
    // consist of two planes: near and far along the view direction. The
    // near plane clips out objects in front of the plane; the far plane
    // clips out objects behind the plane. This way only what is drawn
    // between the planes is actually rendered.
    aRenderer->ResetCameraClippingRange();

    // Initialize the event loop and then start it.
    iren->Initialize();
    iren->Start();

    // It is important to delete all objects created previously to prevent
    // memory leaks. In this case, since the program is on its way to
    // exiting, it is not so important. But in applications it is
    // essential.
    //释放内存
    v16->Delete();
    /*skinExtractor->Delete();
    skinNormals->Delete();*/
    skinMapper->Delete();
    skin->Delete();
    outlineData->Delete();
    mapOutline->Delete();
    outline->Delete();
    aCamera->Delete();
    iren->Delete();
    renWin->Delete();
    aRenderer->Delete();

}
实例11:基于VTK对MHD格式文件单张切片的鼠标滑动提取显示
#include "vtkAutoInit.h"
VTK_MODULE_INIT(vtkRenderingOpenGL2);
VTK_MODULE_INIT(vtkInteractionStyle);

#include
#include
#include
#include
#include
#include
#include
#include
#include
#include
#include
#include
#include
#include
#include

class vtkImageInteractionCallback : public vtkCommand
{
public:
    static vtkImageInteractionCallback* New()
    {
        return new vtkImageInteractionCallback;
    }

    vtkImageInteractionCallback()
    {
        this->Slicing = 0;
        this->ImageReslice = 0;
        this->Interactor = 0;
    }

    void SetImageReslice(vtkImageReslice* reslice)
    {
        this->ImageReslice = reslice;
    }

    void SetImageMapToColors(vtkImageMapToColors* mapToColors)
    {
        this->mapToColors = mapToColors;
    }

    vtkImageReslice* GetImageReslice()
    {
        return this->ImageReslice;
    }

    void SetInteractor(vtkRenderWindowInteractor* interactor)
    {
        this->Interactor = interactor;
    }

    vtkRenderWindowInteractor* GetInteractor()
    {
        return this->Interactor;
    }

    virtual void Execute(vtkObject*, unsigned long event, void*)
    {
        vtkRenderWindowInteractor* interactor = this->GetInteractor();

        int lastPos[2];
        interactor->GetLastEventPosition(lastPos);
        int currPos[2];
        interactor->GetEventPosition(currPos);

        if (event == vtkCommand::LeftButtonPressEvent)
        {
            this->Slicing = 1;
        }
        else if (event == vtkCommand::LeftButtonReleaseEvent)
        {
            this->Slicing = 0;
        }
        else if (event == vtkCommand::MouseMoveEvent)
        {
            if (this->Slicing)
            {
                vtkImageReslice* reslice = this->ImageReslice;

                // Increment slice position by deltaY of mouse
                int deltaY = lastPos[1] - currPos[1];

                reslice->Update();
                double sliceSpacing = reslice->GetOutput()->GetSpacing()[2];
                vtkMatrix4x4* matrix = reslice->GetResliceAxes();
                // move the center point that we are slicing through
                double point[4];
                double center[4];
                point[0] = 0.0;
                point[1] = 0.0;
                point[2] = sliceSpacing * deltaY;
                point[3] = 1.0;
                matrix->MultiplyPoint(point, center);
                matrix->SetElement(0, 3, center[0]);
                matrix->SetElement(1, 3, center[1]);
                matrix->SetElement(2, 3, center[2]);
                mapToColors->Update();
                interactor->Render();
            }
            else
            {
                vtkInteractorStyle* style = vtkInteractorStyle::SafeDownCast(
                    interactor->GetInteractorStyle());
                if (style)
                {
                    style->OnMouseMove();
                }
            }
        }
    }

private:
    int Slicing;
    vtkImageReslice* ImageReslice;
    vtkRenderWindowInteractor* Interactor;
    vtkImageMapToColors* mapToColors;
};

int main()
{
    vtkSmartPointer reader =
        vtkSmartPointer::New();
    reader->SetFileName("brain.mhd");
    reader->Update();

    int extent[6];
    double spacing[3];
    double origin[3];

    reader->GetOutput()->GetExtent(extent);
    reader->GetOutput()->GetSpacing(spacing);
    reader->GetOutput()->GetOrigin(origin);

    double center[3];
    center[0] = origin[0] + spacing[0] * 0.5 * (extent[0] + extent[1]);
    center[1] = origin[1] + spacing[1] * 0.5 * (extent[2] + extent[3]);
    center[2] = origin[2] + spacing[2] * 0.5 * (extent[4] + extent[5]);

    static double axialElements[16] = {
        1, 0, 0, 0,
        0, 1, 0, 0,
        0, 0, 1, 0,
        0, 0, 0, 1
    };

    vtkSmartPointer resliceAxes =
        vtkSmartPointer::New();
    resliceAxes->DeepCopy(axialElements);

    resliceAxes->SetElement(0, 3, center[0]);
    resliceAxes->SetElement(1, 3, center[1]);
    resliceAxes->SetElement(2, 3, center[2]);

    vtkSmartPointer reslice =
        vtkSmartPointer::New();
    reslice->SetInputConnection(reader->GetOutputPort());
    reslice->SetOutputDimensionality(2);
    reslice->SetResliceAxes(resliceAxes);
    reslice->SetInterpolationModeToLinear();

    vtkSmartPointer colorTable =
        vtkSmartPointer::New();
    colorTable->SetRange(0, 1000);
    colorTable->SetValueRange(0.0, 1.0);
    colorTable->SetSaturationRange(0.0, 0.0);
    colorTable->SetRampToLinear();
    colorTable->Build();

    vtkSmartPointer colorMap =
        vtkSmartPointer::New();
    colorMap->SetLookupTable(colorTable);
    colorMap->SetInputConnection(reslice->GetOutputPort());
    colorMap->Update();

    vtkSmartPointer imgActor =
        vtkSmartPointer::New();
    imgActor->SetInputData(colorMap->GetOutput());

    vtkSmartPointer renderer =
        vtkSmartPointer::New();
    renderer->AddActor(imgActor);
    renderer->SetBackground(1, 1, 1);

    vtkSmartPointer renderWindow =
        vtkSmartPointer::New();
    renderWindow->SetSize(500, 500);
    renderWindow->AddRenderer(renderer);

    vtkSmartPointer renderWindowInteractor =
        vtkSmartPointer::New();
    vtkSmartPointer imagestyle =
        vtkSmartPointer::New();

    renderWindowInteractor->SetInteractorStyle(imagestyle);
    renderWindowInteractor->SetRenderWindow(renderWindow);
    renderWindowInteractor->Initialize();

    vtkSmartPointer callback =
        vtkSmartPointer::New();
    callback->SetImageReslice(reslice);
    callback->SetInteractor(renderWindowInteractor);
    callback->SetImageMapToColors(colorMap);

    imagestyle->AddObserver(vtkCommand::MouseMoveEvent, callback);
    imagestyle->AddObserver(vtkCommand::LeftButtonPressEvent, callback);
    imagestyle->AddObserver(vtkCommand::LeftButtonReleaseEvent, callback);

    renderWindowInteractor->Start();
    return EXIT_SUCCESS;
}
用到的MHD文件:
效果(鼠标在切片区域左键一直按住右或左拖动(或上下拖动),即可更换不同切片显示):
注:此例程MHA和NII格式文件同样适用。
实例12:基于VTK对MHA格式文件三维感兴趣区域裁剪及MHA格式保存
#include "vtkAutoInit.h"
VTK_MODULE_INIT(vtkRenderingOpenGL2);
VTK_MODULE_INIT(vtkInteractionStyle);

#include
#include
#include
#include
#include
#include
#include
#include
#include
#include //mha、mad图像读取类
#include mha、mad图像写入类

//测试图像:../data/lena.bmp
int main(int argc, char* argv[])
{
	/*vtkSmartPointer reader =
		vtkSmartPointer::New();
	reader->SetFileName("lena.bmp");
	reader->Update();*/

	vtkSmartPointer reader = vtkSmartPointer::New();
	//mhd与mha文件其实格式是一样的,记录mhd对应的raw文件应在同一目录
	//mhd格式图像信息头与实际图像的存储分为两个文件(*.mhd文件记录图像信息头;*.raw或//*.zraw(zraw指有压缩)记录实际图像)
	//mha格式将图像信息头与实际的像素值等数据写入到同一个文件中
	//reader->SetFileName("test1.mhd");
	  //.mha和.raw文件需要在同一个文件夹
	reader->SetFileName("CT_6_spacing.mha");
	reader->Update();

	int dims[3];
	reader->GetOutput()->GetDimensions(dims);

	vtkSmartPointer extractVOI =
		vtkSmartPointer::New();
	extractVOI->SetInputConnection(reader->GetOutputPort());
	//设置感兴趣区域:X_min、X_max、Y_min、Y_max、Z_min、Z_max
	extractVOI->SetVOI(dims[0] / 4., 3. * dims[0] / 4., dims[1] / 4., 3. * dims[1] / 4., 0, 5);//这里设置0~5,表示裁剪六张切片
	extractVOI->Update();

	vtkSmartPointer originalActor =
		vtkSmartPointer::New();
	originalActor->SetInputData(reader->GetOutput());

	vtkSmartPointer voiActor =
		vtkSmartPointer::New();
	voiActor->SetInputData(extractVOI->GetOutput());

	double originalViewport[4] = { 0.0, 0.0, 0.5, 1.0 };
	double voiviewport[4] = { 0.5, 0.0, 1.0, 1.0 };

	vtkSmartPointer originalRenderer =
		vtkSmartPointer::New();
	originalRenderer->SetViewport(originalViewport);
	originalRenderer->AddActor(originalActor);
	originalRenderer->ResetCamera();
	originalRenderer->SetBackground(1.0, 1.0, 1.0);

	vtkSmartPointer shiftscaleRenderer =
		vtkSmartPointer::New();
	shiftscaleRenderer->SetViewport(voiviewport);
	shiftscaleRenderer->AddActor(voiActor);
	shiftscaleRenderer->ResetCamera();
	shiftscaleRenderer->SetBackground(1.0, 1.0, 1.0);

	vtkSmartPointer renderWindow =
		vtkSmartPointer::New();
	renderWindow->AddRenderer(originalRenderer);
	renderWindow->AddRenderer(shiftscaleRenderer);
	renderWindow->SetSize(900, 300);
	renderWindow->Render();
	renderWindow->SetWindowName("ExtractVOIExample");

	vtkSmartPointer renderWindowInteractor =
		vtkSmartPointer::New();
	vtkSmartPointer style =
		vtkSmartPointer::New();

	//保存为mhd文件
	//vtkMetaImageWriter* vtkWriter = vtkMetaImageWriter::New();
	//vtkWriter->SetInputConnection(extractVOI->GetOutputPort());
	以raw和mhd格式保存,去掉此句则以zraw保存
	//vtkWriter->SetCompression(0);
	//vtkWriter->SetFileName("BrainProtonDensity3Slices_1.mhd");
	//vtkWriter->Write();

	保存为mha文件
	vtkMetaImageWriter* vtkWriter = vtkMetaImageWriter::New();
	vtkWriter->SetInputConnection(extractVOI->GetOutputPort());
	//以raw和mhd格式保存,去掉此句则以zraw保存
	vtkWriter->SetCompression(0);
	vtkWriter->SetFileName("CT_6_spacing_cut.mha");
	vtkWriter->Write();

	renderWindowInteractor->SetInteractorStyle(style);
	renderWindowInteractor->SetRenderWindow(renderWindow);
	renderWindowInteractor->Initialize();
	renderWindowInteractor->Start();


	return EXIT_SUCCESS;
}
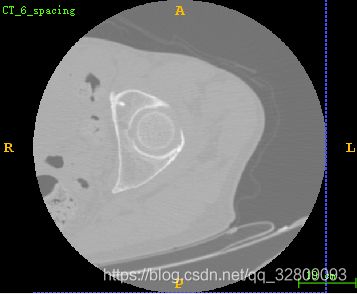
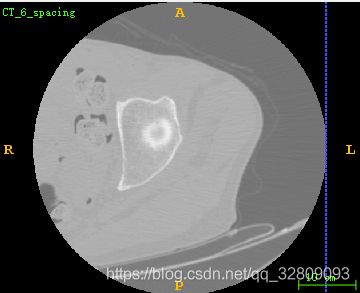
读取的MHA源文件:
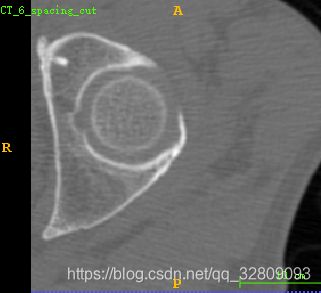
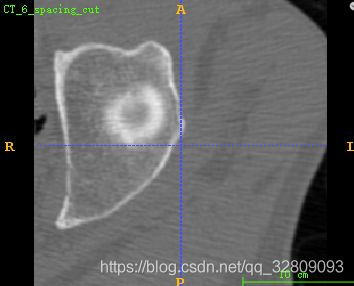
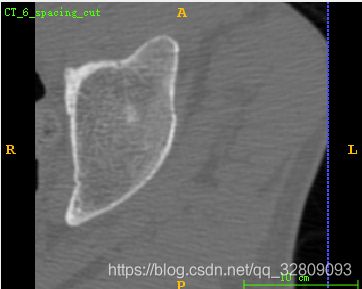
选定区域剪切后保存的MHA文件:
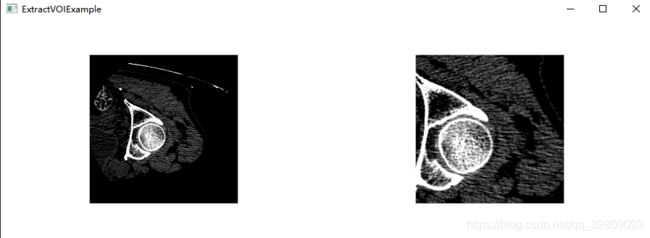
其中前四张剪切前后效果对比:
注:此例程MHD和NII格式文件同样适用。


