学习笔记:PIE-Engine监督分类
官网的教程太简单,在这里补充一下。
一、核心内容说明
1、绘制训练区
说明:这里直接利用PEE自带的绘点工具即可,无需其他代码
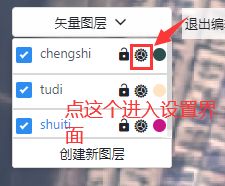
(1)绘制样本点
绘制样本点的规则和ENVI一样,但在这里要注意一个图层只能绘制一种类型的样本(比如都是水体)
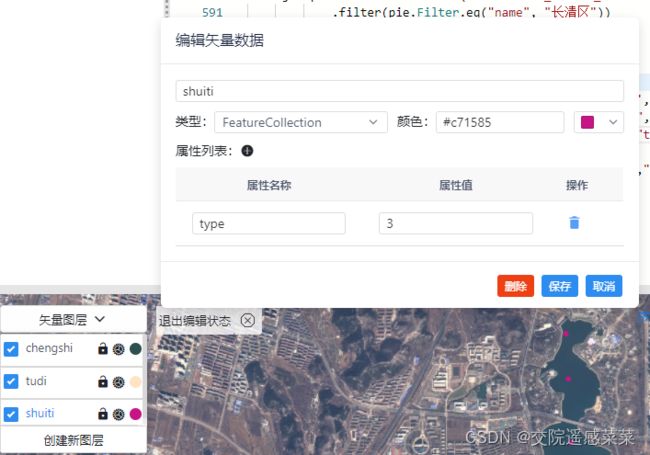
(2)样本点转要素集
别忘了点保存
这里要说明一下,属性名称指的是这个地物的面积,种类,高度等(在本次说明中指得是roi样本点的种类),属性值指的是100㎡,第一种,10m等(在本次说明中指得是roi样本点的种类:水体)。属性值只能以数字形式表示,不然计算系统无法识别。
这里是绘制结果
(3)导入图层与合并集合
说明:合并集合的原因是sampleRegions无法识别多个要素集(只取第一个)
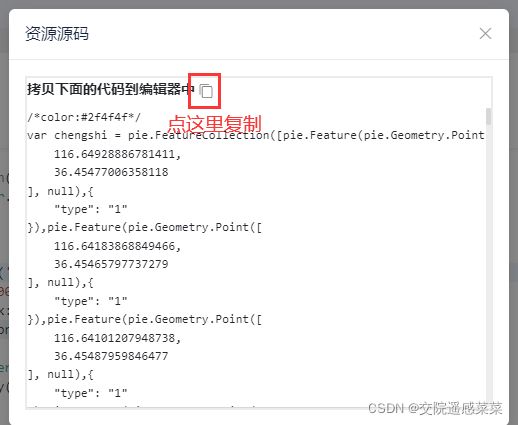
导入图层
代码最好放在最上面!!!
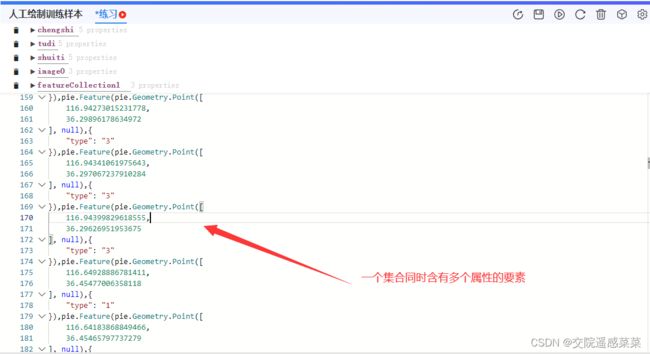
合并集合
首先定义一个新的要素集
var fea = pie.FeatureCollection([]);
然后将其他要素集中的要素都复制到这里面来:
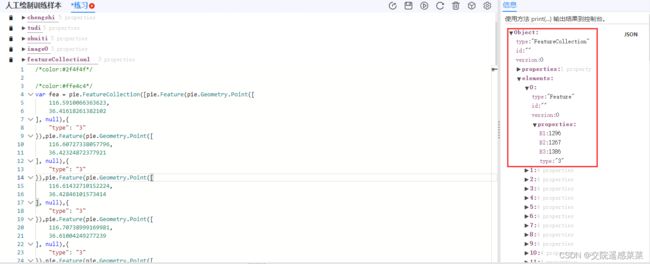
(我们要的是这一段)
pie.Feature(pie.Geometry.Point([116.64928886781411,36.45477006358118], null),{"type": "1"}),pie
成果
2、样本点采样
代码
var training = img.sampleRegions(fea,["type"],10);
代码说明
img是用于分类的影像图,fea是样本点,type是采样结果保留的属性值(作为分类的依据),10是影象分辨率。
sampleRegions功能:在当前影像中采集距样本点最近的像素块的DN值(如果给定参数大于实际影像分辨率则取多个像素块DN值的平均值)
采样结果
3、监督分类
代码:
var classifier = pie.Classifier.rTrees().train(training,"type",["B1","B2","B3"]);
var resultImage = img.classify(classifier,"classifyA");
var visParam = {
opacity:1,
uniqueValue:'1,2,3',
palette: '#87CEFA,#BDB76B,#CD0000'
};
Map.addLayer(resultImage,visParam);
Map.setCenter(0,0,0);
代码说明:
classifier是分类器.rTrees代表分类方式(决策树),resultImage是分类结果,visParam是分类结果的风格设置(数量必须与样本点的种类一致),Map.addLayer是加载分类结果
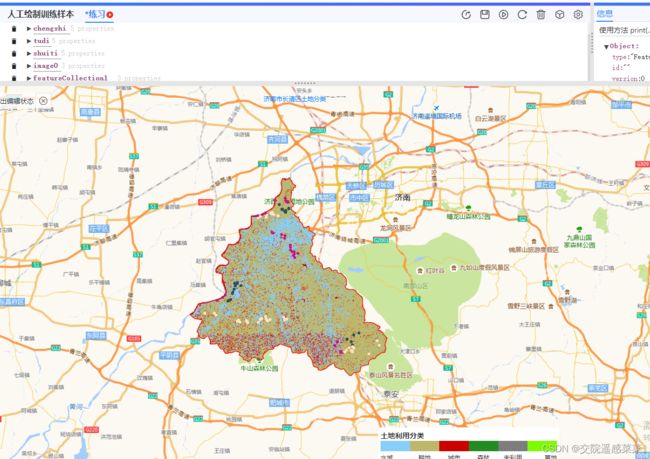
结果
4、精度评价
解释一下官网里的代码
// 获得样本点,并且按照7:3分成训练样本点和验证样本点,地图加载显示
var featureCollection = pie.FeatureCollection('user/17090142114/PGDB001/WorldROI');
featureCollection = featureCollection.randomColumn('random');
//令要素集产生一组随机数,数组名为random(和type一样,不过属性值是0~x随机数)
var trainingFeatures = featureCollection.filter(pie.Filter.lte("random", 0.7));
//对featurecollection进行筛选,删选出random属性值前百分之七十,筛选结果为trainingFeatures
var testingFeatures = featureCollection.filter(pie.Filter.gt("random", 0.7));
//同上,筛选条件变为后百分之七十
Map.addLayer(trainingFeatures,{color:'FF0000FF'},"TrainLayer");
Map.addLayer(testingFeatures,{color:'0000FFFF'},"TestLayer");
Map.centerObject(featureCollection,0);
//加载出来看一下训练样本和验证样本
// 构建查询数据
var image = pie.Image('user/17090142114/PGDB001/World84').select(["B1","B2","B3"]);
// 获得训练样本,并且按照7:3分成训练样本和验证样本
var sampleFeatureCollection = image.sampleRegions(featureCollection, ["type","random"], 50000);
//对样本点进行采样,保留的字段为type、random,采样结果为sampleFeatureCollection
var sampleTrainingFeatures = sampleFeatureCollection.filter(pie.Filter.lte("random", 0.7));
//同6行
var sampleTestingFeatures = sampleFeatureCollection.filter(pie.Filter.gt("random", 0.7));
// 构建正态贝叶斯分类器,并训练数据
var classifer = pie.Classifier.normalBayes().train(sampleTrainingFeatures, "type", ["B1", "B2", "B3"]);
// 影像分类,并加载显示
var resultImage = image.classify(classifer, "classifyA");
var visParam = {
opacity:1,
uniqueValue:'1,2,3,4',
palette: '008000,0000ff,ffa500,c0c0c0'
};
Map.addLayer(resultImage,visParam, "ClassifyImage");
Map.addLayer(image,{},"SrcImage",false);
// 添加图例
var data = {title: "利用分类",
colors: ['#ffa500','#008000','#0000ff','#c0c0c0'],
labels: ["沙漠","绿地", "海洋","冰川"],
step: 1};
var style = {
bottom: "10px",
right: "450px",
width: "400px",
height: "70px"
};
var legend = ui.Legend(data, style);
Map.addUI(legend);
// 评估训练样本的精度
var checkM = classifer.confusionMatrix();
print("训练矩阵:",checkM);
print("训练矩阵-ACC系数:",checkM.acc(),"训练矩阵-Kappa系数:",checkM.kappa());
// 评估验证样本的精度
var predictResult = sampleTestingFeatures.classify(classifer,"classification");
var errorM=predictResult.errorMatrix("type","classification");
print("验证矩阵:",errorM);
print("验证矩阵-ACC系数:",errorM.acc(),"验证矩阵-Kappa系数:",errorM.kappa());


