激光雷达和IMU联合标定并运行LIOSAM
激光雷达和IMU联合标定并运行LIOSAM
激光雷达和IMU(我用的是Velodyne和xsense传感器)标定这块我尝试了许多方法,钻研了好几天包括:
(1)浙江大学开源的方案。
(2)通过我之前对激光雷达和相机联合标定得到的变换矩阵和相机与IMU联合标定得到的变换矩阵相乘
(3)lidar-align(里面代码需要自己改写)
但是最后还是通过lidar-align标定成功了,并且将获得参数用到LIOSAM中(通过自己录制数据集跑出效果)。下面我一一介绍我标定过程中遇到的问题,希望对你有帮助。
1.浙江大学开源的方案
github地址:链接: https://github.com/APRIL-ZJU/lidar_IMU_calib
编译的过程并没有遇到问题,后续就是在licalib_gui.launch和calib.sh里面修改成你录制的话题,但是在运行的时候遇到各种问题。
问题一:运行的时候出现process has died…如下图。
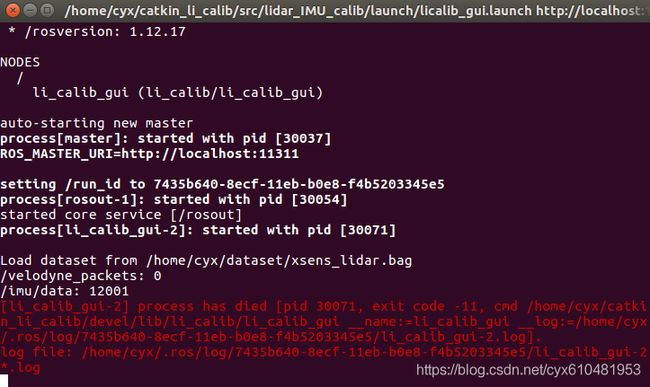 刚开始我以为是数据集录制的有问题,后来又录制了多次数据集,继续尝试还是出现这种错误,我看github上也有人说出现错误,但是都没解决。最后我看到上面有:
/velodyne_packets:0
/imu/data:12001
发现velodyne_packets并不是我录制的话题。然后我运行激光雷达的时候rostopic list了一下,发现有这个话题,于是我尝试在录制时将velodyne_points换成了velodyne_packets。
rosbag record -O velo_xsens.bag /imu/data /velodyne_packets
然后在又按github的方法运行了一下,果不其然,终于出现标定框了,效果如下。 然后点击了初始化(Initialization)及下面的三个按钮,后续就一直是点击下面的按钮。
问题二:并不知道自己得到的标定文件是不是对的。
上面点击过程持续了好久好久,我看终端里显示迭代了20多次,于是我ctrl+c关闭了,最后文件保存到你设置的路径下。文件如图:
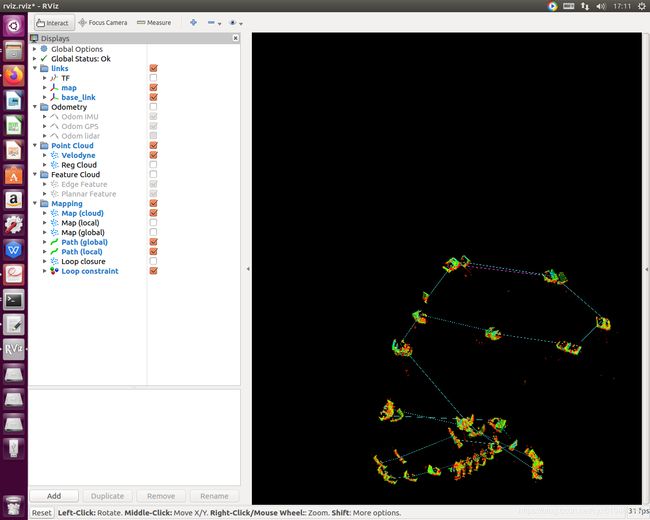
 然后我问了下师兄,师兄说这应该是的,因为它给出了四元数,于是自己写了个代码将四元数转换为旋转矩阵。感觉自己要成功了。。。最后将得出的矩阵放入了LIOSAM的param.yaml文件里。可惜根本就是飘的。如图:
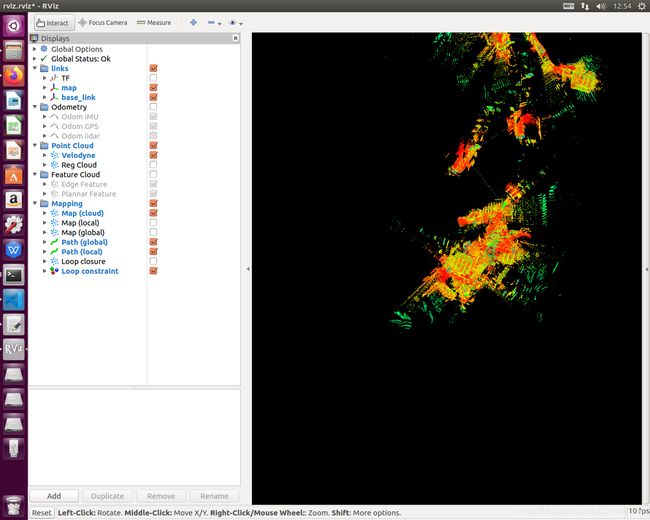 后面还继续用这个方法重新录制数据集,重新标定,到最后依然飘,目前还不知道问题出在哪里,如果知道的欢迎在下方评论。
2.用之前标定的工作
之前我表定过雷达和相机,以及相机和IMU。于是想通过直接将它们之间的变换矩阵相乘就可以得到雷达到IMU的外参了(道理是这样的)。于是自己写了个变换代码,代码如下:
#include<Eigen/Core>
#include<Eigen/Dense>
#include<opencv2/opencv.hpp>
#include<iostream>

using namespace Eigen;
using namespace std;
using namespace cv;

int main(int argc, char **argv)
{
    Matrix<double, 4, 4> camera2lidar;
       camera2lidar<<2.4179517096019842e-01, -1.9642514858819676e-01,
       9.5023799982027335e-01, -1.7757374048233032e-01,
       -9.6988254863381052e-01, -7.8571928659428691e-02,
       2.3055215002754242e-01, 3.9515018463134766e-02,
       2.9375792004868617e-02, -9.7736564960553163e-01,
       -2.0950763665137412e-01, 1.1383673548698425e-01, 0.000000, 0.0000000, 0.000000, 1.000000;
    Matrix<double, 4, 4> lidar2camera=camera2lidar.inverse();
    Matrix<double, 4, 4> imu2camera;
   imu2camera<< -0.3461823, -0.9118556, 0.22062904, 0.00098007,
  0.77577957, -0.41047747, -0.47924347, 0.00315419,
  0.5275641, 0.00525389, 0.84949898, 0.00117689,
  0.0000000, 0.00000000, 0.00000000, 1.00000000;
//    Matrix imu2camera=camera2imu.inverse();
    Matrix<double, 4, 4> imu2lidar=imu2camera*lidar2camera;
//    Matrix lidar2imu=imu2lidar.inverse();
    cout<<"imu_lidar_result:["<<imu2lidar<<"]"<<endl;
//    cout<<"lidar_imu_result:["<
   return 0;
}
CMakeLists.txt代码如下:
cmake_minimum_required(VERSION 2.8)
project(produceYAML)
set(OpenCV_DIR "/usr/local/include/opencv")
find_package(OpenCV 3.4.3 REQUIRED)

include_directories(${/usr/local/include/opencv})


find_package(Eigen3 REQUIRED)
include_directories(${EIGEN3_INCLUDE_DIRS})

add_executable(lidar-imu lidar-imu.cc)

target_link_libraries(lidar-imu ${OpenCV_LIBS})
link_directories(${OpenCV_LIBRARY_DIRS})
最后将得到的变换矩阵放入到LIOSAM的param.yaml文件里。但是没有成功,还是飘的!!于是我对矩阵求逆,尝试了2*2=4的所有可能,最后还是没成功!!(浪费了好多时间)。于是这个方法也就到此为止了。
3.lidar-align标定
这个方法其实是我最先尝试的方法。。。但是中途因为发现代码中没有IMU这部分于是就放弃了。最后查资料发现网上都说lidar-align可以标定雷达和IMU的。于是上网差了IMU改写接口。最后成功了!过程如下:
首先,安装并编译好lidar-align。
github链接:链接: https://github.com/ethz-asl/lidar_align
问题一:编译时出现Could not find NLOPTConfig.cmake
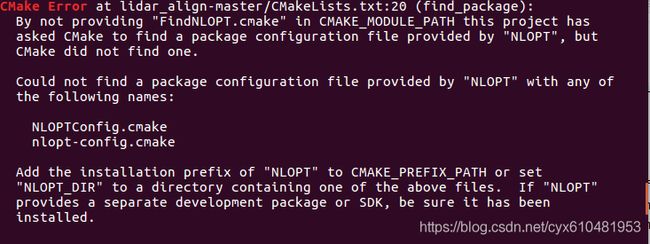
解决办法:找到这个文件并将其放入到工程目录下,并在CMakeLists.txt里加上这样一句话:
list(APPEND CMAKE_FIND_ROOT_PATH ${PROJECT_SOURCE_DIR})
set (CMAKE_PREFIX_PATH "/usr/local/lib/cmake/nlopt")
然后就是需要在lidar_align.launch文件里改成你自己录制的数据包(里面包含话题/velodyne_points和/imu/data)的路径。
然后在工程目录下打开终端输入
source devel/setup.bash
roslaunch lidar_align lidar_align.launch
问题二:No odom message found

后来查github发现是因为这里面又odom里程计的数据而没有加入IMU数据,需要自己在loader.cc里进行改写。于是上网搜索了一下,有位博主自己改写了。链接如下: https://my.oschina.net/u/4417917/blog/4479328
把对应的代码加进去,并注释掉odom相关的代码。

然后重新编译成功了(其实没成功,把我给迷惑了)。
问题三:Error loading transforms from ROS bag

然后又花费了很长时间去搜索这个问题,但都没有找到,于是回过头来看代码,发现之前改写的函数类型数bool函数,需要返回真值,然而我并没有加入这句话。但我很好奇为什么编译的时候没有提示啊!!于是又在下面加入了return true。如图:
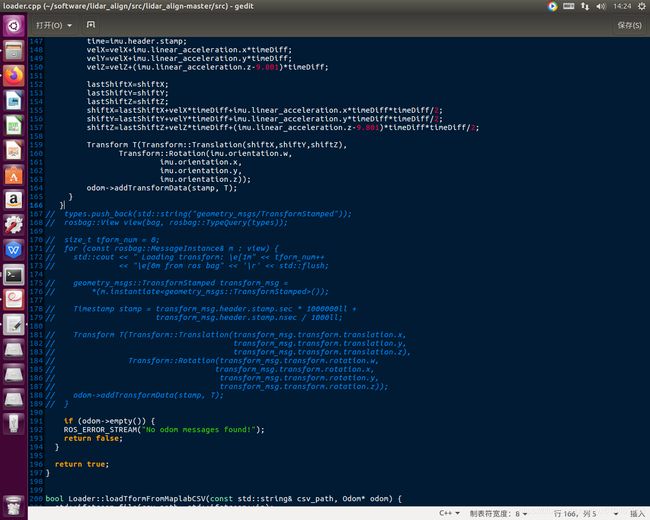
最后又重新编译了一下。终于出现了标定过程:
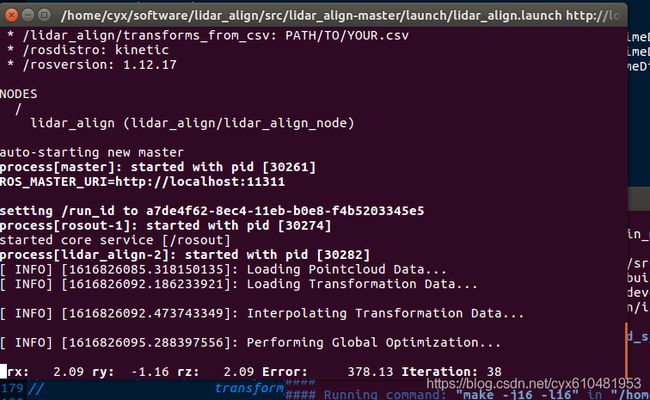

然后就是漫长的等待,最后标定的结果文件存放在lidar-align的results文件夹下(可算是成功了!),标定结果如下:
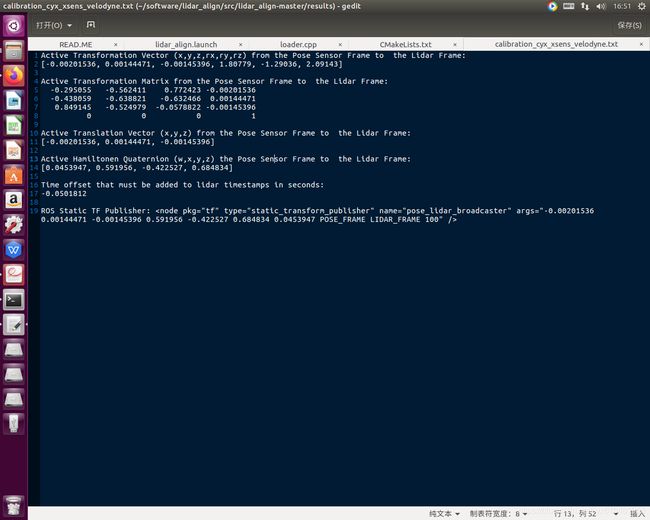
4.运行LIOSAM
安装并编译好LIOSAM。
github链接: https://github.com/TixiaoShan/LIO-SAM
问题一:Error: GTSAM was built against a different version of Eigen。
这个问题是GTSAM自带的eigen库和之前安装的eigen库的版本不同导致的。
解决办法:
修改gtsam下的CMakeLists.txt文件中的内容,在if(GTSAM_USE_SYSTEM_EIGEN)前面加上set(GTSAM_USE_SYSTEM_EIGEN ON),使得gtsam使用自己安装的eigen而不是它自带的eigen。然后重新编译gtsam,之后再编译LIO-SAM,问题解决。
编译好就可以运行数据集了,运行官网数据集的时候不需要改写param.yaml。注意:如果运行自己的数据集必须使用的是9轴IMU!不能是6轴的!之前我就用zed2里自带的IMU来运行,发现出现如下错误:

所以一定是9轴IMU才可以。
然后需要在里面修改你录制的话题、IMU的内参、IMU到雷达的外参以及PCD存放路径。代码如下(这是我自己的数据哦):
lio_sam:
  # Topics
#  pointCloudTopic: "points_raw"               # Point cloud data
  pointCloudTopic: "velodyne_points"
  imuTopic: "imu/data"                         # IMU data
#  imuTopic: "imu_correct"
  odomTopic: "odometry/imu"                   # IMU pre-preintegration odometry, same frequency as IMU
  gpsTopic: "odometry/gpsz"                   # GPS odometry topic from navsat, see module_navsat.launch file

  # Frames
  lidarFrame: "base_link"
  baselinkFrame: "base_link"
  odometryFrame: "odom"
  mapFrame: "map"

  # GPS Settings
#  useImuHeadingInitialization: true           # if using GPS data, set to "true"
  useImuHeadingInitialization: false
  useGpsElevation: false                      # if GPS elevation is bad, set to "false"
  gpsCovThreshold: 2.0                        # m^2, threshold for using GPS data
  poseCovThreshold: 25.0                      # m^2, threshold for using GPS data

  # Export settings
#  savePCD: false                              # https://github.com/TixiaoShan/LIO-SAM/issues/3
  savePCD: true
  savePCDDirectory: "/dataset/LIO-SAM/xsens_velodyne"        # in your home folder, starts and ends with "/". Warning: the code deletes "LOAM" folder then recreates it. See "mapOptimization" for implementation

  # Sensor Settings
  sensor: velodyne                            # lidar sensor type, either 'velodyne' or 'ouster'
  N_SCAN: 16                                  # number of lidar channel (i.e., 16, 32, 64, 128)
  Horizon_SCAN: 1800                          # lidar horizontal resolution (Velodyne:1800, Ouster:512,1024,2048)
  downsampleRate: 1                           # default: 1. Downsample your data if too many points. i.e., 16 = 64 / 4, 16 = 16 / 1
  lidarMinRange: 1.0                          # default: 1.0, minimum lidar range to be used
  lidarMaxRange: 1000.0                       # default: 1000.0, maximum lidar range to be used

  #IMU Settings
  imuAccNoise: 9.7816033475532395e-03
  imuGyrNoise: 1.9958347084630267e-03
  imuAccBiasN: 8.4485975927320214e-05
  imuGyrBiasN: 2.5139562639019187e-05
  imuGravity: 9.80511
  imuRPYWeight: 0.01
#  imuAccNoise: 1.9238237446574064e-02
#  imuGyrNoise: 1.5385754496033436e-03
#  imuAccBiasN: 4.9615115224550062e-04
#  imuGyrBiasN: 5.0721205121154150e-06
#  imuGravity: 9.80511
#  imuRPYWeight: 0.01

  # Extrinsics (lidar -> IMU)
  extrinsicTrans: [-0.00201536, 0.00144471, -0.00145396]
#  extrinsicTrans: [0.0, 0.0, 0.0]
#  extrinsicRot: [-1, 0, 0,
#                  0, 1, 0,
#                  0, 0, -1]
#  extrinsicRPY: [0,  1, 0,
#                 -1, 0, 0,
#                  0, 0, 1]
#  extrinsicRot: [1, 0, 0,
#                 0, 1, 0,
#                 0, 0, 1]
#  extrinsicRPY: [1, 0, 0,
#                 0, 1, 0,
#                 0, 0, 1]
  extrinsicRot:   [-0.295055,   -0.562411,    0.772423,
  -0.438059,   -0.638821,   -0.632466,
   0.849145,   -0.524979,  -0.0578822]


  extrinsicRPY:  [-0.295055,   -0.562411,    0.772423,
  -0.438059,   -0.638821,   -0.632466,
   0.849145,   -0.524979,  -0.0578822]
  # LOAM feature threshold
  edgeThreshold: 1.0
  surfThreshold: 0.1
  edgeFeatureMinValidNum: 10
  surfFeatureMinValidNum: 100

  # voxel filter paprams
  odometrySurfLeafSize: 0.4                     # default: 0.4 - outdoor, 0.2 - indoor
  mappingCornerLeafSize: 0.2                    # default: 0.2 - outdoor, 0.1 - indoor
  mappingSurfLeafSize: 0.4                      # default: 0.4 - outdoor, 0.2 - indoor

  # robot motion constraint (in case you are using a 2D robot)
  z_tollerance: 1000                            # meters
  rotation_tollerance: 1000                     # radians

  # CPU Params
  numberOfCores: 4                              # number of cores for mapping optimization
  mappingProcessInterval: 0.15                  # seconds, regulate mapping frequency

  # Surrounding map
  surroundingkeyframeAddingDistThreshold: 1.0   # meters, regulate keyframe adding threshold
  surroundingkeyframeAddingAngleThreshold: 0.2  # radians, regulate keyframe adding threshold
  surroundingKeyframeDensity: 2.0               # meters, downsample surrounding keyframe poses
  surroundingKeyframeSearchRadius: 50.0         # meters, within n meters scan-to-map optimization (when loop closure disabled)

  # Loop closure
  loopClosureEnableFlag: true
  loopClosureFrequency: 1.0                     # Hz, regulate loop closure constraint add frequency
  surroundingKeyframeSize: 50                   # submap size (when loop closure enabled)
  historyKeyframeSearchRadius: 15.0             # meters, key frame that is within n meters from current pose will be considerd for loop closure
  historyKeyframeSearchTimeDiff: 30.0           # seconds, key frame that is n seconds older will be considered for loop closure
  historyKeyframeSearchNum: 25                  # number of hostory key frames will be fused into a submap for loop closure
  historyKeyframeFitnessScore: 0.3              # icp threshold, the smaller the better alignment

  # Visualization
  globalMapVisualizationSearchRadius: 1000.0    # meters, global map visualization radius
  globalMapVisualizationPoseDensity: 10.0       # meters, global map visualization keyframe density
  globalMapVisualizationLeafSize: 1.0           # meters, global map visualization cloud density


# Navsat (convert GPS coordinates to Cartesian)
navsat:
  frequency: 50
  wait_for_datum: false
  delay: 0.0
  magnetic_declination_radians: 0
  yaw_offset: 0
  zero_altitude: true
  broadcast_utm_transform: false
  broadcast_utm_transform_as_parent_frame: false
  publish_filtered_gps: false

# EKF for Navsat
ekf_gps:
  publish_tf: false
  map_frame: map
  odom_frame: odom
  base_link_frame: base_link
  world_frame: odom

#  frequency: 50
  frequency: 200
  two_d_mode: false
  sensor_timeout: 0.01
  # -------------------------------------
  # External IMU:
  # -------------------------------------
#  imu0: imu_correct
  imu0: imu/data
  # make sure the input is aligned with ROS REP105. "imu_correct" is manually transformed by myself. EKF can also transform the data using tf between your imu and base_link
  imu0_config: [false, false, false,
                true,  true,  true,
                false, false, false,
                false, false, true,
                true,  true,  true]
  imu0_differential: false
  imu0_queue_size: 50
  imu0_remove_gravitational_acceleration: true
修改完后,打开两个终端分别输入:
source devel/setup.bash

roslaunch lio_sam run.launch
source devel/setup.bash
rosbag play /home/cyx/dataset/xsens_lidar.bag
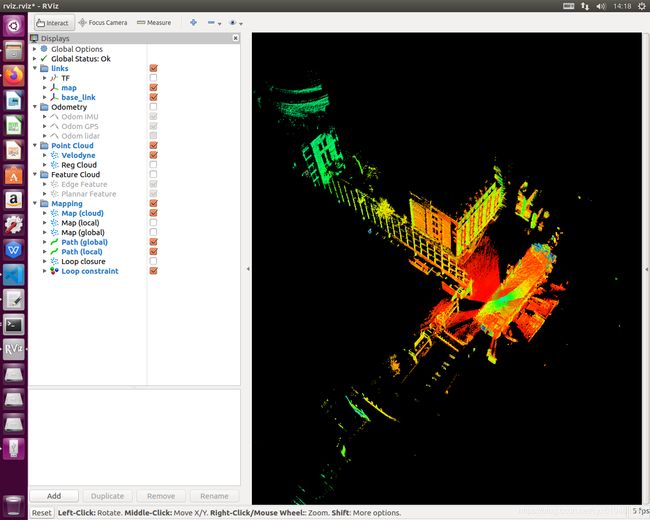
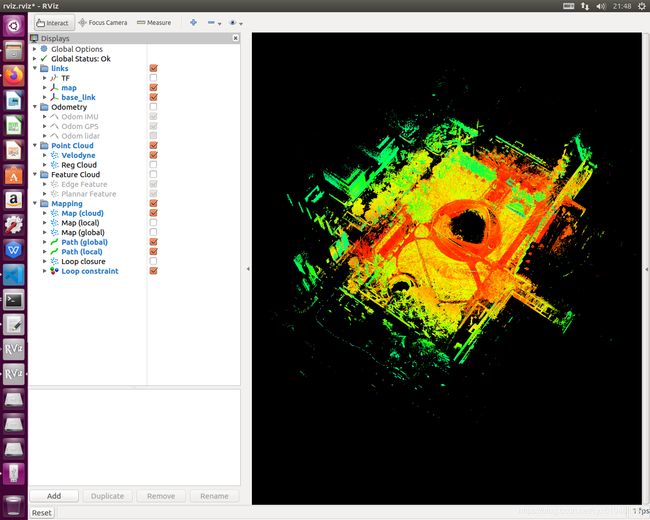
最后运行结果如下:
终于成功了!!!
以上就是我此次标定及跑代码的全过程,希望对你有帮助,喜欢的话点个赞加收藏吧!

