【深度学习】(二)深度学习基础学习笔记
深度学习基础
文章目录
-
- 深度学习基础
- 前言
- 一、 深度学习与传统机器学习的区别?
- 二、深度学习的改进点
-
- 1.更加合适目标函数
- 2.新增Softmax层
- 3.激活函数进化历程
- 4.梯度下降算法进化历程
- 5.Batch Normalization的由来
- 6.抑制过拟合
- 三、卷积神经网络(CNN)
-
- 1.CNN 解决了什么问题?
- 2.基本组件
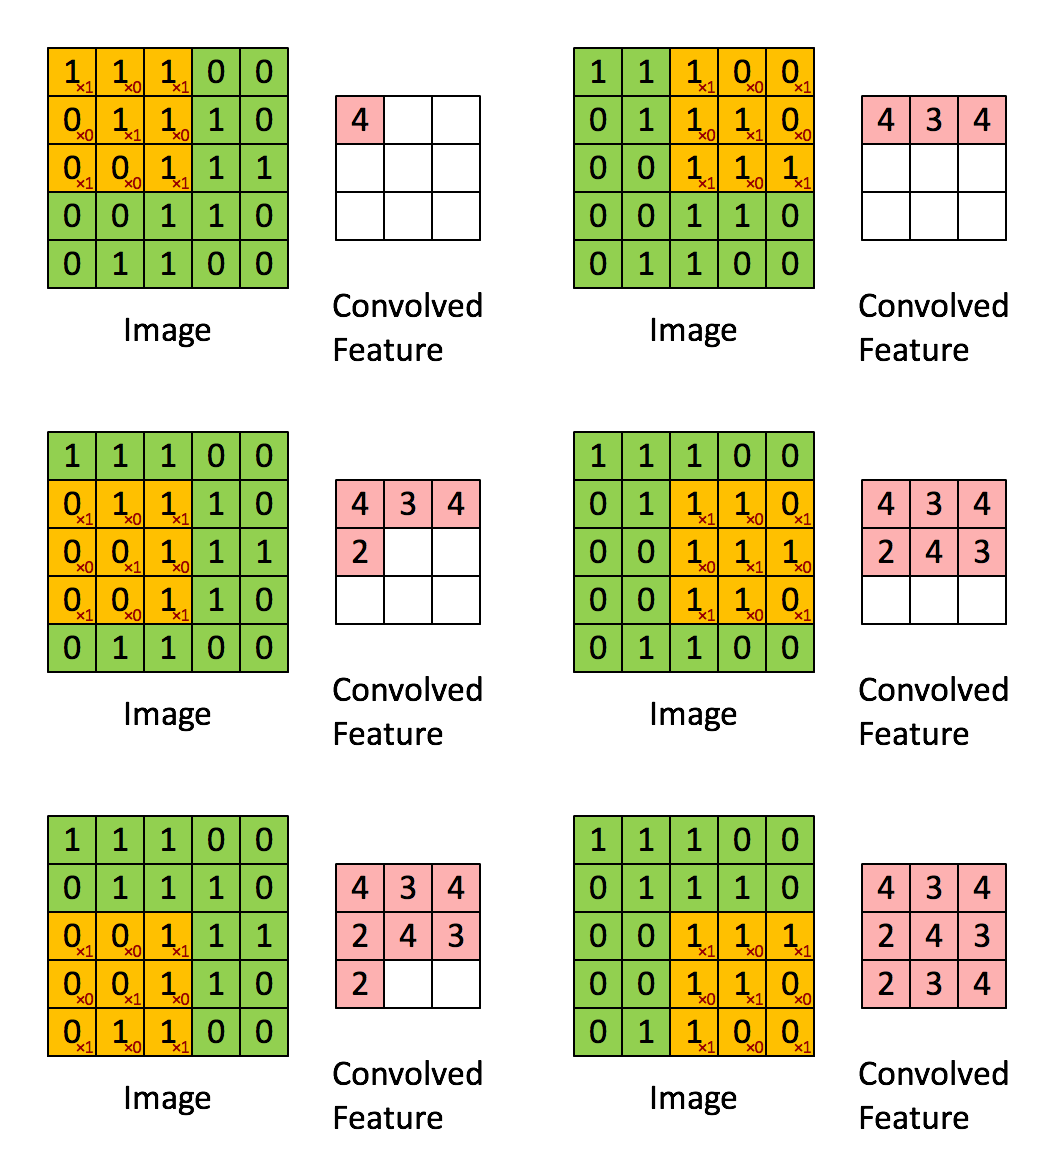
- 3.卷积层
- 4.池化层
- 5.全连接层
- 代码实现
- 总结
前言
上一章介绍了机器学习的内容,这一章来了解一下深度学习。深度学习是在机器学习的基础上继续研究得来的,又经过了几十年日日夜夜的科研人员的研究,最终留下一些通用的、经典的算法,下面我们开始学习吧。
一、 深度学习与传统机器学习的区别?
网络架构:3层以内—>可达上千层 深度的由来,网络更加深,类比人类的脑细胞更多,深度神经网络能解决的问题也越多
✨层间连接:全连接层—>形式多样:卷积层、池化层 特点:共享权值、跨层反馈等
目标函数:MSE—>CE等
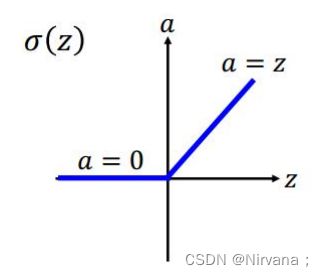
激活函数:Sigmoid/tanh—>ReLu等
️梯度下降算法:GD等—>Adam等
️过拟合抑制:凭经验—>Dropout等
二、深度学习的改进点
1.更加合适目标函数
CE,交叉熵误差损失是深度学习常用的损失函数,其定义为:

交叉熵目标函数的最优值搜索空间的“地形”更加“陡峭”,更有利于快速的找的最优值。
2.新增Softmax层

Softmax层的作用是突出最大值并转换成概率形式,类似于max函数,只不过max还是硬最大值,输出唯一的一个最大值,而软最大值是给每一个值一个权值,最大值得权重比例远大于其他值。这样可以解决机器学习Sigmoid函数带来的梯度消失问题。
3.激活函数进化历程
Sigmoid/tanh函数—>2006年RBM预训练—>2015年ReLu函数

ReLu函数避免了调整各层权重时的梯度消失问题。
4.梯度下降算法进化历程
SGD(存在马鞍面问题)—>Momentum---->Nesterov Momentum->Adagrad(自适应步长)—>RMSprop—>Adam(Nadam)

Adam,自适应矩估计是目前最好的梯度下降算法,本质是带有动量项的RMSprop,利用梯度的一阶矩估计和二阶矩估计动态调整每个参数的学习率。它相当于汽车的自动挡很适合新手使用,当然你是老司机也可以使用原始SGD手动调整步长。
5.Batch Normalization的由来
Batch Normalization,简称BatchNorm或BN,翻译为“批归一化”,是神经网络中一种特殊的层,如今已是各种流行网络的标配。在原paper中,BN被建议插入在(每个)ReLU激活层前面。
2015年深度学习领域非常棒的一篇文献提出这一算法:《Batch Normalization: Accelerating Deep Network Training by Reducing Internal Covariate Shift》,目前已经被大量的应用,最新的文献算法很多都会引用这个算法,进行网络训练。

BN的核心思想不是为了防止梯度消失或者防止过拟合,其核心是通过对系统参数搜索空间进行约束来增加系统鲁棒性,这种约束压缩了搜索空间,约束也改善了系统的结构合理性,这会带来一系列的性能改善,比如加速收敛,保证梯度,缓解过拟合等。
6.抑制过拟合
主要的三种方法:早期停止训练、权重衰减和Dropout
为了应对神经网络很容易过拟合的问题,2014年 Hinton 提出了Dropout算法,原文《Dropout: A Simple Way to Prevent Neural Networks from Overfitting》。
dropout 是指在深度学习网络的训练过程中,按照一定的概率将一部分神经网络单元暂时从网络中丢弃,相当于从原始的网络中找到一个更瘦的网络。

三、卷积神经网络(CNN)
1.CNN 解决了什么问题?
在 CNN 出现之前,图像对于人工智能来说是一个难题,有2个原因:
- 图像需要处理的数据量太大,导致成本很高,效率很低
- 图像在数字化的过程中很难保留原有的特征,导致图像处理的准确率不高
而CNN的提出很好的解决了这两个问题,对大量的图像数据进行降维的同时进行特征提取。它用类似视觉的方式保留了图像的特征,当图像做翻转,旋转或者变换位置时,它也能有效的识别出来是类似的图像。
2.基本组件
典型的 CNN 由3个部分构成:
3.卷积层
# 卷积层,32个卷积核,尺寸为5x5
conv1 = tf.layers.conv2d(x, 32, 5, activation=tf.nn.relu)
4.池化层
- 作用:特征融合,降维
- 无参数需要学习
- 超参数:尺寸、步长、计算类别–最大池化/平均池化
# 最大池化层,步长为2,无需学习任何参量
conv1 = tf.layers.max_pooling2d(conv1, 2, 2)
5.全连接层
- 全连接层采用softmax函数,指数归一化函数,将一个实数向量压缩到(0,1)。
- 最后一个全连接层对接1000类的softmax层(主要取决于标签的种类)
# 展开特征为一维向量,以输入全连接层
fc1 = tf.contrib.layers.flatten(conv2)

# 全连接层
fc1 = tf.layers.dense(fc1, 1024)

# 应用Dropout (训练时打开,测试时关闭)
fc1 = tf.layers.dropout(fc1, rate=dropout, training=is_training)

# 输出层,预测类别
out = tf.layers.dense(fc1, n_classes)
代码实现
开发环境:Python3.9+Tensorflow2.9.1
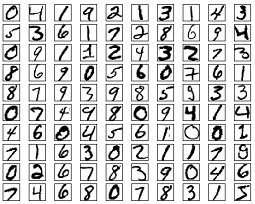
以经典的手写数字集MNIST识别为例,采用LeNet-5网络。最简单的网络和数据集,之后的网络将会越来越深,数据集会越来越复杂,做好准备
MNIST数据集是机器学习领域中非常经典的一个数据集,由60000个训练样本和10000个测试样本组成,每个样本都是一张28*28像素的灰度手写数字图片。
LeNet 是一系列网络的合称,包括LeNet1 - LeNet5,由Yann LeCun 等人在 1990 年《Handwritten Digit Recognition with a Back-Propagation Network》中提出,是卷积神经网络的 HelloWorld。
# coding: utf-8
# # TensorFlow卷积神经网络(CNN)示例 - 高级API
# ### Convolutional Neural Network Example - tf.layers API
# ## CNN网络结构图示
#
# 
#
# ## MNIST数据库
#
# 
#
# More info: http://yann.lecun.com/exdb/mnist/
from __future__ import division, print_function, absolute_import
# Import MNIST data,MNIST数据集导入
from tensorflow.examples.tutorials.mnist import input_data
mnist = input_data.read_data_sets("/tmp/data/", one_hot=False)
import tensorflow as tf
import matplotlib.pyplot as plt
import numpy as np
# Training Parameters,超参数
learning_rate = 0.001 # 学习率
num_steps = 2000 # 训练步数
batch_size = 128 # 训练数据批的大小
# Network Parameters,网络参数
num_input = 784 # MNIST数据输入 (img shape: 28*28)
num_classes = 10 # MNIST所有类别 (0-9 digits)
dropout = 0.75 # Dropout, probability to keep units,保留神经元相应的概率
# Create the neural network,创建深度神经网络
def conv_net(x_dict, n_classes, dropout, reuse, is_training):
# Define a scope for reusing the variables,确定命名空间
with tf.variable_scope('ConvNet', reuse=reuse):
# TF Estimator类型的输入为像素
x = x_dict['images']
# MNIST数据输入格式为一位向量,包含784个特征 (28*28像素)
# 用reshape函数改变形状以匹配图像的尺寸 [高 x 宽 x 通道数]
# 输入张量的尺度为四维: [(每一)批数据的数目, 高,宽,通道数]
x = tf.reshape(x, shape=[-1, 28, 28, 1])
# 卷积层,32个卷积核,尺寸为5x5
conv1 = tf.layers.conv2d(x, 32, 5, activation=tf.nn.relu)
# 最大池化层,步长为2,无需学习任何参量
conv1 = tf.layers.max_pooling2d(conv1, 2, 2)
# 卷积层,32个卷积核,尺寸为5x5
conv2 = tf.layers.conv2d(conv1, 64, 3, activation=tf.nn.relu)
# 最大池化层,步长为2,无需学习任何参量
conv2 = tf.layers.max_pooling2d(conv2, 2, 2)
# 展开特征为一维向量,以输入全连接层
fc1 = tf.contrib.layers.flatten(conv2)
# 全连接层
fc1 = tf.layers.dense(fc1, 1024)
# 应用Dropout (训练时打开,测试时关闭)
fc1 = tf.layers.dropout(fc1, rate=dropout, training=is_training)
# 输出层,预测类别
out = tf.layers.dense(fc1, n_classes)
return out
# 确定模型功能 (参照TF Estimator模版)
def model_fn(features, labels, mode):
# 构建神经网络
# 因为dropout在训练与测试时的特性不一,我们此处为训练和测试过程创建两个独立但共享权值的计算图
logits_train = conv_net(features, num_classes, dropout, reuse=False, is_training=True)
logits_test = conv_net(features, num_classes, dropout, reuse=True, is_training=False)
# 预测
pred_classes = tf.argmax(logits_test, axis=1)
pred_probas = tf.nn.softmax(logits_test)
if mode == tf.estimator.ModeKeys.PREDICT:
return tf.estimator.EstimatorSpec(mode, predictions=pred_classes)
# 确定误差函数与优化器
loss_op = tf.reduce_mean(tf.nn.sparse_softmax_cross_entropy_with_logits(
logits=logits_train, labels=tf.cast(labels, dtype=tf.int32)))
optimizer = tf.train.AdamOptimizer(learning_rate=learning_rate)
train_op = optimizer.minimize(loss_op, global_step=tf.train.get_global_step())
# 评估模型精确度
acc_op = tf.metrics.accuracy(labels=labels, predictions=pred_classes)
# TF Estimators需要返回EstimatorSpec
estim_specs = tf.estimator.EstimatorSpec(
mode=mode,
predictions=pred_classes,
loss=loss_op,
train_op=train_op,
eval_metric_ops={'accuracy': acc_op})
return estim_specs
if __name__ == "__main__":
# 构建Estimator
model = tf.estimator.Estimator(model_fn)
# 确定训练输入函数
input_fn = tf.estimator.inputs.numpy_input_fn(
x={'images': mnist.train.images}, y=mnist.train.labels,
batch_size=batch_size, num_epochs=None, shuffle=True)
# 开始训练模型
model.train(input_fn, steps=num_steps)
# 评判模型
# 确定评判用输入函数
input_fn = tf.estimator.inputs.numpy_input_fn(
x={'images': mnist.test.images}, y=mnist.test.labels,
batch_size=batch_size, shuffle=False)
model.evaluate(input_fn)
# 预测单个图像
n_images = 4
# 从数据集得到测试图像
test_images = mnist.test.images[:n_images]
# 准备输入数据
input_fn = tf.estimator.inputs.numpy_input_fn(
x={'images': test_images}, shuffle=False)
# 用训练好的模型预测图片类别
preds = list(model.predict(input_fn))
# 可视化显示
for i in range(n_images):
plt.imshow(np.reshape(test_images[i], [28, 28]), cmap='gray')
plt.show()
print("Model prediction:", preds[i])
总结
对于图像处理来说,深度学习只需掌握CNN即可。下一节开始介绍近年来火爆的原始CNN基础上不断改进的神经网络模型,敬请期待


