用idea搭建一个Spring Cloud项目(含代码)
目录
目标
相关术语介绍
实战
搭建父工程(聚合工程)
搭建注册中心微服务
搭建生产者和消费者微服务
新增Eureka用户认证
新增健康检测
手动维护注册列表
剔除微服务
up微服务
down微服务
搭建Eureka注册中心集群
远程调用&负载均衡
服务隔离&降级
Hystrix数据监控
Hystrix熔断器
Feign远程调用
服务网关
admin服务监控
总结
项目结构
下载地址
目标
- 熟练搭建Spring Cloud项目,掌握常见的微服务技术解决方案。
相关术语介绍
服务注册与发现:微服务作为服务提供方主动向注册中心注册信息,消费方通过注册中心查询需要的服务并进行调用。
Eureka用户认证:微服务向注册中心注册信息时,必须要有用户名和密码认证,且查看注册列表也需要用户名和密码验证。
服务续约保活(心跳机制):微服务成功注册后会定时向注册中心发送信息,如果注册中心长时间没有收到某个微服务的信息,则认为该微服务不可用。
Eureka高可用:通过搭建Eureka注册中心集群,并配置每个注册中心相互注册,来确保注册中心的高可用。
Eureka健康检测:微服务能向注册中心发送心跳,但该微服务连接第三方的服务(如MySQL)失败,此时应该将该微服务在注册列表中的状态设置成DOWN。
服务下线:微服务不可用,需要将它从注册列表中删除。服务下线能维护服务列表,防止心跳间隔期间内微服务不可用导致调用失败。
远程调用:不同主机上的微服务相互调用。
负载均衡:把请求分摊到集群中的各个节点,常见的负载均衡策略有随机、轮询、权重、最小连接数量等。
服务雪崩:各个微服务之间存在相互调用的关系,局部微服务不可用导致整个项目不可用,常用的解决方案是服务隔离。
服务降级:请求达到限流阈值后,后续的请求调用已经准备好了的备胎方案。
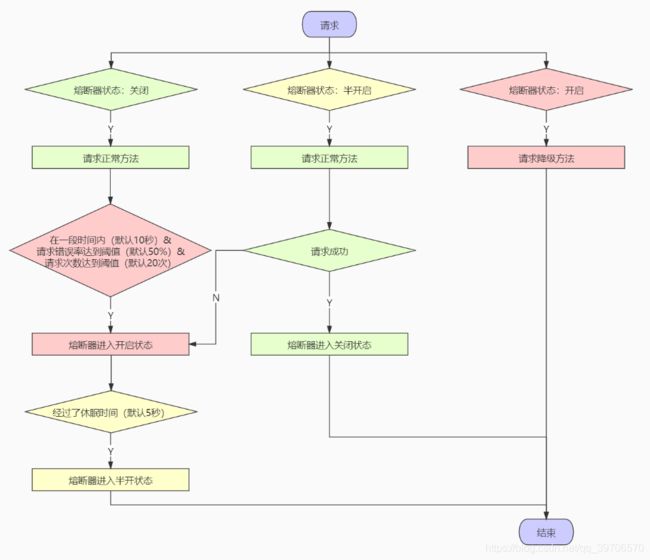
Hystrix熔断器:一定时间段内(默认10秒),错误率(默认50%)和请求次数(默认20次)达到阈值则会开启熔断器。后续的请求会直接请求到降级方法,过了休眠时间后(默认5秒),熔断器处于半开状态。后续请求时,如果是半开状态则请求正常方法,调用成功后熔断器状态变成关闭,反之变成开启。
Hystrix隔离策略:有两种,分别是THREAD和SEMAPHORE。其中THREAD表示:线程池隔离策略,独立线程接收请求,由Hystrix创建的线程(默认10个)调用接口,默认是THREAD,SEMAPHORE表示:信号量隔离策略,通过加锁在调用线程上执行,默认最大信号量是10个,Hystrix不创建线程。前者侧重提高响应时间,后者侧重节省资源。
Hystrix数据监控:监控微服务的熔断率,请求频率,延迟时间等,要求监控与被监控的微服务必须配置相应的熔断降级依赖和配置。
Feign远程调用:Feign创建一个用JAX-RS或Spring MVC注解修饰的接口的动态实现。就使用的直观效果来看,Feign使得微服务相互远程调用更像本地调用一样优雅。
Zuul服务网关:请求会经过网关,由网关负责路由到各个微服务或第三方服务,常用来做权限控制等。
admin服务监控:以图形界面的方式展示各个微服务的状态。
实战
搭建父工程(聚合工程)
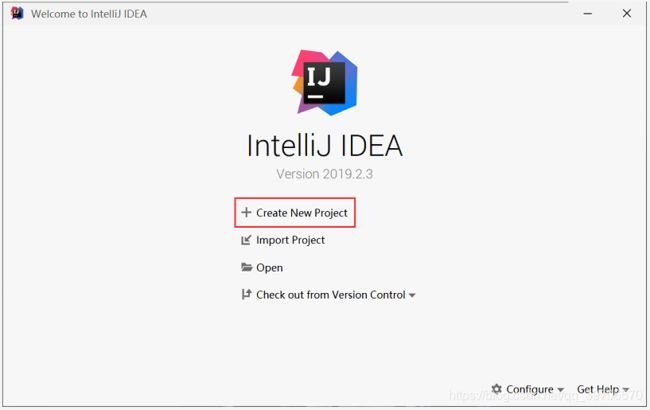
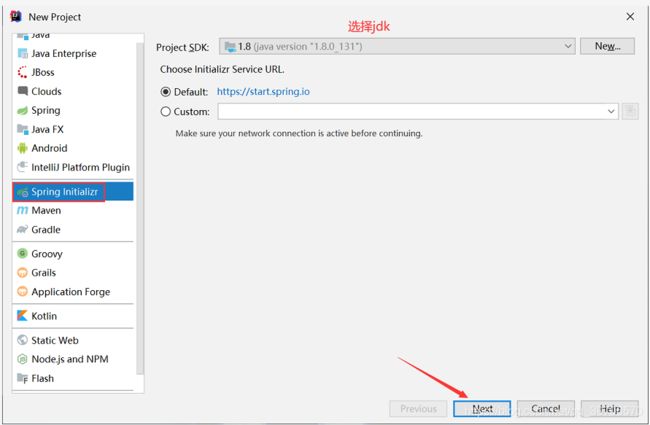
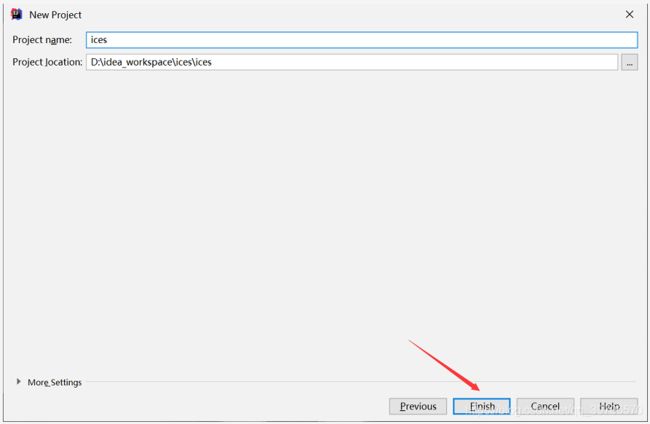
第一步:创建父工程;
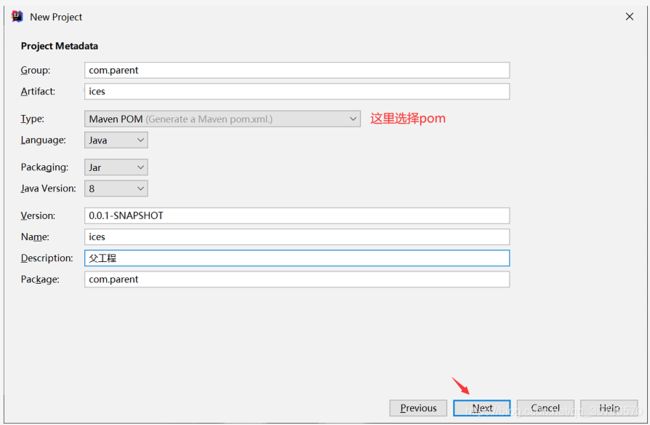

第二步:修改父工程pom.xml文件,设置打包方式为pom。
pom 搭建注册中心微服务
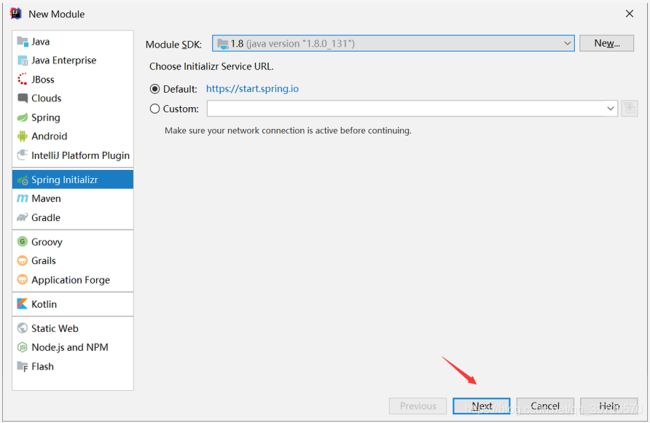
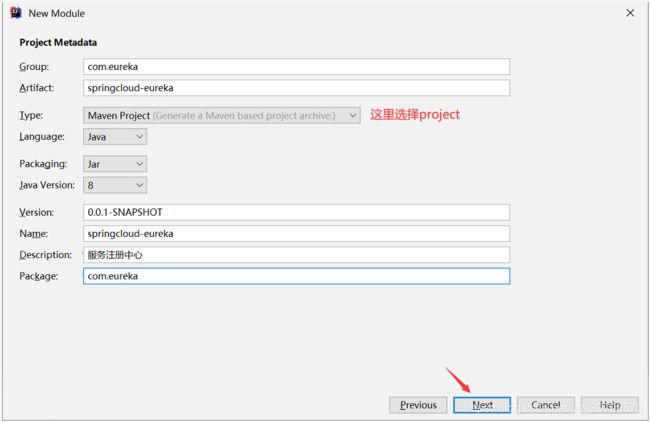
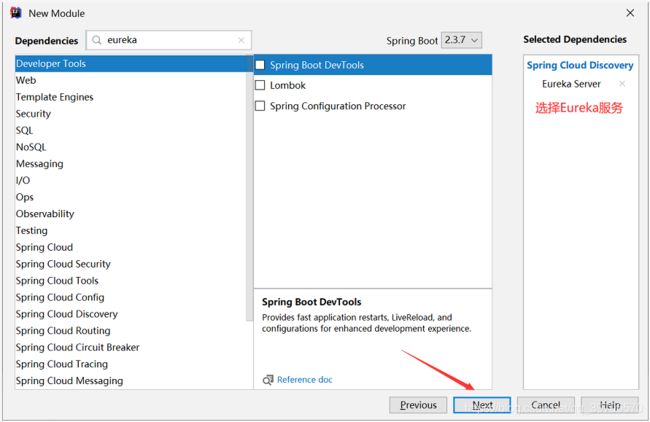
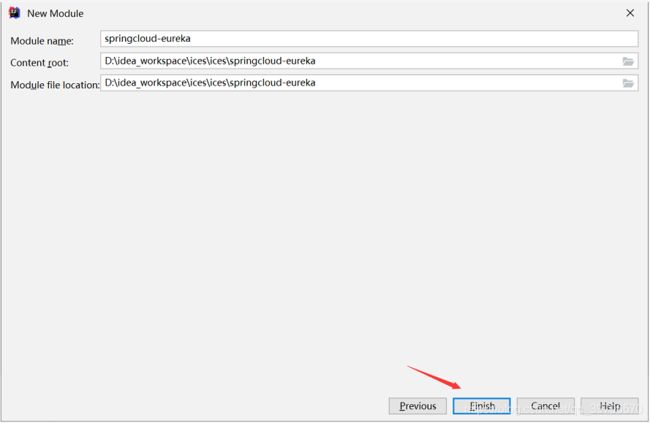
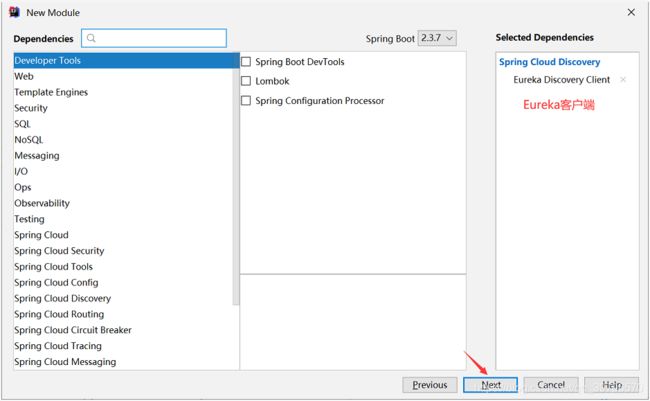
第一步:创建名称为springcloud-eureka的子工程(注意Spring Boot版本要一致);

第二步:复制父工程的pom.xml坐标,将其粘贴到子工程的
        com.parent
        ices
        0.0.1-SNAPSHOT
第三步:在启动类上添加@EnableEurekaServer,表示开启Eureka服务注册;
package com.huangshang.springcloudeureka;

import org.springframework.boot.SpringApplication;
import org.springframework.boot.autoconfigure.SpringBootApplication;
import org.springframework.cloud.netflix.eureka.server.EnableEurekaServer;

@SpringBootApplication
//开启Eureka服务注册
@EnableEurekaServer
public class SpringcloudEurekaApplication {
    public static void main(String[] args) {
        SpringApplication.run(SpringcloudEurekaApplication.class, args);
    }
}第四步:在application.properties文件内,定义这个微服务的端口,暴露eureka服务的地址;
server.port=8761
eureka.hostname=localhost

#暴露eureka服务的地址
eureka.client.serviceUrl.defaultZone=http://${eureka.hostname}:${server.port}/eureka/
#是否注册到eureka
eureka.client.registerWithEureka=false
#是否从eureka中拉取注册信息
eureka.client.fetchRegistry=false
# 关闭自我保护
eureka.server.enable-self-preservation=false
#清除无效节点,时间间隔为10秒
eureka.server.eviction-interval-timer-in-ms=1000第五步:运行启动类并访问注册中心。
http://localhost:8761/搭建生产者和消费者微服务
第一步:创建名称为springcloud-producer的子工程作为生产者(服务提供方),并添加Eureka客户端依赖(略);
第三步:复制父工程的pom.xml坐标,将其粘贴到子工程的
        com.parent
        ices
        0.0.1-SNAPSHOT
第四步:在启动类上添加@EnableEurekaClient,表示向Eureka注册中心注册自己的信息;
package com.producer;

import org.springframework.boot.SpringApplication;
import org.springframework.boot.autoconfigure.SpringBootApplication;
import org.springframework.cloud.netflix.eureka.EnableEurekaClient;

@SpringBootApplication
@EnableEurekaClient
public class SpringcloudProducerApplication {

    public static void main(String[] args) {
        SpringApplication.run(SpringcloudProducerApplication.class, args);
    }
}
第五步:在application.properties文件内,定义这个微服务的端口,根据暴露的eureka服务地址注册自己的信息;
#自定义微服务名称
spring.application.name=SPRINGCLOUD-PRODUCER
#端口
server.port=8081
#根据刚才定义的注册中心的对外暴露的地址填写。
eureka.client.serviceUrl.defaultZone=http\://localhost\:8761/eureka/
#每隔3秒拉取最新的注册列表(默认30秒)
eureka.client.registry-fetch-interval-seconds=3
#心跳间隔时间为3秒(默认30秒)
eureka.instance.lease-renewal-interval-in-seconds=3
#6秒没有接收到心跳则剔除微服务(默认90秒)
eureka.instance.lease-expiration-duration-in-seconds=6第六步:启动该微服务,再刷新注册中心,此时生产者微服务已经出现在了服务列表;
第七步:重复以上步骤,再搭建名称为springcloud-consumer的子工程作为服务消费者,注意设置不同的端口和微服务名称(略);
第八步:给springcloud-producer微服务创建两个简单的接口(get和post请求),且能正常进行本地调用;
package com.producer.order.controller;

import org.springframework.web.bind.annotation.GetMapping;
import org.springframework.web.bind.annotation.PostMapping;
import org.springframework.web.bind.annotation.RequestMapping;
import org.springframework.web.bind.annotation.RestController;

@RestController
@RequestMapping("/order")
public class OrderController {
    @GetMapping("/getFun")
    public String getFun(){
        return "getFun";
    }
    @PostMapping("/postFun")
    public String postFun(){
        return "postFun";
    }
}第九步:给springcloud-consumer微服务的启动类添加RestTemplate对象;
package com.consumer;

import org.springframework.boot.SpringApplication;
import org.springframework.boot.autoconfigure.SpringBootApplication;
import org.springframework.cloud.client.loadbalancer.LoadBalanced;
import org.springframework.cloud.netflix.eureka.EnableEurekaClient;
import org.springframework.context.annotation.Bean;
import org.springframework.web.client.RestTemplate;

@SpringBootApplication
@EnableEurekaClient
public class SpringcloudConsumerApplication {
    @Bean
    @LoadBalanced
    RestTemplate restTemplate() {
        return new RestTemplate();
    }

    public static void main(String[] args) {
        SpringApplication.run(SpringcloudConsumerApplication.class, args);
    }

}
第十步:给springcloud-consumer创建一个简单的接口,并通过生产者微服务的名称调用生产者提供的接口;
package com.consumer.user.controller;

import com.consumer.user.service.UserServiceInter;
import org.springframework.web.bind.annotation.GetMapping;
import org.springframework.web.bind.annotation.RequestMapping;
import org.springframework.web.bind.annotation.RestController;

import javax.annotation.Resource;

@RestController
@RequestMapping("/user")
public class UserController {
    @Resource
    private UserServiceInter userServiceInter;
    @GetMapping("/fun")
    public String fun(){
        return userServiceInter.fun();
    }
}
package com.consumer.user.service.impl;

import com.consumer.user.service.UserServiceInter;
import org.springframework.beans.factory.annotation.Autowired;
import org.springframework.stereotype.Service;
import org.springframework.web.client.RestTemplate;

@Service
public class UserServiceImpl implements UserServiceInter {

    public static String SERVIER_NAME = "SPRINGCLOUD-PRODUCER";

    @Autowired
    private RestTemplate restTemplate;

    @Override
    public String fun() {
        //简单演示get和post请求
        String getFun = restTemplate.getForObject("http://" + SERVIER_NAME + "/order/getFun", String.class);
        String postFun = restTemplate.postForObject("http://" + SERVIER_NAME + "/order/postFun", null,String.class);
        return getFun+"    "+postFun;
    }
}
第十一步:启动项目,访问springcloud-consumer微服务的接口,观察是否调用springcloud-producer微服务的接口。
http://localhost:8082/user/fun新增Eureka用户认证
第一步:在注册中心微服务的pom.xml中新增security依赖;
            org.springframework.boot
            spring-boot-starter-security
第二步:新增security配置类WebSecurityConfigurer;
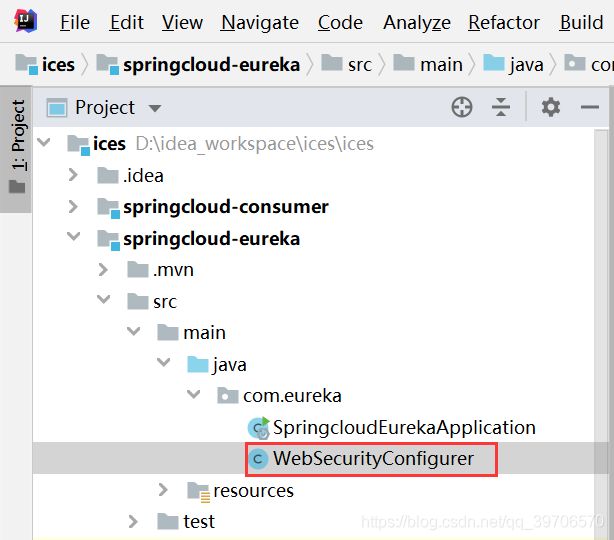
package com.eureka;

import org.springframework.security.config.annotation.web.builders.HttpSecurity;
import org.springframework.security.config.annotation.web.configuration.EnableWebSecurity;
import org.springframework.security.config.annotation.web.configuration.WebSecurityConfigurerAdapter;

@EnableWebSecurity
public class WebSecurityConfigurer extends WebSecurityConfigurerAdapter {
    @Override
    protected void configure(HttpSecurity http) throws Exception {
        //关闭csrf
        http.csrf().disable();
        //开启认证:URL格式登录必须是httpBasic
        http.authorizeRequests().anyRequest().authenticated().and().httpBasic();
    }
}
第三步:在注册中心的application.properties文件内开启security认证,并设置用户名和密码;
#开启认证
security.basic.enabled=true
#用户名
spring.security.user.name=ices
#密码
spring.security.user.password=ices123第四步:在其他微服务的application.properties文件内新增认证信息;
#根据刚才定义的注册中心的对外暴露的地址填写。(security认证格式:用户名:密码@)
eureka.client.serviceUrl.defaultZone=http\://ices:ices123@localhost\:8761/eureka/第五步:启动注册中心和其他微服务,查看注册列表(略)。
新增健康检测
第一步:健康检测的对象是各个微服务,所以需要向各个微服务中新增健康检测相关的依赖,这里以springcloud-producer微服务为例;
            org.springframework.boot
            spring-boot-starter-actuator
第二步:application.properties文件内开启健康检测;
#开启健康检测
eureka.client.healthcheck.enabled=true第三步:新增健康检测类,这里以检测连接MySQL为案例,省略连接的步骤;
package com.producer.check;

import org.springframework.scheduling.annotation.Scheduled;
import org.springframework.stereotype.Component;
import org.springframework.web.bind.annotation.GetMapping;
import org.springframework.web.bind.annotation.RestController;

/**
 * 检查MySQL连接
 */
@RestController
@Component
public class CheckMySQL {
    public static boolean CANCONNECTION=true;
    @GetMapping("/checkConnection")
    public void checkConnection(boolean b){
        //连接MySQL的业务在此处省略
        CANCONNECTION=b;
    }
}
package com.producer.check;

import org.springframework.boot.actuate.health.Health;
import org.springframework.boot.actuate.health.HealthIndicator;
import org.springframework.boot.actuate.health.Status;
import org.springframework.context.annotation.Configuration;

@Configuration
public class HealthIndicatorImpl implements HealthIndicator {
    @Override
    public Health health() {
        if(CheckMySQL.CANCONNECTION){
            return new Health.Builder(Status.UP).build();
        }
        return new Health.Builder(Status.DOWN).build();
    }
}
第四步:启动项目,查看健康状态;
http://localhost:8081/actuator/health第五步:设置MySQL不可连接,过一段时间后刷新注册列表,查看springcloud-producer微服务的状态是否为down(略);
http://localhost:8081/checkConnection?b=false第六步:新增定时检测:启动类加@EnableScheduling注解,修改CheckMySQL类检测方法(我这里是随机产生布尔值,具体业务省略了)。
package com.producer.check;

import org.springframework.scheduling.annotation.Scheduled;
import org.springframework.stereotype.Component;
import org.springframework.web.bind.annotation.GetMapping;
import org.springframework.web.bind.annotation.RestController;

import java.util.Random;

/**
 * 检查MySQL连接
 */
@RestController
@Component
public class CheckMySQL {
    public static boolean CANCONNECTION=true;
    //每隔20秒钟检测MySQL连接
    @Scheduled(fixedRate=20000)
    @GetMapping("/checkConnection")
    public void checkConnection(){
    //连接MySQL的业务在此处省略,为了查看效果,我随机让连接保持与断开。
        CANCONNECTION = Math.random()<0.5;
    }
}
手动维护注册列表
剔除微服务
#手动剔除:服务名称为=SPRINGCLOUD-PRODUCER,且实例为=localhost:SPRINGCLOUD-PRODUCER:8081的微服务实例。
#请求方式:delete
localhost:8761/eureka/apps/SPRINGCLOUD-PRODUCER/localhost:SPRINGCLOUD-PRODUCER:8081
up微服务
#手动上线:服务名称为=SPRINGCLOUD-PRODUCER,且实例为=localhost:SPRINGCLOUD-PRODUCER:8081的微服务实例。
#请求方式:put
localhost:8761/eureka/apps/SPRINGCLOUD-PRODUCER/localhost:SPRINGCLOUD-PRODUCER:8081/status?value=UP
down微服务
#手动下线:服务名称为=SPRINGCLOUD-PRODUCER,且实例为=localhost:SPRINGCLOUD-PRODUCER:8081的微服务实例。
#请求方式:put
localhost:8761/eureka/apps/SPRINGCLOUD-PRODUCER/localhost:SPRINGCLOUD-PRODUCER:8081/status?value=DOWN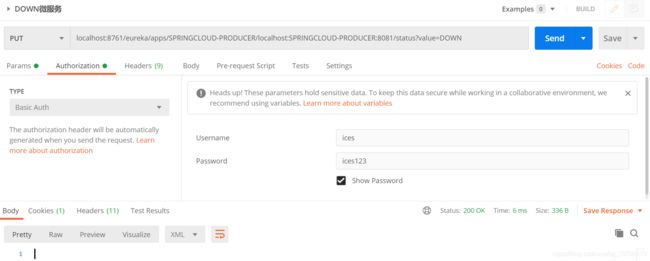
搭建Eureka注册中心集群
第一步:给注册中心微服务创建两个配置文件(演示集群两个注册中心),结构和内容如下;
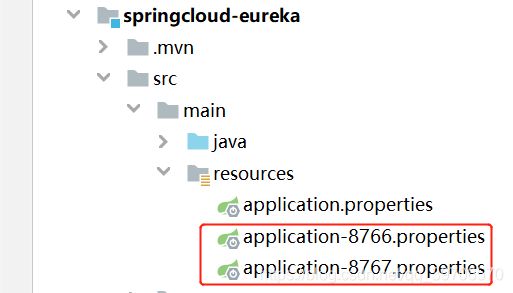
##################这是application-8766.properties的内容##################
server.port=8766
#自定义微服务名称
spring.application.name=SPRINGCLOUD-EUREKA
#是否注册到eureka
eureka.client.registerWithEureka=true
#是否从eureka中拉取注册信息
eureka.client.fetchRegistry=true
#eureka服务的地址(security认证格式:用户名:密码@)
eureka.client.serviceUrl.defaultZone=http://ices:[email protected]:8762/eureka/
#关闭自我保护模式
eureka.server.enable-self-preservation=false
#账号认证
security.basic.enabled=true
spring.security.user.name=ices
spring.security.user.password=ices8766
##################这是application-8767.properties的内容##################
server.port=8767
#自定义微服务名称
spring.application.name=SPRINGCLOUD-EUREKA
#是否注册到eureka
eureka.client.registerWithEureka=true
#是否从eureka中拉取注册信息
eureka.client.fetchRegistry=true
#eureka服务的地址(security认证格式:用户名:密码@)
eureka.client.serviceUrl.defaultZone=http//ices:[email protected]:8761/eureka/
#关闭自我保护模式
eureka.server.enable-self-preservation=false
#账号认证
security.basic.enabled=true
spring.security.user.name=ices
spring.security.user.password=ices8767第二步:打包springcloud-eureka微服务;
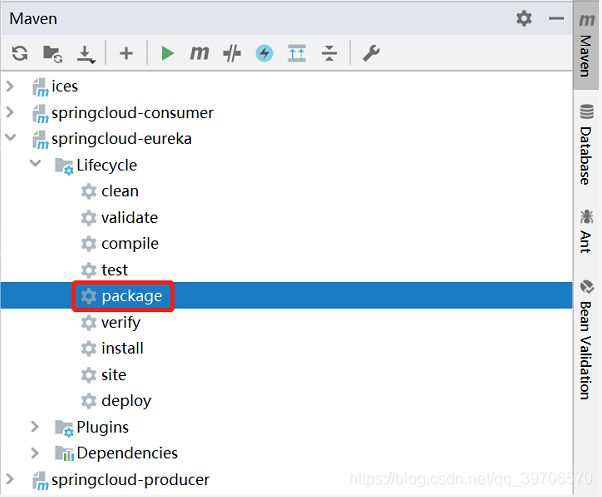
第三步:打开两个springcloud-eureka微服务的终端;

第四步:根据不同的配置文件来启动springcloud-eureka微服务的jar包;
#注意:因为注册中心微服务的相互注册的关系,所以会有启动的jar包出现找不到其他注册中心的异常,这是正常现象。
java -jar springcloud-eureka-0.0.1-SNAPSHOT.jar --spring.profiles.active=8766
java -jar springcloud-eureka-0.0.1-SNAPSHOT.jar --spring.profiles.active=8767
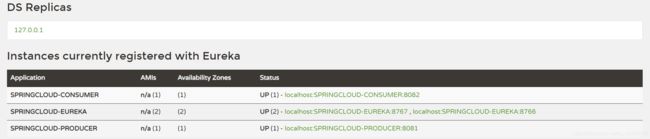
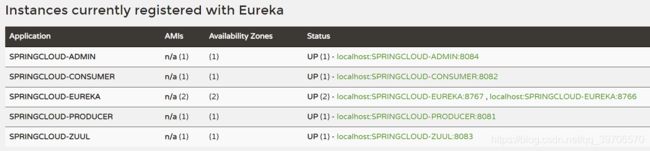
第五步:访问注册中心,查看注册列表是否被相互注册,是否存在副本;
http://127.0.0.1:8766/
http://127.0.0.1:8767/
第六步:配置各个微服务向注册中心集群注册信息;
#微服务向注册中心集群注册自己的信息,以逗号隔开多个实例。
eureka.client.serviceUrl.defaultZone=http://ices:[email protected]:8767/eureka/,http://ices:[email protected]:8766/eureka/
第七步:启动各个微服务并刷新注册中心,查看注册中心集群的每个实例。
远程调用&负载均衡
第一步:这里以springcloud-consumer微服务对springcloud-producer微服务的远程调&负载均衡为例,在springcloud-consumer微服务中配置一下信息(ribbon有多种使用方法,这里只介绍application.properties配置文件的方法。)。
#true:从注册中心拿微服务实例;false:使用微服务名称.ribbon.listOfServers指定的微服务实例
ribbon.eureka.enabled=true
#指定调用SPRINGCLOUD-PRODUCER微服务的实例:localhost:SPRINGCLOUD-PRODUCER:8088,localhost:SPRINGCLOUD-PRODUCER:8089
#SPRINGCLOUD-PRODUCER.ribbon.listOfServers=localhost:SPRINGCLOUD-PRODUCER:8088,localhost:SPRINGCLOUD-PRODUCER:8089
#请求连接超时时间:3秒
SPRINGCLOUD-PRODUCER.ribbon.ConnectTimeout=3000
#请求处理的超时时间:3秒
SPRINGCLOUD-PRODUCER.ribbon.ReadTimeout=3000

#请求失败后是否重试
#SPRINGCLOUD-PRODUCER.ribbon.OkToRetryOnAllOperations=true
#切换实例的重试次数
#SPRINGCLOUD-PRODUCER.ribbon.MaxAutoRetriesNextServer=2
#服务连不上后重试连接次数
#SPRINGCLOUD-PRODUCER.ribbon.MaxAutoRetries=2
#随机:com.netflix.loadbalancer.RandomRule;
#轮询:com.netflix.loadbalancer.RoundRobinRule;
#权重(响应时间越长权重越小):com.netflix.loadbalancer.WeightedResponseTimeRule
SPRINGCLOUD-PRODUCER.ribbon.NFLoadBalancerRuleClassName=com.netflix.loadbalancer.RandomRule
服务隔离&降级
第一步:以springcloud-consumer微服务为例,在pom.xml中添加相关依赖;
            org.springframework.cloud
            spring-cloud-starter-netflix-hystrix
第二步:在启动类上加@EnableCircuitBreaker注解,表示开启断路器(略);
第三步:仍以UserController类做演示案例,通过CountDownLatch来模拟高并发场景;
package com.consumer.user.controller;
import com.consumer.user.service.UserServiceInter;
import org.springframework.web.bind.annotation.GetMapping;
import org.springframework.web.bind.annotation.RequestMapping;
import org.springframework.web.bind.annotation.RestController;
import javax.annotation.Resource;
import java.util.concurrent.CountDownLatch;

@RestController
@RequestMapping("/user")
public class UserController {
    @Resource
    private UserServiceInter userServiceInter;

    @GetMapping("/fun")
    public String fun() {
        //String fun = userServiceInter.fun();
        return userServiceInter.hystrixDemo();
    }

    //并发数量
    private static final int THREAD_NUM = 6;
    private CountDownLatch cdl = new CountDownLatch(THREAD_NUM);
    @GetMapping("/hystrixDemo")
    public void hystrixDemo() {
        for (int i = 0; i < THREAD_NUM; i++) {
            Thread t = new Thread(() -> {
                try {
                    // 减一
                    cdl.countDown();
                    // 等待
                    cdl.await();
                } catch (InterruptedException e) {
                    e.printStackTrace();
                }
                // 并发执行(这里写业务。)
                System.out.println("并发测试,线程ID:"+Thread.currentThread().getId()+"  线程NAME:"+Thread.currentThread().getName());
                userServiceInter.hystrixDemo();
            });
            t.start();
        }
        try {
            // 子线程创建完以后主线程退出,并没有等待子线程作业,所以先等待子线程作业。
            Thread.sleep(1000);
        } catch (InterruptedException e) {
            e.printStackTrace();
        }
    }
}第四步:在业务层的方法上设置隔离类型和相关属性,具体如下;
package com.consumer.user.service.impl;

import com.consumer.user.service.UserServiceInter;
import com.netflix.hystrix.contrib.javanica.annotation.HystrixCommand;
import com.netflix.hystrix.contrib.javanica.annotation.HystrixProperty;
import org.springframework.beans.factory.annotation.Autowired;
import org.springframework.stereotype.Service;
import org.springframework.web.client.RestTemplate;

@Service
public class UserServiceImpl implements UserServiceInter {

    public static String SERVIER_NAME = "SPRINGCLOUD-PRODUCER";

    @Autowired
    private RestTemplate restTemplate;


    @Override
    public String fun() {
        String getFun = restTemplate.getForObject("http://" + SERVIER_NAME + "/order/getFun", String.class);
        String postFun = restTemplate.postForObject("http://" + SERVIER_NAME + "/order/postFun", null,String.class);
        return getFun+"    "+postFun;
    }

    //线程隔离
    @HystrixCommand(
            //Hystrix数据监控时的唯一标志,通常和方法名一样。
            commandKey = "hystrixDemo",
            //指定降级方法名称,要求降级方法与本方法的返回值&参数列表一致。
            fallbackMethod ="hystrixDemoSpare",
            //控制属性
            commandProperties = {
                    //线程池隔离策略
                    @HystrixProperty(name = "execution.isolation.strategy", value = "THREAD"),
                    //线程超时时间:10秒
                    @HystrixProperty(name = "execution.isolation.thread.timeoutInMilliseconds", value = "10000")
            },
            threadPoolProperties ={
                    //最大线程数:5个,默认10个
                    @HystrixProperty(name = "coreSize", value = "5")
            },
            //groupKey和threadPoolKey同时配置:threadPoolKey相同的使用同一个线程池。
            //只配置groupKey:groupKey相同的使用同一个线程池。
            groupKey = "hystrixDemoKey",
            threadPoolKey = "hystrixDemoThreadPool"
    )
    @Override
    public String hystrixDemo() {
        System.out.println("hystrixDemo:hystrixDemo正常执行。线程ID:"+Thread.currentThread().getId()+"  线程NAME:"+Thread.currentThread().getName());
        return "hystrixDemo:hystrixDemo正常执行。";
    }

    /**
     * 该方法是hystrixDemo方法的降级方法,根据业务,该方法还可以被继续降级。
     * @return
     */
    public String hystrixDemoSpare(){
        System.out.println("hystrixDemoSpare:hystrixDemo降级处理。线程ID:"+Thread.currentThread().getId()+"  线程NAME:"+Thread.currentThread().getName());
        return "系统繁忙,请稍后再试。";
    }
}
第五步:启动项目,运行接口,根据线程ID得出:使用线程池隔离策略,Hystrix会创建线程池调用接口。
http://localhost:8082/user/hystrixDemo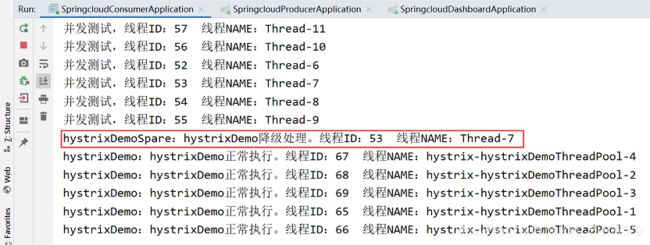
Hystrix数据监控
第一步:创建springcloud-dashboard微服务,在pom.xml中添加相关依赖;
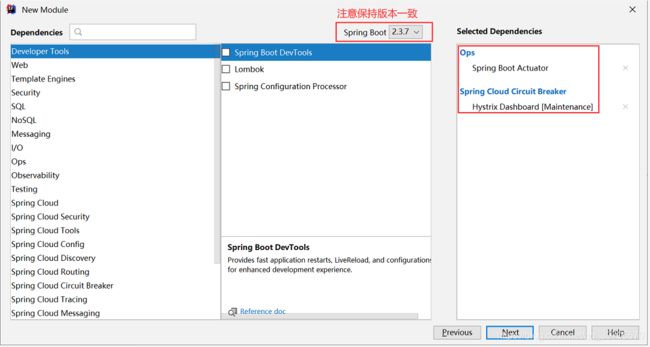
第二步:在启动类上加@EnableHystrixDashboard表示开启Hystrix仪表板(略);
第三步:配置application.properties文件;
server.port=8099
# 暴露监控端点
management.endpoints.web.exposure.include=*
hystrix.dashboard.proxy-stream-allow-list=*第四步:这里演示监控springcloud-consumer微服务,需要在springcloud-consumer微服务的application.properties配置文件内加配置;
#开放所有的监控接口
management.endpoints.web.exposure.include=*第五步:启动微服务,访问Hystrix数据监控页面;
localhost:8099/hystrix#填写内容
http://localhost:8082/actuator/hystrix.stream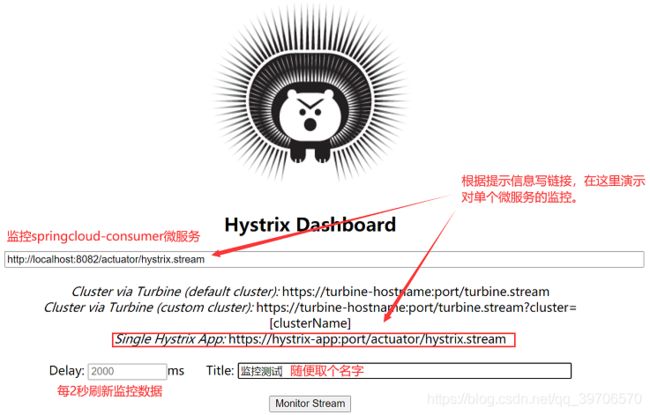
第六步:调用接口,观察Hystrix数据监控页面。
http://localhost:8082/user/hystrixDemo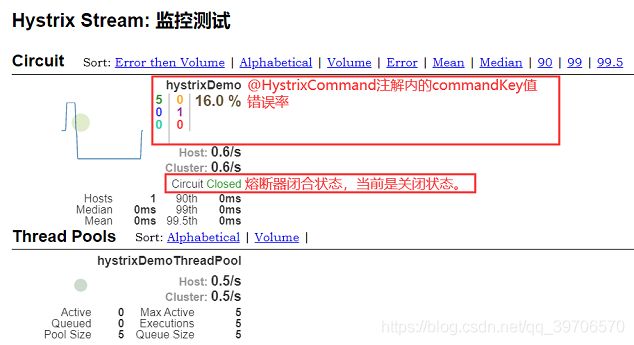
Hystrix熔断器
第一步:以springcloud-consumer微服务为例,创建以下类做案例演示;
package com.consumer.user.controller;

import com.consumer.user.service.CircuitInter;
import org.springframework.web.bind.annotation.GetMapping;
import org.springframework.web.bind.annotation.RequestMapping;
import org.springframework.web.bind.annotation.RestController;

import javax.annotation.Resource;

@RestController
@RequestMapping("/circuit")
public class CircuitController {
    @Resource
    private CircuitInter circuitInter;

    /**
     * Hystrix熔断器测试
     * 熔断开启必须同时满足三个条件:1、一段时间内(默认10秒);2、请求次数达到阈值(默认20次);3、失败率达到阈值(默认50%)。
     * @param size 循环次数
     * @param divisor 除数
     * @param sleepTime 每次调用的间隔时间,单位:毫秒
     * @throws InterruptedException
     */
    @GetMapping("/circuitFun")
    public void circuitFun(int size,int divisor,int sleepTime) throws InterruptedException {
        //循环size次
        for(int i=0;i
package com.consumer.user.service.impl;
import com.consumer.user.service.CircuitInter;
import com.netflix.hystrix.contrib.javanica.annotation.HystrixCommand;
import org.springframework.stereotype.Service;
@Service
public class CircuitImpl implements CircuitInter {
//线程隔离
@HystrixCommand(
//Hystrix数据监控时的唯一标志,通常和方法名一样。
commandKey = "circuitFun",
//指定降级方法名称,要求降级方法与本方法的返回值&参数列表一致。
fallbackMethod ="circuitFunSpare"
)
@Override
public void circuitFun(int divisor) {
System.out.println("circuitFun:circuitFun正常执行。线程ID:"+Thread.currentThread().getId()+" 线程NAME:"+Thread.currentThread().getName());
int i=1/divisor;
}
/**
* 该方法是circuitFun方法的降级方法,根据业务,该方法还可以被继续降级。
* @return
*/
public void circuitFunSpare(int divisor){
System.out.println("circuitFunSpare:circuitFun降级处理。线程ID:"+Thread.currentThread().getId()+" 线程NAME:"+Thread.currentThread().getName());
}
}
第二步:在application.properties文件中配置熔断器的阈值;
#全局超时时间
hystrix.command.default.execution.isolation.thread.timeoutInMilliseconds=5000
#熔断器开启之后,设置休眠时间5秒;circuitFun:@HystrixCommand中commandKey值
hystrix.command.circuitFun.circuitBreaker.sleepWindowInMilliseconds=5000
#熔断器开启触发条件1:5秒时间内(默认10s);circuitFun:@HystrixCommand中commandKey值
hystrix.command.circuitFun.metrics.rollingStats.timeInMilliseconds =5000
#熔断器开启触发条件2:请求次数阈值10个(默认20个);circuitFun:@HystrixCommand中commandKey值
hystrix.command.circuitFun.circuitBreaker.requestVolumeThreshold=10
#熔断器开启触发条件3:出错百分比阈值(默认50%);circuitFun:@HystrixCommand中commandKey值
hystrix.command.circuitFun.circuitBreaker.errorThresholdPercentage =0.5第三步:启动springcloud-consumer微服务和springcloud-dashboard微服务,访问以下接口进行测试,观察Hytrix监控页面熔断器的状态。
#熔断开启必须同时满足三个条件:
#1、5s时间内;2、请求次数达到阈值10次;3、失败率达到阈值50%。

#测试链接如下:
#满足条件1、条件3的测试链接:
http://localhost:8082/circuit/circuitFun?size=9&divisor=0&sleepTime=0
#满足条件2、条件3的测试链接:
http://localhost:8082/circuit/circuitFun?size=9&divisor=0&sleepTime=1000
#满足条件1、条件2、条件3的测试链接:
http://localhost:8082/circuit/circuitFun?size=10&divisor=0&sleepTime=0
#熔断器半开启状态后的测试链接:
http://localhost:8082/circuit/circuitFun?size=1&divisor=0&sleepTime=0
http://localhost:8082/circuit/circuitFun?size=1&divisor=1&sleepTime=0总结:Hystrix熔断器工作流程如下:
Feign远程调用
第一步:以springcloud-consumer微服务远程调用springcloud-producer微服务作为演示案例,需要在springcloud-consumer微服务新增以下依赖;
            org.springframework.cloud
            spring-cloud-starter-openfeign
第二步:给springcloud-consumer微服务启动类加@EnableFeignClients;
第三步:给springcloud-producer微服务创建演示所用的接口;
package com.producer.bean;

import lombok.Data;

import java.io.Serializable;

@Data
public class Student implements Serializable {
    private Long id;
    private String name;
    private Integer age;
    private Integer classNo;

    public Student(Long id, String name, Integer age, Integer classNo) {
        this.id = id;
        this.name = name;
        this.age = age;
        this.classNo = classNo;
    }
}
package com.producer.order.controller;
import com.producer.bean.Student;
import org.springframework.web.bind.annotation.*;
@RestController
@RequestMapping("/student")
public class StudentController {
@PostMapping("findStudentById")
public Student findStudentById(@RequestParam("id") Long id) {
return new Student(1L, "张三", 12, 123);
}
@GetMapping("findStudentTotal")
public Long findStudentTotal(@RequestParam("classNo") Integer classNo) {
return 100L;
}
@PostMapping("saveStudent")
public Student saveStudent(@RequestBody Student student) {
return new Student(2L, "李四", 12, 123);
}
}第四步:给springcloud-consumer微服务创建演示所用的接口;
package com.consumer.bean;


import lombok.Data;

import java.io.Serializable;

@Data
public class Student implements Serializable {
    private Long id;
    private String name;
    private Integer age;
    private Integer classNo;

    public Student(Long id, String name, Integer age, Integer classNo) {
        this.id = id;
        this.name = name;
        this.age = age;
        this.classNo = classNo;
    }
}
package com.consumer.feign;
import com.consumer.bean.Student;
import org.springframework.cloud.openfeign.FeignClient;
import org.springframework.web.bind.annotation.GetMapping;
import org.springframework.web.bind.annotation.PostMapping;
import org.springframework.web.bind.annotation.RequestBody;
import org.springframework.web.bind.annotation.RequestParam;
@FeignClient(
//name表示调用服务名为:SPRINGCLOUD-PRODUCER的项目。
//path表示接口前缀。
name = "SPRINGCLOUD-PRODUCER", path = "/student",
//该接口下面的方法的降级方法放在该类下面。
fallbackFactory = StudentInterFallbackFactory.class
)
public interface StudentInter {
//请求方式,返回值,参数要求一致。
@PostMapping("findStudentById")
public Student findStudentById(@RequestParam("id") Long id) ;
@GetMapping("findStudentTotal")
public Long findStudentTotal(@RequestParam("classNo") Integer classNo) ;
@PostMapping("saveStudent")
public Student saveStudent(@RequestBody Student student) ;
}package com.consumer.feign;
import com.consumer.bean.Student;
import org.springframework.web.bind.annotation.*;
import javax.annotation.Resource;
@RestController
@RequestMapping("/student")
public class StudentController {
@Resource
private StudentInter studentInter;
@PostMapping("findStudentById")
public Student findStudentById(@RequestParam("id") Long id) {
return studentInter.findStudentById(id);
}
@GetMapping("findStudentTotal")
public Long findStudentTotal(@RequestParam("classNo") Integer classNo) {
return studentInter.findStudentTotal(classNo);
}
@PostMapping("saveStudent")
public Student saveStudent(@RequestBody Student student) {
return studentInter.saveStudent(student);
}
}package com.consumer.feign;
import com.consumer.bean.Student;
import feign.hystrix.FallbackFactory;
import org.springframework.stereotype.Component;
/**
* StudentInter接口中,各个方法的降级方法。
*/
@Component
public class StudentInterFallbackFactory implements FallbackFactory {
@Override
public StudentInter create(Throwable throwable) {
if(throwable == null) {
return null;
}
//获取异常
final String msg = throwable.getMessage();
return new StudentInter() {
@Override
public Student findStudentById(Long id) {
System.out.println("=============findStudentById方法异常:"+msg);
return null;
}
@Override
public Long findStudentTotal(Integer classNo) {
System.out.println("=============findStudentTotal方法异常:"+msg);
return null;
}
@Override
public Student saveStudent(Student student) {
System.out.println("=============saveStudent方法异常:"+msg);
return null;
}
};
}
} 第五步:配置springcloud-consumer微服务application.properties文件;
#开启feign的熔断器功能
feign.hystrix.enabled=true
#开启feign的压缩功能
feign.compression.request.enabled=true第六步:启动各个微服务,测试相关接口。
#post请求
localhost:8082/student/findStudentById?id=1
#get请求
localhost:8082/student/findStudentTotal?classNo=1
#post请求,注意参数传递。
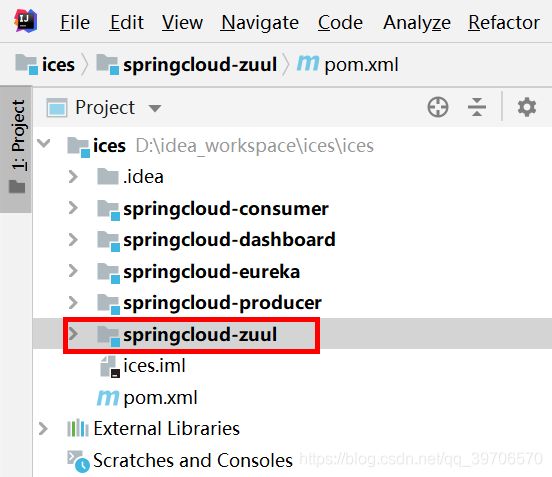
localhost:8082/student/saveStudent服务网关
第一步:创建网关管理的微服务springcloud-zuul,并添加相关依赖;
            org.springframework.cloud
            spring-cloud-starter-netflix-eureka-client


            org.springframework.cloud
            spring-cloud-starter-netflix-zuul
第二步:在启动类添加@EnableEurekaClient和@EnableZuulProxy,表示注册到注册中心,开启Zuul网关服务;
第三步:给springcloud-zuul微服务配置注册信息与路由地址,这里演示Zuul组件对springcloud-consumer微服务和springcloud-producer微服务的路由;
#自定义微服务名称
spring.application.name=SPRINGCLOUD-ZUUL
#端口
server.port=8083
#根据刚才定义的注册中心的对外暴露的地址填写。(security认证格式:用户名:密码@)
eureka.client.serviceUrl.defaultZone=http://ices:[email protected]:8767/eureka/,http://ices:[email protected]:8766/eureka/
#每隔3秒拉取最新的注册列表(默认30秒)
eureka.client.registry-fetch-interval-seconds=10
#心跳间隔时间为3秒(默认30秒)
eureka.instance.lease-renewal-interval-in-seconds=10
#6秒没有接收到心跳则剔除微服务(默认90秒)
eureka.instance.lease-expiration-duration-in-seconds=20
#开启健康检测
eureka.client.healthcheck.enabled=true

######################################################################
#当请求链接以/consumer开头,则路由到微服务名称为:SPRINGCLOUD-CONSUMER
######################################################################
#通配符使用注意事项:*表示任意数量字符,不包含多级目录;**表示任意数量字符,包含多级目录;?表示单个字符。
#格式:zuul.routes.自定义字符串.path=接口结构
zuul.routes.springcloud-consumer.path=/consumer/**
#格式:zuul.routes.自定义字符串.service-id=微服务名称
zuul.routes.springcloud-consumer.service-id=SPRINGCLOUD-CONSUMER

######################################################################
#指定zuul微服务本地调用
######################################################################
#访问springcloud-zuul微服务的本地
zuul.routes.springcloud-zuul-local.path=/teacher/**
zuul.routes.springcloud-zuul-local.url=forward:/teacher

######################################################################
#指定请求访问具体的实例
######################################################################
#指定访问springcloud-producer微服务的某个实例
zuul.routes.springcloud-producer-order.path=/order/**
zuul.routes.springcloud-producer-order.url=http://localhost:8081/

######################################################################
#取消zuul网关路由
######################################################################
# 配置的服务将不被zuul路由,用逗号分隔多个微服务名称。
#zuul.ignored-services=SPRINGCLOUD-EUREKA
# 所有服务都不被zuul路由,只有配置了zuul网关的微服务才可以。
zuul.ignored-services=*
# 请求路径中包含/user/就不被zuul网关代理。
zuul.ignored-patterns=/**/user/**

######################################################################
#指定zuul网关路由
######################################################################
# 请求路径的前缀为/order的请求将由zuul网关路由。
#zuul.prefix=/order第四步:启动各个微服务,演示网关路由规则是否生效。
#根据服务名网关路由
localhost:8083/consumer/circuit/circuitFun?size=1&divisor=1&sleepTime=1
#zuul本地访问测试
localhost:8083/teacher/fun
#访问指定的注册列表中的实例
localhost:8083/order/order/getFun
#访问不被zuul网关路由的地址(该请求会出现404错误,说明被zuul网关忽略了。)
localhost:8083/consumer/user/fun
admin服务监控
第一步:创建springcloud-admin微服务,相关依赖如下;
            org.springframework.boot
            spring-boot-starter-security


            org.springframework.boot
            spring-boot-starter-web


            de.codecentric
            spring-boot-admin-starter-server


            de.codecentric
            spring-boot-admin-server-ui


            org.springframework.cloud
            spring-cloud-starter-netflix-eureka-client
第二步:springcloud-admin微服务的启动类上加@EnableEurekaClient和@EnableAdminServer两个注解
第三步:配置springcloud-admin微服务的application.properties文件;
spring.application.name=SPRINGCLOUD-ADMIN
server.port=8084
#是否注册到eureka
eureka.client.registerWithEureka=true
#是否从eureka中拉取注册信息
eureka.client.fetchRegistry=true
#注册服务
eureka.client.serviceUrl.defaultZone=http://ices:[email protected]:8767/eureka/,http://ices:[email protected]:8766/eureka/

# 登录校验
spring.security.user.name=ices
spring.security.user.password=ices
eureka.instance.metadata-map.user.name=${spring.security.user.name}
eureka.instance.metadata-map.user.password=${spring.security.user.password}第四步:给需要被监控的微服务(如:微服务)加上以下依赖;
            org.springframework.boot
            spring-boot-starter-actuator
第五步:开放springcloud-eureka微服务的授权匹配(如果需要监控springcloud-eureka微服务);
package com.eureka;

import org.springframework.security.config.annotation.web.builders.HttpSecurity;
import org.springframework.security.config.annotation.web.configuration.EnableWebSecurity;
import org.springframework.security.config.annotation.web.configuration.WebSecurityConfigurerAdapter;

@EnableWebSecurity
public class WebSecurityConfigurer extends WebSecurityConfigurerAdapter {
    @Override
    protected void configure(HttpSecurity http) throws Exception {
        //关闭csrf
        http.csrf().disable();
        //开启认证:URL格式登录必须是httpBasic
        //http.authorizeRequests().anyRequest().authenticated().and().httpBasic();
        http.authorizeRequests().antMatchers("/actuator/health/**").permitAll()   // 授权通过
                .anyRequest().authenticated().and().httpBasic();
    }
}第六步:启动各个微服务,访问admin监控页面和注册中心,观察两者之间关联。

总结
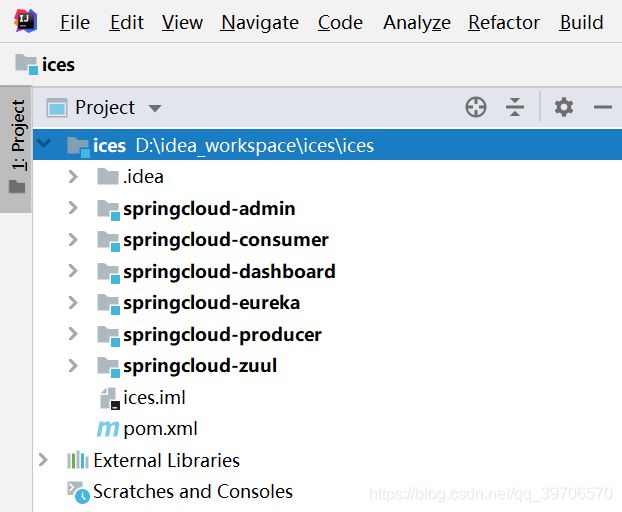
项目结构
下载地址
Spring Cloud项目技术解决方案闪电战