SilverLight2 Beta2 学习研究06、样式、模板与VSM
本部分介绍SilverLight的样式、模板与VSM。
1、样式
Styles与CSS一样,用来控制控件的外观。通过在App.xaml中<Application.Resources>节点内部定义<Style>节点来实现控件样式的定义。其中TargetType指定目标控件的类型,比如Button、TextBox等等,通过x:Key来定义类似CSS类的类名,在控件中只需写上Style="{StaticResource x:Key定义的名称}"即可实现控件的外观定义。
注意,样式中定义的属性,可以在控件中重写属性的值。代码如下:
App.xaml中的代码:
<Application.Resources>
<Style TargetType="Button" x:Key="ButtonPrompt">
<Setter Property="Background" Value="Navy"/>
<Setter Property="Foreground" Value="Coral"/>
<Setter Property="FontSize" Value="28"/>
<Setter Property="FontWeight" Value="Bold"/>
<Setter Property="Height" Value="40"/>
<Setter Property="Width" Value="300"/>
</Style>
</Application.Resources>
Page.xaml中的代码:
<StackPanel Margin="0,50,0,0" HorizontalAlignment="Center">
<Button Style="{StaticResource ButtonPrompt}" Content="StyleButton"/>
</StackPanel>
效果如下:

2、模板
SilverLight的控件模板通过把多种功能封装到一起,定制控件的外观。与Style类似ControlTemplate是写在全局页面中(App.xaml)的节点。模板中定义的各种属性,默认情况下在具体的控件中是不可以重写属性的。但是SilverLight提供了一个TemplateBinding绑定属性,以及一个控件ContentPresenter来动态定制控件的外观与内容,ContentPresenter 可以呈现分配给此控件的 Content 属性的任何 XAML。具体代码如下:
App.xaml中的代码:
<Application.Resources>
<Style TargetType="Button" x:Key="TemplateButtonPrompt">
<Setter Property="Background" Value="Navy"/>
<Setter Property="Foreground" Value="White"/>
<Setter Property="FontSize" Value="28"/>
<Setter Property="FontWeight" Value="Bold"/>
<Setter Property="HorizontalAlignment" Value="Center"/>
<Setter Property="VerticalAlignment" Value="Center"/>
<Setter Property="Height" Value="100"/>
<Setter Property="Width" Value="300"/>
</Style>
<ControlTemplate x:Key="RoundButton" TargetType="Button">
<Grid>
<Ellipse Fill="Coral" Height="{TemplateBinding Height}" Width="{TemplateBinding Width}"></Ellipse>
<ContentPresenter
Content="{TemplateBinding Content}"
Background="{TemplateBinding Background}"
Foreground="{TemplateBinding Foreground}"
FontSize="{TemplateBinding FontSize}"
HorizontalAlignment="{TemplateBinding HorizontalAlignment}"
VerticalAlignment="{TemplateBinding VerticalAlignment}">
</ContentPresenter>
</Grid>
</ControlTemplate>
</Application.Resources>
Page.xaml中的代码:
<StackPanel Margin="0,50,0,0" HorizontalAlignment="Center">
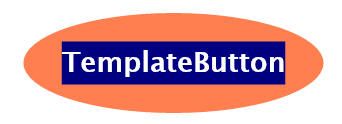
<Button Style="{StaticResource TemplateButtonPrompt}" Template="{StaticResource RoundButton}" Content="TemplateButton"/>
</StackPanel>
效果如下:

3、VSM
Silverlight 控件的两个主要组件是可视状态和可视状态转换。可视状态用于定义控件在不同状态下的外观:在处于按下、鼠标点击、禁用等状态时的外观。可视状态转换用于定义控件如何从一种可视状态转换到另一种可视状态:例如,从“正常”状态转换到“按下”状态。Silverlight 2 Beta 2 引入了一个新组件,称为视觉状态管理器 (VSM),它可以简化状态和状态转换以及协助实现更好的工具支持。借助 VSM,您可以使用 VisualState 对象封装 Storyboards 以定义状态,使用 VisualTransition 对象定义转换。然后,您可以使用 VisualStateManager 类的静态 GoToState 方法将控件转换到指定的状态以响应用户操作。(以上文字引自MSDN)
VSM视觉状态管理器(Visual State Manager),通过修改模板来实现不同状态下的响应,是与模板结合使用的一种功能,由于相关知识还没有介绍,相关Demo将在讲解Expreee Blend如何使用时介绍。
本部分主要介绍了SilverLight的样式、模板与VSM,下一讲我们介绍用户控件。