用python3+opencv3.4+dlib库采集人脸
一 准备工作
1 python
查看python版本,用命令提示符
python --version
2 opencv
使用命令
pip3 install opencv_python
3 dlib库
pip install dlib-19.19.0-cp38-cp38-win_amd64.whl.whl
二 用pycharm来编程实现
新建项目后,新建一个main.py
# -*- coding: utf-8 -*-
import os
import cv2
import dlib
import numpy as np
# 存储位置
output_dir = 'D:\pycharm\homework'
size = 64
if not os.path.exists(output_dir):
os.makedirs(output_dir)
# 改变图片的亮度与对比度
def relight(img, light=1, bias=0):
w = img.shape[1]
h = img.shape[0]
# image = []
for i in range(0, w):
for j in range(0, h):
for c in range(3):
tmp = int(img[j, i, c] * light + bias)
if tmp > 255:
tmp = 255
elif tmp < 0:
tmp = 0
img[j, i, c] = tmp
return img
# 使用dlib自带的frontal_face_detector作为我们的特征提取器
detector = dlib.get_frontal_face_detector()
# 打开摄像头 参数为输入流,可以为摄像头或视频文件
camera = cv2.VideoCapture(0)
# camera = cv2.VideoCapture('C:/Users/CUNGU/Videos/Captures/wang.mp4')
ok = True
detector = dlib.get_frontal_face_detector()
predictor = dlib.shape_predictor('D:\pycharm\homework\shape_predictor_68_face_landmarks.dat')
while ok:
# 读取摄像头中的图像,ok为是否读取成功的判断参数
ok, img = camera.read()
# 转换成灰度图像
img_gray = cv2.cvtColor(img, cv2.COLOR_BGR2GRAY)
rects = detector(img_gray, 0)
for i in range(len(rects)):
landmarks = np.matrix([[p.x, p.y] for p in predictor(img, rects[i]).parts()])
for idx, point in enumerate(landmarks):
# 68点的坐标
pos = (point[0, 0], point[0, 1])
print(idx, pos)
# 利用cv2.circle给每个特征点画一个圈,共68个
cv2.circle(img, pos, 2, color=(0, 255, 0))
# 利用cv2.putText输出1-68
font = cv2.FONT_HERSHEY_SIMPLEX
cv2.putText(img, str(idx + 1), pos, font, 0.2, (0, 0, 255), 1, cv2.LINE_AA)
cv2.imshow('video', img)
k = cv2.waitKey(1)
if k == 27: # press 'ESC' to quit
break
camera.release()
cv2.destroyAllWindows()
效果如下:
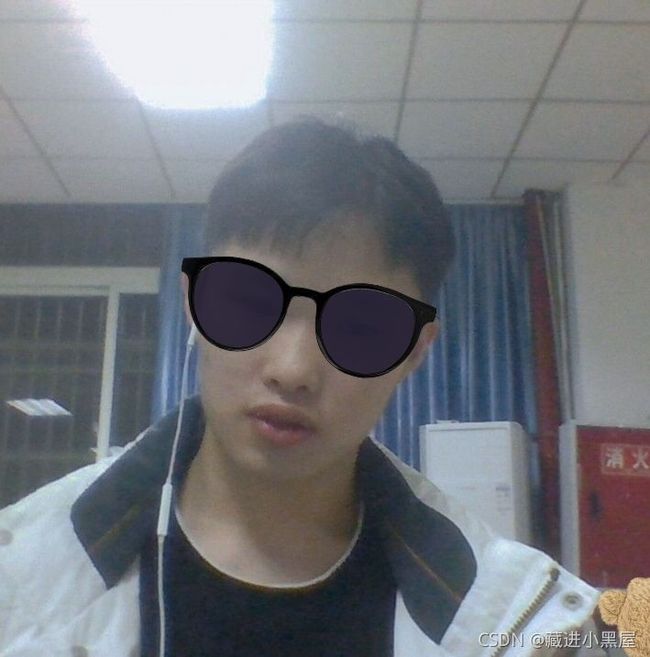
三 给人脸加上墨镜
代码:
#具体啥玩意的你就点击运行就行了。d键是开始,c键是替换照片,q键是结束。这代码一看就会。
import dlib
from PIL import Image, ImageDraw, ImageFont
import random
import cv2
from imutils.video import VideoStream
from imutils import face_utils, translate, rotate, resize
import numpy as np
vs = VideoStream().start()
detector = dlib.get_frontal_face_detector()
predictor = dlib.shape_predictor('shape_predictor_68_face_landmarks.dat')
max_width = 500
frame = vs.read()
frame = resize(frame, width=max_width)
fps = vs.stream.get(cv2.CAP_PROP_FPS) # need this for animating proper duration
animation_length = fps * 5
current_animation = 0
glasses_on = fps * 3
# uncomment for fullscreen, remember 'q' to quit
# cv2.namedWindow('deal generator', cv2.WND_PROP_FULLSCREEN)
#cv2.setWindowProperty('deal generator', cv2.WND_PROP_FULLSCREEN,
# cv2.WINDOW_FULLSCREEN)
deal = Image.open("F:/download//glass.png")
dealing = False
number =0
while True:
frame = vs.read()
frame = resize(frame, width=max_width)
img_gray = cv2.cvtColor(frame, cv2.COLOR_BGR2GRAY)
faces = []
rects = detector(img_gray, 0)
img = Image.fromarray(cv2.cvtColor(frame, cv2.COLOR_BGR2RGB))
# print(rects)
for rect in rects:
face = {}
shades_width = rect.right() - rect.left()
# predictor used to detect orientation in place where current face is
shape = predictor(img_gray, rect)
shape = face_utils.shape_to_np(shape)
# grab the outlines of each eye from the input image
leftEye = shape[36:42]
rightEye = shape[42:48]
# compute the center of mass for each eye
leftEyeCenter = leftEye.mean(axis=0).astype("int")
rightEyeCenter = rightEye.mean(axis=0).astype("int")
# compute the angle between the eye centroids
dY = leftEyeCenter[1] - rightEyeCenter[1]
dX = leftEyeCenter[0] - rightEyeCenter[0]
angle = np.rad2deg(np.arctan2(dY, dX))
# print((shades_width, int(shades_width * deal.size[1] / deal.size[0])))
# 图片重写
current_deal = deal.resize((shades_width, int(shades_width * deal.size[1] / deal.size[0])),
resample=Image.LANCZOS)
current_deal = current_deal.rotate(angle, expand=True)
current_deal = current_deal.transpose(Image.FLIP_TOP_BOTTOM)
face['glasses_image'] = current_deal
left_eye_x = leftEye[0,0] - shades_width // 4
left_eye_y = leftEye[0,1] - shades_width // 6
face['final_pos'] = (left_eye_x, left_eye_y)
# I got lazy, didn't want to bother with transparent pngs in opencv
# this is probably slower than it should be
# 图片动画以及配置
if dealing:
# print("current_y",int(current_animation / glasses_on * left_eye_y))
if current_animation < glasses_on:
current_y = int(current_animation / glasses_on * left_eye_y)
img.paste(current_deal, (left_eye_x, current_y-20), current_deal)
else:
img.paste(current_deal, (left_eye_x, left_eye_y-20), current_deal)
# img.paste(text, (75, img.height // 2 - 52), text)
# 起初动画配置
if dealing:
current_animation += 1
frame = cv2.cvtColor(np.asarray(img), cv2.COLOR_RGB2BGR)
# 按键选择
cv2.imshow("video", frame)
key = cv2.waitKey(1) & 0xFF
#退出程序
if key == ord("q"):
break
# 开始程序
if key == ord("d"):
dealing = not dealing
# 图片切换
if key == ord("c"):
# 让图片从上面重新开始
# current_animation = 0
number = str(random.randint(0, 8))
print(number)
deal = Image.open("'F:/download/'"+number+".png")
cv2.destroyAllWindows()
vs.stop()效果:
四 总结
人脸识别需要建立人体面貌的面像档案,即用摄像机采集单位人员的人体面貌的面像文件或取他们的照片形成面像文件,并将这些面像文件生成面纹(Faceprint)编码贮存起来。然后获取当前的人体面像 ,即用摄像机捕捉的当前出入人员的面像,或取照片输入,并将当前的面像文件生成面纹编码。醉后用当前的面纹编码与档案库存的比对, 即将当前的面像的面纹编码与档案库存中的面纹编码进行检索比对。
五 参考链接
[python+opencv+dlib实现人脸识别_一只特立独行的猪️的博客-CSDN博客]:

