YOLOv4训练自定义数据集
目录
-
-
- 一. darknet
- 1.环境配置
- 2.权重下载
- 3.数据集处理
- 4.修改配置文件
-
- 4.1 修改data/voc.names
- 4.2 修改data/voc.data
- 4.3 修改cfg/yolov4.cfg
- 4.4 修改Makefile文件
- 5.训练
- 6.测试
- 二. YOLOv4-pytorch
- 1.环境配置
- 2.权重下载
- 3.数据集处理
- 4.修改配置文件:config/yolov4_config.py
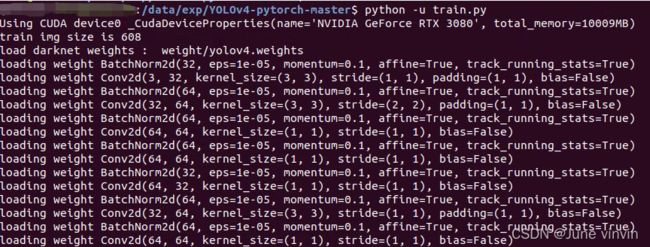
- 5.训练
- 三. 问题汇总
-
文献地址:https://arxiv.org/pdf/2004.10934.pdf
darknet版源码地址:https://github.com/AlexeyAB/darknet
pytorch版源码地址:https://github.com/argusswift/YOLOv4-pytorch
一. darknet
1.环境配置
https://blog.csdn.net/weixin_50008473/article/details/115250986?spm=1001.2014.3001.5501
2.权重下载
yolov4.weights: https://github.com/AlexeyAB/darknet/releases/download/darknet_yolo_v3_optimal/yolov4.weights
yolov4.conv.137: https://drive.google.com/open?id=1JKF-bdIklxOOVy-2Cr5qdvjgGpmGfcbp
3.数据集处理
(1)在scripts文件夹下按如下目录创建VOCdevkit 文件夹,放自己的训练数据。
VOCdevkit
--VOC2007
----Annotations  #(XML标签文件)
----ImageSets
------Main
----JPEGImages   # (原始图片)
(2)运行voc2yolo5.py 生成划分的训练集、测试集等文件
import os
import random
import sys
root_path = './scripts/VOCdevkit/VOC2007'
xmlfilepath = root_path + '/Annotations'
txtsavepath = root_path + '/ImageSets/Main'
if not os.path.exists(root_path):
    print("cannot find such directory: " + root_path)
    exit()
if not os.path.exists(txtsavepath):
    os.makedirs(txtsavepath)
trainval_percent = 0.8
train_percent = 0.2
total_xml = os.listdir(xmlfilepath)
num = len(total_xml)
list = range(num)
tv = int(num * trainval_percent)
tr = int(tv * train_percent)
trainval = random.sample(list, tv)
train = random.sample(trainval, tr)
print("train and val size:", tv)
print("train size:", tr)
ftrainval = open(txtsavepath + '/trainval.txt', 'w')
ftest = open(txtsavepath + '/test.txt', 'w')
ftrain = open(txtsavepath + '/train.txt', 'w')
fval = open(txtsavepath + '/val.txt', 'w')
for i in list:
    name = total_xml[i][:-4] + '\n'
    if i in trainval:
        ftrainval.write(name)
        if i in train:
            ftrain.write(name)
        else:
            fval.write(name)
    else:
        ftest.write(name)
ftrainval.close()
ftrain.close()
fval.close()
ftest.close()
(3)修改scripts/voc_label.py并运行,生成对应图片的labels标签文件
sets=[('2007', 'train'), ('2007', 'val'), ('2007', 'test')]
classes = ["smoke","fire","xxx1",,"xxx2",,"xxx3",,"xxx4"] #按自己的类别修改,顺序要和data/voc.names保持一致
以上2步运行后目录如下所示:
VOCdevkit
--VOC2007
----Annotations  #(XML标签文件)
----ImageSets
------Main
------------test.txt
------------train.txt
------------trainval.txt
------------val.txt
----JPEGImages   # (原始图片)
----labels
------------00001.txt
------------00002.txt
------------00003.txt
------------......
------------......
------------xxxxx.txt
4.修改配置文件
4.1 修改data/voc.names
将自己的多个类别换行输入,如下所示:
smoke
fire
xxx1
xxx2
xxx3
xxx4
4.2 修改data/voc.data
classes=6  # 类别的数量
# 数据集处理中的voc_label.py生成
train=./scripts/2007_train.txt  # 训练过程中训练数据的txt文件
valid=./scripts/2007_val.txt  # 训练过程中验证数据的txt文件
names=data/voc.names  # 类别标签名称
backup=backup/  # 存放权重的路径
4.3 修改cfg/yolov4.cfg
(1)训练参数修改:包括batch、max_batches、steps
[net]
batch=64  # 根据GPU进行修改
subdivisions=8
# Training
#width=512
#height=512
width=608
height=608
channels=3
momentum=0.949
decay=0.0005
angle=0
saturation = 1.5
exposure = 1.5
hue=.1

learning_rate=0.0013
burn_in=1000
max_batches = 12000  # 基本设置:2000 × classes(此处为2)
policy=steps
steps=9600,10800 # steps的设置:max_batches × 80% 和 max_batches × 90%/
scales=.1,.1
(2)网络结构的修改
[yolo]
mask = 3,4,5
anchors = 12, 16, 19, 36, 40, 28, 36, 75, 76, 55, 72, 146, 142, 110, 192, 243, 459, 401
classes=6  # 修改为自己的类别
修改filters个数:(classes + 5)*3;修改类别数classes
(共有三处)
[convolutional]
size=1
stride=1
pad=1
filters=33  # filters = (classes + 5)*3
activation=linear


[yolo]
mask = 0,1,2
anchors = 12, 16, 19, 36, 40, 28, 36, 75, 76, 55, 72, 146, 142, 110, 192, 243, 459, 401
classes=6  # 自己的类别
num=9
jitter=.3
ignore_thresh = .7
truth_thresh = 1
scale_x_y = 1.2
iou_thresh=0.213
cls_normalizer=1.0
iou_normalizer=0.07
iou_loss=ciou
nms_kind=greedynms
beta_nms=0.6
max_delta=5
4.4 修改Makefile文件
5.训练
sudo ./darknet detector train voc.data cfg/yolov4.cfg yolov4.conv.137 -map
6.测试
(1)测试图片
./darknet detector test data/voc.data cfg/yolov4.cfg backup/yolov4_10000.weights data/test.jpg
(2)计算MAP
./darknet detector map data/voc.data cfg/yolov4.cfg backup/yolov4_10000.weights
二. YOLOv4-pytorch
1.环境配置
主要环境配置参考上方,缺什么装什么
安装依赖:pip3 install -r requirements.txt
(1)安装mmcv
git clone https://github.com/open-mmlab/mmcv.git
cd mmcv
pip install -e .
(2)安装apex
git clone https://github.com/NVIDIA/apex
cd apex
python3 setup.py install
2.权重下载
参考上方权重下载链接,将下载的权重文件放入新建文件夹(weight)
3.数据集处理
(1)同上:在data文件夹下按如下目录创建VOCdevkit 文件夹,放训练数据。
./data
VOCdevkit
--VOC2007
----Annotations  #(XML标签文件)
----ImageSets
------Main
----JPEGImages   # (原始图片)
(2)运行voc_anno.py,得到两个yolov4需要的数据集格式
import sys
sys.path.append("..")
import xml.etree.ElementTree as ET
import config.yolov4_config as cfg
import os
from tqdm import tqdm
def parse_voc_annotation(data_path, file_type, anno_path, use_difficult_bbox=False):
    """
    phase pascal voc annotation, eg:[image_global_path xmin,ymin,xmax,ymax,cls_id]
    :param data_path: eg: VOC\VOCtrainval-2007\VOCdevkit\VOC2007
    :param file_type: eg: 'trainval''train''val'
    :param anno_path: path to ann file
    :param use_difficult_bbox: whither use different sample
    :return: batch size of data set
    """
    classes = cfg.VOC_DATA["CLASSES"]
    img_inds_file = os.path.join(data_path, 'ImageSets', 'Main', file_type+'.txt')
    with open(img_inds_file, 'r') as f:
        lines = f.readlines()
        image_ids = [line.strip() for line in lines]
    with open(anno_path, 'a') as f:
        for image_id in tqdm(image_ids):
            image_path = os.path.join(data_path, 'JPEGImages', image_id + '.jpg')
            annotation = image_path
            label_path = os.path.join(data_path, 'Annotations', image_id + '.xml')
            root = ET.parse(label_path).getroot()
            objects = root.findall('object')
            for obj in objects:
                difficult = obj.find("difficult").text.strip()
                if (not use_difficult_bbox) and (int(difficult) == 1): # difficult 表示是否容易识别,0表示容易,1表示困难
                    continue
                bbox = obj.find('bndbox')
                class_id = classes.index(obj.find("name").text.lower().strip())
                xmin = bbox.find('xmin').text.strip()
                ymin = bbox.find('ymin').text.strip()
                xmax = bbox.find('xmax').text.strip()
                ymax = bbox.find('ymax').text.strip()
                annotation += ' ' + ','.join([xmin, ymin, xmax, ymax, str(class_id)])
            annotation += '\n'
            # print(annotation)
            f.write(annotation)
    return len(image_ids)
if __name__ =="__main__":
    # train_set :  VOC2007_trainval 和 VOC2012_trainval
    train_data_path_2007 = os.path.join(cfg.DATA_PATH,'VOCdevkit', 'VOC2007')
    #train_data_path_2012 = os.path.join(cfg.DATA_PATH,'VOCdevkit', 'VOC2012')
    train_annotation_path = os.path.join('../data', 'train_annotation.txt')
    if os.path.exists(train_annotation_path):
        os.remove(train_annotation_path)
    # val_set   : VOC2007_test
    test_data_path_2007 = os.path.join(cfg.DATA_PATH,'VOCdevkit', 'VOC2007')
    test_annotation_path = os.path.join('../data', 'test_annotation.txt')
    if os.path.exists(test_annotation_path):
        os.remove(test_annotation_path)
    len_train = parse_voc_annotation(train_data_path_2007, "trainval", train_annotation_path, use_difficult_bbox=False) #+ \
            #parse_voc_annotation(train_data_path_2012, "trainval", train_annotation_path, use_difficult_bbox=False)
    len_test = parse_voc_annotation(test_data_path_2007, "test", test_annotation_path, use_difficult_bbox=False)
    print("The number of images for train and test are :train : {0} | test : {1}".format(len_train, len_test))
参考
4.修改配置文件:config/yolov4_config.py
(1)修改MODEL_TYPE
MODEL_TYPE = {
    "TYPE": "YOLOv4"
}
(2)修改TRAIN中的参数
# train
TRAIN = {
    "DATA_TYPE": "Customer",  # DATA_TYPE: VOC ,COCO or Customer
    "TRAIN_IMG_SIZE": 416,
    "AUGMENT": True,
    "BATCH_SIZE": 4,
    "MULTI_SCALE_TRAIN": False,
    "IOU_THRESHOLD_LOSS": 0.5,
    "YOLO_EPOCHS": 200,
    "Mobilenet_YOLO_EPOCHS": 120,
    "NUMBER_WORKERS": 0,
    "MOMENTUM": 0.9,
    "WEIGHT_DECAY": 0.0005,
    "LR_INIT": 1e-4,
    "LR_END": 1e-6,
    "WARMUP_EPOCHS": 2,  # or None
    "showatt": False
}
(3)修改Customer_DATA中的NUM和CLASSES
Customer_DATA = {
    "NUM": 2,  # your dataset number
    "CLASSES": ["smoke", "fire","xxx1",,"xxx2",,"xxx3",,"xxx4"],  # your dataset class
}
5.训练
修改train.py
if __name__ == "__main__":
    global logger, writer
    parser = argparse.ArgumentParser()
    parser.add_argument(
        "--weight_path",
        type=str,
        default="weight/yolov4.weights",
        help="weight file path",
    )  # weight/darknet53_448.weights
    parser.add_argument(
        "--resume",
        action="store_true",
        default=False,
        help="resume training flag",
    )
    parser.add_argument(
        "--gpu_id",
        type=int,
        default=0,
        help="whither use GPU(0) or CPU(-1)",
    )
    parser.add_argument("--log_path", type=str, default="log/", help="log path")
    parser.add_argument(
        "--accumulate",
        type=int,
        default=2,
        help="batches to accumulate before optimizing",
    )
    parser.add_argument(
        "--fp_16",
        type=bool,
        default=False,
        help="whither to use fp16 precision",
    )
    opt = parser.parse_args()
    writer = SummaryWriter(logdir=opt.log_path + "/event")
    logger = Logger(
三. 问题汇总
(1)未生成模型权重文件
1> 原因:train,py中,验证模型必须在30或50epoch以上才可以验证结果

2> 解决方法:必须在config/yolov4_config.py中设置YOLO_EPOCHS大于50epoch
![]()
(2)找不到文件的错误 ,如:
FileNotFoundError: [Errno 2] No such file or directory: 'data/YOLOv4-pytorch-master/data/VOCdevkit/VOC2007/Annotations\\01345.xml'
1> 原因:文件未放错,因为不同的系统对于默认分隔符的不同,根据使用的系统不同添加不同的分隔符
2> 解决办法:修改evaluator.py第226行
self.val_data_path, "Annotations\\" + "{:s}.xml"
修改为
self.val_data_path, "Annotations" + os.sep + "{:s}.xml"


