Flutter入门
Flutter
文章目录
- Flutter
-
- 参考
- 实践
- 0、 虚拟机配置
- 一、无状态控件
-
- Hello World
- container组件
- AppBar组件
-
- TabController 实现内容的切换
- Drawer 侧边抽屉组件 (UserAccountsDrawerHeader // DrawerHeader )
- FloatingActionButton// 悬浮按钮
- BottomAppBar//底部导航条
- ButtonBar //按钮条组件
- Image 图片控件
-
- 远程图片加载
- 圆形图片
- 本地图片加载
- ListView 列表组件
-
- 垂直列表
- 水平列表
- 动态添加列表
- GridView组件(网格布局)
- Stack 层叠组件
-
- 基本使用
- Stack 结合 Align
- Stack 结合 Positioned
- AspectRatio 组件
- Card 组件
-
- 案例一
- 案例二
- Wrap 组件
- 弹出框组件
-
- AlertDialog 组件
- SimpleDialog 组件
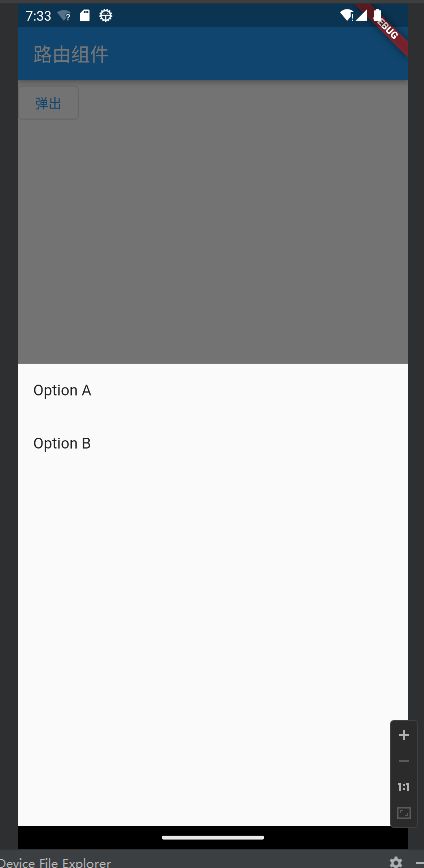
- showModalBottomSheet 底部弹出
- 自定义Dialog
- 二、状态控件
-
- widget管理自己的状态
- 父组件控制子组件的状态
- 三、Flutter 中的路由
-
-
- 普通路由实现
- 命名路由
-
- 请求数据
-
- Get / Post 请求
参考
- https://api.flutter.dev/flutter/widgets/Row-class.html
- https://developer.android.com/studio/command-line
- 第三方库官网
实践
0、 虚拟机配置
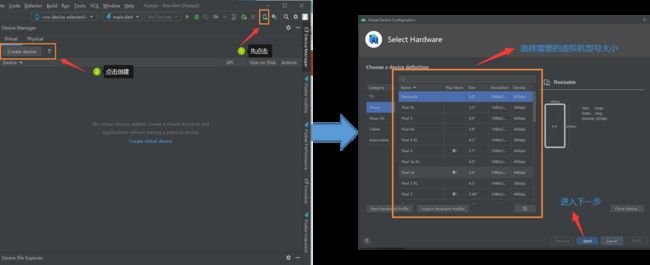
这里我是用 Android Studio 来创建虚拟机的,具体的配置使用过程如下图组。其中要重点关注以下几个点:
- 虚拟机创建时的一些参数设置(我设置的不一定是最好的但是可以避免一些问题,默认的参数可能导致虚拟机无法多次运行Flutter项目)。
- ⭕每次虚拟机前记得
Wipe Data!否则项目可能无法运行
- ⭕每次虚拟机前记得
关闭后可以按照前面的方法重新启动虚拟机,记得wipe Data!否则虚拟机可能因为内存不够而无法运行flutter项目。(因为每次Flutter项目启动的时候都会重新下载一些东西)不过Flutter支持热更新我们不必频繁地重启虚拟机。
一、无状态控件
Hello World
import 'package:flutter/material.dart';
void main() {
runApp(MyApp());
}
class MyApp extends StatelessWidget{
//app继承于StatelessWidget组件对象
//重构build方法
Widget build(BuildContext context){ //组件的build的方法返回一个组件 参数是其上下文文件
return MaterialApp( //返回方法 返回组件
title: "welcome", //APP的title
home: Scaffold( //APP的主体,其类型是一个脚手架Scaffold
appBar: AppBar( //脚手架第一个组成是appbar
title: const Text("welcome to big bear's flutter!!!"), //appbar的title
),
body: const Center( //脚手架的第二个组成是body 给body一个center组件做内容
child: Text(
"hello World",
textAlign: TextAlign.left,
), //center里有一个子组件是 Text("???")
),
),
);
}
}
container组件
import 'package:flutter/material.dart';
void main() {
runApp(MyApp());
}
class MyApp extends StatelessWidget{
//app继承于StatelessWidget组件对象
//重构build方法
Widget build(BuildContext context){ //组件的build的方法返回一个组件 参数是其上下文文件
return MaterialApp( //返回方法 返回组件
title: "welcome", //APP的title
home: Scaffold( //APP的主体,其类型是一个脚手架Scaffold
appBar: AppBar( //脚手架第一个组成是appbar
title: const Text("welcome to big bear's flutter!!!"), //appbar的title
),
body: Center(
child:Container(
width: 200,
height: 200,
margin: const EdgeInsets.symmetric(horizontal: 010.0),
decoration: BoxDecoration(
gradient: const LinearGradient(
colors: [Colors.lightBlue, Colors.black],
begin: Alignment.topLeft,
end: Alignment.bottomRight,
tileMode: TileMode.clamp,
),
border: Border.all(width: 1.0, color: Colors.black),
),
transform: Matrix4.rotationZ(0.1),
alignment: const Alignment(10, 10),
padding: const EdgeInsets.fromLTRB(15.0, 30.0, 15.0, 0),
child: const Text(
"welcome",
),
),
),)
);
}
}
AppBar组件
import 'package:flutter/material.dart';
void main() {
runApp(MyApp());
}
class MyApp extends StatelessWidget{
Widget build(BuildContext context) {
return MaterialApp(
title: "Test",
home: Scaffold(
appBar: AppBar(
leading: const Icon(Icons.home),
title: const Text("AppBar"),
centerTitle: true,
backgroundColor: Colors.deepOrangeAccent,
actions: <Widget>[
IconButton(onPressed: () {
print("Press");
}, tooltip: "print" , icon: const Icon(Icons.print)),
IconButton(onPressed: () {}, tooltip: "+1" , icon: const Icon(Icons.plus_one)),
IconButton(onPressed: () {}, tooltip: "share" , icon: const Icon(Icons.share)),
PopupMenuButton(itemBuilder:
(context) => <PopupMenuItem<String>>[
const PopupMenuItem<String>(
value: "share",
child: Text("share to we meet"),
),
const PopupMenuItem<String>(
value: "quit",
child: Text("go out"),
)
],
)
],
),
),
);
}
}
TabController 实现内容的切换
class MyHomeBody extends StatefulWidget {
const MyHomeBody({super.key});
State<MyHomeBody> createState() => _MyHomeBodyState();
}
class _MyHomeBodyState extends State<MyHomeBody>
with SingleTickerProviderStateMixin {
late TabController _tabController;
void initState() {
super.initState();
_tabController = TabController(
vsync: this,
length: 2,
);
_tabController.addListener(() {
print("切换");
});
}
Widget build(BuildContext context) {
return Scaffold(
appBar: AppBar(
title: Text('路由组件'),
bottom:
TabBar(controller: _tabController, tabs: [Text("热销"), Text("推荐")]),
),
body: TabBarView(
controller: _tabController,
children: [Center(child: Text('热销')), Center(child: Text('推荐'))]),
);
}
}
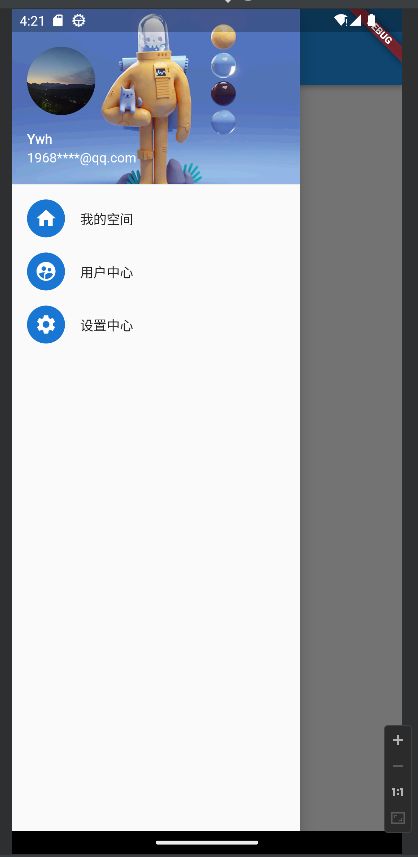
Drawer 侧边抽屉组件 (UserAccountsDrawerHeader // DrawerHeader )
DrawerHeader
更加灵活
class MyHomeBody extends StatefulWidget {
const MyHomeBody({super.key});
State<MyHomeBody> createState() => _MyHomeBodyState();
}
class _MyHomeBodyState extends State<MyHomeBody> {
Widget build(BuildContext context) {
return Scaffold(
appBar: AppBar(
title: Text('路由组件'),
),
drawer: Drawer(
child: Column(
children: <Widget>[
Row(children: const [
Expanded(
child: DrawerHeader(
child: Text('用户个人信息'),
decoration: BoxDecoration(
image: DecorationImage(
image: NetworkImage(
"https://www.itying.com/images/flutter/2.png",
),
fit: BoxFit.cover)),
))
]),
ListTile(
leading: CircleAvatar(
child: Icon(Icons.home),
),
title: Text("我的空间"),
),
ListTile(
leading: CircleAvatar(
child: Icon(Icons.supervised_user_circle),
),
title: Text("用户中心"),
),
ListTile(
leading: CircleAvatar(
child: Icon(Icons.settings),
),
title: Text("设置中心"),
),
],
),
),
);
}
}

UserAccountsDrawerHeader 有更多配置
class _MyHomeBodyState extends State<MyHomeBody> {
Widget build(BuildContext context) {
return Scaffold(
appBar: AppBar(
title: Text('路由组件'),
),
drawer: Drawer(
child: Column(
children: <Widget>[
Row(children: const [
Expanded(
child: UserAccountsDrawerHeader(
accountName: Text("Ywh"),
accountEmail: Text("1968****@qq.com"),
currentAccountPicture: CircleAvatar(
backgroundImage: AssetImage("images/home.jpg"),
),
decoration: BoxDecoration(
image: DecorationImage(
image: NetworkImage(
"https://www.itying.com/images/flutter/5.png"),
fit: BoxFit.cover)),
))
]),
ListTile(
leading: CircleAvatar(
child: Icon(Icons.home),
),
title: Text("我的空间"),
),
ListTile(
leading: CircleAvatar(
child: Icon(Icons.supervised_user_circle),
),
title: Text("用户中心"),
),
ListTile(
leading: CircleAvatar(
child: Icon(Icons.settings),
),
title: Text("设置中心"),
),
],
),
),
);
}
}
FloatingActionButton// 悬浮按钮
import 'package:flutter/material.dart';
void main() {
runApp(MyApp());
}
class MyApp extends StatelessWidget{
Widget build(BuildContext context) {
return MaterialApp(
title: "Test",
home: Scaffold(
appBar: AppBar(
leading: const Icon(Icons.home),
title: const Text("AppBar"),
centerTitle: true,
backgroundColor: Colors.deepOrangeAccent,
actions: <Widget>[
IconButton(onPressed: () {
print("Press");
}, tooltip: "print" , icon: const Icon(Icons.print)),
IconButton(onPressed: () {}, tooltip: "+1" , icon: const Icon(Icons.plus_one)),
IconButton(onPressed: () {}, tooltip: "share" , icon: const Icon(Icons.share)),
PopupMenuButton(itemBuilder:
(context) => <PopupMenuItem<String>>[
const PopupMenuItem<String>(
value: "share",
child: Text("share to we meet"),
),
const PopupMenuItem<String>(
value: "quit",
child: Text("go out"),
)
],
)
],
),
floatingActionButtonLocation: FloatingActionButtonLocation.centerDocked,
floatingActionButton: FloatingActionButton(
tooltip: "small tips",
foregroundColor: Colors.black87,
backgroundColor: Colors.amberAccent,
hoverColor: Colors.deepPurple,
focusColor: Colors.greenAccent,
elevation: 5,
focusElevation: 10,
autofocus: true,
mini: true,
child: Icon(Icons.add),
onPressed: () { },
),
body: Container(),
),
);
}
}
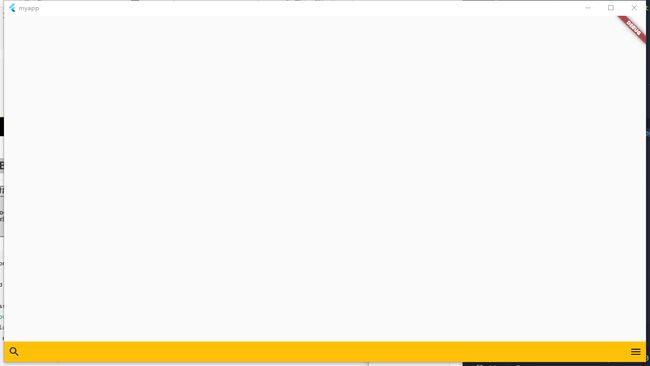
BottomAppBar//底部导航条
import 'package:flutter/material.dart';
void main() {
runApp(MyApp());
}
class MyApp extends StatelessWidget{
Widget build(BuildContext context) {
return MaterialApp(
title: "Test",
home: Scaffold(
bottomNavigationBar: BottomAppBar(
notchMargin: 10.0,
color: Colors.amber,
elevation: 10,
child: Row(
mainAxisSize: MainAxisSize.max,
mainAxisAlignment: MainAxisAlignment.spaceBetween,
children: <Widget>[
IconButton(icon: Icon(Icons.search), onPressed: () {}),
IconButton(icon: Icon(Icons.menu), onPressed: () {}),
],
),
),
body: Container(),
),
);
}
}
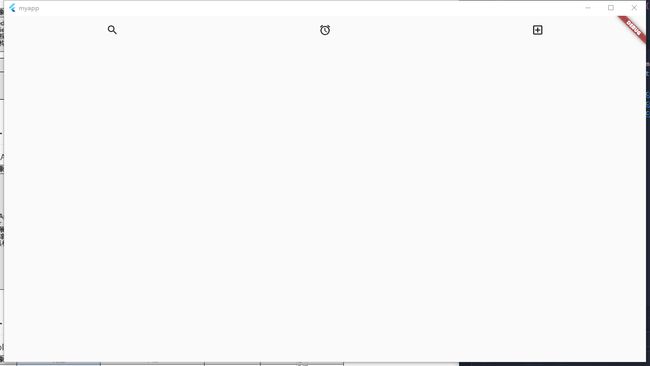
ButtonBar //按钮条组件
import 'package:flutter/material.dart';

void main() {
  runApp(MyApp());
}
class MyApp extends StatelessWidget{
  @override
  Widget build(BuildContext context) {
    return MaterialApp(
      title: "Test",
      home: Scaffold(

        body: ButtonBar(
          mainAxisSize: MainAxisSize.max,
          alignment: MainAxisAlignment.spaceAround,
          children: [
              IconButton(icon: Icon(Icons.search), onPressed: () {  },),
              IconButton(icon: Icon(Icons.access_alarm), onPressed: () {  },),
              IconButton(icon: Icon(Icons.add_box_outlined), onPressed: () {  },),
          ],
        ),
      ),
    );
  }
}
Image 图片控件
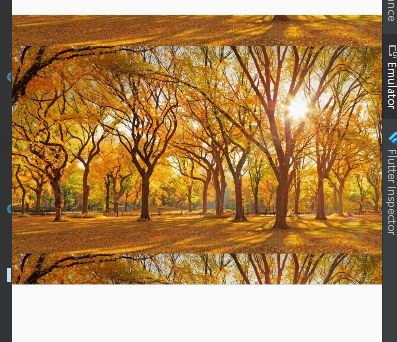
远程图片加载
class ImageView extends StatelessWidget {
Widget build(BuildContext context) {
return Container(
width: 500,
height: 300,
decoration: BoxDecoration(color: Colors.blue),
child: Image.network(
"https://lmg.jj20.com/up/allimg/1114/010121111R7/210101111R7-1-1200.jpg",
alignment: Alignment.center,
color: Colors.blue,
colorBlendMode: BlendMode.dstOver,
// 图片的填充效果
// fit: BoxFit.cover,
// 图片重复排版
repeat: ImageRepeat.repeatY),
);
}
}
圆形图片
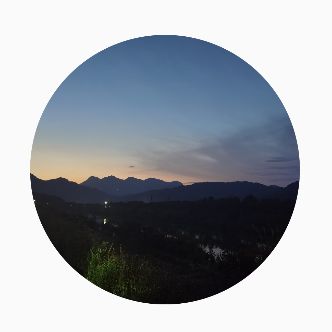
方法1:通过圆角设置将Container设置成圆形,然后通过设置背景图片来获得圆形图片。
class ImageView extends StatelessWidget {
Widget build(BuildContext context) {
return Container(
width: 300,
height: 300,
decoration: BoxDecoration(
color: Colors.blue,
borderRadius: BorderRadius.circular(150),
image: const DecorationImage(
fit: BoxFit.cover,
image: NetworkImage(
"https://lmg.jj20.com/up/allimg/1114/010121111R7/210101111R7-1-1200.jpg"))),
);
}
}
方案2:通过 ClipOval组件实现圆形。
class ImageView extends StatelessWidget {
Widget build(BuildContext context) {
return Container(
width: 300,
height: 300,
decoration: const BoxDecoration(),
child: ClipOval(
child: Image.network(
"https://lmg.jj20.com/up/allimg/1114/010121111R7/210101111R7-1-1200.jpg",
height: 100,
width: 100,
fit: BoxFit.cover,
),
),
);
}
}
本地图片加载
我们先按照下图的方式将本地的图片添加到项目中

使用和设置都与远程图片的使用方式类似
class ImageView extends StatelessWidget {
Widget build(BuildContext context) {
return Container(
width: 300,
height: 300,
decoration: const BoxDecoration(),
child: ClipOval(
child: Image.asset(
"images/home.jpg",
height: 100,
width: 100,
fit: BoxFit.cover,
),
),
);
}
}
ListView 列表组件
垂直列表
import 'package:flutter/material.dart';
class ImageView extends StatelessWidget {
Widget build(BuildContext context) {
return ListView(
padding: const EdgeInsets.all(5),
children: <Widget>[
Image.network(
"https://lmg.jj20.com/up/allimg/1114/010121111R7/210101111R7-1-1200.jpg"),
Image.network(
"https://img0.baidu.com/it/u=1880899726,3824907986&fm=253&fmt=auto&app=138&f=JPEG?w=750&h=500"),
Container(
height: 40,
padding: EdgeInsets.all(5.0),
child: Text("近日消息", style: TextStyle(fontSize: 24)),
),
ListTile(
leading: Image.asset("images/home.jpg"),
title: Text("好消息 好消息"),
subtitle: Text("四天假期开始了!"),
),
const ListTile(
title: Text("好消息 好消息"),
subtitle: Text("四天假期开始了!"),
trailing: Icon(Icons.settings),
),
const ListTile(
leading: Icon(
Icons.accessibility_sharp,
color: Colors.deepOrangeAccent,
),
title: Text("好消息 好消息", style: TextStyle(fontSize: 24)),
subtitle: Text("四天假期开始了!"),
),
],
);
}
}
水平列表
class ImageView extends StatelessWidget {
Widget build(BuildContext context) {
return Container(
height: 200,
width: 300,
child: ListView(
// 设置水平列表
scrollDirection: Axis.horizontal,
children: <Widget>[
Container(
height: 100,
width: 100,
color: Colors.blue[100],
child: ListView(
children: <Widget>[
Image.asset("images/home.jpg"),
const Text(
"my home",
style: TextStyle(fontSize: 24),
)
],
),
),
Container(height: 100, width: 100, color: Colors.blue[200]),
Container(height: 100, width: 100, color: Colors.blue[300]),
Container(height: 100, width: 100, color: Colors.blue[400]),
],
));
}
}
动态添加列表
数据
List<dynamic> ListData = [
  {
    "title": "Candy Shop",
    "author": "Mohamed Chain",
    "imageUrl": "https://www.itying.com/images/flutter/1.png",
  },
  {
    "title": "Childhood in a picture",
    "author": "Google",
    "imageUrl": "https://www.itying.com/images/flutter/2.png",
  },
  {
    "title": "Alibaba Shop",
    "author": "Alibaba",
    "imageUrl": "https://www.itying.com/images/flutter/3.png",
  },
];
code
import 'data/ListData.dart';
class ImageView extends StatelessWidget {
const ImageView({super.key});
List<Widget> _getData() {
return ListData.map((item) => ListTile(
leading: Image.network(item["imageUrl"], fit: BoxFit.cover),
title: Text(item["title"]),
subtitle: Text(item["author"]),
)).toList();
}
Widget build(BuildContext context) {
return Container(
height: 300,
width: 300,
decoration: BoxDecoration(border: Border.all()),
child: ListView(
children: [..._getData()],
));
}
}

另一种写法使用 ListView.builder, 先指定 itemCount 然后通过迭代itemCount的长度向其中添加数据。
class ImageView extends StatelessWidget {
Widget build(BuildContext context) {
return Container(
height: 300,
width: 300,
decoration: BoxDecoration(border: Border.all()),
child: ListView.builder(
itemCount: ListData.length,
itemBuilder: (context, index) => ListTile(
title: Text(ListData[index]["title"]),
subtitle: Text(ListData[index]["author"]),
leading: Image.network(ListData[index]["imageUrl"])),
));
}
}
GridView组件(网格布局)
class ImageView extends StatelessWidget {
List<Widget> list = [];
ImageView({super.key}) {
for (int i = 0; i < 10; i++) {
list.add(Container(
alignment: Alignment.center,
color: Colors.green[100],
child: Text("第${i + 1}条数据"),
));
}
}
Widget build(BuildContext context) {
return Container(
height: 500,
width: 500,
decoration: BoxDecoration(border: Border.all()),
child: GridView.count(
padding: EdgeInsets.all(5),
mainAxisSpacing: 20.0,
crossAxisSpacing: 20.0,
crossAxisCount: 3,
// 设置长宽比 在使用GridView组件的时候子组件的Container width和height失效
childAspectRatio: 0.7,
children: list,
));
}
}
Stack 层叠组件
基本使用
class ImageView extends StatelessWidget {
Widget build(BuildContext context) {
return Container(
height: 500,
width: 500,
decoration: BoxDecoration(border: Border.all()),
child: Stack(
alignment: const Alignment(0, 0.3), // 使用Alignment 设置子元素的位置
children: <Widget>[
Container(
height: 100,
width: 100,
color: Colors.blueGrey,
),
const Text("我是文本"),
],
),
);
}
}
Stack 结合 Align
class ImageView extends StatelessWidget {
Widget build(BuildContext context) {
return Container(
height: 500,
width: 500,
decoration: BoxDecoration(border: Border.all()),
child: Stack(
alignment: const Alignment(0, 0.3), // 使用Alignment 设置子元素的位置
children: <Widget>[
Align(
child: Icon(Icons.home),
alignment: Alignment(0, 0.2),
),
Align(
child: Icon(Icons.ac_unit_rounded),
alignment: Alignment(1, 0.2),
),
Align(
child: Icon(Icons.zoom_out_map_outlined),
alignment: Alignment(1, -1),
)
],
),
);
}
}
Stack 结合 Positioned
class ImageView extends StatelessWidget {
Widget build(BuildContext context) {
return Container(
height: 500,
width: 500,
decoration: BoxDecoration(border: Border.all()),
child: Stack(
children: <Widget>[
Positioned(
left: 20,
child: Icon(Icons.home),
),
Positioned(
right: 20,
child: Icon(Icons.search),
),
Positioned(
left: 20,
top: 50,
child: Icon(Icons.access_time_sharp),
),
],
),
);
}
}
AspectRatio 组件
AspectRatio作用于父控件,根据aspectRatio计算父控件的宽或者高,AspectRatio的子控件将填充满父控件,子控件的宽高无效。
基本使用
class ImageView extends StatelessWidget {
const ImageView({super.key});
Widget build(BuildContext context) {
return Container(
width: 100,
decoration: BoxDecoration(border: Border.all()),
child: AspectRatio(
aspectRatio: 2.0 / 1.0,
child: Container(
color: Colors.red[300],
)),
);
}
}
Card 组件
案例一
class ImageView extends StatelessWidget {
const ImageView({super.key});
Widget build(BuildContext context) {
return ListView(
children: <Widget>[
Card(
margin: EdgeInsets.all(5),
child: Column(
children: const [
ListTile(
title: Text("张三"),
subtitle: Text("语文老师"),
),
ListTile(title: Text("电话: 12345678")),
ListTile(title: Text("地址: ********")),
],
),
),
Card(
margin: EdgeInsets.all(5),
child: Column(
children: [
ListTile(
title: Text("李四"),
subtitle: Text("数学老师"),
),
ListTile(title: Text("电话: 12345678")),
ListTile(title: Text("地址: ********")),
],
),
),
],
);
}
}
案例二
class ImageView extends StatelessWidget {
const ImageView({super.key});
Widget build(BuildContext context) {
return ListView(
children: <Widget>[
...ListData.map((item) {
return Card(
margin: EdgeInsets.all(8),
child: Column(
children: [
AspectRatio(
aspectRatio: 2, // 设置图片的长宽比的
child: Image.network(item["imageUrl"], fit: BoxFit.cover)),
ListTile(
leading: CircleAvatar(
// 圆形的图片
backgroundImage: NetworkImage(item["imageUrl"]),
),
title: Text(item["title"]),
subtitle: Text(item["author"]),
)
],
),
);
}).toList(),
],
);
}
}
Wrap 组件
Wrap组件可以实现流布局,单行的Wrap和Row的表现几乎一致,单列的Wrap跟Column表现几乎一致。但是Wrap组件不同的是当mainAxis上空间不足时,则想crossAxis上去扩展。
封装一个按钮
class MyButton extends StatelessWidget {
final String? text;
const MyButton({super.key, required this.text});
Widget build(BuildContext context) {
return ElevatedButton(
onPressed: () {},
child: Text(
text!,
// style: TextStyle(color: Theme.of(context).colorScheme.secondary),
),
);
}
}
布局代码
class ImageView extends StatelessWidget {
const ImageView({super.key});
Widget build(BuildContext context) {
return Container(
width: 400,
height: 400,
color: Colors.green[100],
child: Wrap(
spacing: 10,
runSpacing: 10,
// alignment: WrapAlignment.end, // 设置行的对齐方式
runAlignment: WrapAlignment.end, // 设置纵向的对齐方式
children: const <Widget>[
MyButton(text: "按钮1"),
MyButton(text: "按钮2"),
MyButton(text: "按钮3"),
MyButton(text: "按钮4"),
MyButton(text: "按钮5"),
MyButton(text: "按钮6"),
MyButton(text: "按钮7"),
MyButton(text: "按钮8"),
MyButton(text: "按钮11"),
MyButton(text: "按钮111"),
],
));
}
}
弹出框组件
AlertDialog 组件
class MyHomeBody extends StatefulWidget {
const MyHomeBody({super.key});
State<MyHomeBody> createState() => _MyHomeBodyState();
}
class _MyHomeBodyState extends State<MyHomeBody> {
_alertDialog(context) async {
// 获得操作的结果
var res = await showDialog(
context: context,
builder: (context) {
return AlertDialog(
title: Text("这是提示消息"),
content: Text("您确定要删除嘛?"),
actions: <Widget>[
OutlinedButton(
child: Text("取消"),
onPressed: () {
Navigator.pop(context, "cancel");
}),
OutlinedButton(
child: Text("确定"),
onPressed: () {
Navigator.pop(context, "ok");
}),
],
);
});
print(res);
}
Widget build(BuildContext context) {
return Scaffold(
appBar: AppBar(
title: Text('路由组件'),
),
body: Column(
children: <Widget>[
OutlinedButton(
onPressed: () {
_alertDialog(context);
},
child: Text("弹出"))
],
),
);
}
}
SimpleDialog 组件
class MyHomeBody extends StatefulWidget {
const MyHomeBody({super.key});
State<MyHomeBody> createState() => _MyHomeBodyState();
}
class _MyHomeBodyState extends State<MyHomeBody> {
_alertDialog(context) async {
// 获得操作的结果
var res = await showDialog(
context: context,
builder: (context) {
return SimpleDialog(
title: Text("选择内容"),
children: <Widget>[
SimpleDialogOption(
child: Text("Option A"),
onPressed: () {
Navigator.pop(context, "A");
},
),
Divider(),
SimpleDialogOption(
child: Text("Option B"),
onPressed: () {
Navigator.pop(context, "B");
},
),
],
);
});
print(res);
}
Widget build(BuildContext context) {
return Scaffold(
appBar: AppBar(
title: Text('路由组件'),
),
body: Column(
children: <Widget>[
OutlinedButton(
onPressed: () {
_alertDialog(context);
},
child: Text("弹出"))
],
),
);
}
}
showModalBottomSheet 底部弹出
class MyHomeBody extends StatefulWidget {
const MyHomeBody({super.key});
State<MyHomeBody> createState() => _MyHomeBodyState();
}
class _MyHomeBodyState extends State<MyHomeBody> {
_alertDialog(context) async {
// 获得操作的结果
var res = await showModalBottomSheet(
context: context,
builder: (context) {
return Container(
child: Container(
child: Column(children: [
ListTile(
title: Text("Option A"),
onTap: () {
Navigator.pop(context, "A");
}),
ListTile(
title: Text("Option B"),
onTap: () {
Navigator.pop(context, "B");
}),
]),
),
);
});
print(res);
}
Widget build(BuildContext context) {
return Scaffold(
appBar: AppBar(
title: Text('路由组件'),
),
body: Column(
children: <Widget>[
OutlinedButton(
onPressed: () {
_alertDialog(context);
},
child: Text("弹出"))
],
),
);
}
}
自定义Dialog
自定义Dialog
class MyDialog extends Dialog {
final String? title;
final String? content;
const MyDialog({super.key, required this.title, required this.content});
Widget build(BuildContext context) {
return Material(
type: MaterialType.transparency,
child: Center(
child: Container(
height: 300,
color: Colors.white,
child: Column(
children: [
Padding(
padding: EdgeInsets.all(8),
child: Stack(
children: [
Align(
alignment: Alignment.center,
child: Text("主题:${title!}"),
),
Align(
alignment: Alignment.topRight,
child: InkWell(
child: Icon(Icons.close),
onTap: () {
Navigator.pop(context);
},
),
),
],
)),
Divider(height: 3),
Align(
child: Text("内容: ${content!}"),
),
],
),
),
));
}
}
使用部分
class _MyHomeBodyState extends State<MyHomeBody> {
_alertDialog(context) async {
// 获得操作的结果
var res = await showDialog(
context: context,
builder: (context) {
return const MyDialog(
title: "关于我们",
content: "自定义组件",
);
});
print(res);
}
Widget build(BuildContext context) {
return Scaffold(
appBar: AppBar(
title: Text('路由组件'),
),
body: Column(
children: <Widget>[
OutlinedButton(
onPressed: () {
_alertDialog(context);
},
child: Text("弹出"))
],
),
);
}
}
二、状态控件
既然涉及到组件状态的管理,我们肯定会接触组件自身状态的管理以及组件之间的通信。后面我们就通过几个案例来了解几种常见的组件状态管理。
widget管理自己的状态
状态子组件
import 'package:flutter/material.dart';
class BoxApp extends StatefulWidget{
const BoxApp({super.key});
State<BoxApp> createState() => _changeBoxState();
}
class _changeBoxState extends State<BoxApp> {
bool _active = false;
/// 改变滋生的状态
void _handleTap() {
/// setState接收一个函数用于触发界面的重新渲染
setState((){
_active = !_active;
});
}
Widget build(BuildContext context) {
return GestureDetector(
onTap: _handleTap,
child: Container(
width: 200.0,
height: 200.0,
decoration :BoxDecoration(
color: _active ? Colors.lightBlue : Colors.deepOrangeAccent,
),
child :Center(
child: Text(
_active ? "active" : "Inactive",
style: const TextStyle(fontSize: 32.0, color :Colors.white),
),
),
),
);
}
}
父组件代码
import 'package:flutter/material.dart';
import 'box.dart';
void main() {
runApp(MyApp());
}
class MyApp extends StatelessWidget{
Widget build(BuildContext context) {
return const MaterialApp(
title: "Test",
home: Scaffold(
bottomNavigationBar: BottomAppBar(
notchMargin: 10.0,
color: Colors.amber,
elevation: 10,
child: Center(
child: BoxApp(),
),
),
),
);
}
}
当点击中间正方形的时候,会改变正方形的颜色
父组件控制子组件的状态
其实与上一小节的类似,只需要修改父组件为状态组件。并将其管理的状态和响应状态的函数传递给子组件即可。
父组件
import 'package:flutter/material.dart';
import 'package:myapp/statelessBox.dart';
import 'box.dart';
void main() {
runApp(MainAppWrapper());
}
class MainAppWrapper extends StatefulWidget {
const MainAppWrapper({super.key});
State<MainAppWrapper> createState() => _MyApp();
}
class _MyApp extends State<MainAppWrapper>{
bool state = false;
void changeSonState() {
setState(() {
this.state = !state;
});
}
Widget build(BuildContext context) {
return MaterialApp(
title: "Test",
home: Scaffold(
appBar: AppBar(
title: const Text("父组件状态传递"),
),
body: Center(
child: StateLessBox(
active: state,
changeState: changeSonState,
),
),
floatingActionButtonLocation: FloatingActionButtonLocation.centerFloat,
floatingActionButton: FloatingActionButton(
tooltip: "修改子组件的颜色",
autofocus: true,
onPressed: changeSonState,
child: const Icon(Icons.ac_unit),
),
),
);
}
}
子组件
import 'package:flutter/material.dart';
class StateLessBox extends StatelessWidget {
const StateLessBox({
super.key,
this.active = false,
required this.changeState,
});
final bool active;
final void Function() changeState;
Widget build(BuildContext context) {
return GestureDetector(
onTap: changeState,
child: Container(
width: 200.0,
height: 200.0,
decoration :BoxDecoration(
color: active ? Colors.lightBlue : Colors.deepOrangeAccent,
),
child :Center(
child: Text(
active ? "active" : "Inactive",
style: const TextStyle(fontSize: 32.0, color :Colors.white),
),
),
),
);
}
}
这样我们可以点击正方形或者悬浮按钮改变中间的正方的颜色。
综合案例 TodoList
在这个案例中我们实现一个任务的待做列表支持任务的添加和删除。
main.dart
父级的控件
import 'package:flutter/material.dart';
import 'package:myapp/statelessBox.dart';
import 'box.dart';
void main() {
runApp(const MainAppWrapper());
}
class MainAppWrapper extends StatefulWidget {
const MainAppWrapper({super.key});
State<MainAppWrapper> createState() => _MyApp();
}
class _MyApp extends State<MainAppWrapper> {
List<String> toList = [];
final TextEditingController _controller = TextEditingController();
void dispose() {
toList.clear();
super.dispose();
}
void addTask() {
setState(() {
toList.add(_controller.text);
});
}
void deleteItem(int item) {
print("Deleting itemIndx: ${item.toString()}");
setState(() {
toList.removeAt(item);
});
}
Widget build(BuildContext context) {
return MaterialApp(
title: "Test",
home: Scaffold(
appBar: AppBar(
title: const Text("Todos"),
),
body: Center(
child: Column(
textDirection: TextDirection.ltr,
mainAxisAlignment: MainAxisAlignment.spaceAround,
children: [
TextButton(onPressed: () {}, child: Text("任务列表")),
Expanded(
flex: 1, // 扩展宽度
child: BoxApp(todoList: [...toList], delFunc: deleteItem)),
TextField(
controller: _controller,
decoration: const InputDecoration(
prefix: Icon(Icons.task_sharp),
),
),
])),
floatingActionButtonLocation: FloatingActionButtonLocation.centerFloat,
floatingActionButton: FloatingActionButton(
tooltip: "添加任务",
autofocus: true,
onPressed: addTask,
child: const Icon(Icons.add_box),
),
),
);
}
}
box.dart
import 'dart:ffi';
import 'package:flutter/material.dart';
import 'package:myapp/todoItem.dart';
// 中间部分任务列表的组件
List<Widget> get_columns(List<String> list, void Function(int) func) {
final List fixedList = Iterable<int>.generate(list.length).toList();
List<Widget> a = fixedList
.map((index) => TodoItemWrapper(
taskName: list[index as int],
deleteTask: () => func(index),
selfIndex: index))
.toList();
return a;
}
class BoxApp extends StatefulWidget {
const BoxApp({super.key, required this.todoList, required this.delFunc});
final List<String> todoList;
final void Function(int) delFunc;
State<BoxApp> createState() => _changeBoxState();
}
// ignore: camel_case_types
class _changeBoxState extends State<BoxApp> {
Widget build(BuildContext context) {
print("BoxApp=====================");
return Container(
color: Colors.blue[100],
child: ListView(
shrinkWrap: true,
children: get_columns(widget.todoList, widget.delFunc),
));
}
}
todoItem.dart
import 'package:flutter/material.dart';
/// 每一个任务行的组件 */
class TodoItemWrapper extends StatefulWidget {
const TodoItemWrapper({
super.key,
required this.taskName,
required this.deleteTask,
required this.selfIndex,
});
final String taskName;
final int selfIndex;
final void Function() deleteTask;
State<TodoItemWrapper> createState() => _todoItem();
}
class _todoItem extends State<TodoItemWrapper> {
bool? isFinish = false;
bool? tapEd = false;
void changeTaskState(bool? state) {
setState(() {
isFinish = state;
});
return;
}
void handelTap() {
setState(() {
tapEd = !tapEd!;
});
}
Widget build(BuildContext context) {
print("reload");
return GestureDetector(
onTap: handelTap,
child: Container(
color: tapEd! ? Colors.green[100] : Colors.white,
child: Row(
textBaseline: TextBaseline.ideographic,
mainAxisAlignment: MainAxisAlignment.spaceEvenly,
children: [
Text("任务: ${(widget.selfIndex + 1).toString()}"),
Checkbox(value: isFinish, onChanged: changeTaskState),
Expanded(
flex: 1,
child: Text(widget.taskName,
textAlign: TextAlign.center,
style: TextStyle(
color:
isFinish as bool ? Colors.blueGrey : Colors.blue,
fontSize: 25.0,
))),
IconButton(
onPressed: widget.deleteTask, icon: Icon(Icons.delete))
],
)));
}
}
``
三、Flutter 中的路由
普通路由实现
页面的主体组件
class MyHomeBody extends StatefulWidget {
const MyHomeBody({super.key});
State<MyHomeBody> createState() => _MyHomeBodyState();
}
class _MyHomeBodyState extends State<MyHomeBody> {
int _currentIndex = 0;
Function(int) changePageIndex(BuildContext context) => (int index) {
setState(() {
_currentIndex = index;
});
Navigator.of(context).push(MaterialPageRoute(
builder: (context) => SearchPage(data: "组件 $index")));
};
Widget build(BuildContext context) {
return Scaffold(
appBar: AppBar(title: Text('路由组件')),
body: Center(
child: Container(
width: 100,
height: 100,
color: Colors.cyanAccent,
)),
bottomNavigationBar: BottomNavigationBar(
currentIndex: _currentIndex,
onTap: changePageIndex(context),
items: const [
BottomNavigationBarItem(
icon: Icon(Icons.home),
label: '首页',
),
BottomNavigationBarItem(icon: Icon(Icons.category), label: '分类'),
BottomNavigationBarItem(icon: Icon(Icons.settings), label: '设置'),
],
),
floatingActionButton: FloatingActionButton(
onPressed: () {},
child: Text("返回"),
tooltip: "返回",
),
);
}
}
SearchPage子组件
class SearchPage extends StatelessWidget {
final String data;
const SearchPage({super.key, required this.data});
Widget build(BuildContext context) {
return Scaffold(
appBar: AppBar(
title: Text("data"),
),
body: GestureDetector(
onTap: () {
Navigator.of(context).pop();
},
child: Text("search $data")),
);
}
}
命名路由
命名路由其实与普通路由类似,不过需要我们先去设置路由的跳转组件。
根组件
class MyApp extends StatelessWidget {
const MyApp({super.key});
// This widget is the root of your application.
Widget build(BuildContext context) {
return MaterialApp(
title: 'Flutter Demo',
theme: ThemeData(
primarySwatch: Colors.blue,
),
routes: {
"/form0": (context) => SearchPage(data: "form0"),
"/form1": (context) => SearchPage(data: "form1"),
"/form2": (context) => SearchPage(data: "form2"),
},
home: const MyHomeBody());
}
}
路由触发部分组件
class MyHomeBody extends StatefulWidget {
const MyHomeBody({super.key});
State<MyHomeBody> createState() => _MyHomeBodyState();
}
class _MyHomeBodyState extends State<MyHomeBody> {
int _currentIndex = 0;
Function(int) changePageIndex(BuildContext context) => (int index) {
setState(() {
_currentIndex = index;
});
Navigator.pushNamed(context, "/form${index.toString()}");
};
Widget build(BuildContext context) {
return Scaffold(
appBar: AppBar(title: Text('路由组件')),
body: Center(
child: Container(
width: 100,
height: 100,
color: Colors.cyanAccent,
)),
bottomNavigationBar: BottomNavigationBar(
currentIndex: _currentIndex,
onTap: changePageIndex(context),
items: const [
BottomNavigationBarItem(
icon: Icon(Icons.home),
label: '首页',
),
BottomNavigationBarItem(icon: Icon(Icons.category), label: '分类'),
BottomNavigationBarItem(icon: Icon(Icons.settings), label: '设置'),
],
),
floatingActionButton: FloatingActionButton(
onPressed: () {},
child: Text("返回"),
tooltip: "返回",
),
);
}
}
实现的效果与上一小节的类似,这里就不贴出了。
请求数据
Get / Post 请求
首先安装配置依赖包,这里用的时http 的第三方包 https://pub.dev/packages/http。
class MyHomeBody extends StatefulWidget {
const MyHomeBody({super.key});
State<MyHomeBody> createState() => _MyHomeBodyState();
}
class _MyHomeBodyState extends State<MyHomeBody> {
String? msgGet = "";
String? msgPost = "";
_getData() async {
var url = Uri.parse("https://jd.itying.com/api/httpGet");
var response = await http.get(url);
if (response.statusCode == 200) {
setState(() {
// 解码json字符串并取值
msgGet = json.decode(response.body)["msg"];
});
} else {
print(response.statusCode);
}
}
_postData() async {
var url = Uri.parse("https://jd.itying.com/api/httpPost");
var response = await http.post(url, body: {
"usrName": "Ywh",
"age": "18",
});
if (response.statusCode == 200) {
setState(() {
msgPost = json.decode(response.body)["msg"];
});
} else {
print(response.statusCode);
}
}
Widget build(BuildContext context) {
return Scaffold(
appBar: AppBar(
title: Text('路由组件'),
),
body: Center(
child: Column(
children: <Widget>[
ListTile(
title: Text('Get data'),
subtitle: Text(msgGet!),
),
ListTile(
title: Text('Post data'),
subtitle: Text(msgPost!),
),
OutlinedButton(
onPressed: () {
_getData();
},
child: Text("Get request")),
OutlinedButton(
onPressed: () {
_postData();
},
child: Text("Post request")),
],
),
));
}
}

