ELK从零搭建(filebeat+kafka+logstash+es+kibana)
当系统规模比较大,模块非常多时,或者一些重要日志需要归档时,就需要有个日志统一管理平台。本人所在公司有个需求,边缘端的日志需要统一上传管理,方便后续问题定位。方案是边缘端定时打包日志上传到fastdfs,然后把url推送到业务端,业务根据url从fastdfs上获取到日志,解压缩到指定目录,filebeat获取到日志发生变化,然后解析发送到kafka,logstash监听kafka把日志存储到es里面,然后业务系统可以在界面查询。本文主要介绍EKL搭建,对于业务系统ES操作封装后续有时间介绍。
环境:filebeat(8.0.0)+logstash(8.0.0)+kafka(2.8.0)+es(7.14.0)+kibana(7.14.2)
一、filebeat搭建
1、从官网下载Download Filebeat • Lightweight Log Analysis | Elastic,上传到服务器,进入上传目录,执行命令:tar -zxvf filebeat-8.0.0-linux-x86_64.tar.gz
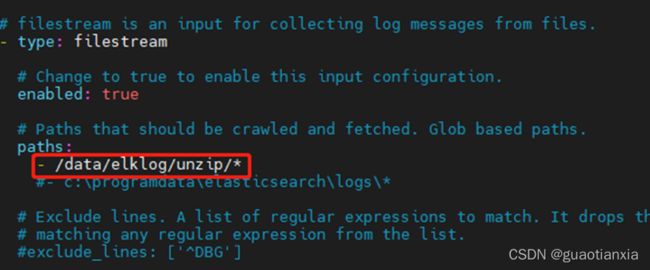
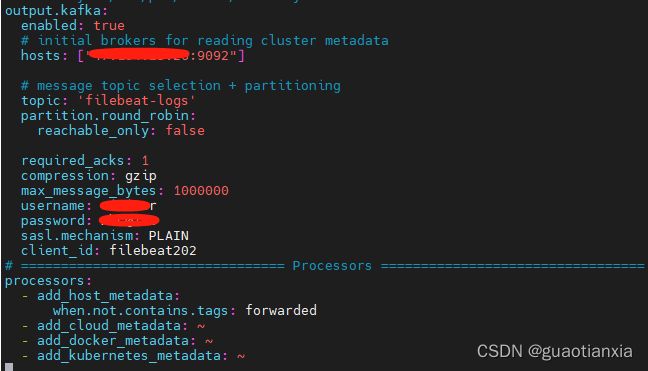
2、修改配置文件filebeat.yml,只要配置文件路径和输出kafka
output.kafka:
enabled: true
hosts: ["127.0.0.1:9092"]
topic: 'filebeat-logs'
partition.round_robin:
reachable_only: false
required_acks: 1
compression: gzip
max_message_bytes: 1000000
username: demo
password: demo@123
sasl.mechanism: PLAIN
client_id: filebeat202
说明:本人配置了kafka服务端连接需要登录验证,需要配置username/password/sasl.mechanism,如kafka不需要登录验证,则不需要配置这三个选项
3、启动filebeat,执行nohup ./filebeat -e -c filebeat.yml &
二、kafka搭建
可参照前期写的kafka搭建
kafka服务端设置用户和密码登录及springboot访问实现_guaotianxia的博客-CSDN博客_登陆kafka
三、logstash搭建
1、下载logstash (https://www.elastic.co/cn/downloads/logstash)上传到指定目录,并执行命令:tar -zxvf logstash-8.0.0-linux-x86_64.tar.gz
2、创建logstash.conf文件, 可以cp logstash-sample.conf logstash.conf,添加如下内容
input {
#连接kafka,从kafka获取日志内容
kafka {
bootstrap_servers => "127.0.0.1:9092"
group_id => "logstash_log_202"
client_id => "logstash1"
auto_offset_reset => "latest"
topics => ["filebeat-logs"]
#add_field => {"logs_type" => "wfl_log"}
codec => json { charset => "UTF-8" }
sasl_mechanism => "PLAIN"
security_protocol => "SASL_PLAINTEXT"
sasl_jaas_config => "org.apache.kafka.common.security.plain.PlainLoginModule required username='hehe' password='123456';"
}
}
filter {
#格式化@timestamp时间为年月,并赋值为indexmonth变量
ruby {
code => 'event.set("indexmonth", event.get("@timestamp").time.localtime.strftime("%Y%m"))'
}
grok {
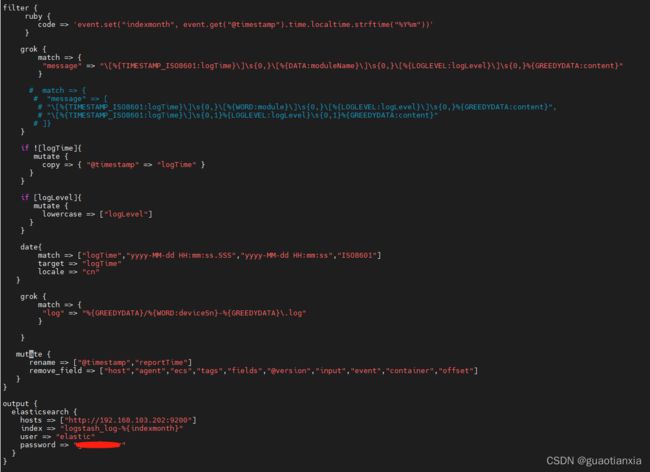
#解析日志内容,可匹配多种日志内容,获取日志时间、模块名、日志级别和内容。具体写法参照截屏图片,因为正则匹配csdn会无法显示,反斜杠都改为双反斜杠
match => {
"message" => "\\[%{TIMESTAMP_ISO8601:logTime}\\]\\s{0,}\\[%{DATA:moduleName}\\]\\s{0,}\\[%{LOGLEVEL:logLevel}\\]\\s{0,}%{GREEDYDATA:content}","\\[%{TIMESTAMP_ISO8601:logTime}\\]\\s{0,1}%{LOGLEVEL:logLevel}\\s{0,1}%{GREEDYDATA:content}"
}
}
#如果无法从日志内容解析到日志时间,则使用自带的时间戳
if ![logTime]{
mutate {
copy => { "@timestamp" => "logTime" }
}
}
#如果获取到日志级别,格式化为小写
if [logLevel]{
mutate {
lowercase => ["logLevel"]
}
}
#使用时间控件格式化时间,否则如es字段默认为text格式
date{
match => ["logTime","yyyy-MM-dd HH:mm:ss.SSS","yyyy-MM-dd HH:mm:ss","ISO8601"]
target => "logTime"
locale => "cn"
}
grok {
#解析日志路径,获取设备序列号
match => {
"log" => "%{GREEDYDATA}/%{WORD:deviceSn}-%{GREEDYDATA}\.log"
}
}
mutate {
#添加临时字段,不会写入es
add_field => { "[@metadata][target_index]" => "logstash-log-%{+YYYY.MM}" }
#重命名字段值
rename => ["@timestamp","reportTime"]
#删除字段,不写入es
remove_field=> ["host","agent","ecs","tags","fields","@version","input","event","container","offset"]
}
}
output {
elasticsearch {
hosts => ["http://192.168.103.202:9200"]
index => "logstash_log-%{indexmonth}"
#index => "%{[@metadata][target_index]}"
user => "elastic"
password => "123456"
}
}
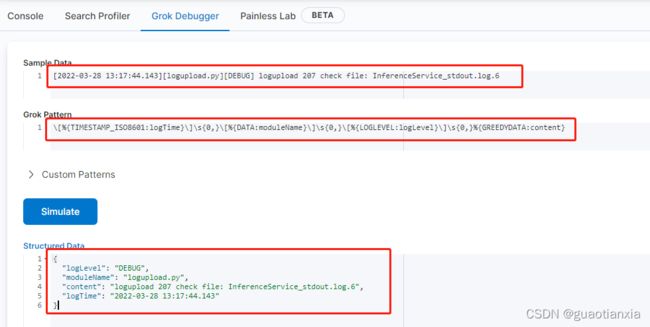
说明:在写grok,解析日志内容为结构化数据时,可以使用kibana的Dev tools进行测试,如下
3、启动,执行命令:nohup bin/logstash -f ./config/logstash.conf & ,然后执行ps -ef |grep logstash查看是否启动成功
四.es搭建
参照前期写的es搭建
linux环境skywalking搭建及项目应用_guaotianxia的博客-CSDN博客_linux安装部署skywalking
五、kibana搭建
1、从官网下载(Download Kibana Free | Get Started Now | Elastic),执行tar -zxvf kibana-7.14.2-linux-x86_64.tar.gz
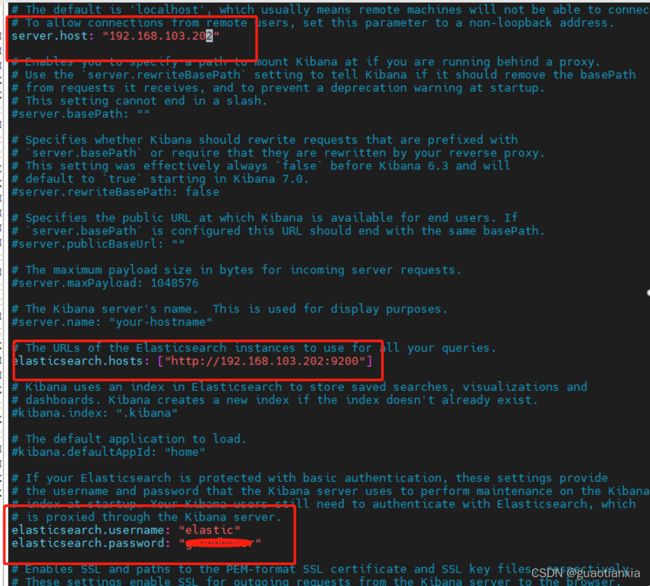
2、进入config目录,修改kibana.yml配置文件
3、启动,执行命令:nohup ./kibana > /dev/null 2>&1 &
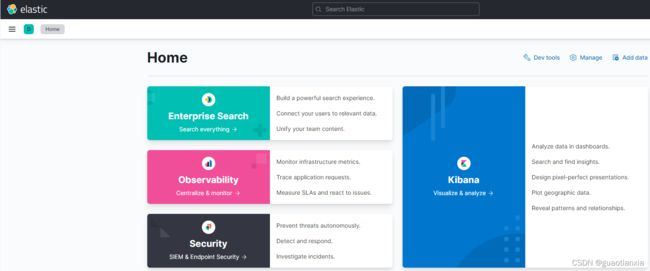
4、浏览器输入:http://192.168.103.202:5601,输入用户名和密码
六、验证
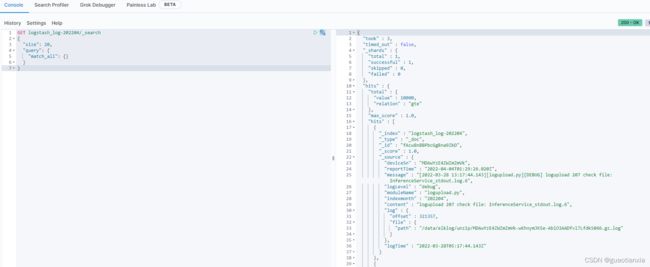
使用kibana的dev tools,查询是否有日志写入
GET logstash_log-202204/_search
{
"size": 20,
"query": {
"match_all": {}
}
}
