SpringBoot源码(一)SpringBoot如何整合SpringMVC的
1.写在前面
笔者上一篇博客介绍了SpringBoot如何创建自定义start,同时整合到SpringBoot中,可以说是对SpringBoot的自动装配的原理进行一种应用吧,如果读者对这块的原理不是很清楚,笔者建议可以看下笔者的第一篇博客《SpringBoot的应用(一)》,今天笔者带着大家来看看SpringBoot是如何整合Spring MVC的,废话不多说,直接上代码。
2.本篇博客的概述
3.DispatcherServlet注册
我们都知道SpringMVC的核心类是DispatcherServlet所以我们需要知道SpringBoot怎么将DispatcherServlet和SpringBoot进行整合。笔者在第一篇就介绍了SpringBoot自动装配的原理了,是通过读取SpringBoot目录下MATA-INF/spring.factories,于是笔者打开了对应的文件,找找看有没有像自动配置SpringMVC的类,于是笔者找到了DispatcherServletAutoConfiguration,具体的如下:
于是笔者打开了这个类,具体的代码如下,笔者只展示了核心的代码:
package org.springframework.boot.autoconfigure.web.servlet;

import java.util.Arrays;
import java.util.List;

import javax.servlet.MultipartConfigElement;
import javax.servlet.ServletRegistration;

import org.springframework.beans.factory.ObjectProvider;
import org.springframework.beans.factory.config.ConfigurableListableBeanFactory;
import org.springframework.boot.autoconfigure.AutoConfigureAfter;
import org.springframework.boot.autoconfigure.AutoConfigureOrder;
import org.springframework.boot.autoconfigure.EnableAutoConfiguration;
import org.springframework.boot.autoconfigure.condition.ConditionMessage;
import org.springframework.boot.autoconfigure.condition.ConditionMessage.Style;
import org.springframework.boot.autoconfigure.condition.ConditionOutcome;
import org.springframework.boot.autoconfigure.condition.ConditionalOnBean;
import org.springframework.boot.autoconfigure.condition.ConditionalOnClass;
import org.springframework.boot.autoconfigure.condition.ConditionalOnMissingBean;
import org.springframework.boot.autoconfigure.condition.ConditionalOnWebApplication;
import org.springframework.boot.autoconfigure.condition.ConditionalOnWebApplication.Type;
import org.springframework.boot.autoconfigure.condition.SpringBootCondition;
import org.springframework.boot.context.properties.EnableConfigurationProperties;
import org.springframework.boot.web.servlet.ServletRegistrationBean;
import org.springframework.boot.web.servlet.support.SpringBootServletInitializer;
import org.springframework.context.annotation.Bean;
import org.springframework.context.annotation.ConditionContext;
import org.springframework.context.annotation.Conditional;
import org.springframework.context.annotation.Configuration;
import org.springframework.context.annotation.Import;
import org.springframework.core.Ordered;
import org.springframework.core.annotation.Order;
import org.springframework.core.type.AnnotatedTypeMetadata;
import org.springframework.web.multipart.MultipartResolver;
import org.springframework.web.servlet.DispatcherServlet;

//自动配置的顺序
@AutoConfigureOrder(Ordered.HIGHEST_PRECEDENCE)
//配置类,同时不生成代理类
@Configuration(proxyBeanMethods = false)
//是Web容器同时是Servlet才会创建
@ConditionalOnWebApplication(type = Type.SERVLET)
//容器中需要有DispatcherServlet
@ConditionalOnClass(DispatcherServlet.class)
//自动配置在ServletWebServerFactoryAutoConfiguration类后
@AutoConfigureAfter(ServletWebServerFactoryAutoConfiguration.class)
public class DispatcherServletAutoConfiguration {

	public static final String DEFAULT_DISPATCHER_SERVLET_BEAN_NAME = "dispatcherServlet";

	public static final String DEFAULT_DISPATCHER_SERVLET_REGISTRATION_BEAN_NAME = "dispatcherServletRegistration";

  //配置类同时不生成代理类
	@Configuration(proxyBeanMethods = false)
  //这儿匹配规则就是调用DefaultDispatcherServletCondition的getMatchOutcome方法,就是看看dispatcherServlet有没有在容器,如果在才会加载配置文件
	@Conditional(DefaultDispatcherServletCondition.class)
  //需要有ServletRegistration类
	@ConditionalOnClass(ServletRegistration.class)
  //WebMvcProperties配置文件生效
	@EnableConfigurationProperties(WebMvcProperties.class)
	protected static class DispatcherServletConfiguration {

		@Bean(name = DEFAULT_DISPATCHER_SERVLET_BEAN_NAME)
    //读取一些springMVC的配置的内容,前缀是spring.mvc
		public DispatcherServlet dispatcherServlet(WebMvcProperties webMvcProperties) {
			DispatcherServlet dispatcherServlet = new DispatcherServlet();
			dispatcherServlet.setDispatchOptionsRequest(webMvcProperties.isDispatchOptionsRequest());
			dispatcherServlet.setDispatchTraceRequest(webMvcProperties.isDispatchTraceRequest());
			dispatcherServlet.setThrowExceptionIfNoHandlerFound(webMvcProperties.isThrowExceptionIfNoHandlerFound());
			dispatcherServlet.setPublishEvents(webMvcProperties.isPublishRequestHandledEvents());
			dispatcherServlet.setEnableLoggingRequestDetails(webMvcProperties.isLogRequestDetails());
			return dispatcherServlet;
		}

	}

  //配置类,但是不生成代理类
	@Configuration(proxyBeanMethods = false)
  //这儿匹配规则就是调用DispatcherServletRegistrationCondition的getMatchOutcome方法
	@Conditional(DispatcherServletRegistrationCondition.class)
  //存在ServletRegistration类
	@ConditionalOnClass(ServletRegistration.class)
  //使WebMvcProperties配置文件生效
	@EnableConfigurationProperties(WebMvcProperties.class)
	@Import(DispatcherServletConfiguration.class)
	protected static class DispatcherServletRegistrationConfiguration {

		@Bean(name = DEFAULT_DISPATCHER_SERVLET_REGISTRATION_BEAN_NAME)
		@ConditionalOnBean(value = DispatcherServlet.class, name = DEFAULT_DISPATCHER_SERVLET_BEAN_NAME)
		//将DispatcherServlet添加到Tomcat容器去
    public DispatcherServletRegistrationBean dispatcherServletRegistration(DispatcherServlet dispatcherServlet,
				WebMvcProperties webMvcProperties, ObjectProvider<MultipartConfigElement> multipartConfig) {
			DispatcherServletRegistrationBean registration = new DispatcherServletRegistrationBean(dispatcherServlet,
					webMvcProperties.getServlet().getPath());
			registration.setName(DEFAULT_DISPATCHER_SERVLET_BEAN_NAME);
			registration.setLoadOnStartup(webMvcProperties.getServlet().getLoadOnStartup());
			multipartConfig.ifAvailable(registration::setMultipartConfig);
			return registration;
		}

	}

}
上面的自动配置类,大概执行操作就是将DispatcherServlet添加到Spring容器中去,同时往Tomcat中添加了这个DispatcherServlet,拦截的是所有的请求。这儿需要注意的是两个地方。笔者之前的博客《SpringMVC源码系列(二)0XML搭建SpringMVC环境的原理》中有介绍,SpringMVC是将Spring的容器添加到DispatcherServlet中去的,而这里的SpringBoot是将DispatcherServlet添加到Spring的容器中的那么这儿实现原理又是怎么样的?笔者先带大家看下DispatcherServlet类的构造方法,具体的代码如下:
public class DispatcherServlet extends FrameworkServlet {
  //SpringBoot
  public DispatcherServlet() {
		super();
		setDispatchOptionsRequest(true);
	}
  //SpringMVC
  public DispatcherServlet(WebApplicationContext webApplicationContext) {
		super(webApplicationContext);
		setDispatchOptionsRequest(true);
	}
}
从上面的代码可以看出都是调用了父类的构造方法,于是笔者又打开了父类的构造函数,具体的代码如下:
public abstract class FrameworkServlet extends HttpServletBean implements ApplicationContextAware {

  public FrameworkServlet() {
	}

  public FrameworkServlet(WebApplicationContext webApplicationContext) {
		this.webApplicationContext = webApplicationContext;
	}

  @Override
	public void setApplicationContext(ApplicationContext applicationContext) {
		if (this.webApplicationContext == null && applicationContext instanceof WebApplicationContext) {
			this.webApplicationContext = (WebApplicationContext) applicationContext;
			this.webApplicationContextInjected = true;
		}
	}
}
终于让笔者知道原理,原来是ApplicationContextAware接口,通过调用setApplicationContext方法,将Spring的容器注入到DispatcherServlet中去的,笔者在这不得不感叹Spring的牛逼。到此第一个注意的点就讲完了。那么第二个注意的就是Tomcat怎么将DispatcherServlet添加到Tomcat容器中去,相信看过笔者的博客都是知道,这个原理是Servlet3.0的一个规范,SPI的技术,如果有不清楚的读者可以看下笔者的这边博客《SpringMVC源码系列(二)0XML搭建SpringMVC环境的原理》,那么我们可以看下SpringBoot也是这样的做的,先来看下DispatcherServletRegistrationConfiguration类的继承图,具体的如下:
我们可以看下ServletContextInitializer类,是不是有Tomcat的应该调用的方法,具体的代码如下:
package org.springframework.boot.web.servlet;

import javax.servlet.ServletContainerInitializer;
import javax.servlet.ServletContext;
import javax.servlet.ServletException;

import org.springframework.web.SpringServletContainerInitializer;
import org.springframework.web.WebApplicationInitializer;

@FunctionalInterface
public interface ServletContextInitializer {

	void onStartup(ServletContext servletContext) throws ServletException;

}
可以发现有onStartup(ServletContext servletContext)方法,至此整个DispatcherServlet注册就讲完了。虽然DispatcherServlet注册完成了,但是还有一些SpringMVC的配置,比如视图的解析前缀,还有后缀,这些东西在哪配置的呢,因为SpringBoot已经将xml的文件干掉了,这个时候我们需要看下SpringBoot怎么做的。
4.WebAutoConfiguration
其实一些SpringMVC的配置信息SpringBoot都是在WebAutoConfiguration这个类中配置了,例如我们上面说的提到的视图的解析前缀和后缀也是在这个类中配置的具体的代码如下:
@Configuration(proxyBeanMethods = false)
@ConditionalOnWebApplication(type = Type.SERVLET)
@ConditionalOnClass({ Servlet.class, DispatcherServlet.class, WebMvcConfigurer.class })
@ConditionalOnMissingBean(WebMvcConfigurationSupport.class)
@AutoConfigureOrder(Ordered.HIGHEST_PRECEDENCE + 10)
@AutoConfigureAfter({ DispatcherServletAutoConfiguration.class, TaskExecutionAutoConfiguration.class,
		ValidationAutoConfiguration.class })
public class WebMvcAutoConfiguration {

	@SuppressWarnings("deprecation")
	@Configuration(proxyBeanMethods = false)
	@Import(EnableWebMvcConfiguration.class)
	@EnableConfigurationProperties({ WebMvcProperties.class,
			org.springframework.boot.autoconfigure.web.ResourceProperties.class, WebProperties.class })
	@Order(0)
	public static class WebMvcAutoConfigurationAdapter implements WebMvcConfigurer {

		@Bean
		@ConditionalOnMissingBean
		public InternalResourceViewResolver defaultViewResolver() {
			InternalResourceViewResolver resolver = new InternalResourceViewResolver();
			resolver.setPrefix(this.mvcProperties.getView().getPrefix());
			resolver.setSuffix(this.mvcProperties.getView().getSuffix());
			return resolver;
		}

	}
从上面可以看出是从配置文件中读取的,我们可以配置如下的内容,让其跳转指定的页面
spring:
  mvc:
    view:
      suffix: .html
那么笔者可能会问为什么不配置前缀呢?其实SpringBoot有配置对应的前缀,具体的代码如下:
public static class Resources {
	private static final String[] CLASSPATH_RESOURCE_LOCATIONS = { "classpath:/META-INF/resources/",
				"classpath:/resources/", "classpath:/static/", "classpath:/public/" };

	private String[] staticLocations = CLASSPATH_RESOURCE_LOCATIONS;
}

@Override
public void addResourceHandlers(ResourceHandlerRegistry registry) {
		if (!this.resourceProperties.isAddMappings()) {
			logger.debug("Default resource handling disabled");
			return;
		}
		Duration cachePeriod = this.resourceProperties.getCache().getPeriod();
		CacheControl cacheControl = this.resourceProperties.getCache().getCachecontrol().toHttpCacheControl();
		if (!registry.hasMappingForPattern("/webjars/**")) {
			customizeResourceHandlerRegistration(registry.addResourceHandler("/webjars/**")
					.addResourceLocations("classpath:/META-INF/resources/webjars/")
					.setCachePeriod(getSeconds(cachePeriod)).setCacheControl(cacheControl)
					.setUseLastModified(this.resourceProperties.getCache().isUseLastModified()));
		}
		String staticPathPattern = this.mvcProperties.getStaticPathPattern();
		if (!registry.hasMappingForPattern(staticPathPattern)) {
			customizeResourceHandlerRegistration(registry.addResourceHandler(staticPathPattern)
					.addResourceLocations(getResourceLocations(this.resourceProperties.getStaticLocations()))
					.setCachePeriod(getSeconds(cachePeriod)).setCacheControl(cacheControl)
					.setUseLastModified(this.resourceProperties.getCache().isUseLastModified()));
		}
	}
通过上面的代码可以看到SpringBoot配置了几个目录,用来解析静态资源,这个可以理解成前缀。上面讲了通过配置文件读取的那么还有什么方法来配置解析的前缀和后缀呢?我们再看看下这个方法,具体的代码如下:
@Bean
@ConditionalOnMissingBean
public InternalResourceViewResolver defaultViewResolver() {
	InternalResourceViewResolver resolver = new InternalResourceViewResolver();
	resolver.setPrefix(this.mvcProperties.getView().getPrefix());
	resolver.setSuffix(this.mvcProperties.getView().getSuffix());
	return resolver;
}
可以发现这个Bean创建的前提就是这个容器中没有这个类,那么笔者是不是可以创建一个InternalResourceViewResolver来添加到Spring的容器,让我们的InternalResourceViewResolver覆盖Spring写的InternalResourceViewResolver类,笔者这就测试一下,书写以下的代码:
package com.ys.config;

import org.springframework.context.annotation.Bean;
import org.springframework.context.annotation.Configuration;
import org.springframework.web.servlet.view.InternalResourceViewResolver;

@Configuration
public class TestConfig {

    @Bean
    public InternalResourceViewResolver internalResourceViewResolver(){
        InternalResourceViewResolver internalResourceViewResolver = new InternalResourceViewResolver();
        internalResourceViewResolver.setSuffix(".html");
        return internalResourceViewResolver;
    }
}
package com.ys;

import org.springframework.boot.SpringApplication;
import org.springframework.boot.autoconfigure.SpringBootApplication;
import org.springframework.stereotype.Controller;
import org.springframework.web.bind.annotation.GetMapping;
import org.springframework.web.servlet.config.annotation.EnableWebMvc;

@SpringBootApplication
@Controller
public class SpringBootTestApplication {

    public static void main(String[] args) {
        SpringApplication.run(SpringBootTestApplication.class,args);
    }

    @GetMapping("/test")
    public String test(){
        return "test";
    }
}
HTML页面如下,记住要创建上面提到的几个目录:
<html lang="en">
<head>
    <meta charset="UTF-8">
    <title>Titletitle>
head>
<body>
	<h1>123456h1>
body>
html>
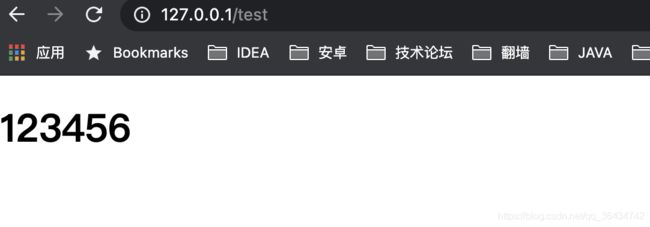
运行的结果如下:
可以发现我们的猜想是正确的,这就是看源码的好处,不然你只知道在配置文件中配置这个解析的后缀。
5.ContentNegotiatingViewResolver
看完上面的代码,现在笔者需要带着查看SpringBoot中配置视图解析,具体的还是WebAutoConfiguration这个类,具体的代码如下:
@Bean
@ConditionalOnBean(ViewResolver.class)
@ConditionalOnMissingBean(name = "viewResolver", value = ContentNegotiatingViewResolver.class)
public ContentNegotiatingViewResolver viewResolver(BeanFactory beanFactory) {
	ContentNegotiatingViewResolver resolver = new ContentNegotiatingViewResolver();
	resolver.setContentNegotiationManager(beanFactory.getBean(ContentNegotiationManager.class));
	// ContentNegotiatingViewResolver uses all the other view resolvers to locate
	// a view so it should have a high precedence
	resolver.setOrder(Ordered.HIGHEST_PRECEDENCE);
	return resolver;
}
可以看到加入的是ContentNegotiatingViewResolver这个视图解析类,于是笔者打开对应的类,看到一个很重要的方法,具体的代码如下:
@Override
protected void initServletContext(ServletContext servletContext) {
    //获取容器中的所有的视图解析器
		Collection<ViewResolver> matchingBeans =
				BeanFactoryUtils.beansOfTypeIncludingAncestors(obtainApplicationContext(), ViewResolver.class).values();
  //视图解析器没有初始化
		if (this.viewResolvers == null) {
      //将刚才查找出来的视图解析器全部添加到这个集合中去
			this.viewResolvers = new ArrayList<>(matchingBeans.size());
			for (ViewResolver viewResolver : matchingBeans) {
				if (this != viewResolver) {
					this.viewResolvers.add(viewResolver);
				}
			}
		}
		else {
			for (int i = 0; i < this.viewResolvers.size(); i++) {
				ViewResolver vr = this.viewResolvers.get(i);
				if (matchingBeans.contains(vr)) {
					continue;
				}
				String name = vr.getClass().getName() + i;
        //初始化没有在viewResolvers集合中但是在没有matchingBeans的视图解析器
				obtainApplicationContext().getAutowireCapableBeanFactory().initializeBean(vr, name);
			}

		}
  //排序
		AnnotationAwareOrderComparator.sort(this.viewResolvers);
		this.cnmFactoryBean.setServletContext(servletContext);
	}
这个方法是在初始化servlet容器的时候执行的。通过上面的方法,想必读者清楚了在SpringBoot中,怎么给SpringMVC添加一个视图解析器,只需要把这个视图解析添加到Spring容器中就可以了。
6.Converter
自定义转换器,废话不多说,笔者先带大家看个例子,笔者打算定义一个字符串转日期的转换器,具体的代码如下:
package com.ys.converter;

import org.springframework.core.convert.converter.Converter;
import org.springframework.stereotype.Component;

import java.text.ParseException;
import java.text.SimpleDateFormat;
import java.util.Date;

@Component
public class DateConvert implements Converter<String, Date> {
    //日期格式
    SimpleDateFormat sdf = new SimpleDateFormat("yyyy-MM-dd");

    @Override
    public Date convert(String s) {
        if (s != null && !"".equals(s)) {
            try {
                //解析参数
                Date date = sdf.parse(s);
                return date;

            } catch (ParseException e) {
                e.printStackTrace();
            }
        }
        return null;
    }
}
书写以下的测试代码,具体的如下:
@GetMapping("/test")
public void test(Date date){
   System.out.println(date);
}
我们再去调用请求这个地址,看看能不能转换成功。
可以看到我们的日期是转换成功了。SpringBoot还是提供了其他的自定义转换器Formatter,那么两者区别是什么呢?
两者的作用一样,都是类型转换。org.springframework.format.Formatter只能做String类型到其他类型的转换。org.springframework.core.convert.converter.Converter可以做任意类型的转换。笔者这边就不写org.springframework.format.Formatter的例子了。
7.HttpMessageConverters
消息的转换器,SpringBoot是怎么给SpringMVC添加消息转换器,还是看WebAutoConfiguration类,具体的方法如下:
@Override
public void configureMessageConverters(List<HttpMessageConverter<?>> converters) {
		this.messageConvertersProvider
				.ifAvailable((customConverters) -> converters.addAll(customConverters.getConverters()));
}
笔者这儿代码有点看不懂,有懂的大佬可以教教笔者。customConverters这个对象包含Spring容器中所有的消息转换器,所以SpringBoot配置消息转换器,一样只需要配置将这个消息转换器添加到Spring容器中即可。
8.写在最后
至此SpringBoot整合SpringMVC就写完了,简单上介绍了SpringBoot与SpringMVC整合的一些源码。


