深度学习模型部署,c++调用python模块的Tensorflow推理过程
文章目录
- 前言
- 一、环境配置
- 二、使用步骤
- 1创建c++项目
- 2.代码演示
- 总结
前言
深度学习的数据处理以及模型训练测试等过程都是Python工具实现的,在C++项目中的部署就显得不方便,目主要有几种途径,1)通过编译C++接口的库,比如C++版本的Tensorflow,C++实现推理过程;2)通过特定的工具实现,比如OpenCV实现模型部署,这种方法局限性高;3)通过C++和Python混编,通过C++调用Python推理过程,这里主要实现最后一种方式。
一、环境配置
- VS2015;
- Tensorflow v1.14,含Keras 库;
- Anaconda 配置的虚拟环境
二、使用步骤
1.创建C++工程
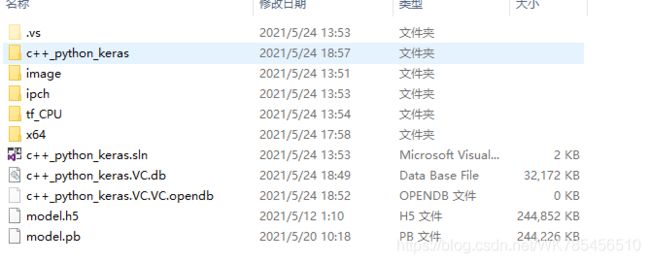
默认你对VS有一定的熟悉度,工程创建之后,配置环境;我这里使用的是Anaconda的虚拟环境;将虚拟环境复制到C++项目中;我这里有GPU环境和CPU环境;我以CPU为例:
复制到你的工程中:
模型也复制到该文件夹:model.h5(Keras训练的模型),也可以是(pb格式)模型;看你自己实现过程。建议用H5模型,过程更简单。
以Debug模式配置环境:VC++目录中包含目录:..\tf_CPU\include; 库目录:..\tf_CPU\libs;
链接器的输入:附加依赖项:python37_d.lib;这里以你的Python版本设置;查看你的tf_CPU\libs是什么版本,并将python37.lib 复制一份改为python37_d.lib.因为是Debug模式所以要改一下名。
环境配好进入下一部分。
2.代码演示
创建Python脚本:主要是导入模型,数据处理:
这里我创建:keras_predict.py文件;
代码如下(示例):
import time
import numpy as np
from tensorflow import keras
from tensorflow.keras.preprocessing.image import load_img
#print("导入模块完成")
model_path="..\\model.h5"

model=keras.models.load_model(model_path)  #导入模型,model是全局变量,不要写入函数里面,这样写的好处是调用时只加载一次模型,不需要每次都加载模型;

#这里设置一个阈值的参数,个人项目需要,你可以不设置
def predict_val(images,threshold=0.0):
    newtime=time.time()
    image=load_img(images,target_size=(256,256))
    image=np.array(image, np.float32)/255.
    image= np.reshape(image, (1, 256, 256, 3))
    predict_value=model.predict(image,batch_size=1)
    oldtime=time.time()
    one_time=oldtime-newtime
    #print("image:%s" % images,predict_value[0],"time:%f" % one_time)
    max_index=np.argmax(predict_value[0])
    pre_maxval=np.max(predict_value[0])
    if (max_index==2)&(pre_maxval
要注意的点:
1)尽量使用tensorflow包含的函数接口实现代码:减少不必要的库导入,比如PIL,cv2等,有些库不容易在C++工程中加载进来。可以在模块到入后加个输出语句,判断是否成功导入模块;
2)一定要在自己的编辑运行调试一遍,确保能运行成功,比如在Pycharm中。
3)将文件keras_predict.py复制到你的C++项目中;路径是:项目名称\x64\Debug; 在VS中运行一下产生Debug文件夹;
VS中创建工程,
#include"stdafx.h"
#include
#include
#include


#include
#include
#include
using namespace std;
void testImage(char* imgpath)
{
	///char*modelpath = "..\\model-40.h5";
	try {
		Py_SetPythonHome(L"..\\tf_CPU");//设置Python路径,也可以指定GPU环境中的python
		//Py_SetPythonHome(L"E:\\anaconda\\envs\\tf_GPU");
		Py_Initialize();
		//PyEval_InitThreads();
		float threshold = 0.83;
		PyObject*pFunc = NULL;
		PyObject*pArg = NULL;
		PyObject* module = NULL;
		PyObject* value = NULL;
		module = PyImport_ImportModule("keras_predict");//myModel:Python文件名
		if (!module) {
			printf("cannot open module!");
			Py_Finalize();
			return;
		}

		pFunc = PyObject_GetAttrString(module, "predict_val");//test_one_image:Python文件中的函数名
		if (!pFunc) {
			printf("cannot open FUNC!");
			Py_Finalize();
			return;
		}
		//开始调用model
		float maxvalue;
		int maxindex;
		float onetime;
		if (module != NULL) {
			pArg = PyTuple_New(2); ;           //初始化一个列表
			PyTuple_SetItem(pArg, 0, Py_BuildValue("s", imgpath));          //对参赛元组复制
			PyTuple_SetItem(pArg, 1, Py_BuildValue("f", threshold));

			//pArg = Py_BuildValue("(s)(f)", imgpath, threshold);//转化成python对象,(path)
			PyObject*value = PyEval_CallObject(pFunc, pArg);
			PyArg_ParseTuple(value, "f|i|f", &maxvalue, &maxindex,&onetime);
			if (value)
			{
				printf("MaxValue:  %f    MaxIndx:  %d    Time:  %f\n", maxvalue, maxindex,onetime);
			}

		}
	}
	catch (exception& e)
	{
		cout << "Standard exception: " << e.what() << endl;
	}
}

void getAllFiles(string path, vector&files, string fileType) {

	//文件句柄
	intptr_t hFile = 0;
	//long hFile = 0;
	struct _finddata_t  fileInfo;
	string p;

	if ((hFile = _findfirst(p.assign(path).append("\\*" + fileType).c_str(), &fileInfo)) != -1) {
		do {
			files.push_back(p.assign(path).append("\\").append(fileInfo.name));
		} while (_findnext(hFile, &fileInfo) == 0);

		_findclose(hFile);//关闭句柄

	}

}
int main()
{
	string folder_path = "C:\\Users\\KGK\\Desktop\\training\\loss";//加入你自己文件夹路径
	vector temp;
	getAllFiles(folder_path, temp, ".jpeg");//获取整个文件夹图片,格式.jpeg
	char imgpath[1000];
	for (int i = 0; i < temp.size(); i++) {
		strcpy_s(imgpath, temp[i].c_str());
		testImage(imgpath);
	}
	system("pause");
	return 0;
}
总结
测试结果:一张图像需要220-260ms,c++调用python在cpu环境下:
测试结果:25-30ms,c++调用python在cpu环境下:gpu :gtx1060 6G
使用c++版本tensorflow,测试一张图像大概是:200ms,和c++调用python速度相差不大。


