HttpRunnerManager + Jenkins接口自动化测试平台搭建
简介:
httprunner是一款基于Python的开源工具。
httprunner目前可以支持http/https协议,使用yaml/json格式的文件编写用例,封装了接口访问方法和pytest测试框架,可以结合allure生成测试报告。
主要特点
继承的所有强大功能requests,只需以人工方式获得乐趣就可以处理HTTP(S)。
以YAML或JSON格式定义测试用例,pytest以简洁优雅的方式运行。
在HAR支持下记录并生成测试用例。
支持variables/ extract/ validate/ hooks机制,以创建非常复杂的测试方案。
使用debugtalk.py插件,任何功能都可以在测试用例的任何部分使用。
使用jmespath,提取和验证json响应从未如此简单。
有了pytest,数百个插件随时可用。
使用allure,测试报告可以非常强大。
通过重复使用locust,您可以进行性能测试,而无需进行额外的工作。
支持CLI命令,与完美结合CI/CD
安装前置条件:
安装Mysql
#wget http://repo.mysql.com/mysql57-community-release-el7-10.noarch.rpm
#rpm -Uvh mysql57-community-release-el7-10.noarch.rpm
#yum install -y mysql-community-server
#systemctl start mysqld.service
如果Centos 8 安装Mysql5.7,以上步骤换成如下:
#dnf remove @mysql --关闭Centos8中MySQL默认的AppStream仓库
#dnf module reset mysql && sudo dnf module disable mysql
#vim /etc/yum.repos.d/mysql-community.repo 添加如下:
[mysql57-community]
name=MySQL 5.7 Community Server
baseurl=http://repo.mysql.com/yum/mysql-5.7-community/el/7/$basearch/
enabled=1
gpgcheck=0
[mysql-connectors-community]
name=MySQL Connectors Community
baseurl=http://repo.mysql.com/yum/mysql-connectors-community/el/7/$basearch/
enabled=1
gpgcheck=0
[mysql-tools-community]
name=MySQL Tools Community
baseurl=http://repo.mysql.com/yum/mysql-tools-community/el/7/$basearch/
enabled=1
gpgcheck=0
#dnf --enablerepo=mysql57-community install mysql-community-server
#systemctl enable --now mysqld.service --开启服务,自动重启
#grep 'A temporary password' /var/log/mysqld.log |tail -1 -- 获取初始化密码
#grep 'A temporary password' /var/log/mysqld.log |tail -1 获取随机密码
#mysql -uroot -p 修改密码
因为MySQL的密码规则需要很复杂,我们一般自己设置的不会设置成这样,所以我们全局修改一下
#mysql> set global validate_password_policy=0;
#mysql> set global validate_password_length=1;
#mysql>ALTER USER 'root'@'localhost' IDENTIFIED BY 'yourpassword';
授权其他机器远程登录
#mysql> GRANT ALL PRIVILEGES ON *.* TO 'root'@'%' IDENTIFIED BY 'yourpassword' WITH GRANT OPTION;
#mysql> FLUSH PRIVILEGES;
支持中文
#vim /etc/my.cnf
[mysql]
default-character-set=utf8
[mysqld]
datadir=/var/lib/mysql
socket=/var/lib/mysql/mysql.sock
default-storage-engine=INNODB
character_set_server=utf8
symbolic-links=0
log-error=/var/log/mysqld.log
pid-file=/var/run/mysqld/mysqld.pid
#service mysqld restart 重启生效
防火墙开放3306
#firewall-cmd --state
#firewall-cmd --zone=public --add-port=3306/tcp --permanent
#firewall-cmd --reload
卸载MySQL仓库
一开始的时候我们安装的yum,每次yum操作都会更新一次,耗费时间,我们把他卸载掉
#yum -y remove mysql57-community-release-el7-10.noarch
安装jdk
#wget --no-check-certificate --no-cookies --header "Cookie: oraclelicense=accept-securebackup-cookie" http://download.oracle.com/otn-pub/java/jdk/8u131-b11/d54c1d3a095b4ff2b6607d096fa80163/jdk-8u131-linux-x64.rpm
#chmod +x jdk-8u131-linux-x64.rpm
#rpm -ivh jdk-8u131-linux-x64.rpm
#vim /etc/profile
export JAVA_HOME=/usr/java/jdk1.8.0_131
export PATH=$JAVA_HOME/bin:$PATH
export CLASSPATH=.:$JAVA_HOME/lib/dt.jar:$JAVA_HOME/lib/tools.jar
#source /etc/profile
#yum install libffi-devel -y
#yum install zlib* -y
#yum install gcc -y
#yum install mysql-devel -y
可能报错:
--> Processing Dependency: mariadb-libs(x86-64) = 1:5.5.68-1.el7 for package: 1:mariadb-devel-5.5.68-1.el7.x86_64
--> Finished Dependency Resolution
Error: Package: 1:mariadb-devel-5.5.68-1.el7.x86_64 (os)
Requires: mariadb-libs(x86-64) = 1:5.5.68-1.el7
You could try using --skip-broken to work around the problem
You could try running: rpm -Va --nofiles --nodigest
#yum install python-devel -y (centos 8 提示:No match for argument: python-devel, Error: Unable to find a match)
安装openssl,因为用pip3安装时,会报错:pip is configured with locations that require TLS/SSL, however the ssl module in Python is not available (解决方法:https://www.jianshu.com/p/8e476eef43f7)
#wget https://github.com/openssl/openssl/archive/OpenSSL_1_1_1d.tar.gz
#tar -zxvf OpenSSL_1_1_1d.tar.gz
#./config --prefix=/usr/local/openssl
#make & make install
替换旧版openssl
#mv /usr/bin/openssl /usr/bin/openssl.old
#mv /usr/lib64/openssl /usr/lib64/openssl.old
#mv /usr/lib64/libssl.so /usr/lib64/libssl.so.old (可能提示文件不存在)
#ln -s /usr/local/openssl/bin/openssl /usr/bin/openssl
#ln -s /usr/local/openssl/include/openssl /usr/include/openssl
#ln -s /usr/local/openssl/lib/libssl.so /usr/lib64/libssl.so
#echo "/usr/local/openssl/lib" >> /etc/ld.so.conf
#ldconfig -v // 建立动态链接
#openssl version
1、首先确保安装了python3.8环境,下载pyton3.8源码,解压进入目录安装:
#./configure --prefix=/usr/local/python3 --with-openssl=/usr/local/openssl
#make & make install
#ln -s /usr/local/python3/bin/python3 /usr/bin/python3
#ln -s /usr/local/python3/bin/pip3 /usr/bin/pip3
#vim /etc/profile 在文件最后增加:
#python3.8 configuration
PATH=$PATH:/usr/local/python3/bin
export PATH=$PATH:/usr/local/python3/bin/
#source /etc/profile *配置pytho环境变量,检查安装是否成功。*
#python3 显示是Python 3.8.6版本即可。
如果需要卸载,按如下步骤:
#rpm -qa|grep python3|xargs rpm -ev --allmatches --nodeps --卸载python3
#whereis python3 |xargs rm -frv -- 删除所有残留文件
2、安装pip3 (安装python 会自动安装pip3)
自动安装的pip3版本是20.2.1 ,使用下面命令升级pip3版本
#/usr/local/python3/bin/python3.8 -m pip install --upgrade pip
3、安装httprunner,使用命令
#pip3 install httprunner
可能会报如下错误:
File "/usr/local/python3/lib/python3.8/site-packages/pip/_vendor/urllib3/response.py", line 437, in _error_catcher 报错原因:网络太慢导致下载失败
解决方法:换库:pip3 install -i https://pypi.tuna.tsinghua.edu.cn/simple httprunner (可能仍然会报Read time out 错误,报错后继续重新执行这个命令直到安装下载安装完成)
#vim /usr/local/python3/lib/python3.8/site-packages/setuptools/windows_support.py 注释了第34行(应该不需要这个步骤)
安装完成后,
#ln -s /usr/local/python3/bin/hrun /usr/bin/hrun
#ln -s /usr/local/python3/bin/httprunner /usr/bin/httprunner
#ln -s /usr/local/python3/bin/har2case /usr/bin/har2case
#ln -s /usr/local/python3/bin/hmake /usr/bin/hmake
检查安装是否成功,使用命令: #httprunner -V,输出了版本号,就表示安装成功
Tips:
If you want to keep up with the latest version, you can install with github repository url.
$pip3 install git+https://github.com/httprunner/httprunner.git@master
If you have installed HttpRunner before and want to upgrade to the latest version, you can use the -U option.
$ pip3 install -U httprunner
$ pip3 install -U git+https://github.com/httprunner/httprunner.git@master
常用命令
httprunner: 核心命令,可以使用 HttpRunner 的所有命令
hrun:httprunner run 命令的别名,运行 YAML/JSON/pytest 格式的测试用例
hmake:httprunner make 命令的别名,将 YAML/JSON 格式的 testcases 转换成 pytest 格式的测试用例
har2case:httprunner har2case 命令的别名,将 HAR 文件转换为 YAML/JSON 格式的测试用例
locusts: used to run load test with locust
接口测试:
1、先用fiddler抓个接口包,导出为:HTTPArchive V1.2 ,包名为:query.har
2、har2case query1.har -2y 将接口文件转换为yaml格式用例,如果转换为json格式,带参数 -2j
3、执行测试 hrun query.yml
接口性能测试:
Locust is an easy to use, scriptable and scalable performance testing tool. You define the behaviour of your users in regular Python code, instead of using a clunky UI or domain specific language. This makes Locust infinitely expandable and very developer friendly.
1、安装locust
https://github.com/locustio/locust项目地址下载zip安装包
下载解压后,在终端 cd 到项目路径,执行:python3 setup.py install
报错如下:
Traceback (most recent call last):
File "setup.py", line 7, in
from setuptools import find_packages, setup
File "/usr/local/python3/lib/python3.8/site-packages/setuptools/__init__.py", line 23, in
from setuptools.dist import Distribution
File "/usr/local/python3/lib/python3.8/site-packages/setuptools/dist.py", line 34, in
from setuptools import windows_support
File "/usr/local/python3/lib/python3.8/site-packages/setuptools/windows_support.py", line 2, in
import ctypes
..........................
换一种安装方式,使用在线安装方式如下:
#pip3 install locust
安装后,查看是否正确安装
#locust --version / locust -V
为了能Locust分布式测试,可以在本机windows上也安装同版本的Python和locust
先在windows 机器上安装Python3.8.6 (注意是64位的:https://www.python.org/ftp/python/3.8.6/python-3.8.6-amd64.exe)
在进入windows 命令行模式:pip3 install locust (可能会报SSL错误),用下面的命令,跳过SSL
pip3 install --trusted-host pypi.org --trusted-host files.pythonhosted.org locust
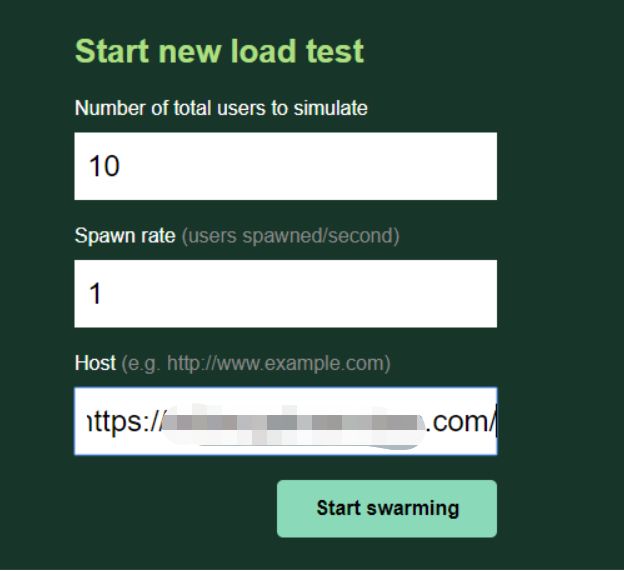
运行性能测试
#cd /home/cvms/testcases
#locusts -f double11.yml
浏览器打开:http://192.168.138.128:8089/

分布式运行Locust(有两种主从模式:第一种是单台机器设置Master和Slave,第二种是多台机器一台设置为Master,其他机器设置为Slave):
一旦单台机器不够模拟足够多的用户时,Locust支持运行在多台机器中进行压力测试。
为了实现这个,你应该在master模式中使用--master标记来启用一个Locust实例。这个实例将会运行你启动测试的Locust交互网站并查看实时统计数据。master节点的机器自身不会模拟任何用户。相反,你必须使用--slave标记启动一台到多台Locustslave机器节点,与标记--master-host一起使用(指出master机器的IP/hostname)。
常用的做法是在一台独立的机器中运行master,在slave机器中每个处理器内核运行一个slave实例。(slave 机器有几个CPU,就最多只能启动几个slave实例)
** master和每一台slave机器,在运行分布式测试时都必须要有locust的测试文件。**
实例:
CentOS 虚拟机192.168.138.128 (做为master)
本机笔记本做为slave机器,
现在CentOS上执行:#locusts -f double11.yml --master
再在本地笔记本上进入cmd,执行:locusts -f double11.yml --work --master-host=192.168.138.128 (可打开4个cmd,执行4个slave节点)
如下图(上面显示workers 是4,表示有4个slave在跑):

集成报表:
httprunner结合allure生成测试报告的步骤
#pip3 install allure-pytest (可能没安装,手动安装下,否则可能会报错:AttributeError: 'module' object has no attribute 'allure')
1、下载allure-commandline-2.13.0.tgz
2、解压到 /usr/local/python3/lib/python3.8/site-packages
# tar -zxvf allure-commandline-2.13.0.tgz
#mv package allure
#ln -s /usr/local/python3/lib/python3.8/site-packages/allure/dist/bin/allure /usr/bin/allure
3、添加环境变量
#For allure
PATH=$PATH:/usr/local/python3/lib/python3.8/site-packages/allure/dist/bin
export PATH
#allure --version (验证是否成功配置安装)
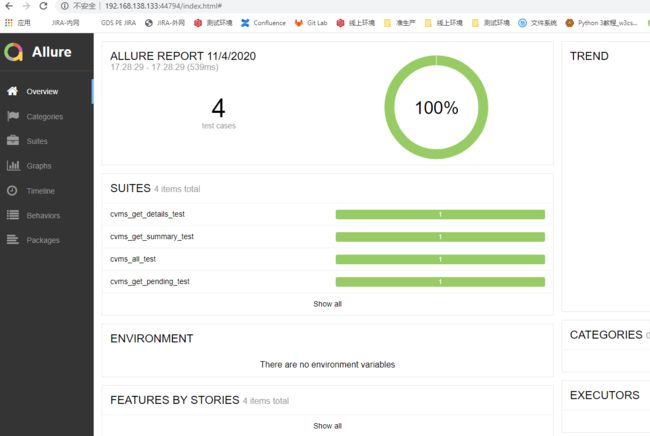
4、#hrun test_post_api.yml --alluredir=/home/demo1/report 如果一次要执行多个测试用例,这样写:hrun cvms_all.yml cvms_get_summary.yml cvms_get_details.yml cvms_get_pending.yml --alluredir=/home/cvms/reports/
执行过程如下图:

#allure serve /home/demo1/report
Generating report to temp directory...
Report successfully generated to /tmp/8439765027582619623/allure-report
Starting web server...
2020-11-02 18:15:55.706:INFO::main: Logging initialized @4485ms to org.eclipse.jetty.util.log.StdErrLog
Can not open browser because this capability is not supported on your platform. You can use the link below to open the report manually.
Server started at
实际使用服务器的IP打开:http://192.168.138.133:39631/

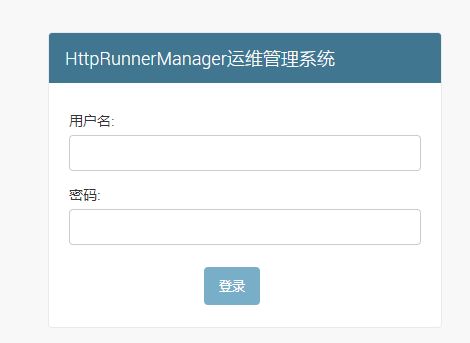
安装HttpRunnerManager:
下载安装包:HttpRunnerManager-master.zip
解压到/opt
#pip3 install pymysql --python版本3X不支持mysqldb,要用pymysql来代替。
执行安装之前,先看下requirements.txt 会安装哪些东西:
Django == 2.0.3
PyYAML == 3.12
requests == 2.18.4
eventlet == 0.22.1
mysqlclient == 1.3.12
django-celery == 3.2.2
flower == 0.9.2
dwebsocket == 0.4.2
paramiko == 2.4.1
HttpRunner == 1.5.8
可以把mysqlclient HttpRunner 删掉,因为不支持或已经安装
修改requirements.txt下的:
Django == 2.0.3 改为 Django == 2.1.2
PyYAML == 3.12 修改为 pyyaml==5.1.2
requests == 2.18.4 修改为 requests==2.22.0
#pip3 install -r requirements.txt (下载安装时关闭fiddle,可能导致下载某些包报错)--因为已经在Linux下安装了python3和pip3,因此这里直接通过 pip3 来安装即可
安装时,可能会报这个:
Traceback (most recent call last):
File "/usr/local/python3/lib/python3.8/site-packages/pip/_vendor/urllib3/response.py", line 437, in _error_catcher
yield
这是因为网络不行,下载超时了,多试几次。
安装完后,报如下log:
Running setup.py install for anyjson ... done
Running setup.py install for billiard ... done
Running setup.py install for django-celery ... done
Running setup.py install for flower ... done
Running setup.py install for dwebsocket ... done
ERROR: After October 2020 you may experience errors when installing or updating packages. This is because pip will change the way that it resolves dependency conflicts.
We recommend you use --use-feature=2020-resolver to test your packages with the new resolver before it becomes the default.
httprunner 3.1.4 requires pyyaml<6.0.0,>=5.1.2, but you'll have pyyaml 3.12 which is incompatible.
httprunner 3.1.4 requires requests<3.0.0,>=2.22.0, but you'll have requests 2.18.4 which is incompatible.
Successfully installed Django-2.0.3 PyYAML-3.12 amqp-1.4.9 anyjson-0.3.3 babel-2.8.0 bcrypt-3.2.0 billiard-3.3.0.23 celery-3.1.26.post2 cffi-1.14.3 cryptography-3.2.1 django-celery-3.2.2 dwebsocket-0.4.2 eventlet-0.22.1 flower-0.9.2 greenlet-0.4.17 idna-2.6 kombu-3.0.37 paramiko-2.4.1 pyasn1-0.4.8 pycparser-2.20 pynacl-1.4.0 pytz-2020.4 requests-2.18.4 tornado-6.1 urllib3-1.22
WARNING: You are using pip version 20.2.1; however, version 20.2.4 is available.
You should consider upgrading via the '/usr/local/python3/bin/python3.8 -m pip install --upgrade pip' command.
看起来是pyyaml, requests版本不兼容,重新安装这两个包
#pip3 install pyyaml==5.1.2
#pip3 install requests==2.22.0
*上面已经修改了requirements.txt文件中这两个包的版本,所以上面这两个命令应该不需要了*
创建数据库:create database hrun character set utf8 collate utf8_bin;
修复配置文件中连接数据库部分:
vim /opt/HttpRunnerManager-master/HttpRunnerManager/settings.py 的第118行开始,host 用127.0.0.1
生成数据迁移脚本:
#cd /opt/HttpRunnerManager-master
#python3 manage.py makemigrations ApiManager
报错如下:
Traceback (most recent call last):
File "/usr/local/python3/lib/python3.8/site-packages/django/db/backends/mysql/base.py", line 15, in
import MySQLdb as Database
ModuleNotFoundError: No module named 'MySQLdb'
解决方案(MySQLdb 只适用于python2.x,发现python3上的pip装不上。它在py3的替代品是:pip install PyMySQL,而django默认的还是使用MySQLdb:执行会报:):
#vim /usr/local/python3/lib/python3.8/site-packages/django/__init__.py 加两行代码如下:
from django.utils.version import get_version
import pymysql --增加的行,
pymysql.install_as_MySQLdb() -- 增加的行
增加后文件如下:

再执行命令#python3 manage.py makemigrations ApiManager
报这个(忽略)

#python3 manage.py migrate (应用到db生成数据表)
#python3 manage.py createsuperuser – 创建后台用户
输入管理员账号,密码,邮箱
#nohup python3 manage.py runserver 0.0.0.0:8000 >hrun.log 2>&1 & --启动django服务
登录后台:http://192.168.138.133:8000/admin/login/?next=/admin/
输入账号:root 密码
登录注册页面:http://192.168.138.133:8000/api/register/ 会报错如下:
ImportError at /api/project_list/1/
cann't import name logger
exception location: /opt/HttpRunnerManager-master/ApiManager/tasks.py in
解决方法::vim /opt/HttpRunnerManager-master/ApiManager/tasks.py 修改一行代码,注释掉16行的logger,刷新注册页面正常显示

注意:在上面的主界面中,我们发现界面的样式似乎有些不对劲,这是因为我们从Github上下载的源码有些问题,这里就需要手动修改一下了。
#vim /opt/HttpRunnerManager-master/templates/base.html 修改第23行的amazeui.org修改为:bootcss.com
Jenkins集成
1、安装jenkins
#yum install git -y
#wget -O /etc/yum.repos.d/jenkins.repo https://pkg.jenkins.io/redhat-stable/jenkins.repo (有时可能会报连接失败,多试几次)
#rpm --import https://pkg.jenkins.io/redhat-stable/jenkins.io.key
#yum install jenkins -y
2、配置
#vim /etc/sysconfig/jenkins
第29行:监听用户=root
第56行:端口=8082
3、
修改目录权限
#chown -R root:root /var/lib/jenkins
#chown -R root:root /var/cache/jenkins
#chown -R root:root /var/log/jenkins
重启
#service jenkins restart
#ps -ef | grep jenkins
启动
#systemctl start jenkins
#systemctl status jenkins 查看状态
登录:http://192.168.138.128:8082/login?from=%2F
使用Jenkins自动邮件Allure报告
Manage Jenkins -- Global Tool Configuration
配置Allure Commandline
name = allure2
installation directory = /usr/local/python3/lib/python3.8/site-packages/allure/dist
为了要触发邮件,出了要再创建的项目上按如上配置外,还需要对Jenkins做系统配置,方法如下
进入Manage Jenkins -- System Configuration,如下图:


首先确保allure在服务器上正确安排配置,参考前文,jenkins初始进入后,先安装几个必要的插件:Allure, Email Extension
1、jenkins上创建一个自由风格的项目,项目名称为:code
项目的具体配置根据实际情况会稍有不同,本次测试的配制如下:
因为要配置定时触发构建job,
【BuildTriggers】 设置Poll SCM Schedule 为: H 11 * * * (表示每天11点自动构建,为unix的cron格式)
【Build】部分Execute Shell Command为:
PATH=$PATH:/usr/local/python3/bin
export PATH=$PATH:/usr/local/python3/bin/
cd /home/auto/codetest/testcases
hrun inputone.yml code_details.yml querycode.yml --alluredir=/var/lib/jenkins/workspace/code/target/allure-results
上面两行是解决jenkins上执行报错:missing dependency tool: black ,因为Jenkins执行时没有获到python的path
【Post-build Action】段Add Allure Report,然后配置如下:
Results path = target/allure-results
JDK InherifFromJob
Report path = target/allure-report
在Jenkins的workspace路径:/var/lib/jenkins/workspace/code/target/ 下可能需要手动创建目录:allure-results,最终workspace/all 下的目录结构为(code为Jenkins中创建的项目名称):
target,下面再有目录:allure-results, allure-report
【Post-build Action】 段再Add Editable Email Notification, 基本配置如下:
Project Recipient List = $DEFAULT_RECIPIENTS,[email protected]
Project Reply-To List = $DEFAULT_REPLYTO
Content Type = HTML
Default Subject = 接口自动化测试报告
Default Content 如下:
以下是Jenkins自动发送的邮件,请勿回复!
allure报告在线查看,请点击邮件中链接。or下载allure-report.zip用firefox离线查看,测试用例见附件
项目描述:${JOB_DESCRIPTION}
有码项目接口测试
项目名称:$PROJECT_NAME
构建编号:$BUILD_NUMBER
构建状态:$BUILD_STATUS
触发原因:${CAUSE}
构建地址:${BUILD_URL}
构建日志地址:${BUILD_URL}console
系统allure测试报告:${PROJECT_URL}${BUILD_NUMBER}/allure
${JELLY_SCRIPT}
再点右下角的:Advanced Settings 按钮,增加一个Trigger,Always,如下图

构建配置:
1.每30分钟构建一次:
H/30 * * * *
2.每2个小时构建一次
H H/2 * * *
3.每天早上8点构建一次
0 8 * * *
4.每天的8点,12点,22点,一天构建3次
0 8,12,22 * * *