Silverlight实例秀——可切换视图的DataTemplate(做网站必备技术)
小序:
敏捷开发也是要有个度的。搞敏捷,最起码的限度是程序员要对手里使用的工具比较精通。
相信大家都见过这个场景:
问:“你在做什么?”
程序员:“我在敏捷开发。”
问:“这样设计不对吧……”
程序员:“没事儿,我可以重构!”
程序员:“我在敏捷开发。”
问:“这样设计不对吧……”
程序员:“没事儿,我可以重构!”
拜托,手里使用的工具都不了解,程序中到处都是诡异的方法……怎么重构?天生就是一恐龙,再怎么重构也变不成人呀!这时候,唯一能做的就是—— 重写。
正文:
今天的例子就是一个由错误程序重写而来的结果。至于那个错误程序,下周我将另写一文《WPF的典型误用》。
客户的需求是这样的:要求用Silverlight写一个留言板,打开界面后,可以看到一个留言列表,每条留言只显示标题、发言人和发言时间。 每条留言有一个切换按钮,可以显示和隐藏留言的详细信息。
实现这个功能很简单。用一个ListBox加上一个DataTemplate就搞定了。这里着重 提示一句:DataTemplate就是“数据的外衣”,只有理解了DataTemplate才能明白WPF的精髓——数据驱动UI,也才能可能准确地使 用MVVM模式。
下面让我们看代码。
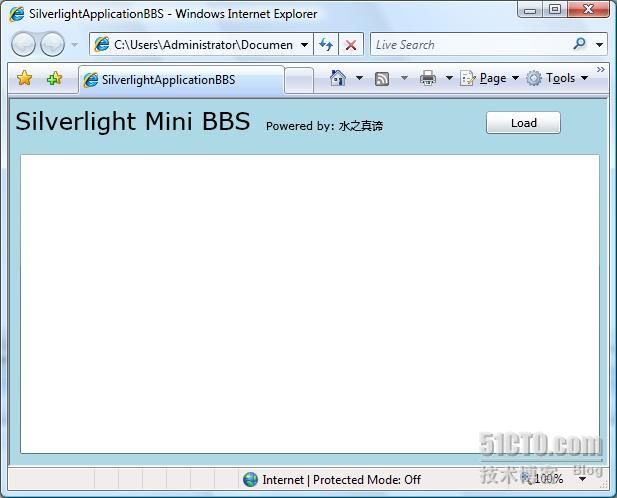
页面的设计很简单——Title和ListBox。Load按钮用来加载模拟数据。模拟数据的类型是自定义类Message。
- <UserControl x:Class="SilverlightApplicationBBS.Page"
- xmlns="http://schemas.microsoft.com/winfx/2006/xaml/presentation"
- xmlns:x="http://schemas.microsoft.com/winfx/2006/xaml"
- Width="600" Height="366">
-
- <StackPanel x:Name="LayoutRoot" Background="LightBlue">
- <!--Title-->
- <StackPanel Orientation="Horizontal">
- <TextBlock Text="Silverlight Mini BBS" FontSize="24" Margin="5" VerticalAlignment="Bottom"/>
- <TextBlock Text="Powered by: 水之真谛" Width="200" VerticalAlignment="Bottom" Margin="10"/>
- <Button Content="Load" Height="23" Width="75" VerticalAlignment="Bottom" Margin="10" Click="LoadButton_Click" />
- </StackPanel>
- <!--Content-->
- <ListBox x:Name="listBox" Margin="10" Height="300" />
- </StackPanel>
- </UserControl>
自定义Message类:
- public class Message
- {
- public string Title { get; set; }
- public string OpenedBy { get; set; }
- public string OpenTime { get; set; }
- public string Content { get; set; }
- }
运行起来是这样:
让我们看看Load按钮的Click事件处理器:
- private void LoadButton_Click(object sender, RoutedEventArgs e)
- {
- // 造些假数据。项目中数据来自 数据库
- List<Message> msgList = new List<Message>();
- for (int i = 0; i < 30; i++)
- {
- Message msg = new Message()
- {
- Title = "Message Title " + i.ToString(),
- OpenedBy = (i % 2 == 0) ? "Tom" : "Tim",
- OpenTime = DateTime.Now.ToShortDateString(),
- Content = (i % 2 == 0) ? "水之真谛" : @"http://blog.csdn.net/FantasiaX"
- };
- msgList.Add(msg);
- }
-
- this.listBox.ItemsSource = msgList;
- }
点击Load后,效果是这样的:
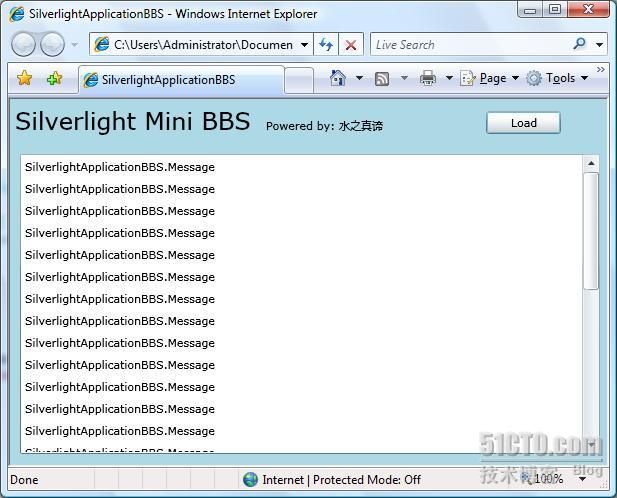
咦?怎么显示的是数据类型呢?
是啊!你不给数据穿好“衣服”,人家怎么知道如何show给你呢?
让我们给Message数据穿 上一身合适的衣服!也就是给ListBox配上合适的ItemTemplate。注意:ListBox的 Item是Message,而不是ListBoxItem控件。当你把一列Message设置为ListBox的ItemsSource 时,ListBox会自动为每个Message生成一个容器(ListBoxItem)——WPF中所有ItemsControl都有自己对应的Item 容器,比如ListView的Item容器是ListViewItem。特别提醒一点:一个好的数据驱动UI的程序,你完全用不着显式地为 ItemsControl添加Item容器,如果你发现有这样的代码,那八成是没理解“数据驱动UI”,或者说又拿WPF当WinForm使了。
这是添加好DataTemplate后的XAML代码:
- <UserControl x:Class="SilverlightApplicationBBS.Page"
- xmlns="http://schemas.microsoft.com/winfx/2006/xaml/presentation"
- xmlns:x="http://schemas.microsoft.com/winfx/2006/xaml"
- Width="600" Height="366">
-
- <UserControl.Resources>
- <!--DataTemplate-->
- <DataTemplate x:Key="messageTemplate">
- <StackPanel>
- <StackPanel Orientation="Horizontal" Height="23">
- <TextBlock Text="Title:" Width="40" VerticalAlignment="Center" />
- <TextBox Text="{Binding Path=Title}" Width="180"/>
- <TextBlock Text="By:" Width="30" VerticalAlignment="Center" />
- <TextBox Text="{Binding Path=OpenedBy}" Width="80"/>
- <TextBlock Text="At:" Width="30" VerticalAlignment="Center" />
- <TextBox Text="{Binding Path=OpenTime}" Width="80"/>
- <Button Content="Switch" Width="75" Margin="20, 0,0 0" Click="Button_Click"/>
- </StackPanel>
- <StackPanel x:Name="detailPanel" Orientation="Horizontal" Height="60" Visibility="Collapsed">
- <TextBox Margin="40,5,10,5" Text="{Binding Path=Content}" Width="400"/>
- </StackPanel>
- </StackPanel>
- </DataTemplate>
- </UserControl.Resources>
-
- <StackPanel x:Name="LayoutRoot" Background="LightBlue">
- <!--Title-->
- <StackPanel Orientation="Horizontal">
- <TextBlock Text="Silverlight Mini BBS" FontSize="24" Margin="5" VerticalAlignment="Bottom"/>
- <TextBlock Text="Powered by: 水之真谛" Width="200" VerticalAlignment="Bottom" Margin="10"/>
- <Button Content="Load" Height="23" Width="75" VerticalAlignment="Bottom" Margin="10" Click="LoadButton_Click" />
- </StackPanel>
- <!--Content-->
- <ListBox x:Name="listBox" Margin="10" Height="300" ItemTemplate="{StaticResource messageTemplate}"/>
- </StackPanel>
- </UserControl>
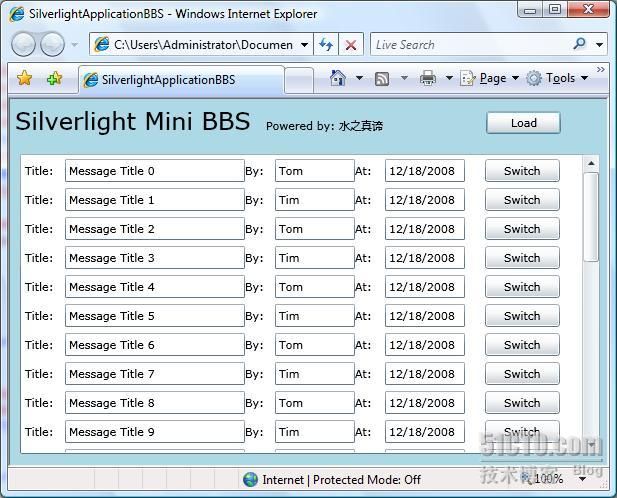
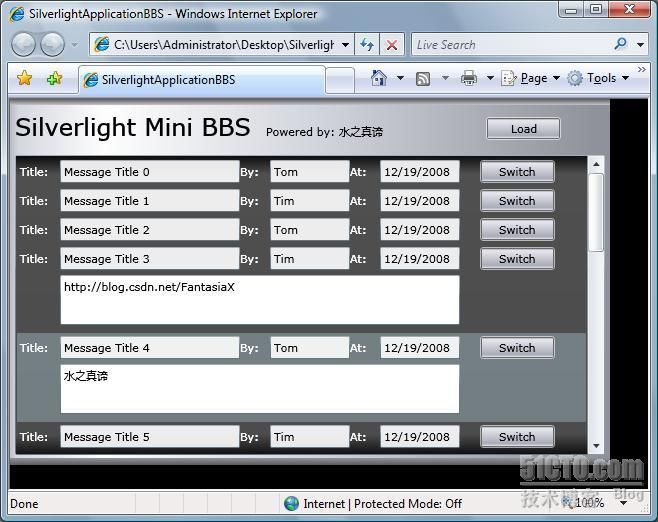
点击Load,这回看到的界面就对了!
然后尝试点击每个Switch按钮——视图能够切换:
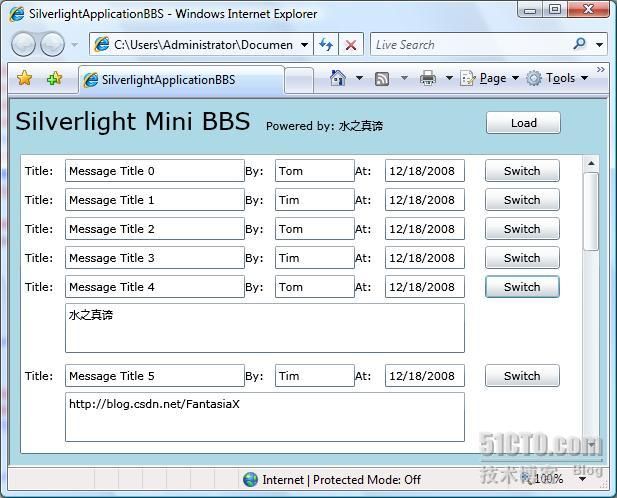
这一点是怎么做到的呢?
原来,秘密是在DataTemplate里Switch按钮的处理函数中:
原来,秘密是在DataTemplate里Switch按钮的处理函数中:
- // 切换视图
- private void Button_Click(object sender, RoutedEventArgs e)
- {
- // Silverlight 里的VisualTreeHelper功能受限,所以只能这样做。WPF里的就方便多了。
- Button b = sender as Button;
- StackPanel p = VisualTreeHelper.GetParent(b) as StackPanel;
- p = VisualTreeHelper.GetParent(p) as StackPanel;
- p = p.FindName("detailPanel") as StackPanel;
- if (p.Visibility == Visibility.Collapsed)
- {
- p.Visibility = Visibility.Visible;
- }
- else
- {
- p.Visibility = Visibility.Collapsed;
- }
- }
只是Silverlight为了“减肥”,把很多VisualTreeHelper的功能都给砍了,这样我们就只能手动地去找到需要显示/隐藏 的UI元素了。
你可能会问:那么多记录,每条上都有一个Switch按钮,是不是需要写一个循环,把它们的Click事件与Button_Click函数关联 起来呀?
答案是:No!当你把一列数据赋值给ListBox.ItemsSource时,ListBox会按照自己的ItemTemplate(即我们 设计的DataTemplate)逐个处理自己的Item。
到此,功能就已经实现了。如果觉得UI不是很漂亮,那就交给我们的designer,他们会给整个程序穿上漂亮的外衣。
下面的图是我请团队主力设计师之一Owen进行美化后的结果,请大家欣赏!
最后,祝大家周末快乐!(这里是源码
http://download.csdn.net/source/885340, 感谢Tom上传!)
=====================================================
友情链接:
Owen同学的设计站
http://www.wangkun2008.com/
Owen同学是我们团队里的主力designer之一,我的一些程序就是由Owen同学美化的。谢谢Owen!
本文出自 “上善若水 润物无声” 博客,请务必保留此出处http://liutiemeng.blog.51cto.com/120361/121346